Monday, November 10, 2014

Flashback Post: A Queen & Planet AAR, "The Battle of Ginnis, Sudan 1885"

 Hi...in honor of the release of our second title -- Queen & Planet -- from our game company,  First Command Wargames, I'm reposting a battle report from my old miniatures gaming page. This game was played in my friend's Keith's basement in February of 2011. Lots of great Colonial/VSF fun...!

Battle of Ginnis - Colonials at Keith's Clubhouse

Rules: Queen and Planet
Scenario: The Battle of Ginnis – Sudan 1885

Battle of Ginnis - 15mm Colonials using Tom's rules. For some months, the Ansar had been filtering into the area around the Nile River villages of Ginnis and Kosha. The Ansar were building up forces to repel an Egyptian or British invasion and the British responding to the buildup had been increasing their own presence in the area.
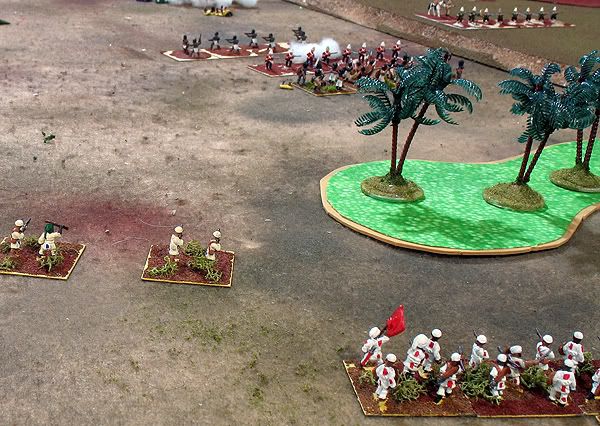
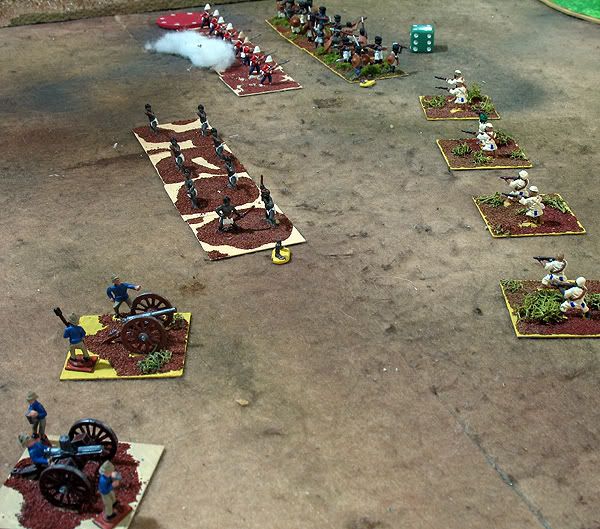
The Ansar move up to support their Beja allies, who are heavily engaged with the British
Skirmishes and artillery shelling had been increasing for several weeks, when the British decided they needed to do something about what might be an Ansar buildup of forces to invade Egypt. Two brigades of seasoned troops hurried to the area and Colonels Sams and Graves wasted little time in formulating an attack plan. Attack at dawn when the heathens were still asleep in their beds and put them to flight.  Simple. Effective. If the Ansar had been abed when the British attacked, it would have worked well. Unfortunately, they were not only awake, but deployed into forward attack positions. In the first glimmers of dawn, Col Sams brigade approached the small village of Kosha with the Egyptian Camel Corp holding his right flank along the Nile, his batteries of cannon and Gatlings holding the center of the line and the Cameron Highlanders holding his left flank near a steep escarpment. The Sudanese IX battalion, at half strength, was in reserve.
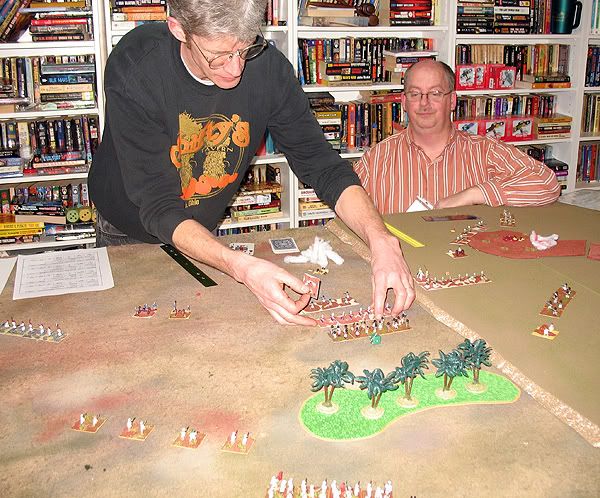
Joel moves his Cameron Highlanders, the heroes of the battle, who held off attack after attack, while Tom hums a bagpipe tune
A sharp-eyed artillerist spotted the first Ansar among the walls and building of Kosha and opened up from extreme range. A skilled or lucky shot forced the Ansar Jehadia to withdraw into the village interior and it was later learned they had completely lost nerve at the unexpected casualties in their ranks and had fallen back south of Ginnis and as such were effectively out of the battle. C in C Graves urged his battalions forward with the caution that the British attack had already been discovered by the Ansar. There would be no surprise and no easy victory. As if in response, 1000 yards to his front along the edge of the escarpment, a captured Krupp artillery battery manned by subject Egyptian crews opened up on the Cameron Highlanders, doing some casualties and forcing them back to regroup. Colonel Graves held the edge of the escarpment as his right flank with the 1st Berkshires Battalion to his left was a battery of mountain guns and further left was West Kent Regiment. The 23rd Royal Engineers were far to the left trying to sweep around a rocky tor. The Durham Light infantry were in reserve.

Unfortunately, the next moment it became clear that the tor was swarming with Beja warbands and they were preparing to charge the Engineers. The Engineers were able to turn to meet the charge of the Beja, but could not get off a shot before they swept down from the tor and charged into their ranks. The Engineers were pushed back, but held firm. Colonel Graves ordered the Light Infantry to assist and moved forward to engage the Ansar artillery. As he did so, another Beja Rifle rub appeared out of the grey dawn and opened up on the 1st Berkshires at very close range. Casualties were taken and the infantry fell back to regroup.
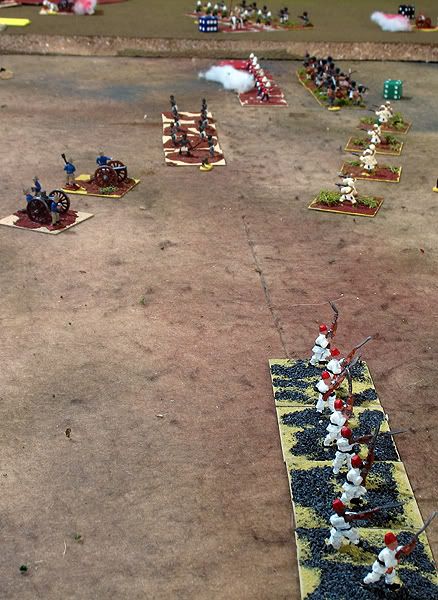
It was touch and go, but the British battle line narrowly held off the Ansar attack
On the Nile flood plain, Colonel Sams was faced by more and more Ansar and Beja pouring out of the Palm orchards between the two villages. Heavily outnumbered, Colonel Sams forces gave better than they got. The Egyptian Camel Corp withstood a furious charge of Ansar warbands near the village of Kosha, driving them back and then watching them fade into the dust their charge had kicked up as their morale failed as quickly as their charge had failed.  Just as quickly, the Egyptians were shaken, after the charge, by the long range, but effective fire of a Krupp gun sheltering in a Zariba far to the Ansar rear. However, the two different threats shook the Egyptians and they fell back on the British fort to our rear, leaving only the Gatlings and field guns to hold the left flank of Colonel Sams’ attack.  On the left flank of Colonel Graves, the Beja had put the Engineers to flight and had turned on the Durham Light Infantry, who having seen the Engineers dispatched had fallen back and received the support of the West Kents. They now stood together, 600 line infantry versus 750 Beja warriors.

Colonel Sams was having both good fortune and bad. The Cameron Highlanders had been engaged with a Beja warband rub for almost an hour. They struggled back and forth and were wearing each other down when the Camerons held their fire to the last moment before another short charge carried the Beja home. This time, they were put to flight, disappearing into the Palm grove. Unfortunately, the Beja appeared to be limitless as another rifle rub moved out to replace them. Unfortunately, the fire was in the belly of the highlanders and they took it to the Beja, inflicting terrible casualties, wounding the Sheik that lead the army and driving them off as well.
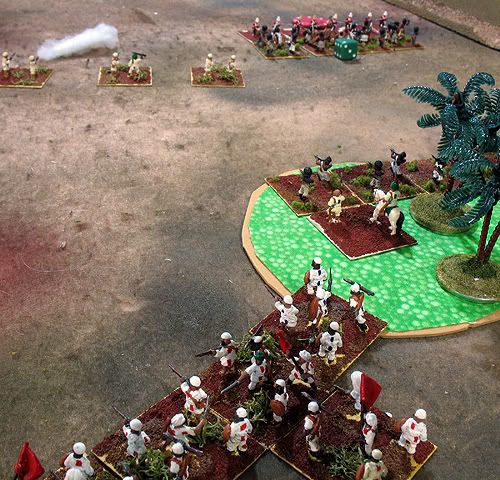
The last Ansar and Beja waves prepare prepare to hurl themselves on the British line, once again
On the escarpment, Colonel Graves forces had managed to obliterate both the Beja warband and rifles and only the artillery remained to be cleaned up. The CinC, seeing and hearing the Camerons put flight to two Beja rubs rode down to join them and ensure that the British would be victorious.  The Ansar lost heart at the furious Camerons, the loss of their Sheik and retired sullenly, but mostly intact, into the desert. The British sighed with relief as their own forces were heavily shaken by the aggressive attack of the Madhist forces.  -- Tom Graves, Read About The Games People Play At Columbus Face Games Blog, http://columbusfacegames.wordpress.com/

Queen & Planet rules are now available on the First Command Wargames website: http://www.firstcommandwargames.com/

Monday, November 3, 2014

"Will Magua Kill 'Gray Hair'?"


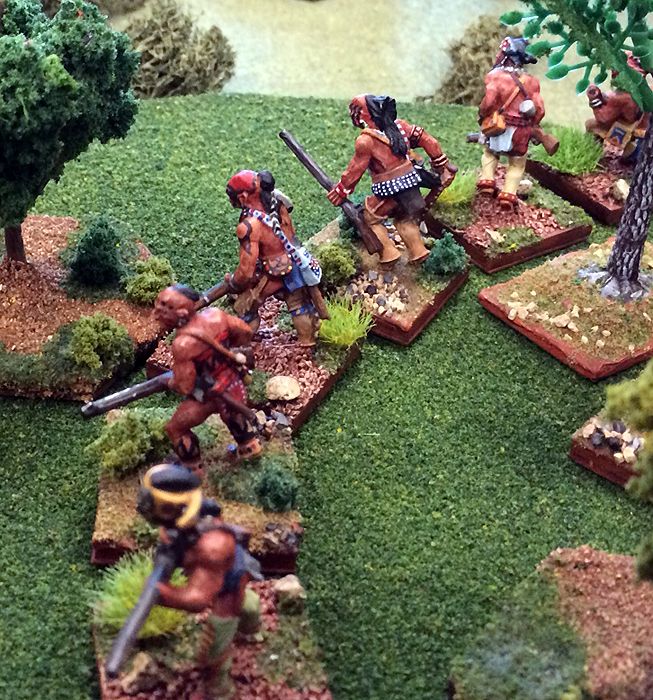
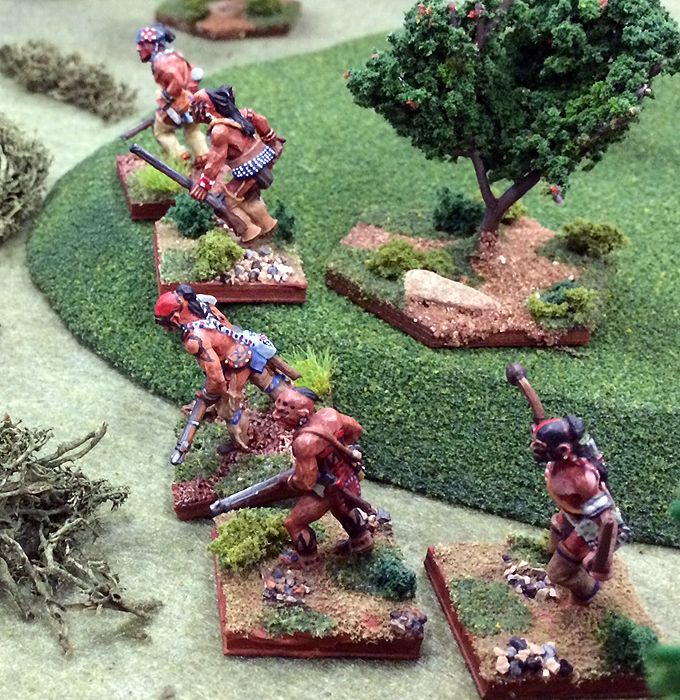
Hurons lurk in the woods, ready to spring an ambush on the British marching by...  

To celebrate the release last week of our French & Indian War skirmish rules, Song of Drums and Tomahawks, I ran a quick scenario at a local convention this past weekend. It is particularly cool to run your event less than a football field away from the palisades of a reconstructed War of 1812 fort. World at War game day (http://www.hmgsgl.org/conventions/world-at-war/) is held in the visitor's center of Fort Meigs -- the same venue we use for our Spring convention, Drums at the Rapids (http://www.hmgsgl.org/conventions/drums/).
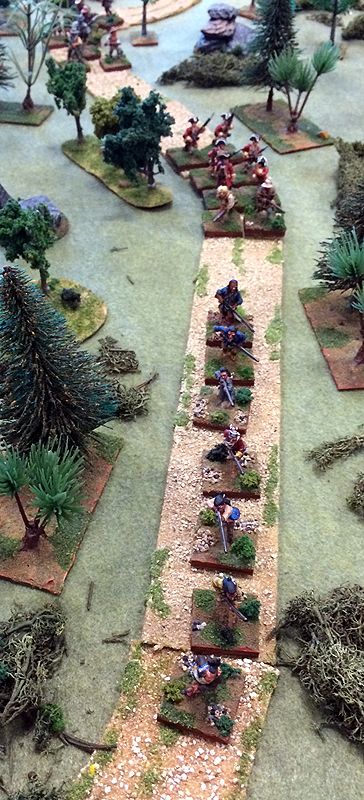
The British line of march, with loyal Mohawks leading the advance, followed by regulars, and then frontier militia
The scenario was based off of the ambush scene after the siege of Fort William Henry in the movie, The Last of the Mohicans. I called it, "Will Magua Kill 'Gray Hair'?" and set it up for six players. A dirt road wound between two large, forested hills. In fact, everything except the road counted as forested. There were 3 British players: a force of loyal Mohawk Indians, frontier militia, and a force of British regulars. All 3 "French" players were Indians, with one commander being designated as Magua just for a dash of color. A thrill ran through the players when Magua scalped a fallen opponent on the road, just as Col. Munro ("Gray Hair") rounded the bend in sight of him. The clash did not occur, but there was plenty of bloodshed and a number of scalps taken!

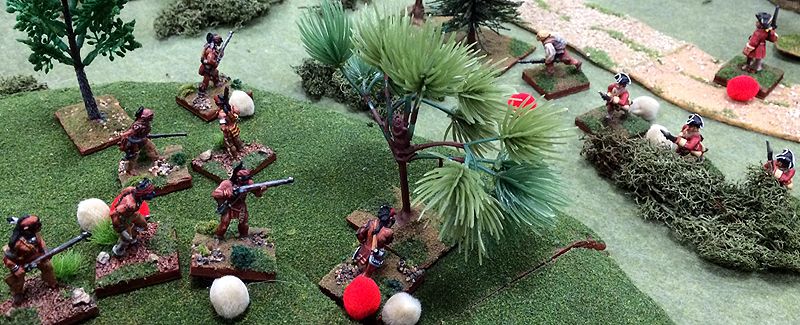
Musket shots ring out as the British column wound between the wooded hills
The British set up on the road, with the Mohawks in the lead, the regulars in the center and the frontier militia as rear guard. The Indians set up not far from the board edges on the wooded hill slopes. The militia quickly veered off the road to guard the right flank of the British from Magua's warband, which was advancing and had fired on the Mohawks. The loyal Indians dashed forward and exchanged musket fire with a force of Huron in the woods off to the left. The remaining Indian warband advanced cautiously, and soon began sniping at the regulars. Col. Munro proved he was no coward and waved his men off the road and into the woods to fire back at the elusive Indians.

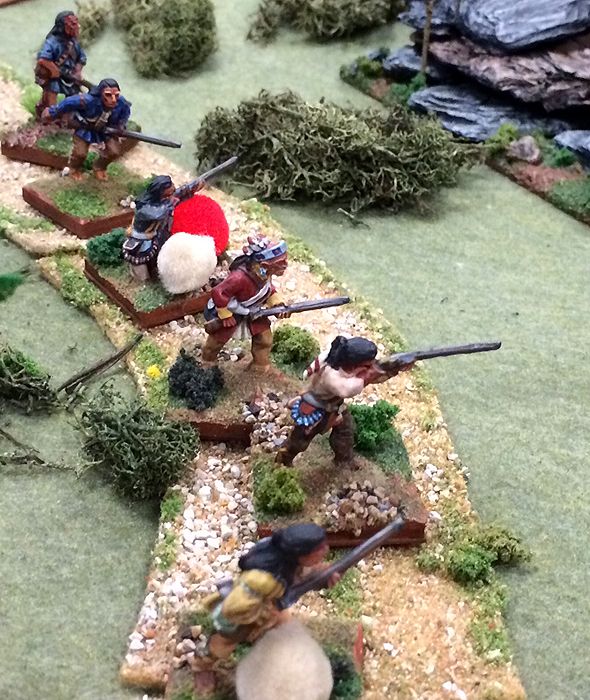
Allied Mohawk tribesmen open fire on the Hurons who have ambushed them
The British players were suffering more hits, and were being whittled down in size. The Mohawks, in particular, suffered grueling losses being shot at from both sides. They were rescued from the fire of Magua's band when the frontier militia rushed onto the flank of the Indian firing line and blazed away at them. Magua's Hurons let loose a war whoop and charged the militia. A stubborn, bloody fight ensued, with both sides taking losses.

The frontier militia veers off the road to protect the flanks of the regulars
Things began to look bleak for the British as all of their forces were below half strength. They proved stalwart on their morale checks, though -- particularly Munro's regulars. The Mohawks were down to 3 warriors, but inflicted enough losses on their Huron foes to drop them below half strength and force morale checks, as well. Even Magua's band was suffering under the frontiersmen's blows, though the militia were the first to break off and run. 

Everywhere the British look, Hurons are in the woods, firing at them
When the game was called, it was certain the Indians had inflicted severe losses on the British. The British gave much better than they did historically (or in the movie, for that matter!). It was a Huron victory, but not the massacre that it looked like it would be early on.

The melee beneath the trees between Magua's warband and the frontier militia proved deadly to many a brave soul
We had two new players who tested out the rules, along with four veterans. Everyone had a good time, and I passed out a number of "calling cards" for downloading the rules. We plan on running quite a few games of SDT at Cold Wars next Spring, as well as other cons in the area.

Col. Munro, aka "Gray Hair," and his regulars proved stalwart under fire -- never flinching in the face of mounting casualties

 
 The rules are available for download on the Ganesha Games site, here: http://www.ganeshagames.net/product_info.php?cPath=1_51&products_id=267&osCsid=v1rt4t6dmmo109prds0bkak551


Song of Drums and Tomahawks officially released!


The cover of our rules set -- artwork by Andrea Sfiligoi
 Well, here it is! Our French & Indian War rules -- Song of Drums and Tomahawks -- were officially released last week as a joint venture by Ganesha Games and our own company, First Command Wargames. Right now, they are available for PDF download on the Ganesha Games website, here: Song of Drums and Tomahawks

The print-on-demand booklets will be available soon. It will also be available soon on WargameVault.com, I believe...

Check them out...at $8 they are quite the bargain (if I must say so myself...!)!!! The rules include a substantial historical background piece, a timeline of the wars in our period, army lists, and all the rules necessary to play. This is a stand-alone rule book -- not a supplement. At 62 pages, there is a lot there!

Sunday, October 5, 2014

Ohio Frontier Aflame at ATC 2014

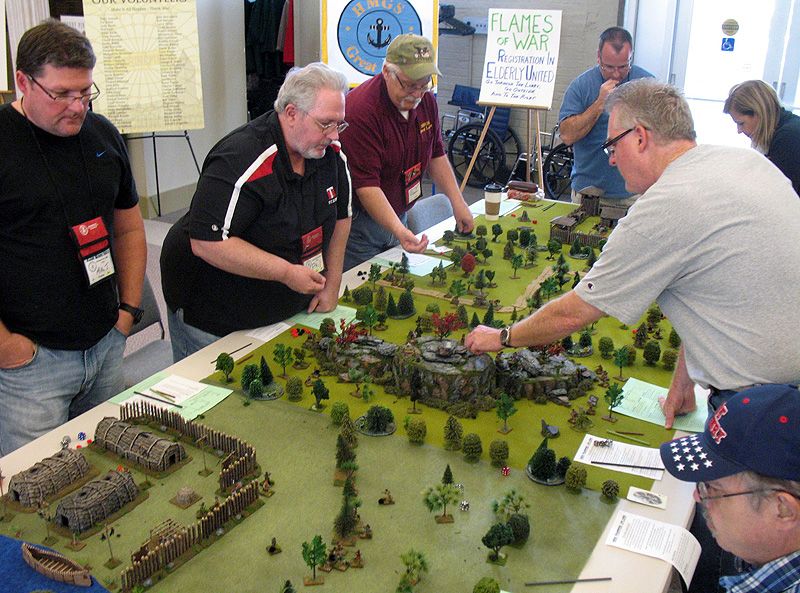
The players gathered around the 14 1/2 foot long table
 My extravangza of a French & Indian War game was hosted three times at Advance the Colors 2014 last month. I've been so busy since then that I'm finally getting a chance to post pictures. I ran it Friday night, Saturday afternoon, and Saturday evening. Every running had at least 8 players. I had upped the limit to 10 players by adding in a fifth scenario. This stretched the table to 14 1/2 feet long -- without a doubt, the biggest single game I've run!
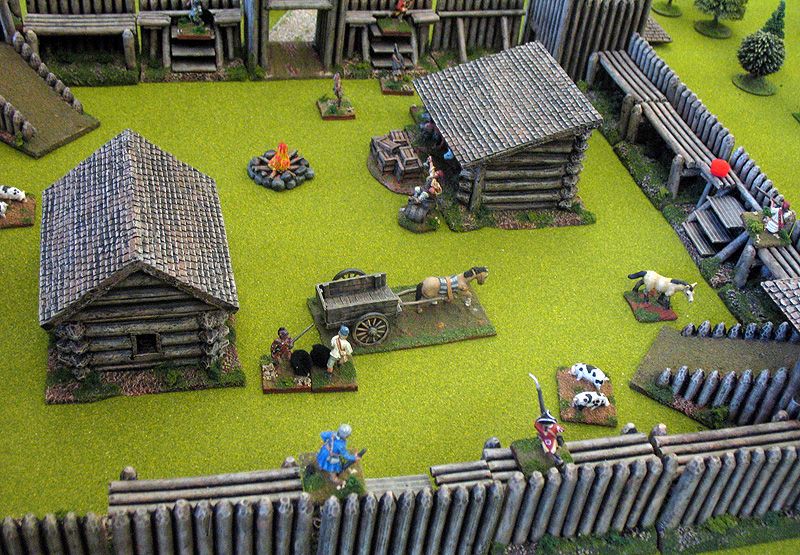
"The Fatal Lacrosse Game" takes place entirely within the walls of my new French & Indian War fort
The five scenarios I ran were:
  • The Fatal Lacrosse Game - This was inspired by a historical incident during Pontiac's Rebellion where Indians staged a lacrosse game next to Fort Michilimackinac under peaceful pretext. When the ball was "accidentally" tossed into the fort, the Indians chased it inside and attacked the garrison.
  • Hurry...to the Blockhouse! - A family of English settlers is hurrying to the local blockhouse as word arrives that the Indians are on the warpath. The blockhouse defenders dispatch a force to escort them in as the Indians seek to cut them off.
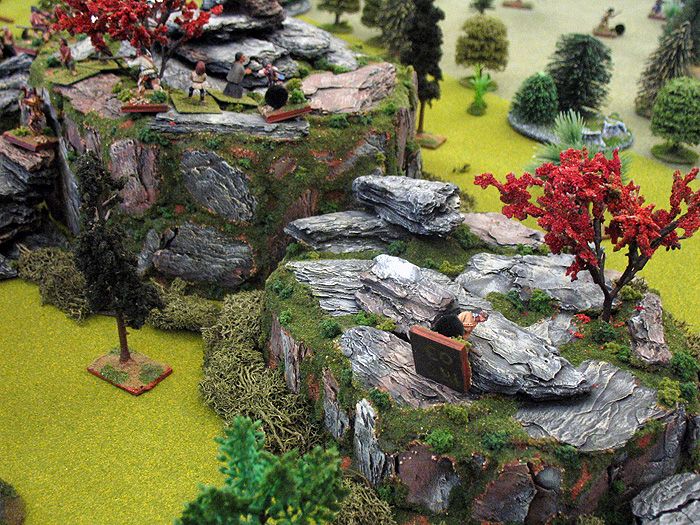
  • The Clifftop Rescue - Inspired the climatic scene of the movie, "Last of the Mohicans," this battle has Huron pursuers attempting to recapture women and children who were kidnapped from their village by a raid of Rogers Rangers and Stockbridge Indians.
  • The Interrupted Raid - Despite the urgings of their Stockbridge Indian allies, a force of Rogers Rangers lingers too long in a Huron village they have raided. The Huron men return from hunting and seek to exact vengeance as the rangers seek to escape offtable.
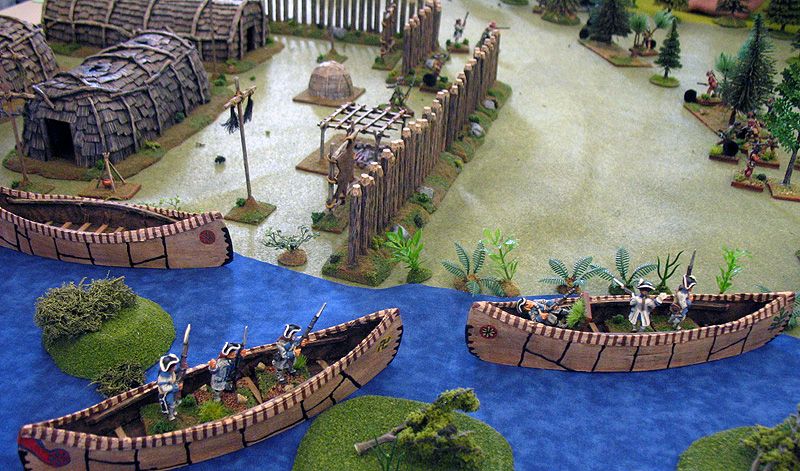
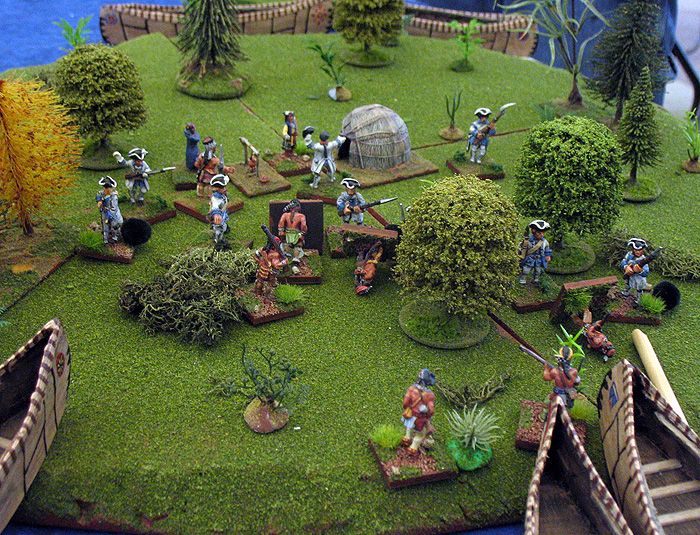
  • A Chieftain's Scalp - Mohawk Indians have discovered the location of a secret meeting on an island in the lake where French paymasters will reward three friendly Indian chieftains. They take canoes to the island where they hope to interrupt the payoff and scalp the chieftains to prove the French powerless to help their allies.
"Hurry...to the Blockhouse!" featured a bloodbath beneath the trees every game
The game used my Song of Drums & Shakos rules -- which are to be published very soon. Everyone seemed to have a good time. The rules move very quickly and 10 players were able to finish up their games in less than 3 hours in all three events. Since I had not play tested the canoe movement rules for the "A Chieftain's Scalp" scenario, I made it the odd scenario out on two of the three runnings. The one time it did run, my co-author Keith Finn met with disaster as the Mohawk raiding party. When your leader is killed on the first turn of the engagement, bad things usually happen!
I tweaked the scenario rules to "The Clifftop Rescue,"giving the Huron pursuers an extra leader -- which made the scenario much more balanced
We plan on taking these rules and scenarios to Cold Wars to showcase it there. I don't know if I'll take all 5 scenarios, or trim it down to 4 to save space. Either way, I think the rules and the "Ohio Frontier Aflame" setup is a winner and the players seem to enjoy it. I hope you enjoy the photos!
The French arrive to help out the Huron hunting party in the neighboring scenario in "The Interrupted Raid"
The Mohawk raiders wade into a withering blast of musket fire from the French soldiers in "A Chieftain's Scalp"

Sunday, September 14, 2014

French & Indian War fort finished!

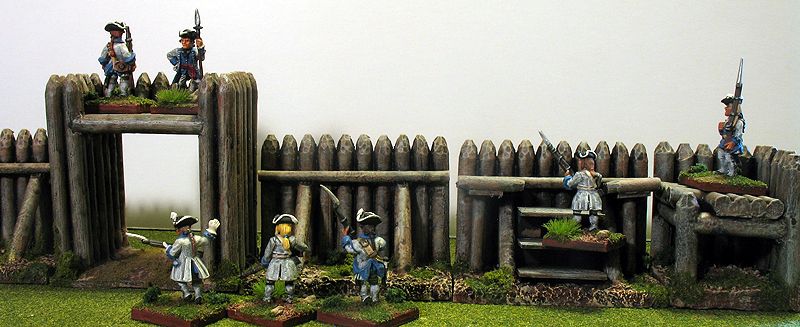
    My completed 25mm Acheson Creations French & Indian War fort
I wasn't sure if I'd be able to get this whole thing completed in time for next weekend's convention, but it painted up a lot quicker than I thought it would. The last pieces to do -- the two stockade towers -- were Dullcoated this morning. I ran into a small snag on them yesterday with the interior floor piece which separates the ground floor from the upper fighting level. The square piece fit in just fine beforehand, but after washing in the dishwasher, priming, painting, and clear coating, it must have grown. I ended up having to shave its edges down to get it to fit again, and then repaint those edges.

    The fort is about 2 feet square on the tabletop
Since it was a nice, sunny Sunday, I thought I'd set it up on my kitchen table and photograph the whole thing. I was curious what its dimensions would be. As it turns out, the fort is about 2 feet square. That is plenty big enough for the scenario I have envisioned for it in this weekend's game. I am actually missing 3 pieces that Acheson Creations did not ship, so it will be even marginally larger once those arrive and are painted up, as well.

    Close up of the fort gate and one of the corner artillery emplacements
Speaking of Acheson, I highly recommend their Basic Fort set, which is the nucleus of what you see in the pictures. I added in the two corner artillery emplacements, along with the two stockade towers finished this morning. In addition, I purchased 8 extra wall sections that I converted into "stairs up" sections, as detailed in earlier posts. The basic set comes with four corner sections for those who don't want a tower or artillery emplacement on the corners (or don't want to buy them!). They are not pictured in my set up, here.

    Close up of on of the corner artillery emplacements (um, with no artillery!) and a stockade tower in the background
I won't go into detail how I prepared and painted these, as I've done that in previous posts. Suffice to say, the excellent detail on these resin pieces makes it easy to base coat and dry brush them so that they look very nice.

    A squad of Rogers Rangers sallies forth from the fort's gate while regulars and militia watch the woods
Stay tuned to my blog for pictures and a report from next weekend's "Ohio Frontier Aflame" games at Advance the Colors 2014. If you like a good French & Indian War game, come on out to the convention in Springfield, OH. I will be running it Friday and Saturday at 7 pm, as well as an afternoon game at 2 pm Saturday. There will be 10 spaces per game, so I hope to accommodate most of those who want to play!


Thursday, September 11, 2014

Silent Auction: The Reporters

I have had these figures done for a couple weeks, now. I'm not sure why I haven't gotten around to posting pictures of them, though. These four figures will be one of my silent auction raffle items I'm doing at Advance the Colors 2014. All the proceeds will go towards my middle school travel club. Although they are not immensely practical figures, they are meant to be nice "eye candy" for GMs to put on their tabletop. Of course, they could be used in skirmish style games as objectives, and so on, too.
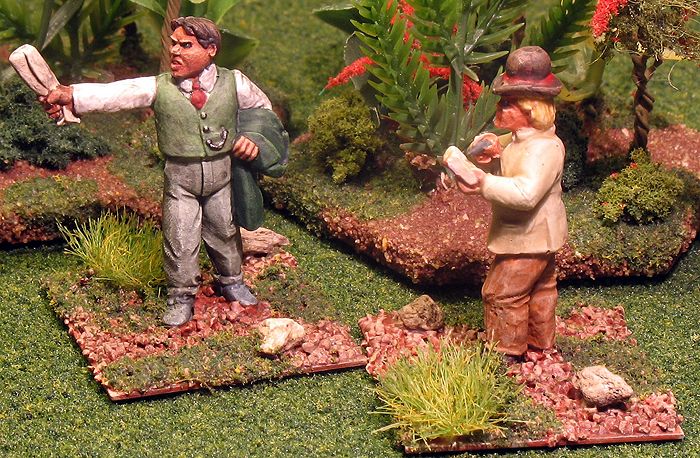
The "Producer" and the "Journalist" -- two 28mm miniatures for my Silent Auction at Advance the Colors 2014
First up, is the "Producer" and the "Journalist." The producer is a Bob Murch figure and one of my favorites of the batch. I like his style -- suit jacket draped over one arm, and gesturing with rolled up plans or script. He looks full of himself as he dramatically describes his grandiose vision to the Victorian-looking reporter. Honestly, I'm not sure where this figure comes from. It may be one from Old Glory's "Famous Newspapermen" pack. He is a much more simple figure without the fancy watch chain of the producer. He'll make a great extra figure hanging around a general on a battlefield, getting the scoop on the great man's thoughts.
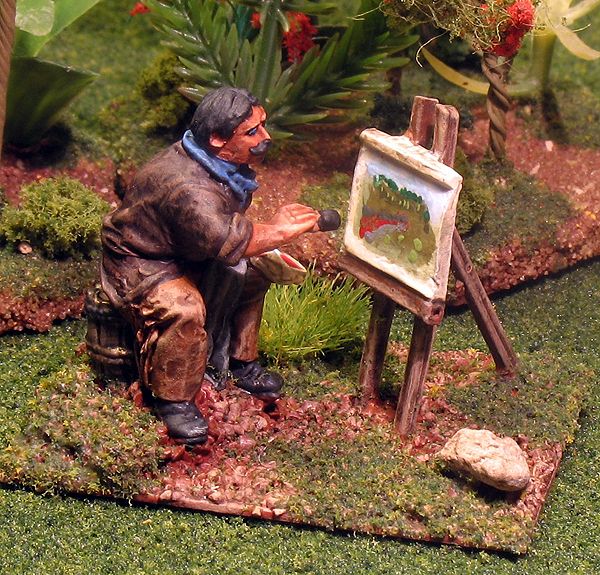
The "Battlefield Artist" hopefully will go to a good home in the Silent Auction
My next favorite is the "Battlefield Artist." This miniature has a decided 19th century look, in my opinion. I really his expression, and with jaunty mustache and rumpled but chic clothes, he looks the part of an artist. I think the watercolor I did on the canvas turned out fairly nice, too. He sits atop a barrel scavenged from somewhere and his palette in his left hand reflects the colors on the painting. Like the others, I think he'll make a nice addition to a tabletop as he quietly records the action on canvas.
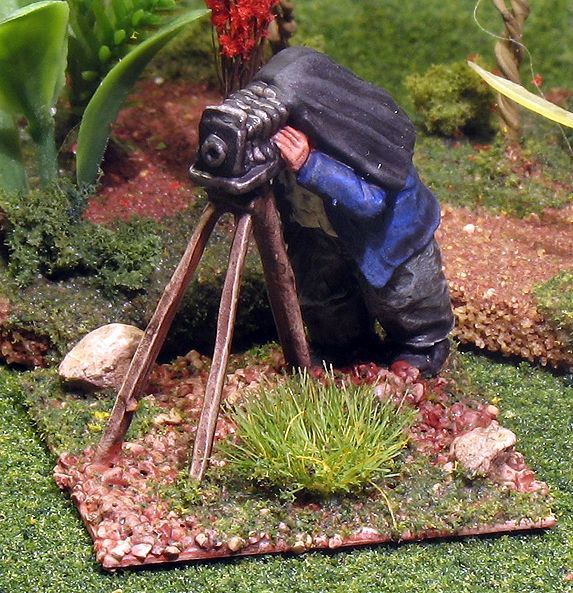
The "Photographer" -- a potentially useful figure for Skirmish scenarios
Finally, the photographer is probably the simplest of all the figures. The black cloth draped over his head and shoulders meant there wasn't as much detail to paint up. His blue suit jacket and gray pants are straight forward attire. I think he'd be a cool figure to use in Pulp or Skirmish games were the actions of the characters need to be "photographed" for victory points. Maybe a dinosaur hunt? Bonus scenario points for posing next to your kill?

Since I run 28mm Pulp games, these figures actually could be useful for me, so I hate to get rid of them. However, they've been sitting in my unpainted lead pile for quite some time, now. If I hadn't chosen them to paint up for my silent auction, they'd still be in that state -- unpainted! So, I don't mind seeing them go. I just hope that whoever has the winning bid is generous with his or her donation to my students' cause!

Sunday, September 7, 2014

Board Games at my Place

 With Allen and Mike S out for the evening, I offered to host board games at my place. I have a few more things to finish before I can run the climactic scenario of my Pulp games. So, board games were a good substitute since no one had a minis game ready.

First, we played Keith's newest version of Pandemic. It adds in a few new roles, including the Quarantine Specialist that Joel played and my Contingency Specialist. We cured three of the four diseases before the end of the game, but still ran out of the player deck before the fourth was cured. I honestly thought we did fairly well, but Pandemic is always tough. And the more players you have, the tougher it gets. Trying to win with five players is difficult.
Next, we did a blast (literally) from the past and played Nuclear War. Joel was the winner, and I was the big loser being the first taken out. Next was Keith, then Steve, then Ptom, leaving Joel the sole survivor. It was a brutal game, as expected, and was interesting flashback to our gaming days of yore!

Saturday, September 6, 2014

The Rest of the Fort Walls Completed

Some of my newly-painted wall sections set up with my 28mm French Infantry
 My Acheson Creations 25mm French & Indian War fort continues to grow towards completion. Earlier this week, I finished off the last of the wall sections, along with the corner pieces and fort gate. All that is left to do are the two corner artillery emplacements and two stockade towers. Then I will have a massive-sized French & Indian War fort. Hopefully, all of this will be completed in time for my Ohio Frontier Aflame scenario at Advance the Colors 2014, Sept. 19-21.

These wall sections were extra that I ordered in addition to the Basic Fort set. At first, I was disappointed they were not identical to the ones in the set (my mistake for not checking the item codes). However, I ended up being happy about it because these were easily converted into "stairs up" sections. I described how I created them in the previous post, so I won't go into that again. I converted six of the eight that I ordered. In the photographs, you can see the two completed wall pieces side by side. You can also see how easy it is to make my based French & Indian War figures "climb" the stairs.

I'm really happy with how this fort is turning out, and think it will be quite the eye-catcher on the tabletop...!
Close up of the "stairs up" conversions I made to the extra wall sections I ordered, along with a shot of the gate and corner sections

Sunday, August 31, 2014

Dinosaur Hunt in East Africa

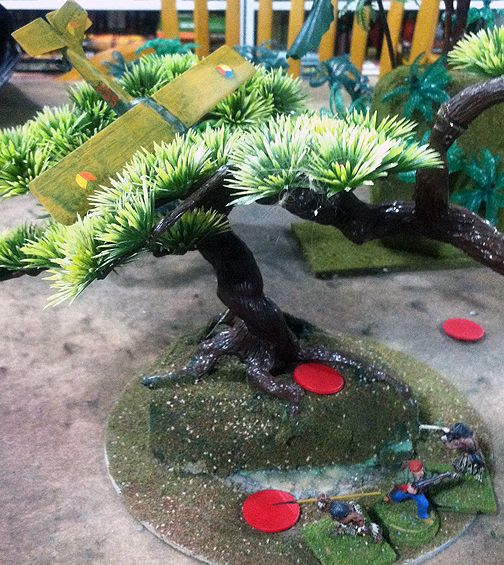
My Italian paleontologist's plane crashes in a large tree, and we disembark to explore the valley
 It had been awhile since Keith had hosted one of his wild and woolley Dino Hunts. He was going to be running one at Advance the Colors 2014, so wanted to get back in the swing of things. Although he plans on using the Pulp Alley rules for the ATC game, he fell back on Saurian Safari for this game to get back into the swing of things.
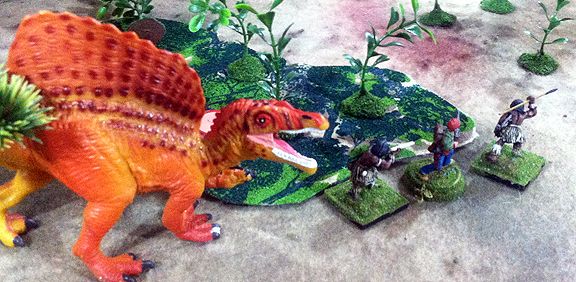
Almost immediately, we encounter a Spinosaurus and the Italian scientist and his native guides flee for their lives
 The scenario had my Italian paleontologist trying to evade capture by both British and German forces sent to apprehend him. Meanwhile, I was investigating this thick, bamboo forest in East Africa for evidence that the Egyptian gods were inspired by prehistoric creatures that might still be alive. It was a fun game, with my Italian scientist and his two native guides cinematically running from one dinosaur encounter to another.
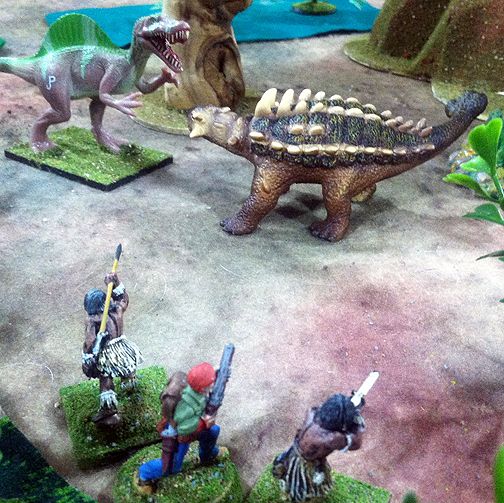
With more deadly dinos in our path, we turn around and flee the other direction!
In the end, we were snagged by the British, mainly because our direction of flight always seemed to be taking them towards their side of the board. The Germans -- played by Allen and Mike S -- blasted away at every dino that came near and left a swath of destruction in their wake. Their only loss was of their machine gunner to an "Apex Predator" giant toad. Allen continually bemoaned the loss of his machine gun, and insisted he should be able to recover it through the tons of toad blubber that it lay beneath.
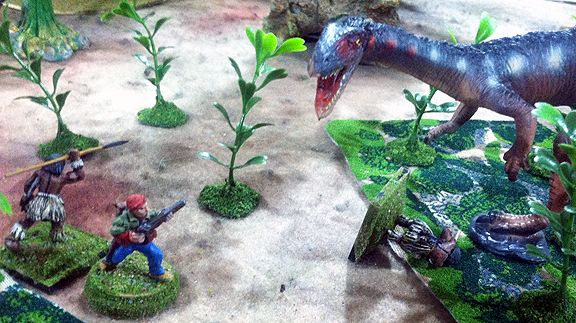
One of the native guides flees straight into the jaws of a lurking carnivore
As always, it was a fun game. I look forward to Keith using Pulp Alley for the next game. In the meantime, this was a good warmup!
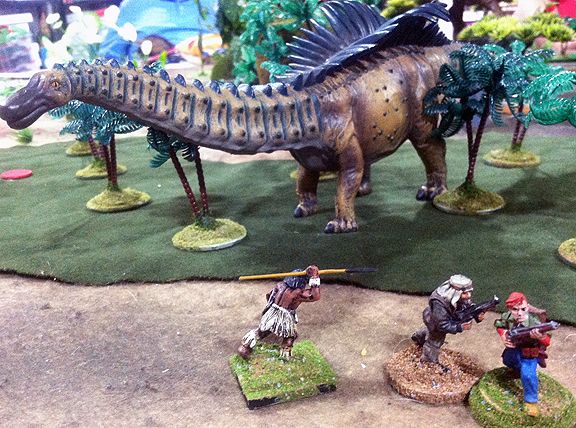
We were slippery for the whole game, but eventually were collared by the British force and marched off to do their bidding