Wednesday, December 24, 2014

Dakota Smith's Oriental Adventures, Part 7: Debacle at the Docks

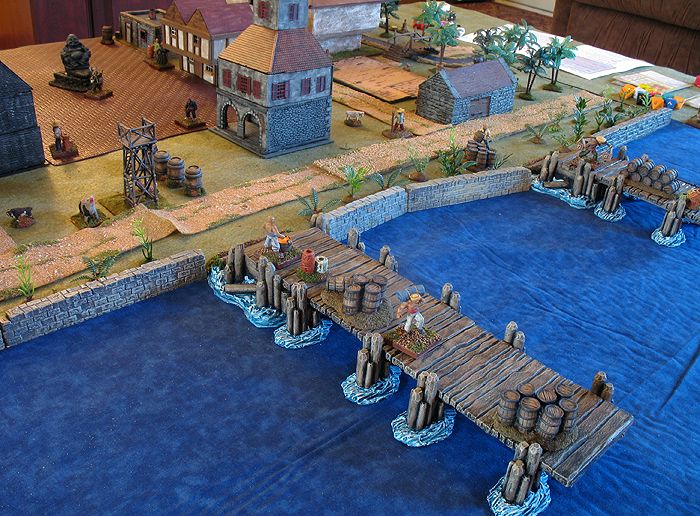
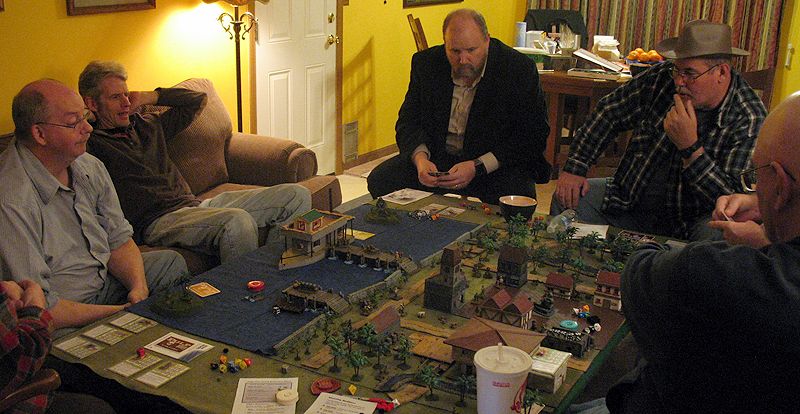
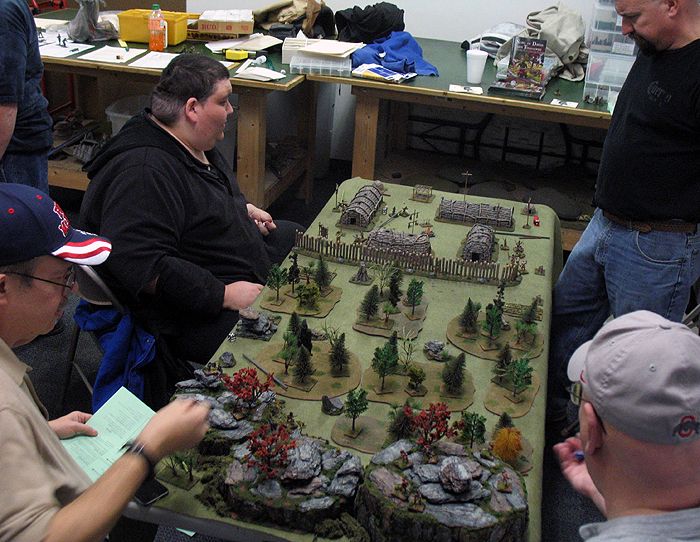
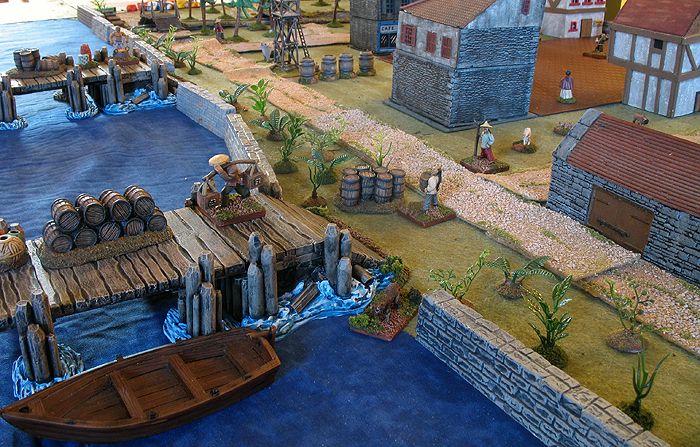
 It is a quiet morning in the riverport town of Hoi An, French Indochina. The freighter Dionysius is expected to pull in at the main pier at any moment. Coolies are stacking the cargo and stores to be loaded upon arrival. In town, various groups of Western archeologists are laying low, scanning the river anxiously. Dakota Smith has booked passage on the freighter for himself and his two companions. Hidden in their luggage (or being carried by them?), is an ancient artifact -- the Tears of the Buddha.
Dakota is not so naive to think he will get on board the freighter without a scrap. First, the French authorities -- represented by Inspector of Antiquities Pierre Fournereau -- don't want such a valuable artifact to leave French territory. Next, the British and Irish archeological teams may want to seize it for themselves. Plus, Dakota knows that it has been too long since his arch-rival, the German archeologist Von Jaeger has reared his ugly head. And finally, perhaps most dangerous, the Order of the Fire Coral has been dogging his footsteps since he arrived in Indochina. To think they would not make one last attempt to recover the Buddhist artifact would be hopelessly optimistic. Masters of disguise, they could be anywhere in Hoi An.
His good friend Harold Fortwine grunted and point to the far jungle. The black smoke of an approaching steamer could be seen rising above the treeline. Chairs scraped as Dakota and his companions headed for the 
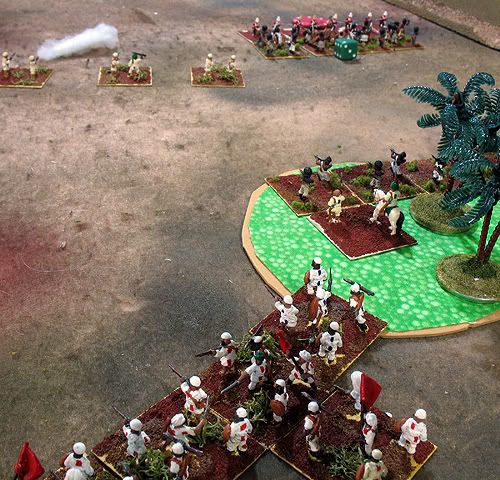
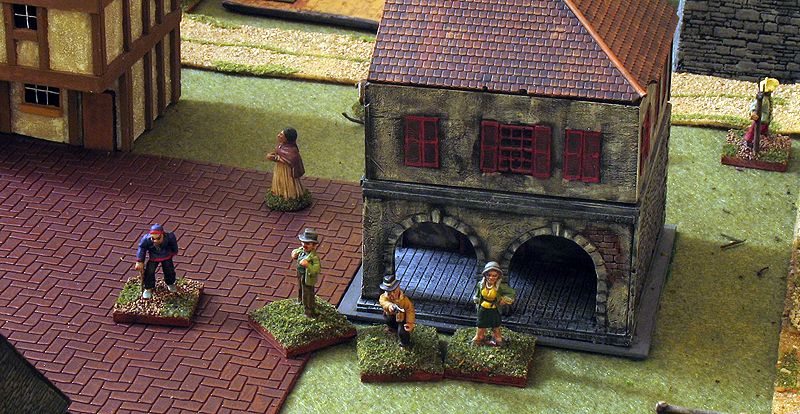
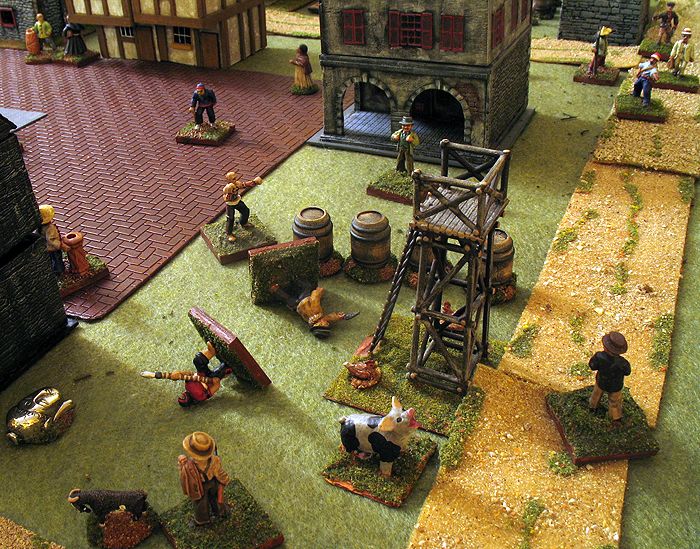
door. It was now or never. As Dakota Smith and his companions left the customs house on the town square of Hoi An, Dakota grumbled, "I got a bad feeling about this. Harold, Dolly, keep a sharp eye out!" All around them, the river port 
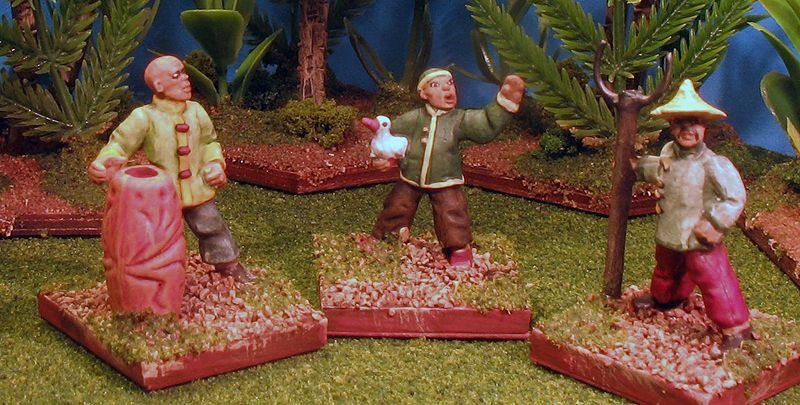
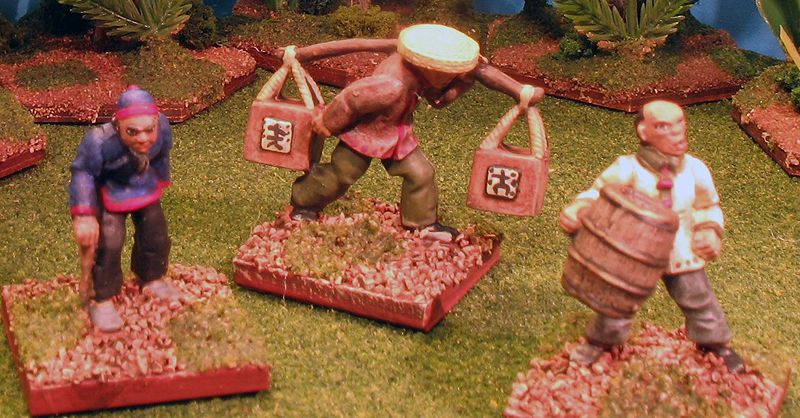
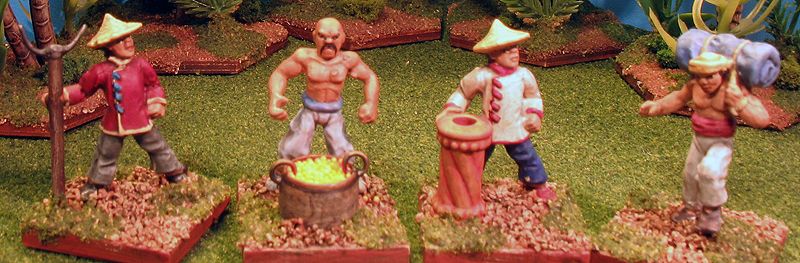
bustled with activity. Coolies were on the wharf loading and unloading the freighter. Dakota saw their baggage among the items being carried aboard on the backs of the IndoChinese laborers. He patted his satchel which contained the prize from this expedition. The famed Buddhist relic, "The Tears of the Buddha" -- which legend said had magical powers.
Shouting on the pier drew the Americans' attention. The freighter's bosun was cursing mightily at two of the coolies who had apparently 
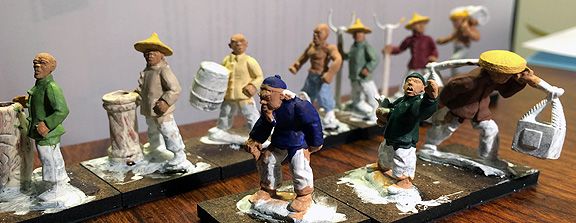
dashed their loads to the dock and stood glaring and pointing at the Americans. With a sinuous movement, they whipped off their peasant garb and assumed a fighting crouch. "Uh-oh," Dakota muttered as he noted the red and black uniforms they had been wearing underneath -- the unmistakable gear of the Order of the Fire Coral.
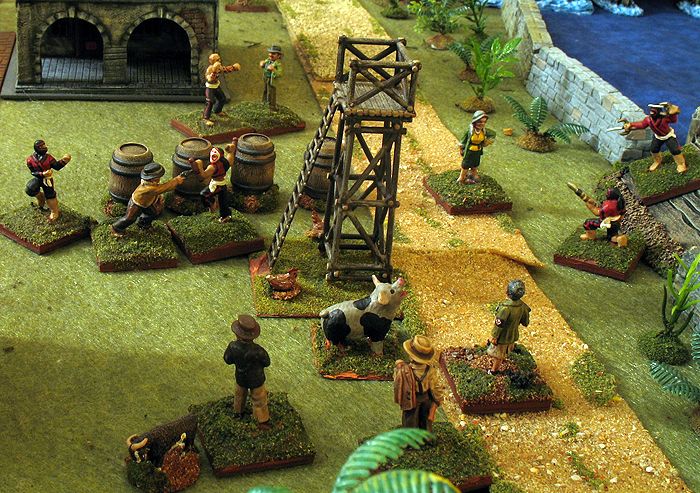
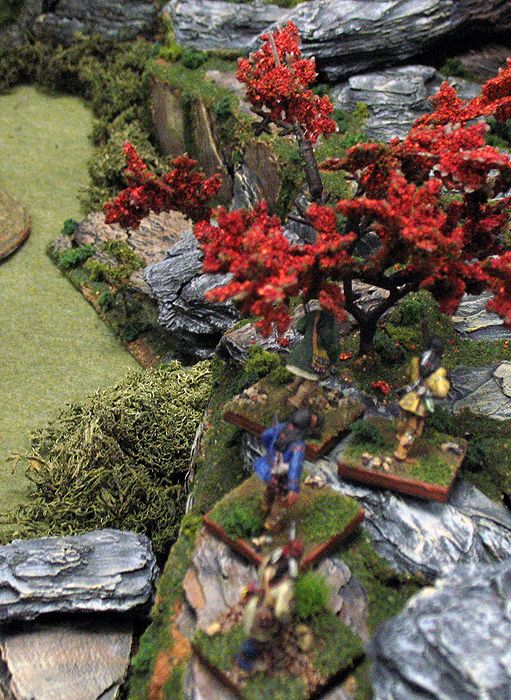
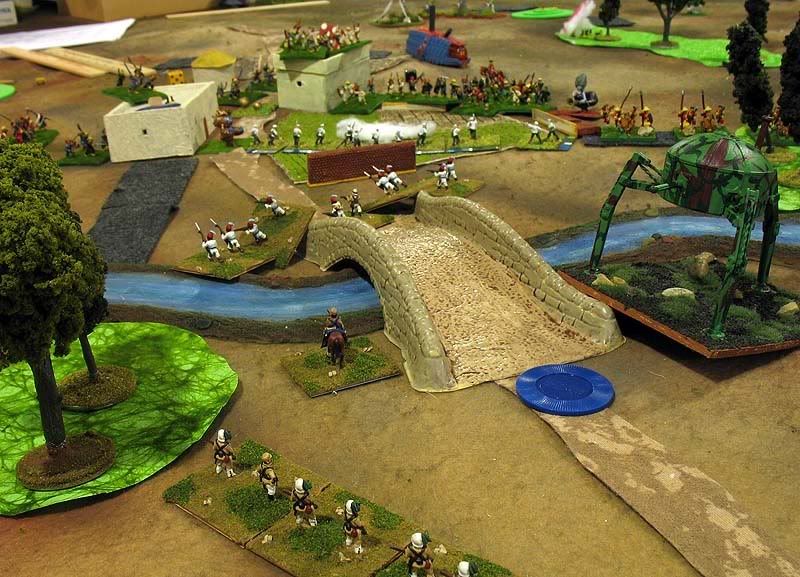
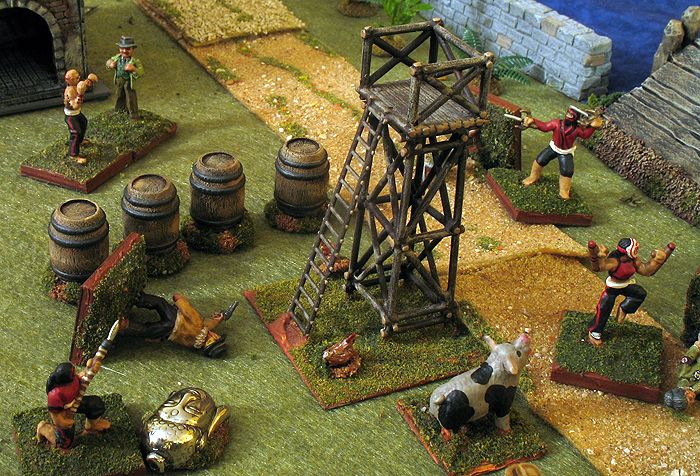
Dakota dashed for the cover of a line of wooden barrels beneath the harbor master's wooden observation tower. Dolly walked determinedly towards the pier when she saw one of the agents kick her luggage into the water and laugh. "Dolly, no!" Dakota shouted, unholstering his pistol. As he took careful aim at the agents on the pier, he caught movement out of the corner of his eye. A warning shout from Harold 
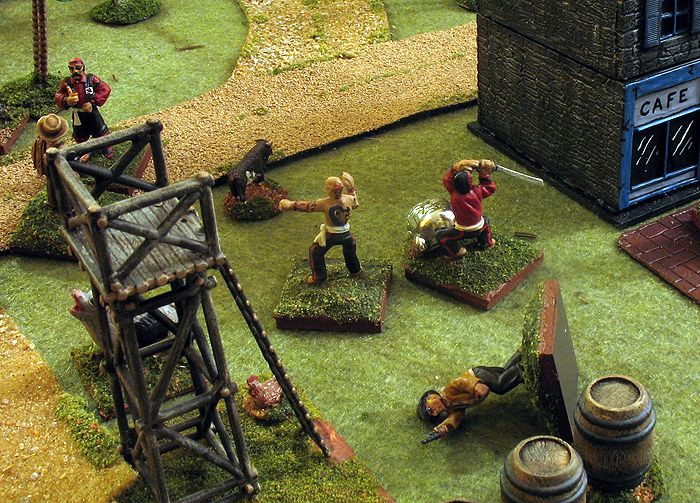
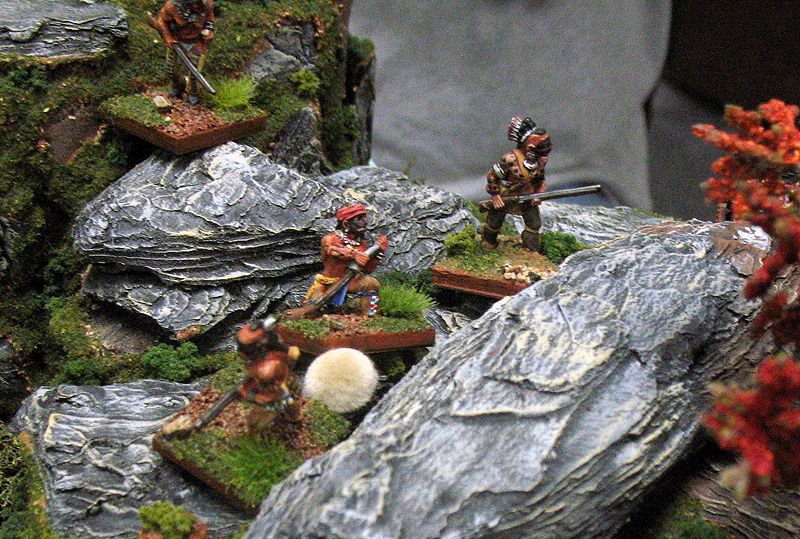
Fortwine, made him turn. Chuckling and cracking their knuckles, three more agents walked out of the door of the customs house. He recognized the bald, muscled Tat Ko and the masked female, Jazh  Minh. "This could be bad..." he called over to Harold.
The hairs on Dakota's neck rose up when he a familiar voice call out, "I'm afraid, my dear Dakota, it is about to get much worse..." The American whirled and saw creeping up behind them Von Jaeger, his stooge Otto Tulmann, and the evil old with Fraulein Blucher. "Harold! Dolly!" he yelled. "We're surrounded...make a break for it!" Jazh Minh and one of the Fire Coral agents rushed him and he fired off shots quickly. He heard Harold cursing as he jabbed and boxed with Tat Ko. There was a blaze of gunfire from the Germans and he heard Dolly cry out and a thud as she fell hard at the foot fo the docks. There was nothing Dakota could do for her as he dodged the kicks and punches of the martial artists.
Dakota grimaced as Jazh Minh vaulted away, thinking "That wench's kicks hurt!" With no martial artists in his face, he turned to face the Germans...too late! Both Von Jaeger and Otto Tulmann opened fire. Dakota felt a searing pain and fell to the dirt. That jarred his wounds even harder and he blacked out. His last thought was for the Tears of the Budhha. Had it gone flying out of his satchel when he spun to the ground? Meanwhile, Harold was holding his own, bludgeoning Tat Ko with his boxing skills. Dolly, though, also in a heap near the pier. Fraulein Blucher growled in disdain as she saw Jazh Minh somersault backwards and landing on her feet. She rushed the martial artist, ignoring Von Jaeger's warning. Just as she began her roundhouse swing, Jazh Minh's foot connected with the bridge of her nose. The gray haired matron collapsed.
There was a gasp among the archeologists and the agents of the Fire Coral as the Tears of the Buddha flew from Dakota's satchel and landed several feet away from his unmoving form. One of the agents dashed in and picked it up. He was gunned down by Von Jaeger and again the Buddha went flying. Tat Ko rushed over and with Neen Wa stood over it and dared the Westerners to make a move towards it. Surprisingly, Von Jaeger nor his goons never tried to grab it. Instead, the were venting their anger on Dakota and Harold, blazing away at them and ignoring the Fire Coral. The Irish and British teams were closing in, but they also seemed leery of making a run at it.
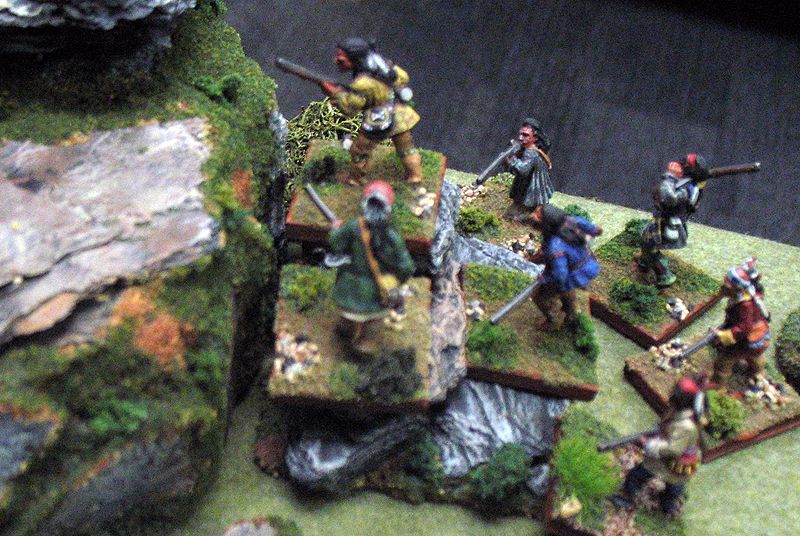
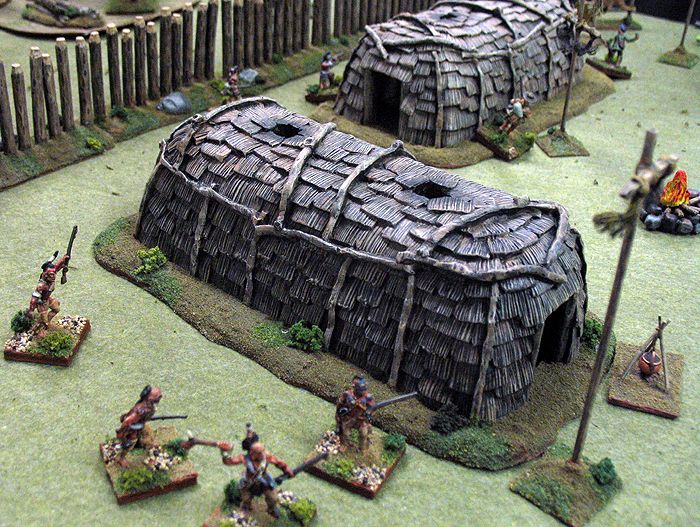
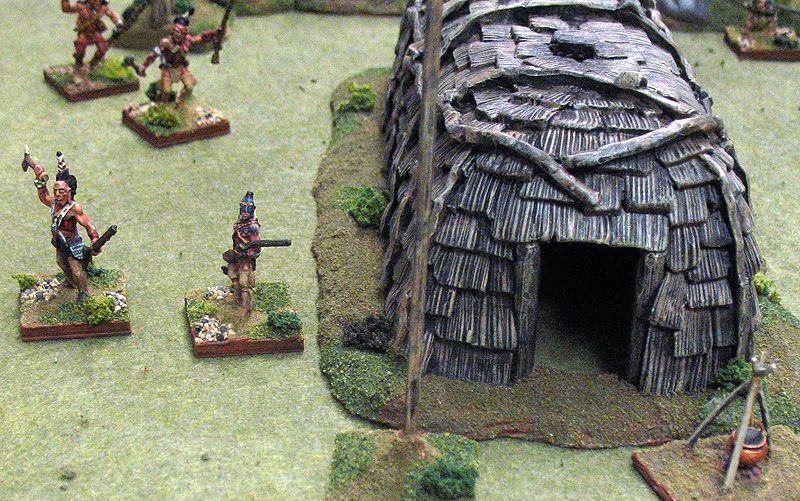
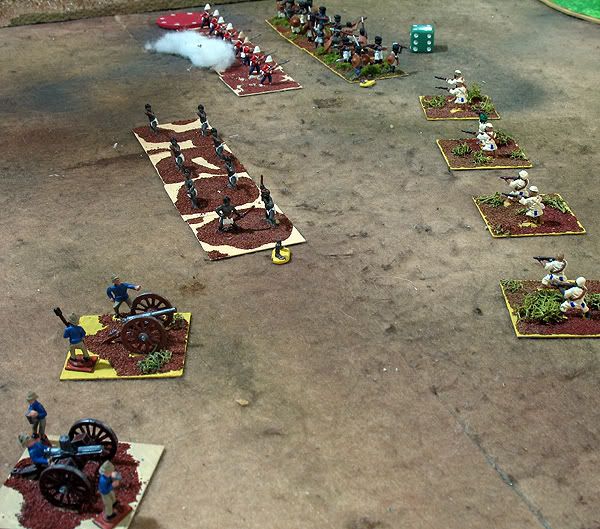
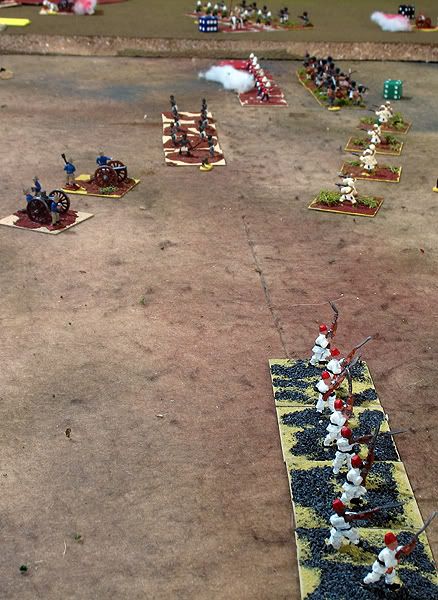
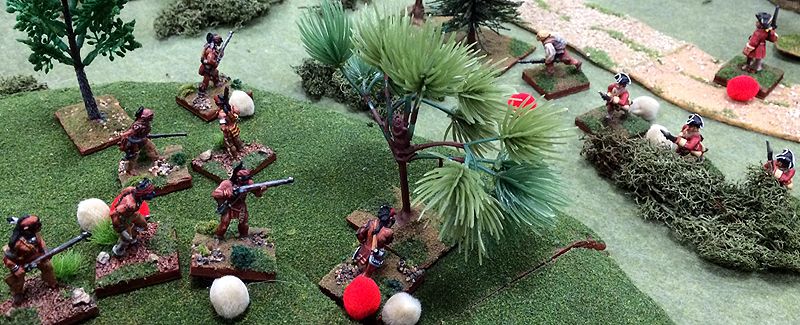
Meanwhile the Irish and British teams were creeping stealthily through the town square towards the pier. Despite previous bad blood, they ignored each other for the most part this game. Both had valid chances to make a grab for the other's minor plot point (they could recognize it by passing two Cunning checks when within 12"). Neither took it. The Irish did close in on the French who were slinking down the road towards the freighter. They joined Otto Tulmann in blazing away at Pierre Fournereau and Dr. Lambert, who was carrying the French artifact. The French fire was accurate, though, and they gave better than they received.
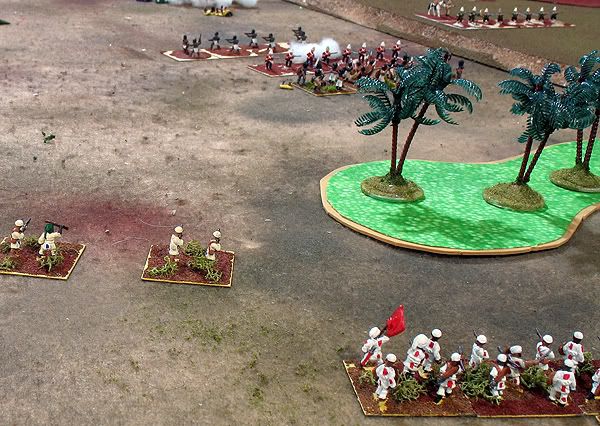
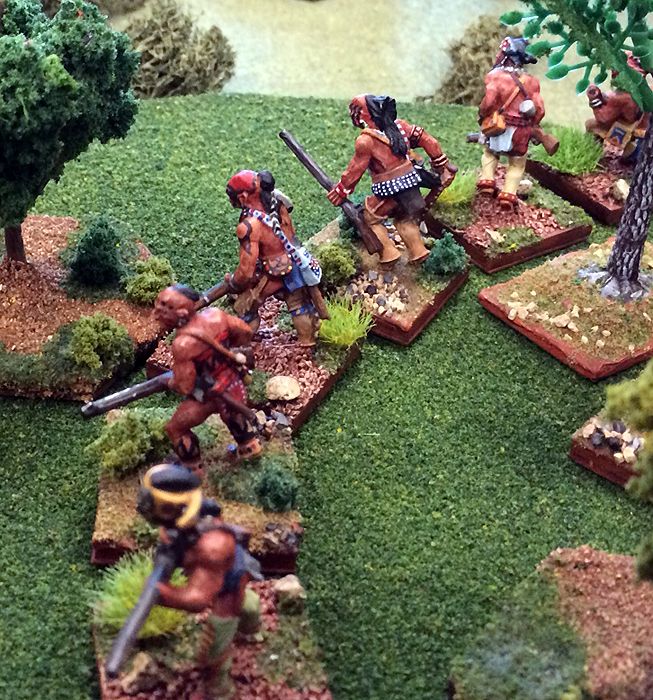
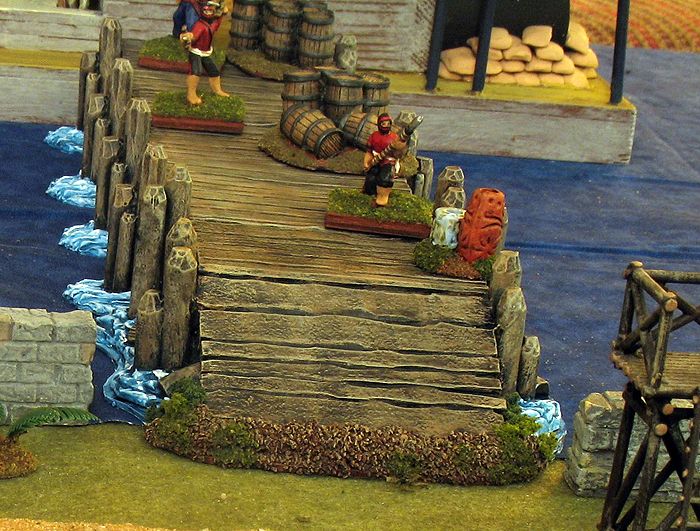
 Surprised at their luck to be ignored by the Germans, Tat Ko nodded at Neen Wa to pick up the Tears of the Buddha and make a dash for it. Tat Ko charged the British Maj. Speke-Eastman who blocked the path leading over the bridge and into the jungle. Neen Wa took advantage of the distraction and raced over the bridge, stowing the idol in his robes.
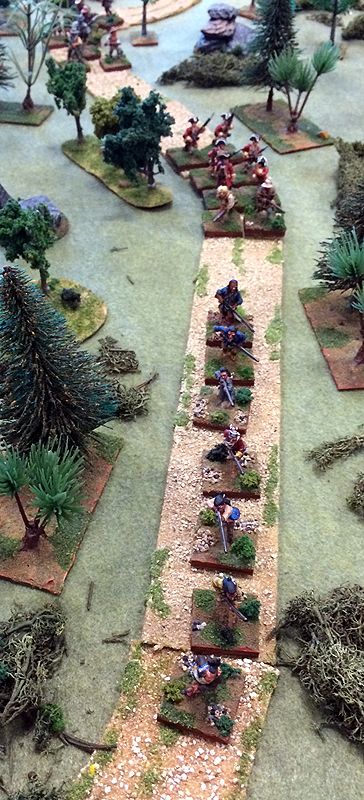
Neen Wa's flight wasn't unobserved, though. Harris McLeod, the portly representative of the British Museum tut-tutted to himself. "Now, here, laddie. We can nae have yee fleeing with such a prize, can we?" The Scottish laird lined up the fleeing agent in his sites and squeeze the triggers of both barrels of his gun. There was a cry and a flash of silver as the idol flew from Neen Wa's lifeless body and tumbled into the jungle. Moving faster than you'd think possible, Harris followed the path of his fatal shot.
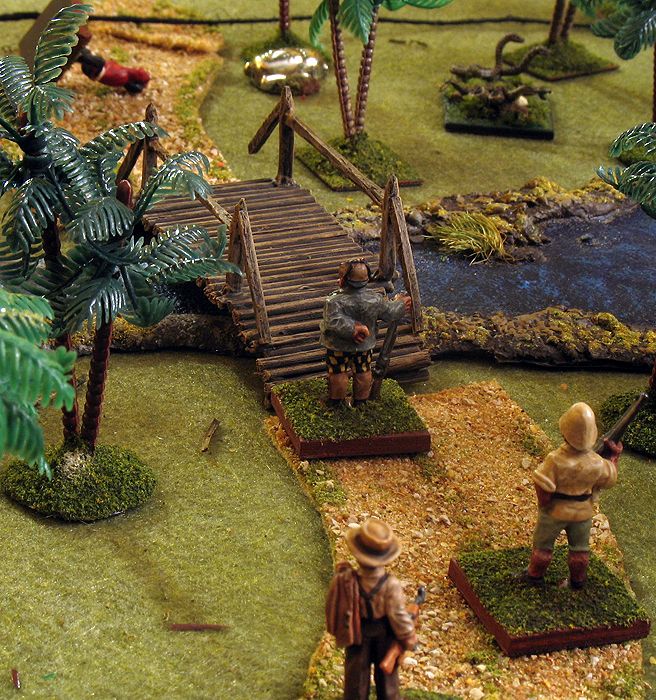
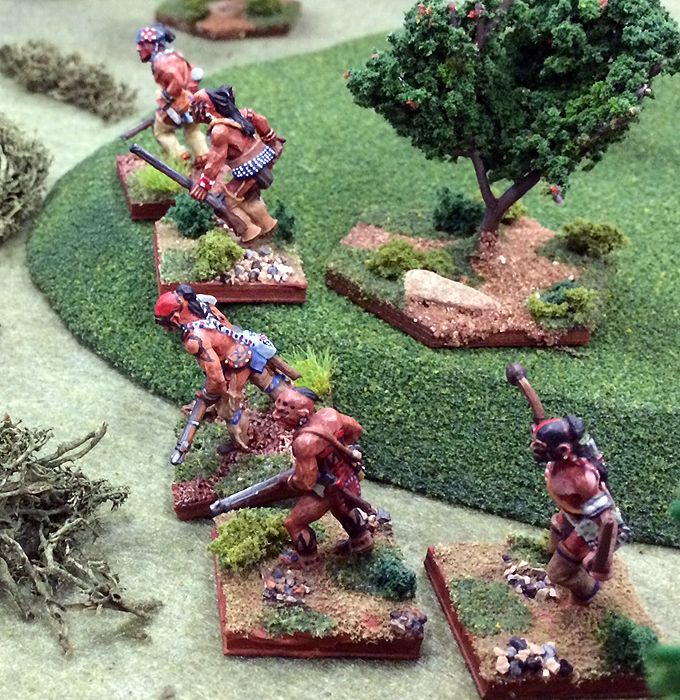
Harris heard footsteps behind him on the bridge as he pounded towards the Tears of the Buddha, which he could see glinting from beneath a swaying fern. He hoped that it was Speke-Eastman behind him, and sneaked a glance over his shoulder to see. An evil hiss in front of him froze him. Swaying above the idol was the hooded body of a cobra, who's nest must have been disturbed the idol's tumble through the vegetation. "Och, good god!" Harris yelped, then swung the barrel of his rifle over his head and pounded the snake into the jungle floor. Reaching tenderly for it, he confirmed the cobra was dead before picking up the gleaming artifact.
On the pier, Pierre waves off Dr. Lambert aboard the departing freighter, carrying the minor plot point that his team had secured. His main goal was to ensure no other Westerners escaped aboard the freighter. It was a shame that the British slinked off into the jungle with the Tears or the Buddha. However, they were not out of French Indochina yet. There was always a chance that his gendarmes would find them and capture it. Something would have to be done about the agents of the Fire Coral. How could an archeologist work here it they constantly had to watch for a knife in their back from their sinister hands!
And so, Dakota Smith's Oriental Adventures first story arc comes to an end. It was quite the adventure and the players seemed to really enjoy it. Each league seemed to have its moment in the sun. Would Harold be able to gather the wounded Dakota and Dolly and nurse them back to health? Would the Americans return empty-handed to Portland, Oregon? Or are there more adventures to be had in French Indochina? After all, only the French Dr. Lambert was on board the freighter when it sailed from Hoi An. The others would all need to find a different way home...
Thanks to Pulp Alley for making our games such a blast! I highly recommend these rules as they seem to create an exciting storyline just in the playing.


Thursday, December 18, 2014

Making Scalp Markers for Song of Drums and Tomahawks

Scalp markers for my Song of Drums and Tomahawks games
 One of the rules in Song of Drums and Tomahawks that give a nice flavor for the period is "Scalping." When a figure has this Trait in the game, it will sometimes go out of control, so to speak. Whenever one of these figures puts an enemy out of action ("kills"), it must make an immediate Quality check. If it fails, then all subsequent movement must be to rush to the position of the downed enemy and take an action to scalp it. This may be foolhardy indeed. Even if the player may think it is foolish to have his Indian leave the cover of a patch of woods and run out into the open to scalp the enemy they just shot, the figure must do it if it failed its check.

Up to this point, I've been using red craft store pom-poms to mark the position of the downed figure (which is itself removed) and to place upon the base of the figure who failed their Scalping check. Late in a game, this may get a bit confusing remembering which marker applies to which figure. My solution? Scalp markers. Or more accurately, pairs of scalp markers. One of the pair is placed at the spot of the downed figure. The other is placed on the actual base of the miniature who must move to that spot and scalp that figure.

I am a big fan at keeping unnecessary and unattractive clutter off of the miniature gaming tabletop. So, though I could put a simple numbered marker on the table, I wanted "scenic" markers that would blend in with the tabletop. All of my miniatures are on 1" (25mm) square wooden bases. So, I looked through my supply of metal washers and found a box labeled "SAE" -- which measured about 3/8th inch diameter (1 cm). These are small enough to fit on my figures' bases, yet large enough to be visible and easily handled on the tabletop. My idea was to create flocked, scenic pieces in matching pairs, such as different colored bushes, rocks, etc. I decided that each player should have a half dozen pairs of these markers. My "Ohio Frontier Aflame" game features five matched pairs of players fighting linked, but essentially one-on-one games. So, that cut down on the variety I needed, as they could be duplicated from battle to battle.
Step 1: Taking the tiny washers and affixing a piece of cardboard to cover the hole. Step 2, flipping them over and adding a tiny ball of blue tack (some times called poster putty).
I started with ordinary cardboard and cut out a long strip the width that would cover the washer's hole. I then cut each individual square out equal to the number of washers I would be creating. The cardboard squares were then epoxied onto the washers. If you have a piece of styrofoam, this is a good place to let these dry, so that any epoxy that drips off of the washer or through the hole will not be too firmly attached to the cardboard or wherever you are drying them. After the epoxy had set, I turned the washers upside down and took a tiny ball of blue tack and placed it onto the washer. In the picture above, you can see the top two steps illustrated.
Step 3: Take a long screw and press it into the blue tack. This makes a nice, easy way handle for the tiny washer. Press the bottoms of these screws into a piece of styrofoam as a holder.
Next, I took a long screw and pressed it into the blue tack. The bottoms of the screws were then pressed into a styrofoam holder I'd created. I did my scalp markers in two batches because that was how many long screws I had sitting around. Once you have all of your screws with washers blue tacked to them sitting in your styrofoam holder, you are ready to move on to the next step.
Step 4: Dip each washer into a 50/50 mix of white glue and brown paint. Let the glue lap up to the sides but not over it onto the bottom of the washer.
 I mix up a batch of about 50/50 white glue and earth red paint -- the color I use for my bases on my figures. Actually, I premix it by taking a bottle of Elmers white glue that is about half empty and pouring in the paint. That way, all I have to do is shake it up and I can unscrew the cap and apply it. In this case, I squirted it into the depression in a plastic palette tray. I grabbed a screw and washer from the tray, inverted it, and pressed it into the glue/paint mixture. Don't let the bottom get covered up. Just dip it in deep enough so that the top and sides are covered in paint.
Step 5: Press the wet washer into a tub of sand -- I simply buy craft sand from the local hobby store as it is a nice, even texture. Set the screw upright back in the styrofoam tray to dry.
Immediately take the washer and press it lightly into a tub of sand. The sand will adhere to the glue/water mix. What's more, the paint will color the yellowish sand a nice shade of dirt brown. It only takes a second or two for the sand to soak up the glue and attach itself to the washer. Invert it and place it back in the styrofoam tray. This step goes real quickly, and you can do dozens in a couple minutes.
A row of washers attached to their screws and set out to let the sand/glue mixture dry overnight.
I let the sand and glue dry overnight. That way it forms a nice hard surface. At this point, you have to decide what type of scenic terrain you're going to put on the flocked washer base. Simple and easy ideas include Woodland Scenics "clump" flocking in various, easy to distinguish colors. I had a light green, dark green, and a reddish brown piece. Had I not been cheap, I would have bought a yellowish piece, as well. These will make good tiny bushes. You can get fancy and take green clumps and paint dots of bright color on them to make flowering bushes, too, like I did. You can also use various colors of rocks, such as aquarium gravel, railroad tallus, and so on. And finally, for piles of tiny stones, you can use Woodland Scenics ballast in different shades (tan, gray, etc.). Other ideas that I did not use could be discarded equipment like tomahawks, packs, hats, and so on. I did not use those ideas because I did not have any spares of these lying around, and I wanted to my first batch of scalp markers quickly without taking the time to make them out of Sculpy or whatever. Remember, keep the washers blue tacked to the screws until they are completely finished. This makes the tiny washer easy to handle.
Yes, I know it is a repeat picture! But here's another shot of the completed, flocked scalp markers. Let the game begin!
I recommend flocking the bases with whatever you use for grass -- I use fine Woodland Scenics blended turf. I flocked my bases by simply painting 100% white glue onto the earth mixture and then sprinkling the flocking onto it. I usually spray them with Dullcoate the seal it in before I go on to the next step. This is simply gluing on your bush, rock, pebbles -- whatever you've decided to decorate that pair of bases with. Try to make the pairs match up, choosing similar size and shapes of rocks or clumps of foliage.

After they have dried, I take a 50/50 white glue and water mix (premixed in a bottle, like above) and fill up the depression in the palette again. I grab each screw from the styrofoam holder, invert it and dip it into the watery glue mixture. I tap off the excess and then set it back in the holder to dry. This "seals in" the flocking effectively. After the glue has dried, give them a final spray of Dullcoate. Once dry, you have to peel off each washer from its screw. Tiny bits of the blue tack may stick to the bottom, or it may come off easily. No biggie either way as this is on the bottom of the scenic washer. The blue tack is reusable, of course. And now, your first batch of scalp markers are done!

Saturday, December 13, 2014

Song of Drums and Tomahawks Demo

I packed up the Song of Drums and Tomahawks "show" and took it down the road a few miles to the local game store. The Central Ohio Gamers Association were having their monthly meeting and were looking for a second game to entertain their members. I set up a small table for 4 players merging two of my one-on-one scenarios I use in the "Ohio Frontier Aflame" game. I added a twist or two, and then set out the rule books to see if I could also get a sale or two.
My four players look over the 6'x2.5' board that I set up at the game store
One player was completely new and another needed a refresher, so I gave them a quick, 10-minute rundown on the rules. Halfway through turn one, I decided to "split" the 4-player turn sequence into the two separate one-on-one games, rationalizing that I would make adjustments if troops got near each other. They never did, so the players were able to go at their own pace and not wait for the other skirmish to progress.
The raiding party of Stockbridge Indians have decided not to wait for their Rogers Rangers allies and head home
One one side of the table was a Huron village. A squad of 7 Rogers Rangers are finishing up their looting of the village when a Huron hunting party returns and finds them. On the other side, the Rangers' Stockbridge Indian allies begin the climb up the cliffs to head home -- tired of waiting for the foolish Rangers who have lingered too long to loot. Unbeknownst to them, another hunting party of Hurons have seen the smoke and climbed ahead of them to cut off their escape.
A Huron hunting party have cut off the escape of the Stockbridge raiders
The battle along the cliffs was quick and brutal. Both sides advanced quickly and were soon exchanging musket fire. Early on, the Stockbridge aim proved more deadly, and a few Huron fell.
Tired of waiting, the Stockbridge raiding party ascend the cliffs
Soon another, and another Huron hunter fell lifeless to the rocks or plummeted far to their deaths. The Huron chieftain urged his men forward to close into the Stockbridge in melee. He hoped their tomahawks would take a toll that his muskets were not.
The Huron firing position proves inadequate, and they begin to take losses
This strategy proves no more successful. One by one, the Huron leader sees his braves cut down. He is proud when they stand firm despite their losses. At least they will die like men, and have no shame when they meet their ancestors around the council fires. Soon, only the leader is left. He, too, falls victim to a well-aimed Stockbridge shot. Only the Stockbridge remain on the ridge. They raise their emptied muskets aloft in triumph. Their war calls echo down into the valley below.
The Stockbridge raiders raise their muskets in triumph as they take possession of the cliffs
In the village, the Ranger sergeant orders his men to make for the exit, which he knows from the Huron howls will be guarded by warriors seeking vengeance. Some of their number take cover in the longhouse doorways while others sneak through the houses themselves towards the exit. The Hurons fan out from the entrance loosing off shots at the Rangers and howling as they close in.
Huron warriors fan out from the village entrance seeking the remaining Rangers
Musket fire is glancing harmlessly off the bark-covered longhouses. First blood goes to the Huron when two braves charge into a longhouse and find a couple Rangers sneaking through it. Their tomahawks flash in the gloomy interiors and soon the two Rangers are lying lifeless on the dirt floors. Knives flash and their scalps are held aloft as the Huron war-cries ring off the walls.
Two Huron braves race into a longhouse where two Rangers are sneaking though, seeking an exit from the village
A fatal shot echoes across the village, though, and the Huron warleader falls dead. The braves momentarily panic and race towards the exit. However, the sight of their smoking villages soon rallies them and they return to the fray. The momentum has swung to the Rangers, though. They crouch in doorways or at the edge of buildings and pour accurate fire into the Huron hunters. Indian after Indian falls. When their numbers drop blow half, many flee for safety in the nearby woods. The remaining Huron accept defeat and quit the village. They hope once the Rangers are gone, they will find some of their people alive and in hiding.

The game went quickly and lasted about two hours. Each warparty began with one leader and six troops. The players enjoyed the game and had fun -- even those whose ranks were decimated. The other club members complimented the terrain and looked interested. I sold a couple copies of the rules, too, so the day was a success! Song of Drums and Tomahawks always provides a fun game and today proved no exception...


Thursday, December 11, 2014

Chinese Civilians Completed!

28mm Chinese Civilians from Pulp Figures by Bob Murch
I am curious how long it has been since I've painted a batch of miniatures. I don't want to count terrain -- which I did a lot of this past summer and fall. However, I bet it has been at it is going on three months! Way too long, I say!

So, to remedy that situation, I finished off my batch of 10 28mm Chinese Civilians for my Pulp Skirmish games. Most of the minis are from Pulp Figures by Bob Murch, as mentioned in the previous post. I really like these figs, so will doubtless be buying more from this company. They are big, solid figures with interesting poses and equipment. Of course, I changed out a lot of that equipment to convert the pack of "Yangtze River Gangs" into more peaceful farmers, merchants, and laborers. These figures have a lot of character -- particularly the short guy selling the duck, the hobbled old man, and the porter with the two boxes suspended on a pole.
The Bob Murch line of Pulp Figures has lots of colorful characters, like these two on the left
I used the painting schemes on Pulp Figures' website as inspiration. Some color mixes I pretty much copied, while others I improvised upon. I'm happy with how they turned out. There is a nice mix of faded colors and brighter, more oriental silk palette. I think all of the conversion look natural. I was worried the barrel the one laborer was hefting would look out of scale, but I don't think it does. Same with the basket on the ground that the well-muscled porter has set down. They all look like they were off to the market rather than to war.
Farmers, Laborers, and other civilians will come in handy in my Pulp games
These figures will be pressed into action as soon as I run my final scenario in this storyline of Dakota Smith's Oriental Adventures. What's up next? I will likely paint some 28mm Native Americans. As I'm getting ready to playtest my Beaver Wars campaign rules, I need more figures I can use for youths or bow armed troops. Hopefully, these Chinese got the ball rolling and I'll get back into the swing of painting, again...

Thursday, November 27, 2014

Painting again!

It seems like such a long, long time since I was painting any miniatures. But today I put the first base coat on a group of 10 28mm Asian civilians. These will be bystanders and such for my Pulp games. Eight of the figures are from the Yangtze River line from Pulp Figures by Bob Murch. Two were figs I'd picked up at a flea market awhile back. As I was priming them I noticed an odd similarity between those two miniatures and one of the Pulp Figures poses. My heart sank when I realized they only looked different because they were a poorly executed pirating of the original Bob Murch casting. This made me sad to think that some of the vendors at flea markets might well be doing this as garage business to offer figures at such a low price. I've always looked at flea markets as places where we sell our items that we don't want any longer, or periods or scales we've moved on from. The idea that there may be dishonest people out there actively producing pirated figures to sell at flea markets seems is disheartening. It is hard enough for figure manufacturers to make money, I'm sure. The last thing they need is competition from someone taking their work and producing cheap knock-offs of it. Shame on such vendors, I say!

Anyway, these Asian civilians are needed for the grand finale of the Dakota Smith adventures I've been running using Pulp Alley rules. Once I have them finished, I should be ready to run the last game. I may do one final project beforehand -- some scratchbuilt sampans. This scenario takes place down on the docks as the European adventurers are taking ship for their homelands. The Indochinese locals (and French party) will make one last attempt to recover the religious and archeological treasures that the others are wanting to abscond with. Who knows? Maybe even Dakota Smith's archrival, Von Jaeger, will reappear. He's been MIA for the last handful of adventures.

28mm Chinese civilians, most from Pulp Figures by Bob Murch
Nearly all of the 10 figures have been modified in one way or another. Instead of spears, they clutch pitchforks, barrels, clay vessels, or baskets. I'd picked up Pulp Figures one pack of Chinese civilians, but wanted more of a variety of poses. Thus, the conversions from armed Yangtze gangs into civilians. I actually did the conversions a month or so ago, and even primed them. However, they've sat untouched for a month or so until this last week. I've painted the flesh and now the first base coat of their shirts (or pants, for those shirtless figs).

Hopefully, this will inspire me to take up the brush again and begin painting. I had been so involved in getting terrain ready for the Song of Drums and Tomahawks game at Advance the Colors from the end of summer up through mid-September. After that, I put in the push to get the rules ready for publication, setting up our company's website, and so on. So, my Pulp stuff has sat neglected for several months, now.  Which means I may have something more to write about on my blog...!

Tuesday, November 18, 2014

Mars Attacks in Aid of Boxer Rebellion: For Queen and Planet AAR

 
View from the bridge as the Allies withdraw across it, fighting their delaying action

The battle report re-posted from Sept. 30, 2009

Sunday evening we met to try the new rules for Queen and Planet VSF. These included, the joker card inserted into the action deck to represent all uncontrolled movement in the game (warband charges, damaged machines, positional instability of water and air craft, also movement of CinC between units). Also, the modified morale rules to limit units that will require a morale check from taking offensive action without making the check.

A Chinese and Cephalopod force on the march
There was a black smoke projector on board, which required wind rules, but it never was able to fire on the enemy because the Chinese and Allies troops were so intermixed (I'm not sure the Cephalopods would have been as careful of Chinese casualties as Joel played them, but that was good for us). I liked the joker card very much, it made the warband charge that much more uncertain for both sides. The ability of the warband to charge as many as three times in a turn gives them the leg up they need against the firing superiority of the colonial troops, so that is still working well. The positional uncertainty of the flyers was also interesting as I found them much more reasonable in their (in)ability to just hover around and shoot things. Now they are more 'straffing-like'.

Russian machine gun company and rifles momentarily check the Chinese/Cephalopod advance
The set up for the game was that the Sino-Cephalopod alliance is in pursuit of a column of retreating civilians and the Colonial allies are tasked with securing the route of escape and holding against the onslaught. The idea comes from the scene in the most recent War of the Worlds where the American armored brigade hopelessly engages the Martians in an attempt to allow the civilians to escape. This battle was quite a bit more balanced!

The Chinese forces close in on the west village
An 'impassable' river bisects the board with only a single bridge crossing it. Two villages are along the road that runs from West to East toward the safety of a port and the evacuation ships. Ceplapods, Imperial Chinese, and Boxers are pursuing from the west and the Colonial Allies are deployed hidden to try to defend the line of retreat (represented by a supply wagon marking tail end charlie of the refugees).


The gallant Russian guard battaltion makes a stand in the center of the west village
Each Command (3 Sino-Cephalopod and 3 Allied) had a special ability of some sort (The imperials knew of a ford across the river, the Italians had minefields, etc). Joel had the Cephalopods, Keith the Imperials, I had the Boxer command, Allen had British and half of the Russians and Mike had Italians and half of the Russians. So, of course the Russian command were sacrificed at the point of the spear. However, they aquited themselves very well and absorbed an enormous amount of Chinese punishment before being forced to withdraw across the bridge. Mike's 'death trap' was never completely sprung, but it held up my Boxer command as I probed for a solution. We played six of the expected 12 turns necessary to complete the scenario. It is hard to tell what the result would have been. The Boxers overran the West Village, but it looked near impossible to have secured the bridge by the turn 8 deadline. Each side had one unit destroyed, one unit crippled at game end, and one unit about half dead. It definitely could have gone either way.

The allies are slowly shoved out of the west village by the Boxer assault
 The above report was written by the rules author and GM Tom Graves. Our long-time gaming companion, Joel Sams, always has a humorous look on any battle. Here's his take on the affair:
And Joel's always humorous take on the action:

The European Powers relief force had collected the threatened civilians and were working on a slow, methodical  evacuation. The Allies dug in to provide full cover for their citizens return to safety.  The Boxers were on the massed on the right flank of the Imperial Chinese, the Cephalopods on the left and back slightly.  The battle opened with a Russian machine gun raking an advancing Imperial Chinese unit, then the Boxers took a slower, caution advance on the village.  The Cephalopods seemed fascinated at the hilariously primitive Sikorsky flier.   After two turn their side bets were much more important than the battle in the village & wheat fields.  The Italians had  hoped on a crossfire to stop the Boxers, but the Russians, to their right were pressed and wavered.  Then the sound of gongs, firecrackers and bugles signaled the Imperial Chinese & Boxers to charge on village.  The Cephalopods were still betting that the Sikorsky flier would/wouldn't crash any minute now.   The Italians pulled back in order, then the Russians ran passed and the Cephalopods were disappointed the Sikorsky flier, wobbled & dipped but survived the entire battle.  Once the British finished their tea & biscuits they were ready for any fight.


Monday, November 10, 2014

Flashback Post: A Queen & Planet AAR, "The Battle of Ginnis, Sudan 1885"

 Hi...in honor of the release of our second title -- Queen & Planet -- from our game company,  First Command Wargames, I'm reposting a battle report from my old miniatures gaming page. This game was played in my friend's Keith's basement in February of 2011. Lots of great Colonial/VSF fun...!

Battle of Ginnis - Colonials at Keith's Clubhouse

Rules: Queen and Planet
Scenario: The Battle of Ginnis – Sudan 1885

Battle of Ginnis - 15mm Colonials using Tom's rules. For some months, the Ansar had been filtering into the area around the Nile River villages of Ginnis and Kosha. The Ansar were building up forces to repel an Egyptian or British invasion and the British responding to the buildup had been increasing their own presence in the area.
The Ansar move up to support their Beja allies, who are heavily engaged with the British
Skirmishes and artillery shelling had been increasing for several weeks, when the British decided they needed to do something about what might be an Ansar buildup of forces to invade Egypt. Two brigades of seasoned troops hurried to the area and Colonels Sams and Graves wasted little time in formulating an attack plan. Attack at dawn when the heathens were still asleep in their beds and put them to flight.  Simple. Effective. If the Ansar had been abed when the British attacked, it would have worked well. Unfortunately, they were not only awake, but deployed into forward attack positions. In the first glimmers of dawn, Col Sams brigade approached the small village of Kosha with the Egyptian Camel Corp holding his right flank along the Nile, his batteries of cannon and Gatlings holding the center of the line and the Cameron Highlanders holding his left flank near a steep escarpment. The Sudanese IX battalion, at half strength, was in reserve.
Joel moves his Cameron Highlanders, the heroes of the battle, who held off attack after attack, while Tom hums a bagpipe tune
A sharp-eyed artillerist spotted the first Ansar among the walls and building of Kosha and opened up from extreme range. A skilled or lucky shot forced the Ansar Jehadia to withdraw into the village interior and it was later learned they had completely lost nerve at the unexpected casualties in their ranks and had fallen back south of Ginnis and as such were effectively out of the battle. C in C Graves urged his battalions forward with the caution that the British attack had already been discovered by the Ansar. There would be no surprise and no easy victory. As if in response, 1000 yards to his front along the edge of the escarpment, a captured Krupp artillery battery manned by subject Egyptian crews opened up on the Cameron Highlanders, doing some casualties and forcing them back to regroup. Colonel Graves held the edge of the escarpment as his right flank with the 1st Berkshires Battalion to his left was a battery of mountain guns and further left was West Kent Regiment. The 23rd Royal Engineers were far to the left trying to sweep around a rocky tor. The Durham Light infantry were in reserve.

Unfortunately, the next moment it became clear that the tor was swarming with Beja warbands and they were preparing to charge the Engineers. The Engineers were able to turn to meet the charge of the Beja, but could not get off a shot before they swept down from the tor and charged into their ranks. The Engineers were pushed back, but held firm. Colonel Graves ordered the Light Infantry to assist and moved forward to engage the Ansar artillery. As he did so, another Beja Rifle rub appeared out of the grey dawn and opened up on the 1st Berkshires at very close range. Casualties were taken and the infantry fell back to regroup.
It was touch and go, but the British battle line narrowly held off the Ansar attack
On the Nile flood plain, Colonel Sams was faced by more and more Ansar and Beja pouring out of the Palm orchards between the two villages. Heavily outnumbered, Colonel Sams forces gave better than they got. The Egyptian Camel Corp withstood a furious charge of Ansar warbands near the village of Kosha, driving them back and then watching them fade into the dust their charge had kicked up as their morale failed as quickly as their charge had failed.  Just as quickly, the Egyptians were shaken, after the charge, by the long range, but effective fire of a Krupp gun sheltering in a Zariba far to the Ansar rear. However, the two different threats shook the Egyptians and they fell back on the British fort to our rear, leaving only the Gatlings and field guns to hold the left flank of Colonel Sams’ attack.  On the left flank of Colonel Graves, the Beja had put the Engineers to flight and had turned on the Durham Light Infantry, who having seen the Engineers dispatched had fallen back and received the support of the West Kents. They now stood together, 600 line infantry versus 750 Beja warriors.

Colonel Sams was having both good fortune and bad. The Cameron Highlanders had been engaged with a Beja warband rub for almost an hour. They struggled back and forth and were wearing each other down when the Camerons held their fire to the last moment before another short charge carried the Beja home. This time, they were put to flight, disappearing into the Palm grove. Unfortunately, the Beja appeared to be limitless as another rifle rub moved out to replace them. Unfortunately, the fire was in the belly of the highlanders and they took it to the Beja, inflicting terrible casualties, wounding the Sheik that lead the army and driving them off as well.
The last Ansar and Beja waves prepare prepare to hurl themselves on the British line, once again
On the escarpment, Colonel Graves forces had managed to obliterate both the Beja warband and rifles and only the artillery remained to be cleaned up. The CinC, seeing and hearing the Camerons put flight to two Beja rubs rode down to join them and ensure that the British would be victorious.  The Ansar lost heart at the furious Camerons, the loss of their Sheik and retired sullenly, but mostly intact, into the desert. The British sighed with relief as their own forces were heavily shaken by the aggressive attack of the Madhist forces.  -- Tom Graves, Read About The Games People Play At Columbus Face Games Blog, http://columbusfacegames.wordpress.com/

Queen & Planet rules are now available on the First Command Wargames website: http://www.firstcommandwargames.com/

Monday, November 3, 2014

"Will Magua Kill 'Gray Hair'?"


Hurons lurk in the woods, ready to spring an ambush on the British marching by...  

To celebrate the release last week of our French & Indian War skirmish rules, Song of Drums and Tomahawks, I ran a quick scenario at a local convention this past weekend. It is particularly cool to run your event less than a football field away from the palisades of a reconstructed War of 1812 fort. World at War game day (http://www.hmgsgl.org/conventions/world-at-war/) is held in the visitor's center of Fort Meigs -- the same venue we use for our Spring convention, Drums at the Rapids (http://www.hmgsgl.org/conventions/drums/).
The British line of march, with loyal Mohawks leading the advance, followed by regulars, and then frontier militia
The scenario was based off of the ambush scene after the siege of Fort William Henry in the movie, The Last of the Mohicans. I called it, "Will Magua Kill 'Gray Hair'?" and set it up for six players. A dirt road wound between two large, forested hills. In fact, everything except the road counted as forested. There were 3 British players: a force of loyal Mohawk Indians, frontier militia, and a force of British regulars. All 3 "French" players were Indians, with one commander being designated as Magua just for a dash of color. A thrill ran through the players when Magua scalped a fallen opponent on the road, just as Col. Munro ("Gray Hair") rounded the bend in sight of him. The clash did not occur, but there was plenty of bloodshed and a number of scalps taken!

Musket shots ring out as the British column wound between the wooded hills
The British set up on the road, with the Mohawks in the lead, the regulars in the center and the frontier militia as rear guard. The Indians set up not far from the board edges on the wooded hill slopes. The militia quickly veered off the road to guard the right flank of the British from Magua's warband, which was advancing and had fired on the Mohawks. The loyal Indians dashed forward and exchanged musket fire with a force of Huron in the woods off to the left. The remaining Indian warband advanced cautiously, and soon began sniping at the regulars. Col. Munro proved he was no coward and waved his men off the road and into the woods to fire back at the elusive Indians.

Allied Mohawk tribesmen open fire on the Hurons who have ambushed them
The British players were suffering more hits, and were being whittled down in size. The Mohawks, in particular, suffered grueling losses being shot at from both sides. They were rescued from the fire of Magua's band when the frontier militia rushed onto the flank of the Indian firing line and blazed away at them. Magua's Hurons let loose a war whoop and charged the militia. A stubborn, bloody fight ensued, with both sides taking losses.

The frontier militia veers off the road to protect the flanks of the regulars
Things began to look bleak for the British as all of their forces were below half strength. They proved stalwart on their morale checks, though -- particularly Munro's regulars. The Mohawks were down to 3 warriors, but inflicted enough losses on their Huron foes to drop them below half strength and force morale checks, as well. Even Magua's band was suffering under the frontiersmen's blows, though the militia were the first to break off and run. 

Everywhere the British look, Hurons are in the woods, firing at them
When the game was called, it was certain the Indians had inflicted severe losses on the British. The British gave much better than they did historically (or in the movie, for that matter!). It was a Huron victory, but not the massacre that it looked like it would be early on.

The melee beneath the trees between Magua's warband and the frontier militia proved deadly to many a brave soul
We had two new players who tested out the rules, along with four veterans. Everyone had a good time, and I passed out a number of "calling cards" for downloading the rules. We plan on running quite a few games of SDT at Cold Wars next Spring, as well as other cons in the area.

Col. Munro, aka "Gray Hair," and his regulars proved stalwart under fire -- never flinching in the face of mounting casualties

 
 The rules are available for download on the Ganesha Games site, here: http://www.ganeshagames.net/product_info.php?cPath=1_51&products_id=267&osCsid=v1rt4t6dmmo109prds0bkak551


Song of Drums and Tomahawks officially released!


The cover of our rules set -- artwork by Andrea Sfiligoi
 Well, here it is! Our French & Indian War rules -- Song of Drums and Tomahawks -- were officially released last week as a joint venture by Ganesha Games and our own company, First Command Wargames. Right now, they are available for PDF download on the Ganesha Games website, here: Song of Drums and Tomahawks

The print-on-demand booklets will be available soon. It will also be available soon on WargameVault.com, I believe...

Check them out...at $8 they are quite the bargain (if I must say so myself...!)!!! The rules include a substantial historical background piece, a timeline of the wars in our period, army lists, and all the rules necessary to play. This is a stand-alone rule book -- not a supplement. At 62 pages, there is a lot there!