Friday, June 17, 2016

Tricking out another log cabin

Darice log cabin with scratch-built chimney added to it
 Because I can't possibly NOT modify and add things to the incredibly cheap wood dowel log cabins from Darice, here's a new one I just built. The big thing for this cabin was I added a stone chimney. This was scratch-built using some Hirst Arts plaster blocks from a leftover project (thanks, Zeke!). I wanted the chimney to have a portion of it on the inside and outside of the cabin. So, it took a bit of doing to match up the blocks. I am happy with the results, though.
The roof, windows, shutters, and bits on and around the door are modifications to the store-bought package
So, what's modified? Number one, the chimney. The package (available at Hobby Lobby and other stores) comes with a small wooden block to sit atop the roof for a chimney -- nothing on the interior. Number two, the roof. It is created from a "scalloped" bass wood piece picked up at the local hobby store. A piece of cardstock joins the two halves. Number three, the windows and shutters. I used more scalloped bass wood and glued these in place on either side of the window opening which I cut into two of the dowels. Number four, the floor. I once again used bass wood trimmed to fit inside and around the chimney to better resemble a wooden floor. Number five, the door. I added wood framing on either side of it and a handle. Otherwise, it is out of the box.
The interior of the cabin, with its plaster block chimney and bass wood floor installed
I tried using Vallejo Plaster Putty to simulate the mud chinking between the log dowels. It was a mess to use, plus it shrank up so much you can't even really see it. So, I did not bother painting it a different color.

Finally, the painting method was similar to previous ones -- black prime, wet brush Howard Hues Camo Brown, and follow up with a dry brush Colonial Khaki and Rebel Gray. I think it creates a very serviceable log cabin which will see action on my tabletop soon!

Wednesday, June 1, 2016

Beaver Wars in Ohio playtest, Turn 7

We are in the home stretch of our second playtest of the Beaver Wars in Ohio campaign rules. I'm very satisfied with this version of the campaign framework. The turn by turn record keeping is minimal, and is easily handled by the GM. My players have said that it would be very easy for the GM to be a player in this campaign. There really is no advantage to what he "knows" or doesn't. I know from past experience that, when a GM doesn't get to play in the campaign as well, it is harder to keep up a level of interest that you would have as a player. The Beaver Wars allows the GM to take on the role of a tribe, as well, and get the same enjoyment out of it that his players are receiving.
Seneca warriors rush the gates of a Neutrals town in "Hold Them at the Gates"
We had four battles generated on turn 7, and they were bloody and brutal ones, at that! The way the Song of Drums and Tomahawks rules work, battles usually end when one side falls below 50% of its starting forces and their morale begins to falter. It is rare when forces fight to the last man (just as it was rare in history). One side will usually run away before that happens. The campaign's "Scenario Victory Point (SVP)" system also encourages a player who's down to his last few guys to not futilely sacrifice them, as he will generally just give his opponent even more SVPs. Players are free to voluntarily withdraw their forces so that they can "live to fight another day."
Cheers rang out in the pizzeria's party room as the battles went down to the bitter end on Turn 7
That said, we had two of our four battles go down to the last man, this turn. If I'm not mistaken, this was the first time it has happened all campaign that both sides were whittled down to a single warrior. I know my Erie tribe had a battle that went down to a 2-on-2, and we have had forces entirely eliminated. However, to have two games come down to the last swing of a tomahawk was fairly unusual, as well as very gripping for my players. There were mighty cheers resounding in the local pizzeria's party room that Saturday morning. As GM, it was gratifying to me to see them still enthusiastic about seizing victory after seven turns of campaigning.

One of the games that went down to the final deadly swing pitted our second and third place tribes, Dave's Mohawk vs. Joe's undefeated Shawnee. The scenario was "Collision on the Forest Path," and is a fairly straight-forward encounter scenario. The opposing tribes have sent raiders towards each other's lands, and these forces bump into each other on their way. Dave knew that the Shawnee warriors were deadly Marksmen (Joe had armed most of his warriors with that Trait), so closed quickly to hand-to-hand to minimize that advantage. Three Mohawk fell quickly, though, and Dave began to worry that the Shawnee reputation for prowess in battle was well-deserved. He battled back, though, and soon enemy warriors began to fall. The Mohawk were the first to fall below half, and saw their battleline fragment as warriors panicked momentarily. The Mohawk chieftain kept them together, though, and soon the Shawnee faltered as their losses fell below half. Warriors kept falling on both sides, though, until only two were left. They traded blow for blow until, at last, the Shawnee fell. The Mohawk held the field, although at great cost. The final score was 15-11, a Mohawk victory (and the Shawnee player's first battlefield defeat).
The Miami warriors are caught by surprise while reclining around their campfire, but soon turned the tables on their Kickapoo attackers
The 18 scenarios that will be included in the Beaver Wars in Ohio campaign rules feature a mix of setups and tactical puzzles. While setting up, the Miami player complained that "Blood on the Campfire" was too disadvantageous to the defender. Most of his forces begin prone around a campfire, with one alert guard keeping watch. The Kickapoo player decided to make it even tougher on the Miami by purchasing the Sprinter Trait for a number of his warriors. This enabled them to rush the prone warriors and attack before they had a chance to rise to their feet. Both shook their heads ruefully at the forthcoming slaughter. Both were surprised by how the game turned out. Yes, the Miami did lose a few drowsy warriors to quick attacks. However, when they counterattacked the Kickapoo leader, who'd entered combat, they slew him, sending panic rippling through the attackers' ranks. The momentum had shifted, and it was Kickapoo warriors who were being chased down and killed by Miami roused from their evening rest. Both players joked that Miami must be VERY grumpy in the morning, and it is probably best to leave them alone until they've had their morning coffee! The Miami scored their first Major Victory of the campaign, winning 11-3.
Seneca warriors flood the passageway into the Neutrals town, but stop to exchange shots with the town defenders
One of the strategic aspects of the campaign is in choosing which "Hunt" or "War" card your tribe will play for this turn. Some, like the Mohawk, have played mostly Hunt cards, which score the tribe more Beaver pelts (one of the three categories tribes are competing in for the victory). Others prefer to be able to select their opponent and choose War cards. The Seneca have chosen that strategy more often than not (and somewhat historically, too!). They played their highest War card this turn so that they could once again attack the Neutral tribe, which was still in 1st place. I rolled up "Hold Them at the Gates" as the scenario for Mike and Keith. This features a struggle for the entrance of the defender's town. Indian towns during this period were usually encircled by palisades that often did not have gates. Instead, they had a looping entranceway that attackers would be exposed entering. Mike's Seneca charged quickly into the entrance, but then took up position along the palisade, firing into the town at the Neutral defenders collecting to oppose them. The Neutral charged to shove them back from the palisades, but lost several warriors. They fell back to defend the longhouses. The Seneca dithered for a few moments before charging into the town and engaging the Neutrals. A couple Seneca braves fell, but when their full might got to grips, the Neutrals began to fall in greater numbers. Soon, the Neutral force broke away from contact as they fell below 50%. Keith chose to have his warriors keep running, even though his losses had not fallen that low. This surrendered the town to the Seneca, who scored a Major Victory, 19-2. 
A small creek runs red with slaughter as a party of Susquehannock hunters is attacked by Honniasont youths in "A Shot Rang Out"
The final scenario pitted the Honniasont against the Susquehannock. In this battle, a party of Susquehannock hunters have shot a deer and are gathered around it to butcher the kill. They are surprised by a force of Honniasont Youths led by a veteran chieftain, who challenge their rivals right to hunt on their ground. A steep-bedded, but shallow, creek divides the two parties. The youths raced to attack the trespassers in hand-to-hand immediately. Meanwhile, the Honniasont preferred to shoot at their enemies from across the creek. Although the firearms of the Susquehannock caused losses in the more numerous Honniasont, the teens were able to gang up on the hunters and began to kill a number of them, as well. The enthusiasm of the Honniasont youths enabled them to withstand the worrisome sight of their friends' and companions' deaths. Even when their numbers fell below 50%, many remained to continue the fray as stalwart as veteran braves. Soon, the Susquehannock numbers dropped below half, and their hunters began to leave the field. The youths remained steadfast, and dealt killing blow for killing blow. Amazingly, it came down to the leaders of each force, trading blows in hand-to-hand. The Honniasont avenged his slain youths, and felled the leader of the Susquehannock hunting party. The spirit of the deer was kept in great company by the numbers of the brave slain. The score was tied at 15-15, but victory was awarded to the Honniasont as they had possession of the field.

In the end, both our 1st and 2nd place tribes lost this turn -- the 1st-place Neutrals losing badly. How did this affect the standings after 7 turns? The Neutrals dropped to a tie for 1st place with the Shawnee. Instead of being 3 1/2 points out of first place, the Mohawk closed to within 1 1/2 points of the lead. The Seneca jumped over the 4th place Kickapoo to be next on the Leaderboard.  Here are the overall standings, followed by each individual category.

Tribe
Place
Victory Points
Neutrals
Tied 1st
24.5 points
Shawnee
Tied 1st
24.5 points
Mohawk
3rd
22 points
Seneca
4th
16 points
Kickapoo
5th
15 points
Miami
6th
12.5 points
Susqehannock
7th
11 points
Erie
8th
7 points
Honniasont
9th
3 points

Tribe
Prestige Points (PPs)
Neutrals (Keith Finn)
16 (5 MajV, 1 MinD)
Shawnee (Joe Merz)
16 (3 MajV, 3 MinV, 1 MinD)
Mohawk (Dave Welch)
12 (3 MajV, 1 MinV, 1 MinD)
Seneca (Mike Stelzer)
12 (2 MajV, 3 MinV)
Kickapoo (Andy Swingle)
10 (3 MajV, 1 MinD)
Miami (Jenny Torbett)
8 (1 MajV, 2 MinV, 1 MinD)
Susquehannock (Steve Phallen)
5 (1 MajV, 2 MinD)
Erie (Mike Demana)
5 (1 MajV, 2 MinD)
Honniasont (Bruce Adamczak)
3 (1 MinV, 1 MinD)

Tribe
Scenario Victory Points (SVPs)
Shawnee (Joe Merz)
97
Neutrals (Keith Finn)
92
Seneca (Mike Stelzer)
79
Mohawk (Dave Welch)
76
Miami (Jenny Torbett)
66
Kickapoo (Andy Swingle)
62
Susquehannock (Steve Phallen)
60
Erie (Mike Demana)
38
Honniasont (Bruce Adamczak)
30

Tribe
Beaver Pelts
Mohawk (Dave Welch)
43
Neutrals (Keith Finn)
37
Shawnee (Joe Merz)
35
Kickapoo (Andy Swingle)
32
Susquehannock (Steve Phallen)
25
Miami (Jenny Torbett)
22
Erie (Mike Demana)
22
Seneca (Mike Stelzer)
22
Honniasont (Bruce Adamczak)
19


Wednesday, May 25, 2016

Scratch-built "Snake Rail" fence sections

A close-up of my scratch-built, Snake Rail Fencing used in one of my French & Indian War games
This year's slate of French & Indian War games I will be running using my Song of Drums and Tomahawks rules will feature native raids against European settlements. In the past, I've had a lot of big eye candy on the table -- Indian bark longhouses, stockade forts, cliff sections, and so on. I've kind of ignored the more common things to make settler farmsteads look good on the tabletop. One of those things I knew I needed was fences for fields of crops.
The "real deal" -- snake rail fencing in colonial America
I'd seen some posts and discussion of "snake rail" (often called split rail) fences. The advantage of them is there is no need for posts. The alternating, zig-zagging posts stack on top of each other and provide a quick way for a frontiersman to fence his fields without time-consuming digging of post holes. I looked at pictures of a number of them online and discovered there was some variety in how they were constructed. So, I had some leeway in representing them on the tabletop.

My first question was fence sections vs. based and flocked fields surrounded by fences? Considering how my 28mm terrain boxes are bursting out of my closet already, I chose sections as they'll have a smaller storage footprint. The next main question was what to do about the ends of each section? I'd seen commercially produced ones that have the three rails "hanging in air" at the end and did not like how that looked. I thought about "X-shaped" support braces at each end, which I'd seen in pictures. I ended up deciding to go with simply having the three rails sloping down to where they lay atop each other on the ground. I'd also seen this in photos, and it seemed the easiest and least eye jarring way to go.
In the center of the photo, towards the bottom, you can see two "ends" of my snake rail fence sections
The third question was how many zig-zags per section? I decided that I wanted each section to be a little less than a foot long (my terrain boxes are stackable, 13" square plastic containers). I cut up pieces of cardboard and played with what looked best. In the end, I simply went with an aesthetic choice. Since each end would feature the three rails simply laying atop each other -- and there would be (by definition) two ends to each section -- I went with four. That way, there would be three places in each section where the rails interlock and only two where they lay flat. It is easier to show with pictures than describe (see above).
The bass wood rods that I purchased at the hobby store to create my snake rail sections
I took a 28mm Conquest Indian figure to the local hobby store that has a good selection of bass and balsa wood. I stacked the various sizes up and compared them to the figure to decide which size to go with. I ended up choosing 3/16"x1/4" rectangular bass wood rods. They were each about two feet long, and I cut 8 of them into 3" sections. I did one prototype first, and then once I was happy with it, went back and assembly-lined the whole batch. That produces a LOT of little sticks.
However, the next step goes much faster than I would have thought. I took a sharp hobby knife and trimmed each end down to a blunt point. I considered trimming the entire length of each of the four edges, but decided not to do so. I know it would make them look more irregular, but the point of these is to give the effect of snake rail fencing -- not necessarily scale them down exactly.
You will need LOTS of these little 3-inch sections...12 per fence section, if you do it as I did!
Once all the sections were cut, it was decision time, again. Do I base each section on a full length rectangular base, or put smaller bases under each intersection. I decided to go with the second choice because I felt it would look better. The fence would blend in to the tabletop better that way. Also, I wanted to avoid any situation where the base of the fence section differed drastically from the tabletop. I purchased a couple bags of 3/4" wooden star shapes from the hobby store to rest the fence rails upon and act as mini-bases.
Trimming down the ends to points was not as time-consuming as I thought it would be...
I decided it would be easier to do at least some of the painting of the rails ahead of time. I took one of the pointed ends and punched holes in a scrap of insulation foam. This created a rack to hold the rails while they dried. I painted a base coat of dark brown, holding onto one end of each rail, then sticking that unpainted end into the foam rack. Once all of them were dry, I painted the other end, sticking the opposite -- now dry -- end into the hold to hold it.
The insulation foam rack I created to help me in my pre-painting of the fence sections
I followed this up with a medium brown dry brush (I like to use Howard Hues Camo Brown). Once again, I held onto one end, then placed that dry end in the rack. Later, I reversed them and dry brushed the other end, as well. The rails were now ready for gluing!
The wooden stars I used as bases for the fence sections
I set five of the wooden stars out onto a sheet of paper and placed sticks upon them, rearranging them until I was happy with the layout. I then traced around each star so I'd have a template for each section. I would use Aleene's Tacky Glue to glue the rails to the stars and the other rails. I started at one end, gluing the first rail to the first and second star base. The next rail sat on where the first one ended on the second star, and rested on the third star base. The third rail sat on the second one and fourth start, and so on. Once again, it is probably easier to show in pictures than describe in words. It is probably best to glue one layer of rails at a time and let them dry. Then, go the next four rails, and so on. If you try to do all at once, you end up with some shifting.
Base coat was a dark brown (I used a craft paint Dark Umbar)
Once they are all dried, I then do two separate dry brush colors. I go over them first with a khaki color (Howard Hues Colonial Khaki). I make sure to get the pointed ends really well with this color. And then, lightly, I finish it off with a gray dry brush (Howard Hues Rebel Gray). Most wood when set out for years turns gray. So, I would probably be more accurate simply skipping the browns altogether and going with gray. However, I like a little brown in my wood tones. So, I do a final gray dry brush to give it the effect of grayed wood.
Next comes the Camo Brown dry brush
Finally, I flocked each of the stars, and the fence sections were done! I did not bother putting a wash on them because of all the nooks and crannies that would need to be filled up. I was very pleased with the fence sections, and plan to do more of them soon!
Fence sections glue together atop the wooden stars as bases


And here is a section, dry brushed Khaki, Gray, and with the bases flocked. Note how the rails simply lay atop each other, interlocking in the middle spots.

Lead Painters League, rounds 7-11

It was a good finish to the Lead Painters League. I made the difficult decision after finishing up my Round 10 entry to forego the bonus points for a newly-painted entry for Round 11. The decision was part time constraint, part tactical. I knew with my upcoming schedule that I would be pushing it to finish an entry to the best of my ability. I also knew that -- after 10 rounds -- I would be facing an opponent whose painting was at least equal mine (and likely better!). I needed to wow the voters, and I had an idea how to do that.

But, I'm getting ahead of myself. Let's pick up where we left off!
Round 10: Safeguard the Aerie 15mm/25mm
This was a round I was worried about from the beginning of the league. It was a theme round and I had to really dig to find figures that fit it in my unpainted collection. The theme was fantasy monsters, and they were specific about no weapon-using, anthropomorphic creatures. Out went my idea for using some Splintered Light Miniatures figures! Also, it could not be real creatures -- so, out went the idea of painting dogs, wolves, deer, or other Woodland creatures I had! I dug through the drawers where I keep my unpainted lead and found a bag of 15mm hippogriffs, as well as two 25mm ones. I decided to do a mama and papa hippogriffs guarding an aerie full of younglings.

I decided to make them flashy, with realistic and interesting wing patterns. So, I Googled a bunch of paintings of hippogriffs and chose the ones I liked best. The castings are not the  most spectacular (especially the 25mm ones), so I knew this would be a tough round. I thought they figures turned out nice, and I posed them next to one of my cliff sections for some additional eye candy. However, my opponent's miniatures were not only better painted, they were an amazing, cool-looking castings. So, I lost fairly soundly, 364-107. I would enter the final round 5-5. Round 11 would decide if I came out of Lead Painters League 10 with an above or below .500 record.

Round 11: The Words of the Prophet
 

So, what was my idea to wow the voters in Round 11? Well, as you can see above, I would use quantity AND quality to do my best to win this round. I envisioned a scene with a shaman speaking to a crowd of Indian warriors around a campfire. I would use only my favorite and best-painted miniatures in the photograph. I pulled out my boxes and sorted through my 28mm Indians. I wanted only poses that looked natural around a campfire -- no aiming, slashing, running, etc. As I pulled out each figure, I sorted it into 3 categories: "Best of the best," "pretty good," and "not bad."

I ended up using only the first two categories once I began setting up the scene. I dug out my best trees and tried to make the scene look like a night-time one. It took several photographs to adjust where each figure was standing so it wasn't blocking the ones behind it. Even doing this for several shots, I still missed one or two weapons in other's faces. The picture came out great, though (I felt). My thinking, tactically, was that a win was worth 30 points while a newly-painted entry gave only a 10-point bonus. What use getting 10 to lose 30?

I was a bit worried when I saw my opponent's entry on Sunday morning. It featured an amazing Japanese kimono and very characterful miniatures. However, most of the people responding to the post praised my scene and felt it was very cinematic. I started off with a slight lead and widened it to a 296-186 victory by the end of the week.

This victory notched me 15th place out of 34 entrants. I was VERY pleased with my 6-5 record -- especially considering that with the Swiss System, you are matched against entrants with similar skill levels. All in all, Lead Painters League 10 was a success for me. I painted 10 rounds of new entries, and resorted to previously-painted (but newly-staged and photographed) miniatures only in the final round. In the end, I had reduced my unpainted lead pile by 58 new miniatures...yet another definition of success!

Tuesday, May 24, 2016

Indian Raid in Frontier Ohio at Drums at the Rapids 2016 Convention

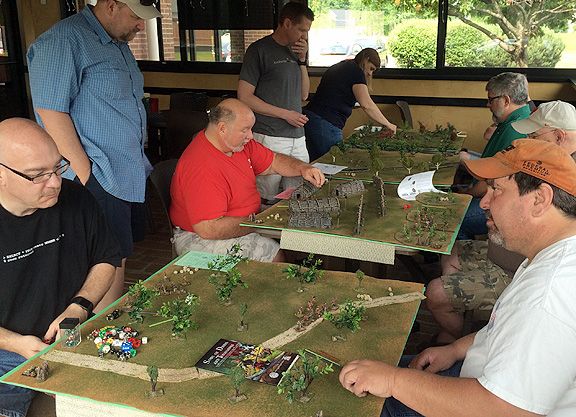
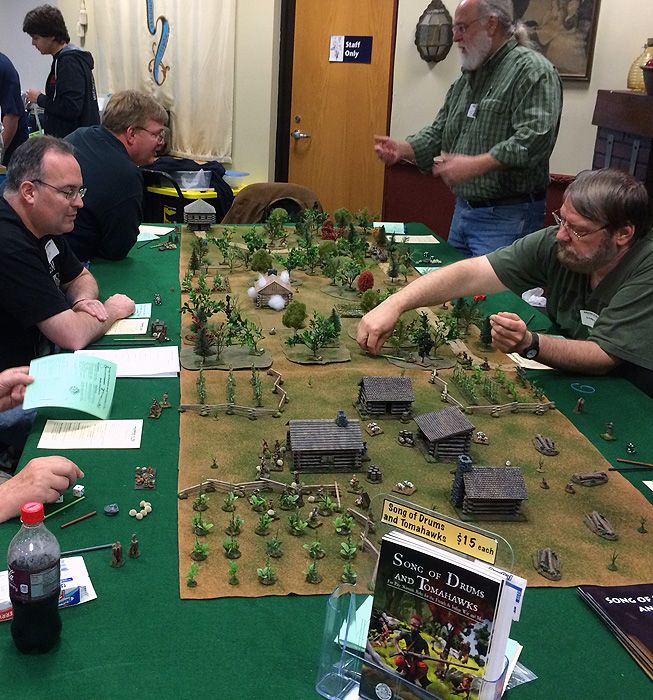
Both of my frontier Indian raid scenarios were full -- including this shot of the Saturday morning session
I took my multiplayer Song of Drums and Tomahawks event up to Drums at the Rapids, a convention held at historic, Fort Meigs, Perrysburg, OH. I have been attending the convention for more than a decade, and it is an excellent local con put on by HMGS Great Lakes. The focus is historical miniatures, though there are always cool-looking fantasy and science-fiction games, too. I cooked up a new set of linked scenarios. This one would feature Indians vs. frontier settlers, as opposed to the more varied scenario groups I've run in the past.
An overview of the "Farmhouse Raid" scenario in the opening stages of Friday night's battle (you can see the women and children beginning to run away from the side that the Indians are entering from)
The first scenario begins with the people of a frontier farmstead community spotting a plume of smoke rising off in the distance. They know that it usually means a raid across the frontier by hostile tribes, so hurriedly debate whether to "fort up" in their cabins, or head to the local blockhouse. Before they can decide, a man runs up and says an Indian warparty is right behind him. The frontiersmen and six women and children deploy in the middle of a collection of four log buildings in the center of the board. The Indians can deploy anywhere on the table, as long as they don't deploy within 1 Long distance (close musket range) of a frontiersman or family member.
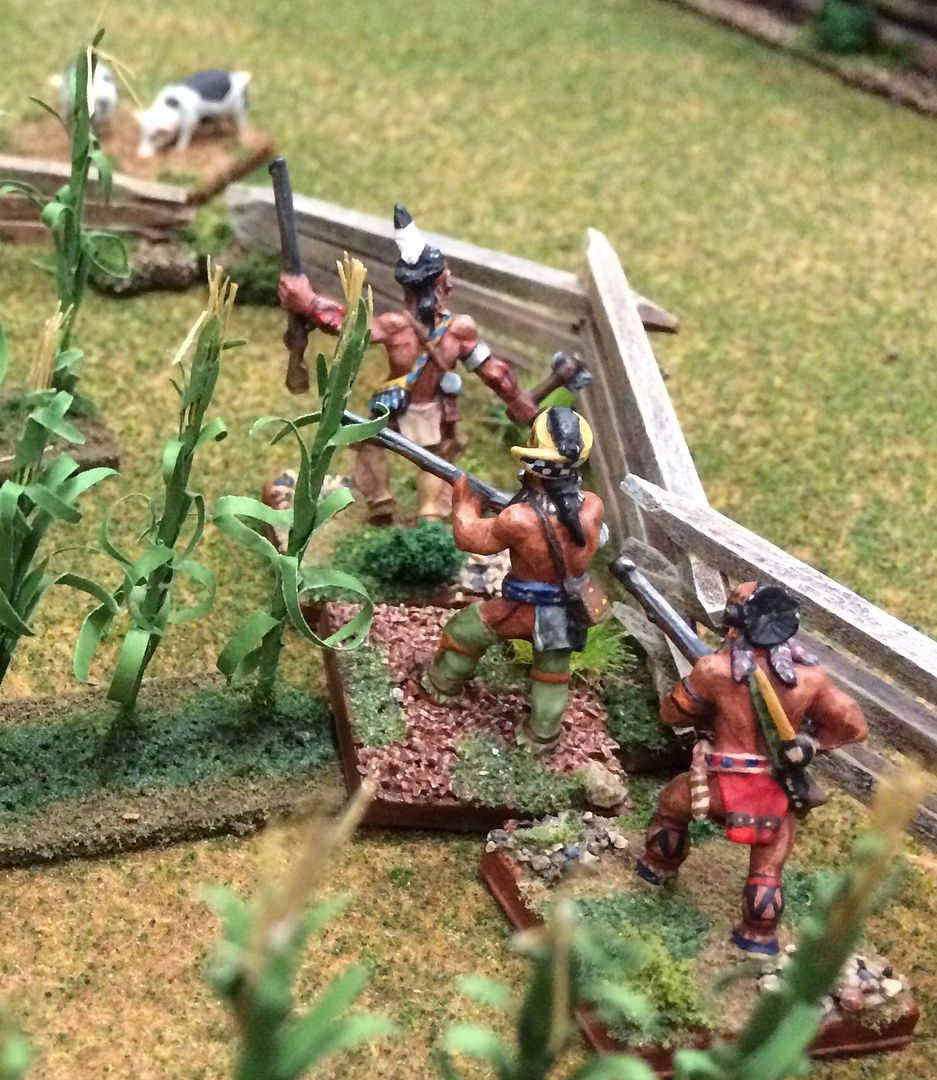
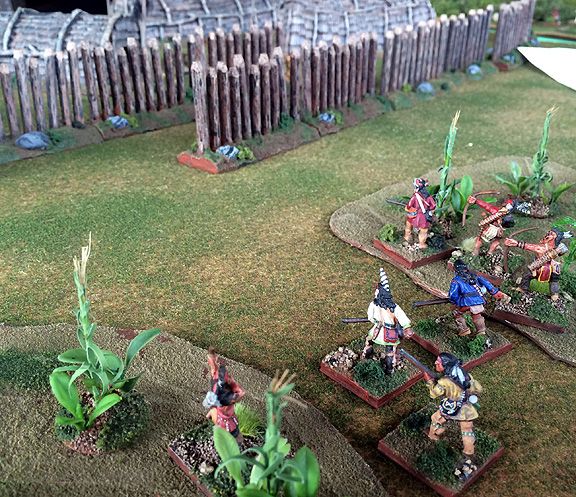
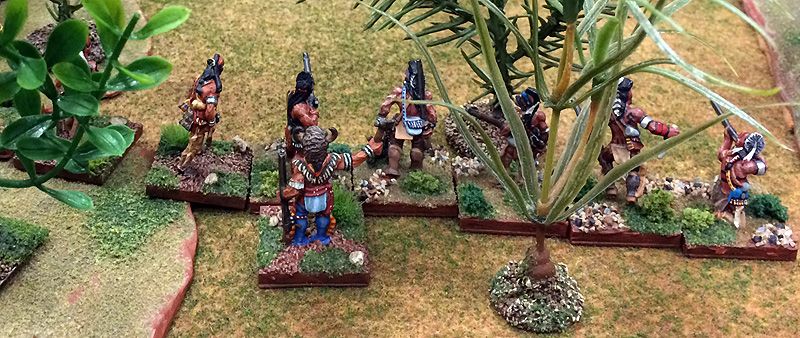
On both days, the Indian player decided to have his raiders enter through one of the cornfields
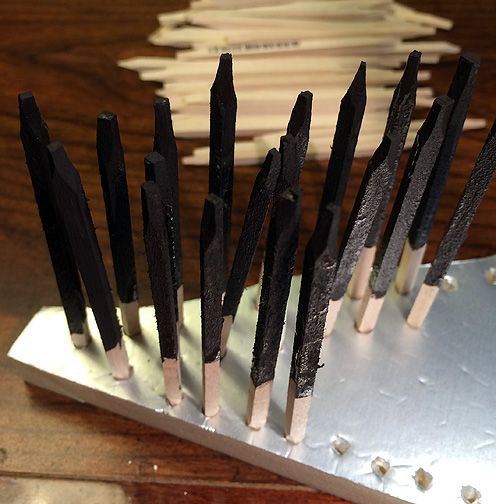
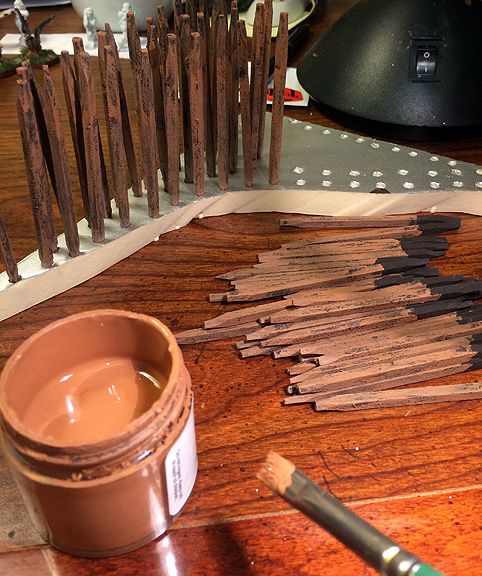
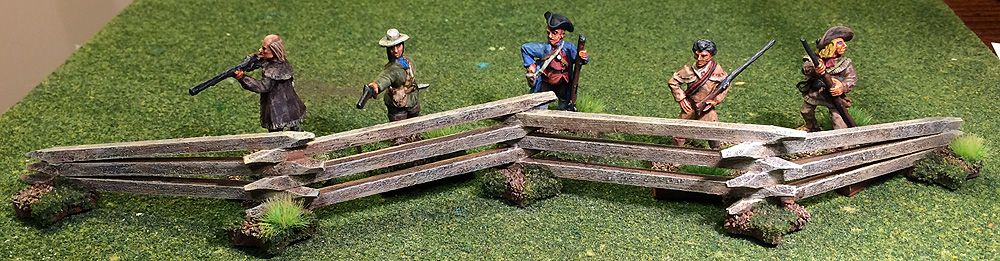
I really liked how this table looked, once it was all set up. This was also the table where I had made my scratch-built, snake rail fences. I used them to create three fields at corners of the boards. Inside the fields were the JTT corn rows (which I now know I need to make more of...!), along with the 3 Sisters native American crop pieces, and some random bits of vegetation to fill them up. In both the Friday night and Saturday morning sessions, the Indian player chose to enter using the cover of the fields.
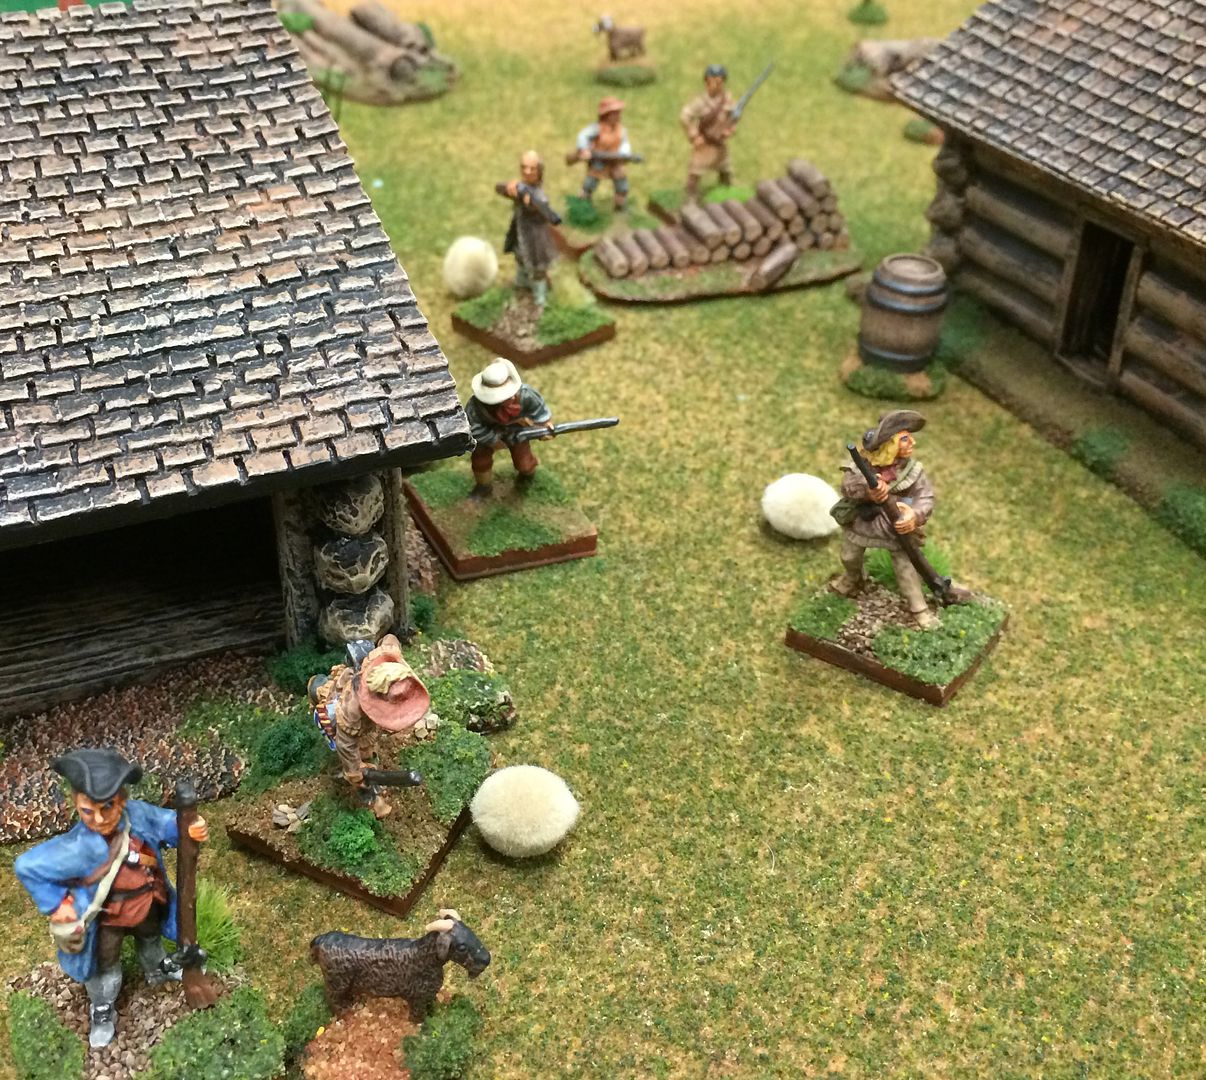
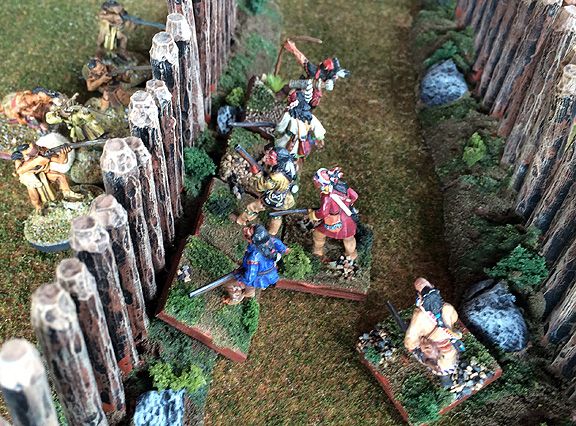
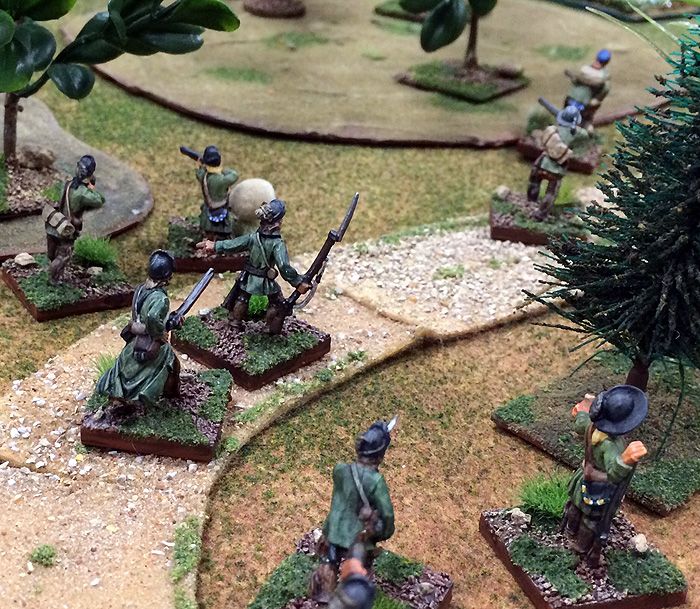
Close up the menfolk of the farmstead community mustered to defend their families (and one brave goat, willing to take his place in the line alongside his owners...ha, ha)
The two runnings of this scenario had vastly different outcomes, though. Friday night, the frontiersman player chose to take advantage of the fact the Indian warparty came in on one board edge to shuttle the women and children off the opposite edge. If a family member ends the game with no Indians within a Long distance, it is victory points. The menfolk fought a delaying action against the Indian raiders, slowly giving ground and surrendering their homesteads to them. When some settlers began to flee from morale checks, they decided to withdraw to prevent further losses. The result was more homesteads up in flames, and Indians in possession of scalps and loot.
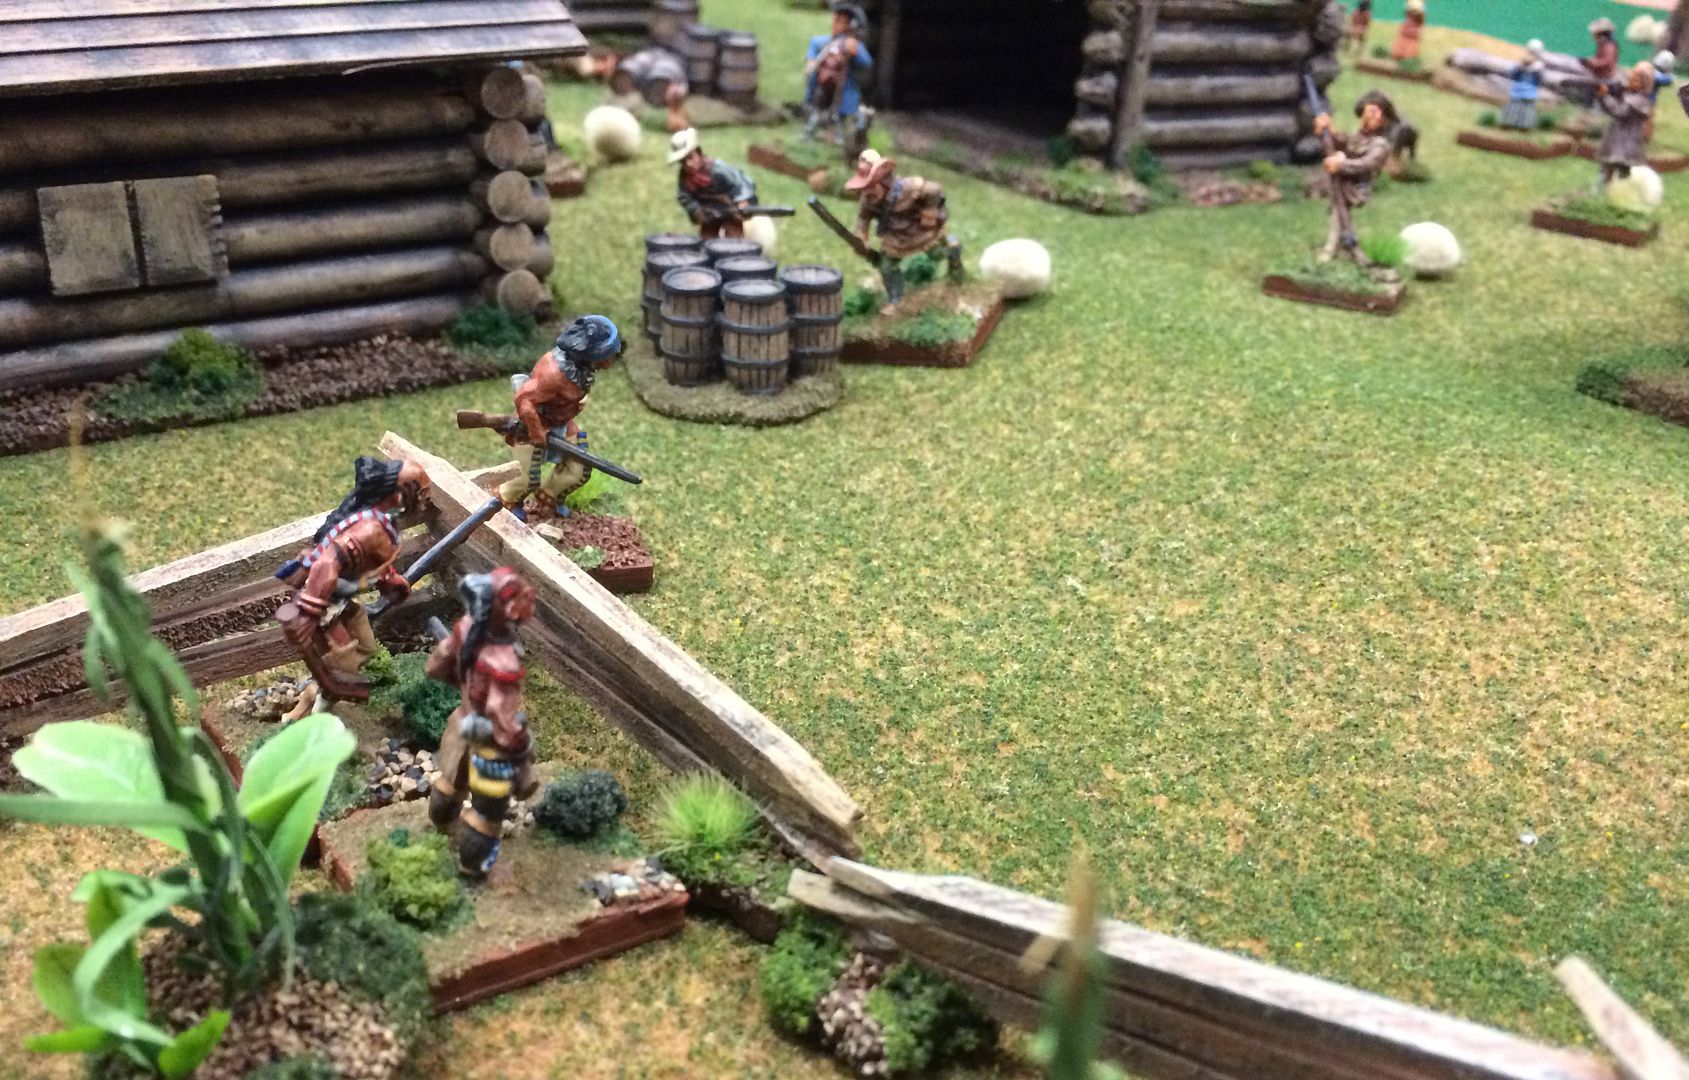
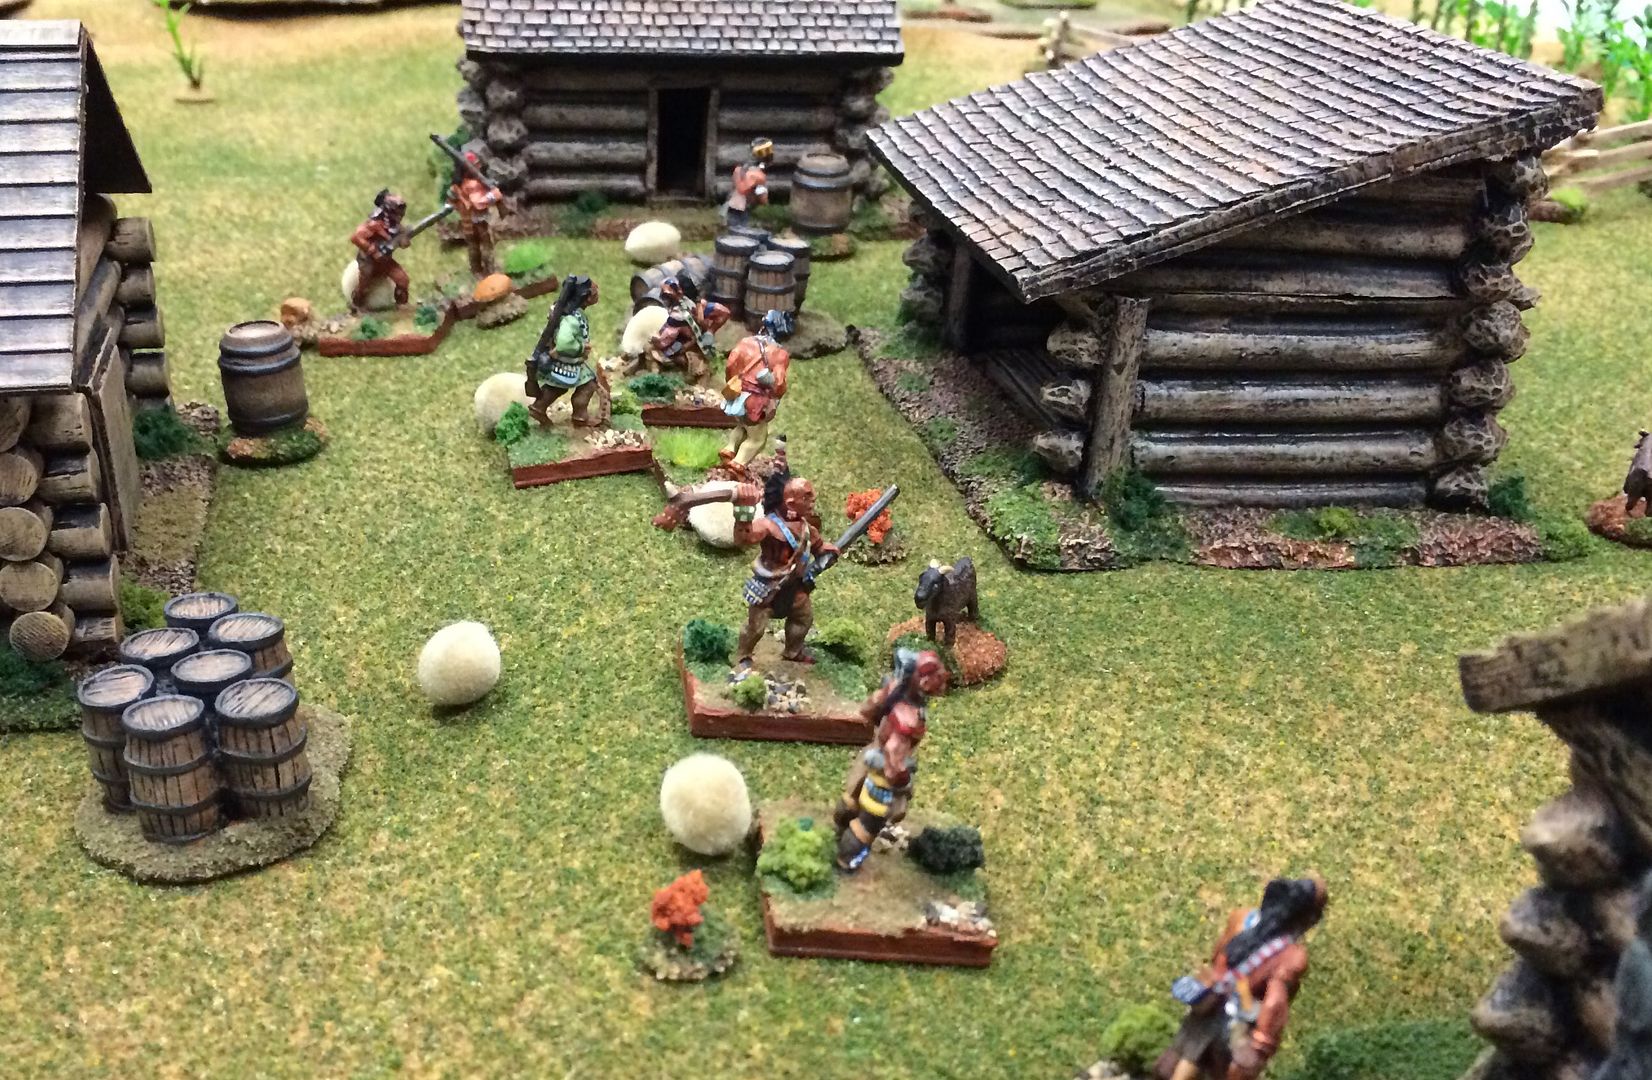
The fighting was at close range and brutal. Here Indians and settlers struggle for control of the center of the farmstead
Saturday morning saw a much more aggressive frontiersman player. She put the women and children inside the cabins and had the menfolk launch an assault on the Indian raiders. Losses piled up on each side, but the Indians broke first. Before long, the settlers were victorious and had chased the raiders off of their hard-won land.
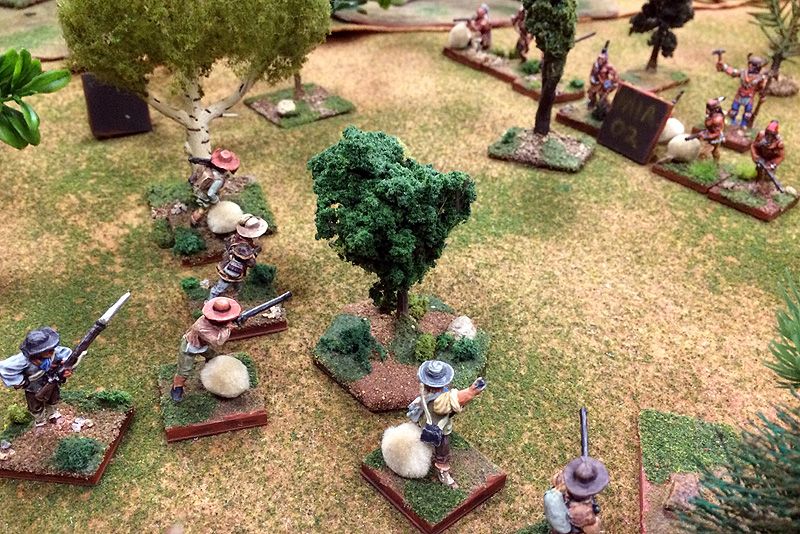
A patrol of rangers investigates the plume of smoke in "They Died in the Smoke"
The middle scenario on the 9'x3' table layout was where that original plume of smoke was originating from. Here, the family spotted the Indians at the last moment and fled into their house, bolting the door. At each window, a musket poked through and fired when any Indians ventured out into the cleared area surrounding the cabin. Fire arrows were shot onto the roof of the cabin, and soon the home was ablaze. Smoke filled the cabin and poured out the windows. However, the family refused to come out and die under the tomahawks of the raiders. Suddenly, the one of the braves spotted a ranger patrol hurrying to the spot to determine the source of the fire.
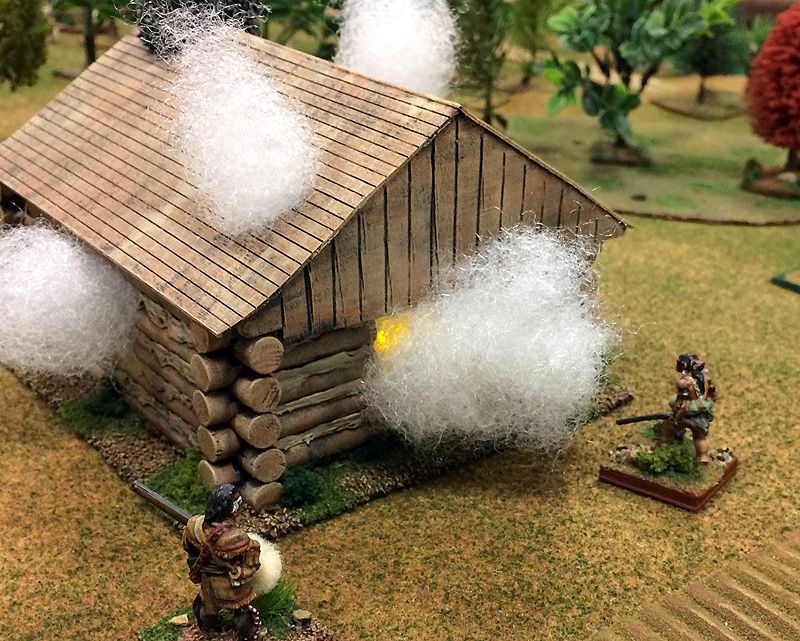
Indian raiders wait in vain for a family of settlers to come out of their burning cabin
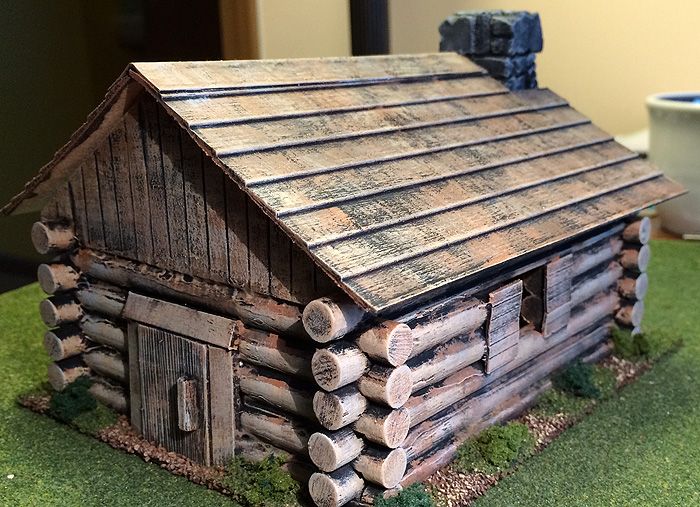
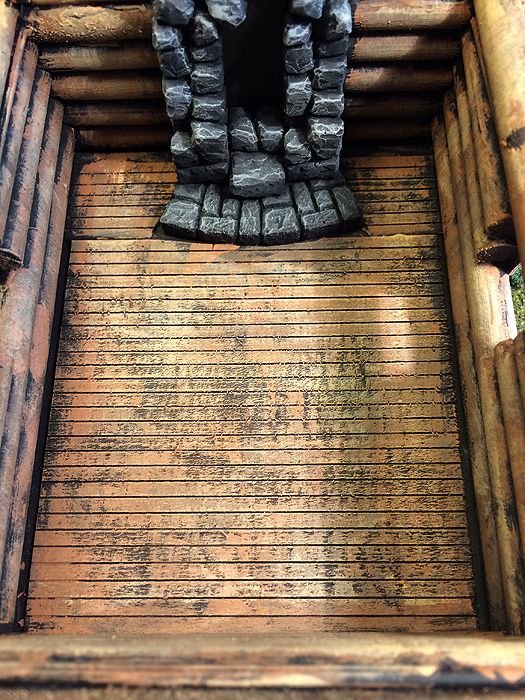
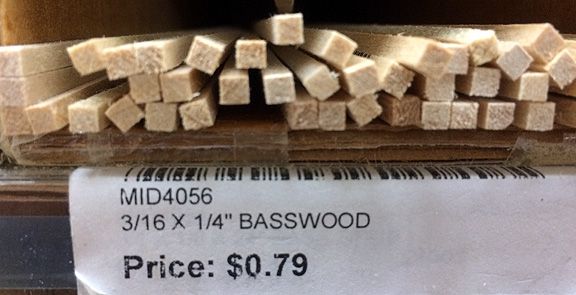
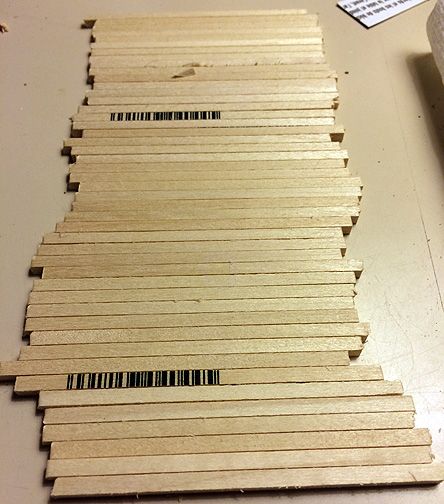
For this scenario, I constructed a special "burning cabin." I used one of the Darice Premium Wood Model log cabin sets that are available at Hobby Lobby for only $3.99. I modified this one by sawing through some of the dowels to have actual openings for windows. I used a corrugated pattern balsa wood sheet for the roof, which I also cut holes into to represent areas disintegrating in the flames. I placed two electric LED votive candles inside the cabin to light up the smoke with their flickering yellowish light. Acrylic "batting" (pillow stuffing) was cut and placed in the windows and protruding out from the roof. I am only moderately pleased with the results. Of course, I was hurrying to get it done in time for the convention, so I intend to go back and tweak it some.
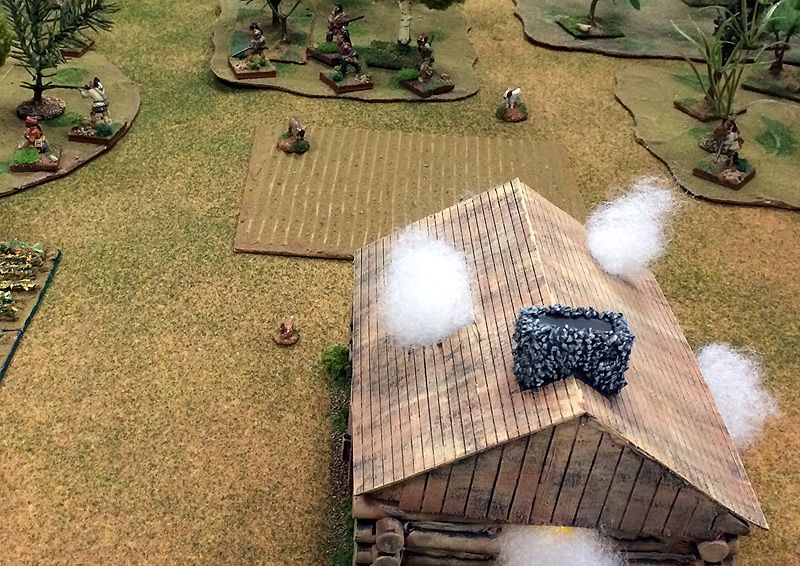
The Indians begin the scenario deployed in the woods in an arc around the cabin
Once again, I had two vastly different outcomes in this scenario. The Indians begin deployed in a woods in an arc around the burning cabin. The rangers enter through the corner of the board where a pathway runs through the forest. I was particularly surprised by the Indian player's choice to deploy part of his force very close to the ranger entry point. Since about 1/3 of them would be scattered far away around the clearning, I felt this could go very bad for him as he faced the full force of the rangers. One of the things I like about Song of Drums and Tomahawks is that player decisions have a major impact and drive the game. How many times have we sat down for a miniatures game to find the only decision we could make was to move forward and roll dice? These rules definitely are NOT that, and the player is constantly called upon to make tactical decisions that impact the game in a major way.
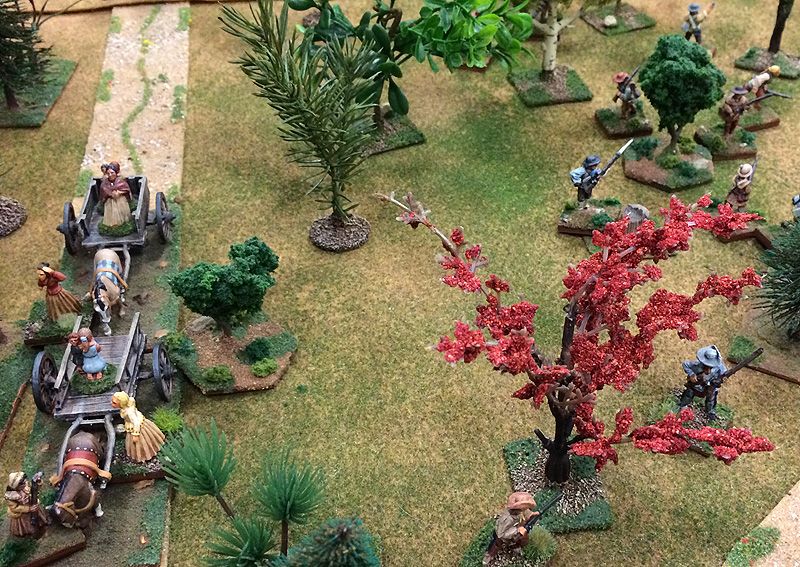
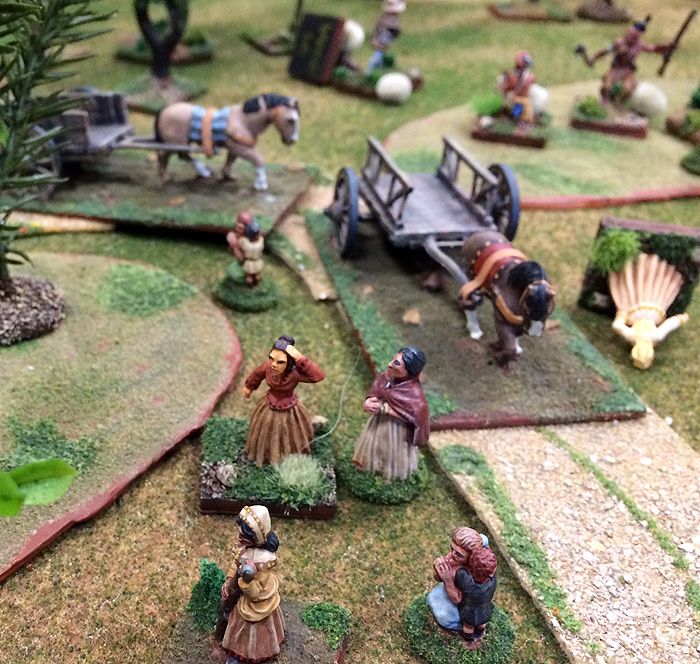
A family hurries to the local blockouse, women and children aboard wagons, while the men scour the woods alongside, searching for ambushing Indian raiders in "Wagon Train Through Peril"
As it was, the aggressive Indian player was rewarded for his decisions when the ranger advance proved tentative and was halted by poor die rolls. The battle was very one-sided, and the rescuing rangers were quickly whittled down by Indian musket fire. The survivors bravely attempted to maneuver around to reach the cabin, but soon the last remaining ones were driven from the field. The previous night, the opposite was true for much of the battle. It was the Indian player who was hampered by his poor die rolls, and could not collect his forces together to oppose a much more aggressive ranger advance. In fact, the Indian force, though causing casualties among the Rangers, soon was fleeing backwards due to morale checks. However, here is where the tide shifted. The core of remaining Indians fought back aggressively. Soon, they had whittled the rangers down to where they were fleeing backwards in morale checks. It proved to be a nail-biter of a game, with the Indians very narrowly triumphing.
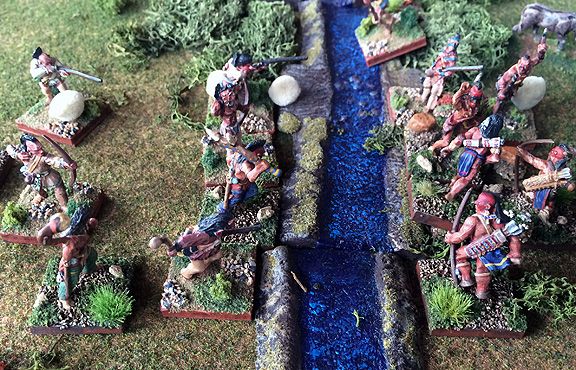
Waiting for the family, in the trees is a line of Indian raiders. When they see the wagon, they close in.
The third scenario was a variant on one I have run for several years. Having seen the plumes of smoke, a family is hurrying for safety towards a local blockhouse. In this version, there are a substantial number of men escorting the wagon. The blockhouse, on the other hand, is only weakly guarded and can send no rescuing force. The family must fight through any Indians they encounter on the way on their own. A couple special scenario mechanics enable the wagons to move on their own, as long as family members are there to drive them. Also, if any Indians enter the clearing surrounding the blockhouse, they can be shot at (one per turn) by the defenders. They will not waste powder on shots in the woods, as they don't know how long the siege will last.
The male family members trade shots with the ambushing Indians, trying desperately to drive them off so their family can reach the blockhouse
Both nights provided a tense, gripping game. The one on Saturday morning was particularly tense, though. It swung back and forth, with the settlers having the upper hand one moment, and the Indians the other. On Friday night, the wagons came close to making it through to the blockhouse, but did not. However, on Saturday morning, they actually made it all the way to the clearing before losses piled up enough to cause morale checks. One interesting feature of my side-by-side scenarios is that players can reinforce neighboring battles if they have driven the enemy from the field in their own. With the rangers being chased off relatively early in the Saturday morning game, a fresh force of Indians was able to appear on the edge of this field.
At the sight of one too many of their menfolk slain, the women and children abandon the wagons and flee on foot towards the safety of the blockhouse
The family proved stalwart, though. They had broken the morale of the ambushing Indians and driven most of them from their path. Three menfolk of the family bravely stood and barred the advance of a new warparty of seven Indians, who had been drawn by the sound of the gunfire. In particular, one man whom the Indians called "Yellow Hair" slew many warriors before finally succumbing to a musket ball. Equally heroic, the leader of the ambushing Indians ran forward and grabbed the reins of the lead horse. Two family members attacked him, but he slew one, which broke the morale of the family. Most of the women and children leaped off of the wagons and sprinted for the blockhouse. A few of the men also bolted for safety, while others remained to fight off the Indians.
Indians triumphant! One day saw an Indian victory, and the other a Settler one, but good games all around!
Just when you'd think the battle could show no more twists, the family members killed enough from the warparty to have them check morale, too. They proved eager for battle, though, and only one warrior fled the vicinity. Meanwhile, the women and children were streaming closer to the blockhouse. The Indians closed in, and only about half of them made it before they were caught. It was a relatively long game of Song of Drums and Tomahawks -- prolonged, of course, by the arrival of 7 fresh warriors from the neighboring battlefield. It was certainly one of the most gripping I'd watched (or played). Everyone who'd played in the games enjoyed them, though, so it was another successful pair of convention events. My next games will likely be at Historicon (I need to sign up for them ASAP). I will also be running games at the local Ohio History Center as part of their Ohio's March Through Time event.