Monday, May 27, 2019

Viking Column Fights Off Ambush

The Viking column marches across the table with the Picts moving in to attack at the top and Saxons at bottom
It was about time for another game of Tribal and our Dark Age skirmish continuing series of battles. I had created a scenario for a multiplayer game and sprang it on my players. The idea was that a column of Viking raiders were returning to their longships laden with loot and slaves. The countryside was roused, though, and their victims were on the warpath to ambush them and take back what was rightfully theirs. Our Viking players, Mike Wallace and Stelzer, were joined by our Norse-Irish run by Keith Finn. Gathering in the woods to attack them were the Picts (Allen), Saxons (me), and Joel's townsfolk.
The Picts emerge from the woods and move into position to attack, while some Vikings warriors rush to block them
I set up the battlefield with an open area bordered by woods running across the length of the table. The three Viking players set up one behind the other, each with a wagon loaded down with loot or a column of slaves. They were to center their forces on that. Meanwhile, the ambushers would set up behind the first line of trees (though I did not make that clear to the townsfolk player who set up in the corner wand was out of the battle in the early phases. The players were given 4-6 points to select their forces, with 0-4 points being spent on skills. The total used was subtracted from their Honor Pool of 15. Thus, a player who spends less on his force starts ahead in victory points. In addition, each wagon train or group of slaves was worth from 1-5 points for each under their control. The Saxons, Picts, and Townsfolk were attempting to steal these from the Vikings.
A Pictish hero faces down a unit of Viking warriors, while more Pict spearmen rush into position behind their leader
The Norse-Irish led the column, followed by Stelzer's Vikings and Wallace's bringing up the rear. Allen's Picts deployed to attack the middle and rear of the column, while my Saxons deployed to take on the middle and front. Joel's were mainly aligned against Keith in the front. I should have known luck was not going to continue for Steapa's Saxons, who were actually leading the campaign in Legend Points. In the first four turns, my four highest cards were flipped for Initiative, which most players consider an unfortunate waste of a card that could kill enemy. Pretty much all night my card drawing for combat proved fairly poor. I managed to squeak out a few wins in combats here and there, but my forces were being steadily whittled down.
Keith's Norse-Irish counter-attack strongly, driving a wedge and splitting my Saxon forces (seen sheltering in the woods)
Allen proved the most deadly of the attackers, inflicting serious losses on the Stelzer's middle Viking command. He was unable to keep up the momentum, though, against Wallace's rearguard command, which wore his forces down, steadily. My Saxons proved fairly impotent, destroying only one unit of Viking warriors. Despite having chosen the "Fearsome" skill -- which causes more losses among the enemy -- I seemed to be unable to cause many casualties to Keith's troops. On the other hand, my Saxons were being savaged by the Norse-Irish. Two units of warriors were whittled down to 1 figure each, and my toughest hero was slain in three card exchanges by a Viking hero. Even Steapa himself, was down to half his wounds remaining.
The Viking loot wagon rolls on as the Picts press home their attacks
The ambush proved to be a disaster for the attackers. The Picts were beaten back with terrible losses, ending the game with only three figures left on the table. My Saxon attack was quickly blunted, meaning I could do little to press home the attack or take pressure off my erstwhile allies. I escaped Only eight of my original 22 Saxons escaped alive. When the townsfolk eventually arrived on the field, they made a valiant attempt to pierce through the Viking van and free the slaves. The Abbot himself, swinging a massive flail wounded one Viking hero severely and pushed back the Norse-Irish chieftain. However, outnumbered, they eventually had to withdraw. The Vikings were left in possession of their ill-gotten gains, and the groans of the Britons continued under the Norsemen.

Meanwhile, the Townsfolk, at top, make a rush to free the lines of slaves, guarded by two heroes and one unit of warriors
In hindsight, I think I need to make a rule that the Viking players must keep at least one unit or leader in contact with the slaves or wagons for them to move. This would hamstring their counter-attacks more, and force them to defend their loot or slaves more closely. Perhaps I need to have the Vikings build their warbands with 3-5 points and the ambushers use 4-6, also. It might mean some attackers would actually get through the wagons or slaves. As it was, none of us got very close. I think our card draws were abysmal, for the most part. Luck certainly was on the Viking side in this game when it came to card play. Twice, units of archers drove off attacks of heroes or warriors in this game (both time it was Viking archers), which should have waded through them -- like the Vikings did when they contacted the Pictish archers.
A highlight of the battle -- the Townsfolk's leader, the abbot of the local monastery, drives back the Norse-Irish chieftain
The game was also intended to be a free-for-all, but none of the three players on either side back-stabbed their compatriots. Not that I thought they would. I figured it was be a one side vs. the other side type of game. With six separate initiatives, though, I think it probably moved a little slow. Maybe next time I will do a "side" initiative. When it is a side's turn to act, they each player on that side selects a unit or character to move. I certainly enjoyed the feel of Tribal with a clear scenario, too. Their seemed to be more tactical decision making in which units to move first, and which to hold off on.
The Townsfolk try to recover the monastery treasures and some livestock, but are driven back by a Viking hero
Here are the updated statistics after three games in our campaign:
LEGEND POINTS (cumulative Honor Points)
  1. 40 Vikings of Jarl Mike W (Wallace, 3-0)
  2. 34 Townsfolk of Camelon (Joel, 1-2)
  3. 33 Steapa's Saxons (Mike D, 2-1)
  4. 33 Vikings of Jarl Mike S (Stelzer, 1-2)
  5. 30 Caithill's Norse Irish (Keith, 2-1)
  6. 19 Picts (Allen, 0-3)
We finally used the Card Pool aspect of the Tribal rules, too. This certainly adds another level of tactical use of the cards. Players begin with a base one card in their pool, plus one for each victory. Here's the new card pool totals:
4 Cards: Vikings of Jarl Mike W
3 Cards: Steapa's Saxons, Caithill's Norse Irish
2 Cards: Townsfolks of Camelon, Vikings of Jarl Mike S,
1 Card: Picts
A look at the early stages of the battle - Viking column in center, Picts & Townsfolk in trees at top & Saxons at bottom
We haven't used the experience point idea that I had, yet. I decided to introduce one thing at a time. Perhaps for next session we will do that. So, at this point, experience points equals Legend Points. The thought is to allow players to purchase permanent skills that do not need to be re-bought every game with points from their Honor Pool.

Maybe I can design a true free-for-all scenario for the next game. Or perhaps we'll go back to the one-one-one matchups. I'll have to see what my players are interested in doing.

Sunday, May 5, 2019

Finally! More attractive Wars of Insurgency order markers

The finished product -- order markers for two dozen squads done quickly, simply, and attractively for the tabletop!

I've been telling myself for months (years?) that I was going to get around to creating less obtrusive order markers for my modern infantry skirmish game, Wars of Insurgency. The colored poker chips I used are functional, but can be an eyesore for a perfectionist like myself when it comes to making your battlefield look great. My latest game, Bush War in Rhodesia, finally forced my hand.
In this game, there are six very large units of ZANLA insurgents. According to the special scenario rules, each time these units of 20 take a hit, they are marked with a "bombshell marker." Bombshell was the name the Rhodesians gave to the insurgent tactics when they came under attack by a Fire Force assault. Essentially, they splinter -- breaking up and running in different directions. In game terms, they split into two. A unit of 20 becomes two units of 10, a unit of 10 splits into two of five, a unit of five actually begins suffering morale effects.
Wooden discs readily available at craft stores make great, inexpensive order markers
What this has to do with markers is it means I need a LOT more order markers for the ZANLA side than I have in my previous games. So, I decided to make some up in a quick and simple fashion, but hopefully so they don't detract from the look of the battlefield. I used 1.5" diameter wooden discs available at craft stores like Hobby Lobby and Michaels.
Each round wooden disc is attached to a bamboo skewer with blue tack then set upright in foam

I would do the next batch differently than I did these, though. The first step is to attach each disc to a bamboo skewer with blue tack, and then use some foam to create a holder for the skewers. Next, glue down the JTT Detachable Grass Bushes first to the center of the disc. I made a mistake and did Step #3 before this step #2. The next step is to paint the disc with a 50/50 mix of brown paint and white glue. The wet disc is sprinkled with Woodland Scenics fine brown ballast to give it a solid, thick flocked earth base.
Sigh, mistake! I foolishly flocked the disc with ballast BEFORE attaching the bush causing problems for me later

After it dries, the next step is to paint the ballast with a 50/50 mix of white glue and water. While it is wet, sprinkle it thickly with Woodland Scenics Blended Turf Earth. After it dries, do this again with Blended Grass. Next, spray it the markers with clearcoat. When dry, a final 50/50 mixture of glue and water should give it a thick durable coating.
A view of the poker chips I used before on a battlefield
You can apply 1" round adhesive stickers to the wood underside to denote your squads that move first, second, etc. The markers are anonymous enough that opponents can't look at them and know which unit you've marked to go first, but scenic enough that they actually add to the look of the tabletop rather than detract from it like...ahem, colored poker chips!

Acheson Creations resin bases which will form my next batch of order markers
I am also working on another batch of markers, this time using Acheson Creations round bases (I believe what they are meant to be). I've washed them to remove the mould release agent off of them, and spray primed them black. The challenge will be to flock and paint them as identically as I did with the wood discs!

Wednesday, May 1, 2019

Kingdom of Gododdin Repels Viking Invasion

The Men of Gododdin - Lord Gwendawg and his Welsh warriors close with Jarl Jimsson and his unit of hearthguard
When word was spread by riders throughout the kingdom of Gododdin, Lord Gwendawg gathered his men - mounted hearthguards, foot warriors, and levy archers. Rumor flew that the Vikings were on the had plundered a monastery and were marching the monks back to their ships to sell overseas as slaves. Riding hard and fast the Welsh warriors caught up with the Vikings of Jarl Jimsson. The Vikings were tossed into confusion, but the jarl quickly reordered his men to face Lord Gwendawg's forces as they deployed.
Jim, left, finished his deployment while Mike Stelzer and his Byzantines faces off against Adrian and his Romano-Brits
This game of Saga was played as part of a game day at a local game store (Guardtower East). Steve Phallen organized it, and eight players showed up from Central Ohio, Springfield, and Dayton. I was matched against one of the Dayton player, Jim, and his borrowed Viking army. Jim suggested we play a game from his friend Adrian's copy of Book of Battles, so we did. I forget the exact scenario name, but it involved four objectives on the battlefield -- two on each side of the table -- that the armies were attempting to hold onto. We received points each turn for being within 2" of them with no enemy within 4". We used monks for the objectives (though they counted as impassable terrain and would remain stationary). Each of us deployed to maximize our chances at holding onto the ones on our side of the board and seizing those on our opponent's.
My mounted hearthguard charge up the hill on the left while my two center units of warriors and Warlord advance
I deployed my large unit of 8 mounted hearthguards on the left, so that they could race across a gentle hill and rescue the monks from the two units of 8 Viking warriors each guarding them. I figured my mounted troops should be up to the challenge, even though they were outnumbered 16 to 12. In the center, I placed my two large units of 12 warriors, supported by my mounted Warlord. Across from them were a unit of 4 berserkers, another unit of 4 Viking hearthguard, and his Warlord. This could be a nearer thing, I thought. On the right, I would have to delay with my unit of 12 Levy archers who marched onto a hill to shoot the enemy, yet still keep men near the objective. Across from them was another unit of 8 Viking warriors. I had five units vs. Jim's six, but most of my units were bigger, which should make them more survivable, I hoped.
Breakthrough! My mounted hearthguard have almost eliminated his first unit of warriors, and ready to charge the other
On my left, the mounted hearthguard of Gododdin raced towards the Vikings and crashed into the first unit. We smashed into them, killing six of them while losing only two. They were driven back to the corner of the battlefield. In the center, Jim advanced his three units, but I felt their attack was somewhat piecemeal. First, his small hearthguard unit tried to charge my archers, but I had saved an "Evade" move on our board and we withdrew before his charge. His berserkers targeted my warrior units, and I crossed my fingers and hoped our numbers could absorb his attack. In the ensuing combat, I lost 7 warriors, but he lost all of his berserkers. His hearthguard were ground down by my combined javelin and bow fire, and by my other warrior unit. Soon, only his Warlord contest the center.
Late stages of the battle - the Viking Jarl nearly surrounded by four units of Welsh
The battle on the left continued to go in my favor. My hearthguard followed up their charge, slamming into the other unit of Viking warriors, killing four of them and driving the rest back into the woods. This left us in control of the objective for the rest of the game. We turned and destroyed the remaining two warriors of the first unit, and tossed javelins at the warriors on the edges of the woods.
Other battles taking place - Roman ballista and infantry target their enemy
Then began the heroics of Jarl Jimsson. Time and again, surrounded and opposed on three sides by larger units, he shrugged off the effects of our javelins and arrows. I wanted to kill his leader, and did manage to get him to two fatigue. However, I could never finish him off, despite numerous flights of arrows and javelins, and even a charge by a warrrior unit. When he brought his fresh unit of warriors from his left to reinforce his center, I sent a "Wild Charge" of javelin-armed warriors to scatter them, slaying most.
Adrian's warlord leads a charge against Brett's Vikings in a second round battle
Essentially down to his virtually surrounded Warlord, Jim conceded the field. Interestingly, this scenario gives zero points for enemy kills. However, I was way ahead in that category, too. It was a smashing victory for the men of Gododdin. I really enjoy playing this Welsh Saga army. It has speed, strong melee ability, and significant missile firepower, as well. It's command and control "board" has a lot of reaction moves which can allow a commander to stay one step ahead of his opponent's maneuvering. In thinking about it more, I may experiment and swap out my 12 Levy archers with 12 javelin-armed ones. It was a fun game, and Jim was a great opponent.
Another second round battle - Steve's Romans face off against Lowell's borrowed Saxon army
Our game lasted about 2 1/2 hours, though, and everyone else had finished and been matched up for a second round by the time we were done. Both of us were fine with playing one game. Jim wanted to shop a bit and I wanted to check out some of the other games. Thanks to Steve for organizing the game day, and providing loaner armies, terrain, dice, and more. The Welsh are my own figures, and several other players brought their own troops, too. Everyone seemed to have a good time. I'm looking forward to playing again soon, and continuing the saga of Lord Gwendawg of Gododdin.
A Viking warlord -- Brett's borrowed army with his berserkers and raven banner
A "Hold the Bridge" scenario
Add caption
John Pittenger deploys his borrowed Irish army and makes adjustments as the Lowell's Saxons close
First round game - Lowell's Saxons vs. John's Irish, while Jason at bottom marches on Brett while Steve oversees
Mike Stelzer's elite Byzantine army, led by Harald Hadrada

Thursday, April 4, 2019

Scratch-building Chain Link Fences

My scratch-built aluminum fence sections surrounding my scratch-built basketball court
As my 28mm urban terrain began to grow, I knew I would needed fences to enclose my basketball court, parking lots, playgrounds -- whatever I think will look better with something around it. I thought I would try my hand at scratch-building chain link sections with easy-to-obtain and common materials. Sure, I realize somebody probably already makes them for purchase. I enjoy the modeling part of the hobby, though. And if I can do them cheaper, it means I can do more of them!
The black mesh called "plastic canvas" which -- when rotated 45 degrees -- looks like a chain link fence
I started with a plastic mesh screen called "plastic canvas" that you can buy at craft or fabric stores (I believe they are used for needlepoint). I chose black as the color so that I could dry brush my aluminum color over it to give it more of a worn look. The mesh is horizontal/vertical. Chain link fences usually have their wires running diagonal, though. So, I simply rotated the mesh 45 degrees. To make sure I was cutting it uniformly straight, I first cut out a thick cardstock template that would equal the size of the fence section that I wanted. I rotated the mesh, placed the template down, and used a sharp X-acto knife to cut along it.

My 6" bass wood sections with holes drilled 1 1/2" from each end for the nails to be forced through
I ended up with lots of segments left over, but I may go back and use those for gates, smaller sections, or whatever comes up. Next, I cut out the bases out of bass wood. In hindsight, I would make the bases wider. I chose bass wood slats that were too narrow and the fences seem a tad top-heavy. I then measured so that if I lined up several sections end to end, the poles would be evenly spaced. With a 6" long base, I needed to measure in 1 1/2" from each end along the centerline of the base. That meant that each pole would be 3" apart. I marked the spot and drilled it to accommodate my fence posts.
The nails, which become fence posts, pushed through the bottom of the bass wood base through the hole drilled for them
I used aluminum nails for my fence posts. My idea was to use a flat head nail and drive it up from the bottom through the bass wood base material. Unfortunately, I did not notice that my chosen nails had a slight, irregular, material bump on the end of each nails flat head. That meant they did not truly lay flat. I thought this could be easily fixed by simply gluing MDF "bricks" -- tiny rectangular pieces that were left over from building construction. I did this, but then found that the base was even more wobbly and unstable. The next attempt to salvage the bases was to epoxy metal bases on the bottom in the center between the two posts. The weight of the metal allowed them to finally be more bottom heavy and stand up more straight. Still, I wished I had gone with wider bases.
The styrene rods placed atop the points of the nails to be the horizontal poles
The next step was to cut the styrene rods that I had bought at a local hobby shop into six inch sections. I measured 1 1/2" in from each end and marked the spot. I then took the sharp point of an X-acto blade and spun it to make a hole at the marked stop. I widened it so that it would fit over the tapered point of the nail. The rods would become the horizontal poles atop the fence sections. Once I had all the poles cut out and drilled, I simply epoxied them onto the nail points.
The size of styrene rods I bought from the local hobby shop
It was at this point I discovered I had made another miscalculation. When I drilled the hole through the bases, I had not done them uniformly straight and perpendicular. This meant the nails did not point up a true straight up and down, and the styrene poles would not look straight. In the future, I would probably find truly flat head nails and simply epoxy them to the base, rather than drilling them up through the bottom. Lessons learned!
The materials all ready for assembling
Next, I coated the horizontal styrene poles and the vertical nails with a line of epoxy. I took each precut mesh screen and placed it onto the epoxy, angling the piece at an angle so gravity would force the screen against the epoxy. This step went very quickly, and I soon had a bunch of 6" chain link sections. I was mostly happy with how they'd turned out.
My first attempt at making the bases more stable. I would later add two metal bases in between the nails for weight
The two gates were a bit more fiddly to make. I cut styrene rods to be the gate posts, and epoxied them onto the base. It took some bracing and use of bluetack while the epoxy was drying for them to stay upright. I glued an appropriate bead onto the top of each post to look like the filial caps you usually see on aluminum fences. I glued on more styrene rods for the gates side and top poles, but otherwise, the steps were very similar as constructing the straight fence sections.
The plastic mesh is epoxied onto the aluminum nails and styrene rods - ready for priming!
Once all dry, I took the sections outside and spraypainted them with Krylon black primer acrylic paint. I followed this up with a coat of 50/50 mixture of black paint and water. They dried overnight, and then it was time to turn them into aluminum. I searched around to find a silver that looks more like aluminum. I purchased a jar of Vallejo Liquid Silver "White Gold" because it looked the most like aluminum of all the paints I'd found.
The painted and flocked gate section with a fence section on either side
My original intention was to drybrush the silver on over the black, leaving some black in the recesses as shadows. This paint is very watery, though, and wanted to cover the area completely -- running into crevices. I decided to go with the flow, so to speak, and cover the poles and fence screen more completely. This went VERY fast, and I really liked the bright color and how it reminded me of aluminum.
A good look at the mesh and how it simulates a chain link aluminum fence
Once dry, I flocked the bases with medium brown ballast, and followed it up with Turf Earth, and finally blended green grass (leaving some sections bare earth). A couple sprays of clear coat and my fences were done! Everything did not go exactly as planned, and I will certainly be making some changes on future fence sections. However, I liked the way it turned out, and actually bought a second section of black plastic canvas tonight to do more fences!
Some of my 28mm urban gangs get ready to rumble on an inner city basketball court surrounded by my fence
These fence sections were quick and easy to create (and cheap, too!) If you follow in my footsteps, don't make the same mistakes that I did! See my blog entry above...

Monday, March 18, 2019

Bitter Tribal Warfare in the North of Britain

Steapa, at bottom right, encourages his Saxon warriors to exact revenge on their Viking foes across the field
I have always been fascinated by the history of Britain during the Dark Ages. Long ago, I painted up 28mm Vikings, Picts, Saxons, Britons, and Irish for use in skirmish games. I've used them with Song of Blades and Heroes rules, Saga, and most recently with Tribal rules from Mana Press. Enough of our Sunday evening gaming group enjoyed them to say they were interested in playing them more often.
In the center, Keith (left) and Joel count up their winning card exchanges to determine which unit won that clash
I pitched the idea to them of a series of games, with players controlling the same faction in a series of battles. We would keep track of Honor Points -- Tribal's ways of judging victory -- over the course of the games. Our forces (and leaders) would get more skilled, and hopefully a storyline would develop. I didn't want to necessarily call it a campaign, because there would be no map and no control of territory, or anything like that. Neither would it be a League, in which players are free to play multiple factions for the sole purpose of one-on-one competition. Ostensibly, the player's forces would remain the same faction.
The Townsfolk of Camelon rally to defend their fields from a horde of inebriated Norse-Irish
Since nearly all of my 28mm Ancient/Medieval stuff is for Dark Ages Britain, I encouraged the others who own figures for it (Keith and Mike S) to also field armies from the north of Britain. That accomplished, I've decided to give it a bit more of a framework. The factions would be from an area known as Gryme's Dyke, formerly the Antonine Wall -- an earth barrier constructed by the Romans before they pulled back to the location of Hadrian's Wall. Thus, in the Dark Ages, this could be the haunt of Picts, Dal Riatan Irish, Britons, as well as invading Saxons and Vikings. Our six players involved in the games so far represented the following factions:
  • Caithill's Norse-Irish (Keith)
  • Steapa's Saxons (Me)
  • Picts (Allen)
  • Vikings (Mike W)
  • Vikings (Mike S)
  • Local Townsfolk (Joel)
A band of Franciscan friars rally to the defense of the townsfolk, ready to use their staffs on the godless heathens!
 For our second set of games, we decided to use three of the four scenarios from the Tribal rulebook (#1 Revenge, #2 Raid, #4 Destruction). I used the order of Honor Points earned from the first game to let players choose their spot on the battlefields (attacker or defender on which designated battlefield). I skipped over myself and took the remaining spot.
The drunken Irish approach the stalwart monks, none too steady on their feet (judging by the cards they'd draw!)
Destruction featured five of my 28mm Acheson Creations Dark Ages buildings that Allen's Picts would be attempting to defend from an invading force of Vikings (Mike W). The attacker's goal would be to have a unit or figure spend an activation card adjacent to a building, which would represent setting them alight. Allen's placed his Pictish defenders in a forward defense, forcing the Vikings to go through them to get there. The drawback of his strategy was that, with half his forces not arriving till he end of turn 3, he would be outnumbered by the Norsemen. As it turned out, the Vikings did win the battle 13-7 in Honor, but managed to fire only one of the buildings.
The ending stages of the game sees the Irish force scattered and being mopped up by the Townsfolk
Since the games were being held on St. Patrick's Day, Caithill's Norse-Irish were full of enthusiasm to go out and raid the outskirts of the town of Camelon, near Gryme's Dyke. The battlefield represented one Dark Age hut and three fenced pastures with horses and pigs. The Irish goal would be to spend an activation card either in, or adjacent to, each of the structures to represent stealing animals or supplies. Led by a local group of monks, the townsfolk of Camelon were ready when the raucous (inebriated from celebrating St. Patrick's Day?) Irish arrived. The Irish would have to attack and drive them away from their herds to attain any loot. Keith was certainly missing the luck of the Irish that night and was soundly thrashed by the stalwart countryfolk and well-fed monks who guarded the pastures, 15-3. The Norse-Irish fled in disgrace.
In the far game, Jarl Mike W (left) grinds down Allen's Picts, while in the middle Keith (left) and Joel count their dead. At bottom right, Jarl Mike S patiently shuffles his deck and waits for me to finish taking pictures!
The final game pitted my Saxons (named after the Last Kingdom's character Steapa) seeking to avenge a wrong done to use by the Vikings of Mike S. Perhaps a band of Viking young men had stolen into our territory and perpetrated an atrocity on our Saxon womenfolk. I was to secretly designate one of Mike's units as the ones marked out for our revenge. I chose his one unit of hand weapons (figuring he would think I would pick one of his leaders). I deployed my three units of Saxon warriors across my front, each of them backed by a character -- my chieftain in the middle, and heroes on either end.
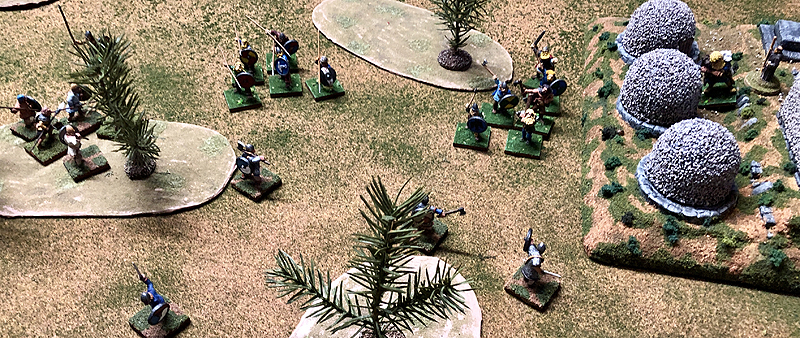
At top, Jarl Mike S's Vikings (including the Ravers just to the left of the monastery beehive huts) charge into my Saxons
I noted that Mike deployed the ravers we wanted vengeance against opposite my right. I then began to refuse my left flank with my unit of spears, and crept the other units over to the right so they would all be able to gang up on hand weapon unit. The characters also stalked forward to be within movement range. As it turned out, Mike attacked first, driving off one of my units with those very same ravers. They then followed up their success against my hero with the fearsome skill. Mike's early luck with cards ran dry, and my hero pulled a number of high black cards. With each wound dealing an extra, my hero cut down the over-confident (dare I say "cocky"?) ravers in one turn of combat.
Another look at the Raid battlefield with its pastures
Each of us had our successes and failures elsewhere on the battlefield. However, I had the upper hand in numbers and a clear lead in Honor. I could have attacked and possibly destroyed another damaged unit or two, but decided that honor had been satisfied. I offered Mike a chance to withdraw, and he took it. Steapa was successful in his second battle, as we revenged ourselves upon the Vikings, 16-7.

After weeks of games, here are the "campaign" Honor Point (renamed Legend Points) won by each faction:
  1. 27 Steapa's Saxons (Mike D, 2-0)
  2. 23 Townsfolk of Camelon (Joel, 1-1)
  3. 22 Vikings (Jarl Mike W, 2-0)
  4. 15 Picts (Allen, 0-2)
  5. 15 Vikings (Jarl Mike S, 0-2)
  6. 14 Caithill's Norse Irish (Keith, 1-1)
 With the next set of games, we're going to introduce a new feature to the games: Card pools. These are drawn at the start of each game and can be substituted for a card that has been played by the player or his opponent. I am planning on each player beginning with one card in the pool, earning an additional one with each victory. So, for next time, here's the card pools:
  • 3 - Steapa's Saxons
  • 3 - Jarl Mike W's Vikings
  • 2 - Townsfolk of Camelon
  • 2 - Caithill's Norse-Irish 
  • 1 - Allen's Picts
  • 1 - Jarl Mike S's Vikings
And finally, the Honor Points in each player's pool are also accumulated as Experience Points. Unlike the Legend Points, which simply accumulate and "rank" players, Experience Points are meant to be spent. Players can spend 15 points to purchase a permanent skill for one of his units or characters. Alternately, the can save them up to purchase a two point skill for 60 points. Purchased Skills will be "free" in future games -- over and above the normal Honor Pool which they can spend on Skills. However, this free skill cannot be changed from game to game, but is a permanent feature of the faction's armed forces.

Obviously, the current Experience Point pool is equal to the Legend Points: 27 (Mike D), 23 (Joel), 22 (Mike W), 15 (Allen), 15 (Mike S), 14 (Keith). After two games, five of the six players can purchase a permanent, 1-point Skill if they desire. Or they can wait and save it up for a 2-pointer! We will see how all these campaign additions affect the game as we progress. I, for one, certainly enjoy the scenarios better than a straight up battle. Tactical objectives always make a game more interesting! I am looking forward to the next time that bloody warfare resumes far to the north of the old Roman wall in the land of Gryme's Dyke!