Monday, April 19, 2021

Let the Game Days Begin!

    Byzantine cavalry charges Crusaders, who were in abundance in our first Saga game day in 2021
During the pandemic, most of us missed out on face-to-face miniatures gaming. Losing our twice-monthly Saga game days was a big blow to a lot of us, so we were eagerly looking forward to their resumption. I had a feeling that the turnout at our first game day of 2021 would be big. Even though the game days at the Dragons Guildhall in Beavercreek, OH, tend to be a big smaller than the ones in Columbus, I kept getting word from more and more players who would attend. It was exciting.

    Keith and Daniel engage in a Norse-Gael civil war on one of Jim's new Winter boards
First, the "next generation" -- my friend Mike Stelzer's son Jason and his two cousins Daniel and Thomas -- said they'd be attending. Mike was in, as well. Next Andy said he'd make his first ride over from Columbus for the Dayton game days. Of course, our hosts Adrian and Jim would be there, as would Jenny and myself. A new group of Saga players starting up in the Cincinnati area said a couple of them would make. Michael Cooper and Ted H brought their Age of Crusades armies. At the last moment, three of my regular Sunday night gamers decided to come. It would be Allen and Mike W's first games of Saga, while Keith had played a couple times before when Jenny coached him through a couple learning games. When it was all said and done, 18 players participated on our April Saga game day -- our best ever turnout!

    Jim and his Viking army deployed on one of his gorgeous new terrain boards
Jim was busy setting up the terrain on his brand new terrain boards that he'd created as a pandemic project. they looked amazing -- each was a thick, two-sided foamcore board. One side had a river cutting across the center (for "The Crossing" scenario in Book of Battles). The other had a flocked surface, with each themed for a season. There were Winter boards, Spring, Summer, and Fall. Each board had its own set of terrain to go along with it -- all of the choices from Saga terrain rules. So, each set included rocky ground, ruins, forests, fields, hills -- you name it! The terrain was similarly themed for the season, so the winter boards had a frozen-looking marsh with snow on its edges, snow-dappled trees -- it was incredible!

    Mike Stelzer's newly-painted Carthaginian army saw its first action at the game day
Since Jim was busy, I decided to pitch in and help with the matchups. First order of business was getting the brand new players paired with a good, experienced teacher. Jenny volunteered to teach Allen, and Jim had previously agreed to play against Mike W and coach him through it. Mike S had finished his Carthaginian Age of Hannibal army, so I matched him up against Andy and his Gauls. Pretty soon, we had everyone paired up and playing a game (except me, as we began with 17 players). My original plan was to circulate around the room and do Saga Ohio podcast interviews. However, things were too hectic with the relatively new players needed help on rules questions and getting their games underway.

    The Carthaginian's first opponent was Andy's Gauls - masses of warrior infantry ready to charge
It was great to look around and see eight games of Saga progressing. The armies were a nice variety, too, with Vikings and Crusaders being the most popular. We also had our first Milites Christi army on the table, along with two Norse-Gaels, Anglo-Saxons, Last Romans, Normans, Romans, and of course, the Carthaginians and Gauls. I moved around the room taking lots of photos, writing down the matchups and scenario choices. As games finished, I recorded the scores or outcomes for the groups that didn't total up the victory points. 

    In one of the teaching games, Jenny coaches Allen on aspects of the Viking army and battle board
Here were the results of the first round games:

  • Bob B's Baltic Crusaders defeated Jason S's Last Romans in Clash of Warlords, 24-20.5.
  • Andy S's Gauls defeated Mike S's Carthaginians in Battle of Heroes, 21-17.
  • Thomas M's Crusaders defeated Michael C's Milites Christi in Clash of Warlords, 32-24.
  • Adrian J's Anglo-Saxons defeated Ted H's Crusaders in Clash of Warlords, 24-9.
  • Daniel M's Norse-Gaels defeated Keith F's Norse-Gaels in Clash of Warlords, 29-20.
  • Jenny T's Vikings defeated Allen S's Vikings in Clash of Warlords, 22-18.
  • Mike W's Vikings defeated Jim B's Vikings in Clash of Warlords (no score).
  • Dave E's Romans defeated Aaron J's Normans in Clash of Warlords 19-13.

    Fanatic pilgrims of Thomas' Crusader army pull down the Grand Master of the Milites Christi
I had a fun time watching the games in progress, giving the novice players some tips, and taking pictures. A couple players were concerned that I wasn't playing, but I told them that I would jump in on the action in Round 2. It was just good to see everyone and admire the armies that looked so good on Jim's new terrain boards. Most of the games were taking a bit longer. The players were a bit rusty on the rules after so much time off. The two teaching games were going even slower, of course, but that's fine. The ultimate goal is to interest the new player in Saga and make sure they understand what was going on. My friend Allen told me afterwards that he enjoyed it and plans to attend our next Saga game day at 11am at the Guardtower East in Columbus, May 2.

    Jason S's Last Romans await the onslaught of Bob B's Crusaders
Due to the length of the games, we had fewer second round games than we might normally. There were only three games -- two of them involving new players. A Dayton area player and friend of Andy's wanted to get in a game. He borrowed my Viking/Anglo-Danish army and fielded them as Jomsvikings against Andy's Gauls. Good matchup -- fanatics against fanatics, haha! And almost as soon as they finished, Michael C and Thomas M played a rematch of their Milites Christi vs. Crusaders. I tried to help arrange a couple other matchups, but a lot of players were kind of worn out and ready to head home. So, I sat down to play my first game against Mike S's Carthaginians. I was a little leery, as some have told me that the Age of Hannibal armies were more powerful than the other historical ones.

    Mike S rolls the die against Andy S in their Age of Hannibal "Battle of Heroes" scenario

Here are the results of the second round games:

  • Thomas M's Crusaders defeated Michael C's Milites Christi in Clash of Warlords, 43-40.
  • Andy S's Gauls defeated Taka's Jomsvikings in Clash of Warlords (no score given).
  • Mike D's Moors defeated Mike S's Carthaginians in Battle of Heroes (no score).

    Mike W gets some pointers from veteran from Jim B in his first game of Saga
Jim Beegan proved his generosity again by buying gift cards to the Dragons Guildhall for all the attendees. He does it to support the store, but it is an incredibly nice touch. I saw most of the attendees busily shopping in the store before they left. I picked up some terrain for the interior of my 28mm MDF Brewpub that I built a couple years ago. They had a small selection of 28mm plastic miniature boxes, but being a "metal guy," I just couldn't force myself to buy one of those boxes. 

    Michael C's Milites Christi seize the high ground in a Crusader civil war with Daniel M
I will write up a separate report detailing my Moors' battle with the Carthaginians. Suffice to say, my army's victory was a perfect ending to a great day of gaming. It was amazing to be back playing Saga, again. The turnout was awesome, and a tribute to how the game's popularity is growing in this area. I look forward to a repeat of the great turnout in two weeks in Columbus!

    Michael C and Thomas M had such a good time in their game they immediately played a rematch!

    Viking battlelines get ready for the clash in Jenny & Allen's teaching game

   Jim B's Vikings with their winter bases await the approach of Mike W's Vikings

    Opposing Jim's Vikings were Mike W's (borrowed from Keith's extensive miniatures collection)


Tuesday, April 13, 2021

Saturday's Change of Plans: "Tune Up" Game of Saga


    Change of Plans scenario with the Viking deployed at top and my Moors at bottom
With the return of Saga Ohio game days only a week away, Jenny felt she needed a tune up game of Saga. She wanted to brush up on her Viking battle board and familiarize herself again with the mechanics of the game. I needed no arm twisting to play Saga, so we pulled out the terrain and armies for some Saturday night Saga instead of our usual two-player board games. 

    Jenny's Vikings once again invade the Emirate of Cordoba defended by my Moorish army
I tossed her the Book of Battles to pick out a scenario, and she chose "Change of Plans." This game has three separate scoring rounds -- massacre points after turn 3, survival points after turn 5, and conquest points at the end of turn 6. It is one of the scenarios Adrian was thinking of using for the Cincycon Age of Vikings tournament (Oct. 23, 2021). Neither of us had played it before, so I agreed that it would be good to try it out. Jenny was using a new, hearthguard-heavy Viking build (five points in units of 6, 5, 5, and 4 figures, along with her usual one point of levy bows). 

    The Moorish warrior foot open the game with an aggressive advance towards the Viking woods
For myself, I wanted to see if my two units of 6-man, mounted hearthguard with javelins unit could switch gears from skirmishers to battering rams. We have a lot of Viking armies in our Saga Ohio group, and the Viking battle board has the "Odin" ability that can Exhaust a shooting unit. Since I also have a Levy bow unit, I normally try to tempt Viking opponents to use that ability on them instead, freeing my mounted to do their usual ride up, throw javelins, and retire behind the lines of warrior infantry. I knew Jenny was on to my trick by now, though. So, my new plan was to use them in primarily a melee role when facing Vikings. Would they be survivable enough? This was my test run.

    This will NOT be celebrated over horns of mead - Viking hearthguard repelled by Moor warriors
I set out a large, gentle hill in the center right of the table to free up maneuver space for my Moorish cavalry. Jenny jacked that up quite nicely with a pair of marshes bracketing it -- one on her side of the board and one on mine. She had a forest on her right, set up in perfect position for her levy archers to enter and use as a stronghold to unleash volleys of arrows from. Deployment in this game is by each player alternating units. I began with my own Moorish levy archers in the center swamp on my deployment area. Since Jenny had complicated things on my right, I decided to switch my main attack to the left. I put out a cavalry unit like it was going to the right, but planned to move forward aggressively on the left, instead.

   My cavalry countercharge came up equally short, causing no casualties on the exhausted Vikings
I opened the game with my two units of warrior foot advancing a full move towards his levy's woods. My levy scooted up to the edge of the swamp to be able to target anyone on my soon-to-be-refused right wing. I placed used one of my three Saga dice (as first player) on "Forest of Spears," in case one of her units of hearthguard double-moved to attack them. Jenny must have had this in mind. She began her turn with a volley from her archers which caused 3 casualties on the warriors on the left. Very good rolling on her part, and below average on mine. It was as if I had read her mind, because Jenny then moved up one of her 5-man hearthguard units once, and then a second time to charge them into the depleted spear unit. We closed ranks, played Forest of Spears, and ended up taking no hits. As if that wasn't insult enough to the Norsemen, she didn't save one of the hits I put on her, so she actually lost a figure and recoiled.

    My warriors screen my recoiling cavalry while the other unit advances into the woods

That was the opening I had been hoping for -- one of her units ending with two fatigue on it (one for the second move and another for the combat). I was VERY fortunate on my command die rolls in this game. On turns 2 through 6, I rolled at least one rare dice each time (one or twice rolling two). This allowed me to use the Moors' primary melee ability, "Torrent of Iron." My warlord Majik Ibn Battuta al-Waqaa waved the left hand unit of cavalry forward, while his pet cheetah Scirocco watched with hunter's interest. As we hit home on the chastened Viking hearthguard, we inflicted a third fatigue, making them Exhausted. This meant they were -1 to all melee dice. That is what my Moorish cavalry are looking for, and we used their fatigue to raise our Armor to 6. That meant she couldn't hit us, and we essentially had free strikes with no chance of casualties. In my excitement at getting what I wanted, I forgot to play "Inspiration," which I had cued up on my Moor Battle Board. That allows rerolls of any 1's on my attack dice. And I rolled a LOT of ones! Still, with the +1 bonus from javelin and lowering their armor, I scored 5 hits. She saved all of them. Five rolls of 5+ on a 6-sided die!!

    Moorish warriors, after repelling an attack from hearthguard, charge into the levy bowmen
Now, it was OUR turn to be chastened and back off. She cleverly used my cavalry unit's fatigue to cut down my ensuing retirement move to a Short distance. My mounted units have only an Armor of 4 and are very vulnerable to both shooting and enemy charges. So, I pulled the depleted warrior unit out into a screen in front of the cavalry. Interestingly, Jenny was NOT playing "Odin" from her battle board on my levy archer's shots. She was being canny and saving it to unleash on my cavalry when they tried to toss javelins and then retire.

    My warlord Majik ibn Battuta al-Waqaa waves the Moorish cavalry forward to charge again
Determined to save her levy and eliminate the threat of my Moorish spearmen, she brought a 4-man hearthguard unit forward to charge the threat. Once again, my warriors closed ranks. We each caused two casualties, which meant her hearthguard bounced off my warriors again! My turn 3 was probably my best of the game. My warlord galloped over to the cavalry, exhorted them, and ordered them in against this new, double-fatigued hearthguard unit. Inspired by Majik's words, or intimidated by Scirocco's yellow stare, they redoubled their efforts and this time did not fail. It also helped that I remember to play "Inspiration" this time (which I needed, as I rolled a lot of ones again!). The Vikings were eliminated and we once again suffered no casualties due to their exhaustion from Torrent of Iron. 

    The Moorish warriors have driven the archers out of the woods and await the Viking counterattack
One of the nice mechanics of Saga that simulate morale is when a friendly unit is eliminated, their comrades within a Short distance receive a fatigue. This included the archers, who were then charged by my warrior unit advancing on them in the woods. We hurled them back cutting their numbers nearly in half, but they caused two casualties on my spearmen. Knowing this was the turn 3, when we would count up massacre points, Jenny brought up her other 6-man hearthguard unit from the center and charged those warriors. This was Jenny's best melee of the night, and she killed all but one of the warriors, sending the survivor running headlong from the woods.

    Another Viking hearthguard unit charges Moorish warriors, this time slaying all but one
Once again, though, the Vikings had accumulated two fatigue with their second move and the melee. Once again, the Moorish cavalry were waved forward (the right hand unit this time). Four Vikings were cut down in another Torrent of Iron. If I had not been so successful in rolling at least one rare in each of my turns except the first, I doubt my charges would have been nearly as successful. Still, we did our usual, and pulled the victorious warriors back towards our lines after their charge.

    And the inevitable response to a double-fatigued Viking unit: Torrent of Iron cavalry charge!
It was at this point that most of the fighting was done. Jenny brought her archers back into the woods and caused a couple casualties here and there. My own archers were ineffective all game. I pulled back the bigger unit of warriors towards my lines. Survival points would be counted on turn 5 and I wanted the +1 they would score for me for generating a Saga die. Jenny considered coming forward with her two, undamaged hearthguard units (one of 5, one of 4), but seemed demoralized by the charges of my cavalry. I knew that I was ahead, and since we were counting survival points, had no plans on making potentially risky charges on fresh troops.

 Situation at the end of the game - my battered warriors withdrawing knowing victory was in hand
After turn 5, which saw only arrows flying, she and I decided to call the game. She pointed out that I could move across the centerline with my two cavalry units and my warlord to score a lot of conquest points, while she would have to double or triple move to get across. The handwriting was on the wall, and it was in Arabic. The Vikings withdrew from the field, chastened. I consoled Jenny, pointing out that she punishes other players in Saga Ohio regularly with her Vikings. She has a system down using them, with the Loki-Odin combination hamstringing many armies' strengths. My advice was to be patient when facing armies that can use your fatigue as effectively as the Moors. Do single moves. Play the long game and advance steadily across the table, sweeping them toward their base edge until they run out of room to withdraw. I am reminded of my early years playing Ancients when I would lose what seemed 9 out of 10 games against my regular opponent, the late Larry Connor. It was those bitter lessons he taught me that made me a better player, though. So, my advice to fellow Saga Ohio players is, if you are selecting opponents to play, beware of Jenny! Hell hath no fury...

Saturday, April 10, 2021

Carolingian Archers Ready to Loose (um...NOT lose!)


    8 Old Glory 28mm archers to use as a Warrior Bow unit in my Carolingian Saga army
Since I like to mix things up while I am painting, it was the archer's turn to be the next group of figures painted for my new Carolingian Saga army. I'd already finished the first mounted hearthguard and foot warriors batches, so they were next. Once finished with these, my Carolingian army will be half finished (not counting the warlord's base, which I will do last).

    My 3 points of Carolingians so far -- almost halfway there on finishing the army!
The archer figures were not part of the Gripping Beast 4-point starter army, which the rest of the army will come from. They are various Dark Ages archers that I had in my unpainted bin. These eight, I believe, are from Old Glory. Sure, I could have purchased archers specifically for this army from Gripping Beast or Footsore, or any of the other miniature manufacturers that are much more popular with Saga players, now. However, the cheapskate in me just couldn't do that. Especially since I think they look perfectly fine. There were only three poses, I admit. However, divided amongst two planned warrior bow units that means only one figure per unit is a repeat. I can live with that!

    Closeup of 4 of the archers - I thought the helms on the first & third guys from left looked Frankish
An advantage of Old Glory is there was no assembly to be done. I cleaned up the flash with an X-acto knife and affixed them to squares of cardboard with white glue. I have decided to use this batch to do a tutorial post. The intent will be to show beginners how I paint miniatures, so look for that post soon. It'll have LOTS of work-in-progress shots to hopefully give newbies an idea how to approach painting up a batch of miniatures. I scribbled notes on the cardboard squares, selecting my colors for the archer's tunics and pants. Three of the figures had a leather/quilted looking armor, so I chose three different leather shades for those, as well. No cloaks or crazy stuff on these guys, so it was fairly easy to pre-plan my painting.

    Minimal detail on these archers - contrasting color hemlines and simple patterns on quivers, etc.
I did the bronze and steel look on the five figures that had helmets I could do that on, and a simple steel conical helm for the other three. I decided to jazz them up a bit with simple patterns on the quivers and sword sheaths. In keeping with my theme for the Carthaginians, warrior figures receive only a contrasting color on the hemline - no patterned borders or anything like the wealthier hearthguards receive. Nothing fancy in this batch, but these guys will quite possibly be doing the bulk of the killing in the way I plan to run my Carolingians. Their command and control battle board has lots of abilities that can make archery more deadly. 

    Still experimenting with the scratch-built lightbox Jenny built that I used to photograph these
What's next? Well, I am taking a break from miniatures to actually do some terrain, again. Since my current terrain has no specifically designed "rocky areas" -- a popular optional choice for Saga players -- I am creating four small ones. After that, I'll paint the remaining four mounted hearthguard for this army.


Thursday, March 25, 2021

First Batch of Carolingian Warriors Finished

    My Carolingian army grows, with nine 28mm Gripping Beast foot warriors joining the ranks
My next Saga army continues to march along on my painting desk. There were 16 foot warriors in the Gripping Beast 4-point starter set that I'm using as the base for my army. However, 9 of them had wrist stumps which needed to have separate fists holding either a sword or axe glued on. Actually, the box came with only 8 matching weapons and fists, but luckily I had a spare left over from my Moorish army. The remaining 7 foot warrior figures had closed fists meant to be drilled out, presumably for spears. Normally, I would do 16 miniatures in two batches of eight, but I decided to do them by the weapons. So, my first Carolingian warriors would be a batch of nine!

    Closeup of three warriors - the yellow and green border on the right was my favorite
I tend to be all thumbs when it comes to using superglue, and prefer 5-minute, two-part epoxy. However, I found when working on my Moors that I could actually handle the wrist stump and fist combination with Gorilla Glue superglue. These axe and sword hands went in equally smoothly, much to my relief. That was all I had to glue as the shields come cast on to the figure. Woo-hoo! That much less to glue! So, the "assembly" portion of these warriors was over quickly, and it was on to priming and choosing the colors for the tunics, cloaks, pants, and more.

    I was happy with how the fists with axe/sword glued onto the wrist stump easily and look natural
One of the reasons that I am a big fan of inexpensive craft acrylic paints (Ceramcoat is my #1 choice) is how affordable it is to purchase a wide variety of shades in various colors. I like to have a range from dark to light when it comes to all of the main colors -- greens, reds, blues, etc. For Dark Ages figures, I like to use the brighter tones for the richer or more noble figures (hearthguard in Saga terms). For poorer figures (warriors and levy in Saga), I like to select more faded colors. For example, I may use a medium or dark blue for a noble, but for the poor troops I would use a faded, grayish blue (like Ceramcoat Wedgewood Blue). Of course, I mix in grays and tans, especially for the pants or leggings.

    The last three of this batch of Carolingian warriors -- I really like these Gripping Beast poses!
Probably the most difficult part of painting this batch of miniatures was the leather cross-hatching on the leggings. I compounded this difficulty by doing my usual two-tone (darker base coat highlighted with a lighter tone) on the leather. It's interesting how painting some parts or equipment of the miniatures is more enjoyable than others. One of my least favorite stages of painting a miniature is the "leather equipment" -- belts, sheaths, etc. Why? I honestly don't know. It just seems that this is more of a chore than the tunics, pants, hair, and other parts. For this warband, I am continuing to favor greens and reds in attempting to go with a "theme" (which I plan to repeat on the warlord figure himself, of course). I don't want it to be the extent of, say, a medieval retinue. However, I am attempting to see with these Carolingians how a hint of a common color theme running through the irregularity of choices turns out.

    A look at the nine shields I hand-painted for these Carolingian warriors - the middle guy is my fave
Four of the figures have cloaks, so I wanted to make sure they had some sort of border or pattern. I decided on the previous batch of four mounted nobles that I would go with a thicker contrasting border on the bottom of the cloak (rather than the pattern running along all four edges). I decided this -- in all honesty -- because bottom edge was the easiest and most accessible on the miniatures. However, I also did a narrow line as an accent color on the edge of all of the warrior's tunics, too. This should give more subtle visual interest to the models than if they were all one plain color.

For the helmets, I kept my theme of bronze and steel that I began with the mounted nobles. This idea of a theme was suggested by Rodge and Monty on the Saga Thorsday blog. This is quite the shift for me because originally I was painting my Dark Ages figures so they could be generic and used across multiple armies. Now here I go making them more tailored! I guess with this being my sixth Saga army, coupled with my plans to have each army using unique and not shared figures, there is nothing preventing me from individualizing armies anymore.

    My two points' worth of Carolingians done -- I'll try to do a "army so far" group pic each update
The next splash of color consideration was, of course, the shields. As always, I did my Google and source research to see what common shield patterns would have been at the time. I admit that a common image that pops up in my searches nowadays are the commercially-available transfers by Little Big Men Studios and others. I rarely copy them exactly, but take themes from them, such as the swirls, crosses, and other devices that seem to be what the Carolingian army used. Once again, I tried to use various shades of reds and greens more than average. Since these are warriors, I could have just gone with plain one or two color shields. However, since Saga armies are so small, I decided to splurge with detail and do individual patterns inspired by my online research. I was definitely happy with how they turned out. 

What's next? The first point of warrior bows (8 figures) has begun its march to being finished, too. These are actually a mix of figures from different manufacturers that I had in my unpainted bin. Hopefully, they'll mix well with the Gripping Beast. Stay tuned for more updates as the army of Charlemagne's empire continues to grow!

Monday, March 8, 2021

New Painting Project: Carolingians for Saga

    The first batch of my 28mm Carolingian army -- Charlemagne's Franks
I'd been planning to get started on these guys for awhile, but had been putting them off to finish a few miscellaneous batches of Dark Ages figures. The intermission is over, though, and it is time to begin painting a new Saga army. The core of my Carolingian army is a 4-point Gripping Beast starter box. The box contains no bow-armed warriors, though, and my planned build calls for two unit's worth of them. Luckily, I have a lot of miscellaneous 28mm Dark Age archers in my unpainted bin. I sorted out 16 suitable looking figures and added them to my round metal tin where I'd dumped the Gripping Box figs into.

    Closeup of two of the riders showing the two-tone helmets and the iron scale armor
Where to start, though? I like to paint in batches of 6-8 figures, but a batch of 8 mounted is simply too large for my sakes. So, I broke the box's 8 troopers into two batches of four. Interestingly, exactly half of the riders are wearing scale armor and the other half chainmail. I chose to paint the scale armored guys, since it would be a change of pace. I did some research trying to decide whether the scales would be bronze or iron/steel. I saw images of both online, and ended up deciding to go with iron/steel. However, I remembered from my 15mm Ancients days how much I liked the look of Republican Roman legionaries who had bronze helmets but steel chainmail. I decided to recapture some of that look by painting their helmets as a bronze bowl with steel reinforcing sections.

    My dappled gray and brindle brown horses, taken from the online horse coloring guide I'd found
I'm getting ahead of myself, though. Lately, for mounted figures I have been actually epoxying the figure to the horse before priming them. And I begin my painting with the horses, finishing them completely before starting on the riders. So, I looked at my chart of horse colorings that I'd found online and picked out four to paint. The chart is kind of cartoonish, but that's not really that bad of a thing considering we are doing a miniature adaption of horse colors. I picked out a nice looking one I'd never done before - brownish "brindle" color (yep, like dogs!), a really nice red bay, a dappled, gray "Chubari Spots," and a lighter brown "Red Dun." I have found that I like how my horses come out so much better since I started actually researching horse colorings online!

    The brighter colored noble cavalry of the Carolingian army in their red & green coloring
For the riders, I went with brighter colors than I would normally do otherwise for Dark Ages figures. These are the hearthguard -- the wealthiest of the warriors -- and should look the part of upper class Franks. Two of them had cloaks, which I painted a Yew Green and faded Red. Monty and Rodge of Saga Thorsday fame talk a lot about a common coloring system running through their excellently painted armies. For irregular Dark Age folks, that's not something I have done. However, with the Carolingians, we see the beginnings of a more professional army. So, I have decided that red and green will be the common colors running through the warband. By no means will every figure be in those colors. Instead, I will just shoot for more reds and greens than the others. For example, one of these riders is in blue, two in green, and the third is the faded red.

I lined their tunics and cloaks in contrasting colors and gave them suitably Frankish looking shields, I felt. I keep telling myself that "next" army I will follow the crowd and give shield decals a try. I have never successfully been able to use them, though I admit the only time I tried was long ago and in 15mm. So, for now, I will continue to hand-paint my shield designs. When flocking the figures, I decided I would do another "common look" bit to tie the army together (as Monty and Rodge would say). I'm going to put flower tufts on the bases of this army. I actually decided that as I was finishing up when I thought the bases looked a little plain. I'd put rocks and pebbles on the Moorish cavalry bases, so I thought I'd give the Carolingians a bouquet of flowers or two!

Hope you guys like them -- feel free to leave comments below (or follow my blog - it has pitifully few followers...ha, ha!). Next up? A point of Frankish infantry warriors! I actually just put the base coat on their tunics tonight, so who knows? Maybe they will follow these guys onto the field relatively quickly.

Tuesday, February 23, 2021

Trying Out Solo Saga Raid Scenario

    Half of the Saxon Raider force who were feeling very lucky that day apparently!
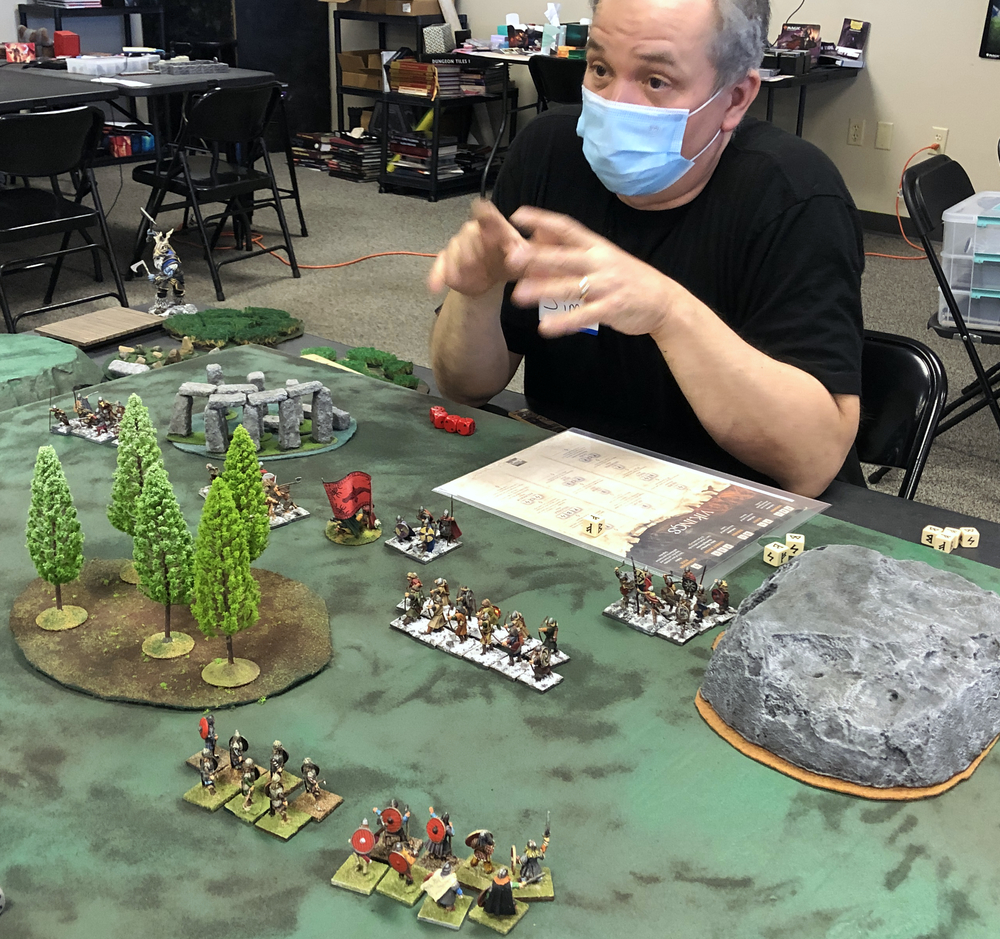
I am normally not the type of guy who plays solo wargames. Sure, I'll do a computer boardgame against the AI. But solo miniatures? I honestly don't think I've ever done that - mostly because I'm blessed with a regular gaming group. However, when Joe of the Northern Tempest Saga Podcast posted about a solo scenario for Saga, I was intrigued. 

My Britons' compact deployment to ensure all units were Galvanized & the Saxons opening rolls
As the defender, you are trying to turn back a raid. The raider's units use dice and the scenario rules to determine what they'll do. There is no battle board for the raiders. Instead, you roll a Saga die for each unit. A Common gives them one action, Uncommon two, and Rare two plus bonus attack dice when shooting or in melee. The defender (you) uses his battle board to the best of his ability.

    An omen of things to come - Saxon archers defy odds and hit 5 of 6 times and I save only 2 of 5
On the face of it, that sounds easy, right? You can make plans, but the raiders must follow a predetermined series of actions that you know will happen. However, Joe didn't make it THAT easy for you! The raiders have significant advantages in this game. Number one is there is no terrain on the smaller, 3'x3' board. They deploy 12" forward, so they're more than 1/3 of the way across already. The defender can't deploy within a Short of any edge, so no hiding on the base line, either. What else? All raiders clear one fatigue marker at the start of their turn for free. Anything else? Do they NEED anything else??

End of Saxon half of turn 1 -- they are already in my face and ready to continue their havoc
I decided to handicap myself even more, choosing to play a new army -- Britons from Age of Invasions. After my recent guest (Adrian) on the Saga Ohio podcast said they were way under powered, I sensed a challenge (and a chance to prove him wrong?). So, I was playing a new board. Also, the battle is a 4-point one rather than the usual 6 points. I had never played a 4-point battle. I did study the Briton board and thought I'd come up with a number of great defensive combinations for them. One problem, though. A number of the abilities on the Briton battle board require two dice, and also a Rare die. My 4-point warband would generate only four Saga dice. Wait a minute...does it sound like I am making excuses before giving my report??

  My 6 mounted hearthguard launch their spoiling charge on a Saxon warrior unit on my turn 1
My plan was to take advantage of the special "Galvanized" ability for the Britons. They are considered Galvanized when they are within Very Short of their Warlord. I also took advantage of the Companions rule, which lets two hearthguard join the warlord and form a Heroic unit. So, I chose two units of 8 foot warriors, 1 unit of 6 mounted hearthguard, and then the Warlord's Heroic unit. I deployed the two foot units side by side up front, with the mounted hearthguard and Warlord directly behind them. All were within Very Short of the Warlord. All Galvinized...all doomed, haha!

    The result of the charge - even though loaded up, I lose 3 troopers while the Saxons lose only five

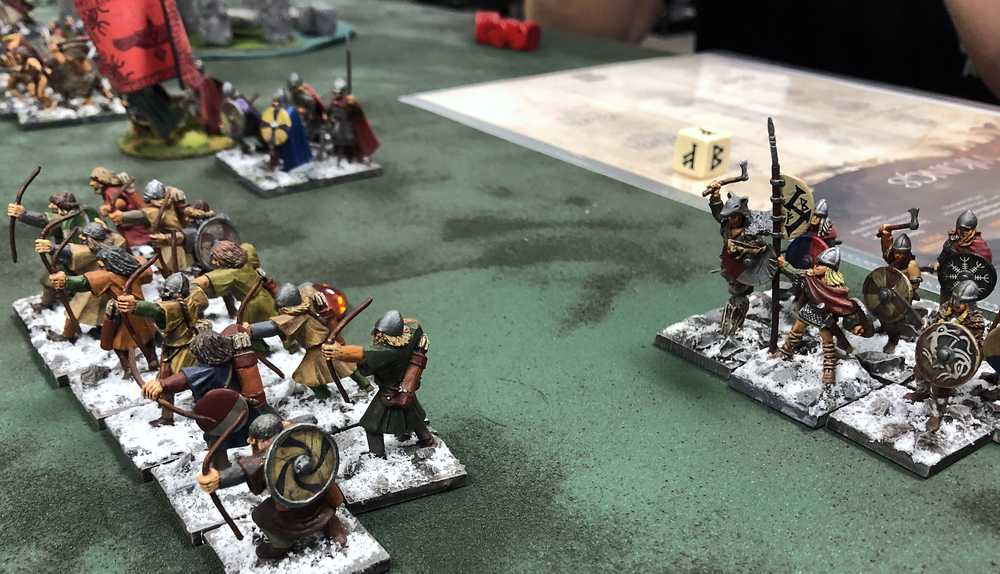
Two of the Saxon units (foot hearthguard and levy archers) rolled Uncommons, the rest rolled Commons. Raider units activate in order of largest unit first, then next largest, and so on. The levy were out of range (I was just outside of Long), so they advanced then fired at my right hand foot warrior unit. At this point, I should have realized something was about to go wrong - very wrong! The levy scored 5 out of 6 hits (needing a 4+ on 1d6). I failed 3 of 5 saves (needing the same 4+). First shot and one of my units is almost at half strength. Note that there is nothing you as defender can do defensively on turn one -- you haven't rolled any Saga dice. 

    Things look bleak for this Briton warrior unit, facing off against Saxon warriors and hearthguard!
Both warrior units advanced towards my block of Britons, followed by the hearthguard who went screaming across the table with two advances, ending close enough to my warriors to smell their breath! At this point, I realized this wasn't going to be easy. I rolled my four Saga dice and scored 3 Commons and 1 Uncommon. A terrible roll, really (again?). Too many of the good Briton abilities require either a Rare or Uncommon. I decided to use my mounted hearthguard to do a spoiling attack on the oncoming Saxon warrior unit on the right. I essentially gave them all four dice -- the Uncommon for Brittania! (which activates them to charge and gives them 3 bonus attack dice, plus makes them Galvanized for the melee). I also used two of the Commons for No Pity, which gave them +1 to attack, and meant they would discard one defense dice that saved a hit. Surely with 15 dice I would eliminate the 8 figures in the Saxon warrior unit? 

    The warriors close ranks against the second charge and will end Saxon turn 2 with one figure left
Once again, the Saxons were on fire with their die rolling, and mine was terrible. They lost only five figures while I lost three! The fourth die on my board was to pull them back after the combat, which I did, stunned that one of my most powerful units was brought down to half strength while barely making an inferior unit slightly less than half. Uh-oh, this wasn't going to be good! The Warlord used his We Obey order to send the shot-up warrior unit away from the center and the impending charge of the Saxon hearthguard. The Warlord's Heroic unit also pulled back so that they couldn't be hit by less than two moves. That was it for my first turn. I was down 3 hearthguard and 3 warriors, and the Saxons had lost only 5 warriors.

    A ray of sunshine in dice luck when 3 warriors drive off the Saxon warlord with no losses!
Turn 2 began equally well for the Saxon raiders. The levy shot again at the unit they'd savaged last turn, causing two more casualties. The full strength warrior unit had rolled an Uncommon, so they raced forward and slammed into my full strength warrior unit. Since the battle turned on Survival Points, I decided to close ranks. It didn't matter. Once again, the Saxons rolled great and the Britons poorly. We lost four figures (I failed 4 out of 5 of my 50/50 save chances -- 4+ when closing ranks), and caused no casualties. Then the Saxon hearthguard followed up and slammed into the remaining four Briton warriors. We closed ranks again, and were left with one figure left, once again causing no casualties. Um...Joe? This was not going well!

    After resting up, the mounted troopers charge back into the fray to pick off a lone Saxon warrior
And then the dice gods sent me a ray of light and hope. The Saxon warlord charged the arrow-riddled Briton warrior unit. Once again, we closed ranks. It has to work sooner or later, right? It did! The Saxon warlord hit with only two of his eight dice (we missed, of course). We actually saved both, and he recoiled a Short distance away. What?? A paltry, three warriors stood up to the Saxon warlord? They weren't out of the woods, yet, though. The Saxon unit that had been attacked by my mounted troopers of course had rolled an Uncommon, allowing them to charge my Britons in a three-on-three, warrior fight. The dice continued to wink at me, and we scored two hits to their one, pushing these Saxons back, as well. It was the end of Saxon turn 2, and we were down a total of 12 warriors and 3 hearthguard. They were down 6 warriors. I would need a lot more than a nudge, nudge, wink, wink from the dice gods if the Britons were going to prevail!

    Towards the end game - I have one mounted hearthguard and one warrior left
For my second turn, I was down to just 2 Saga dice. I rolled a Rare and a Common. I was very tempted to reroll my Rare to give me a third dice. However, one of the fiercest attacking threats on the Briton board is the Warlord. I placed the Rare on Pendragon, which allows the Warlord to reroll all 1's or 2's in melee. Then the common went on Dux Bellorum, which for a single die allows the Warlord to activate as many times as he wants till he's Exhausted. I figured if the troops weren't doing the job, it was up to the Warlord to inspire them.

I charged the Saxon hearthguard first. Even after my rerolls, I had four misses. The Saxons were unable to save enough times, though, and their unit was eliminated. Woo-hoo! This caused a fatigue on the nearby Saxon warrior unit, giving it its second fatigue. I had lost one of my hearthguard from my heroic unit, and had a fatigue from the combat. Still, I slammed into the Saxon warriors next. I had used one of their fatigue to raise my Armor to 6, which SHOULD mean I would take, at most, one or two hits. What did the Saxon bastards roll? Four sixes! Although I whittled them down to one figure, my remaining hearthguard died and my Warlord was left hanging there, Exhausted. I had planned on NOT being Exhausted, and activating again to move close enough to my double-fatigued mounted hearthguard and Rest them. No dice, though...I was in a bad place for turn 3 with my two toughest units loaded up with fatigue!

Apparently, I was so depressed with how things were going I forgot to take pictures of Saxon turn 3. As expected, my warlord was charged by the Saxon warriors and I was unable to make my saves. The levy shot and destroyed my small warrior unit, but little else happened. On my turn 3, I was down to a single Saga die (my 3 mounted hearthguard). I decided to rest them and hope they could do more again on turn 4. The dice gods tried to say they were playing fair when the Saxon levy followed up and unleashed a volley at my remaining warrior guy. I made all three saves.

On my turn 4, my mounted hearthguard charged the single Saxon warrior and killed him. This put a fatigue on their warlord, who we also charged. The Saxon warlord killed two of the mounted troopers and easily survived, driving them off. At this point, it was all over but the shouting. The archers finally killed my last warrior, and my warband ended the game with a single mounted hearthguard. I had whittled the Saxons down to their warlord and the 12 levy archers. So, after an abysmal start, I guess that is some compensation. The Saxons won, 6-1, on Survival Points.

What did I think? Joe has designed a fierce Raider force that will be quite a challenge to defeat. I wouldn't mind taking them on with an army that I am more practiced at...maybe even my Moors, next. To analyze it a bit, I think any battle board that depends on two Saga dice abilities is going to struggle in a 4-point game. I found that I definitely don't like 4-point games as well as 6-pointers! I think that in future games I will not deploy in a solid block and try to stretch all of my units back as far as I can. That way, maybe I can have turn one to build up some Saga dice on my board. I'm looking forward to trying again. Thanks, Joe -- I like how you made this tough and no cake walk! By the way, this is the first game of Saga that I have lost in awhile. So, congratulations on commanding these Raiders in spirit for your victory!