Monday, December 2, 2013

Dakota Smith's Oriental Adventure, Part 2 - Missing at the Mission

Western Archeologist Briefing
Near the Ta-bo Mountains, French Indochina
November 30, 1930

    Despite the failure to get your hands on Brother Virigi’s journal, you came away from the Portuguese monastery on Macau with solid information. The monk had left a few weeks ago for the monastery’s mission on the mainland in French Indochina. The brother monks had set up an outpost in the foothills of the Ta-bo Mountains to preach to the primitive tribes living there. Villagers you speak to along the way there always spit when saying the name of the mountains, so you suspect an evil story lurks in this area’s history.
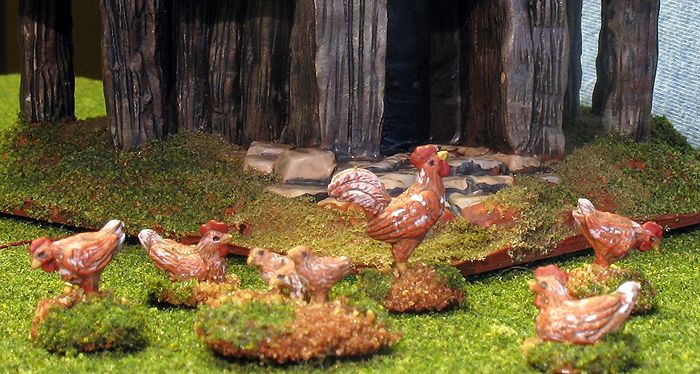
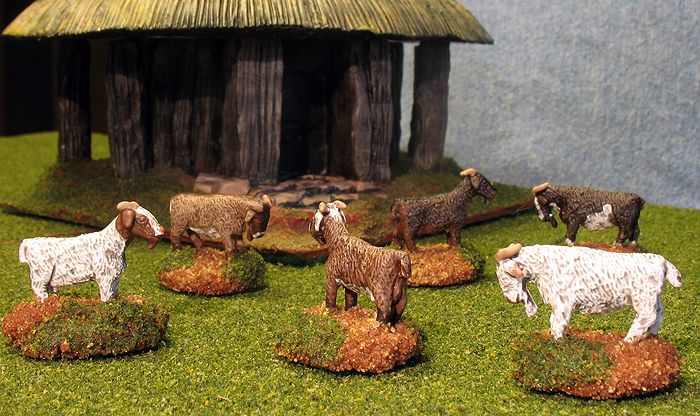
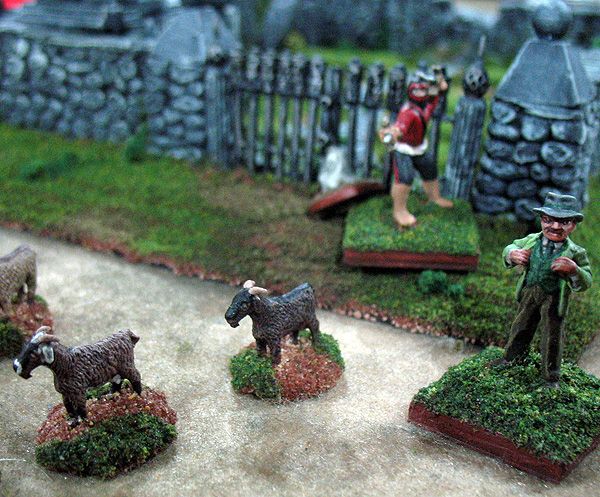
    It takes about a week to trek through jungle and cultivated plain before you begin to climb into the foothills. Once or twice, you see signs that the other archeological teams you encountered at the monastery may be on the same trail. Villages and hamlets are becoming more and more scarce, though. What’s more, in your last several days of travel, all the villages you pass through are deserted. Chickens and goats wander untended, making you suspect the villagers left in a hurry. There is a smell of smoke in the air as you finally come to the mission station. A grayish haze hangs over the area, as if a fire has been smoldering for days...


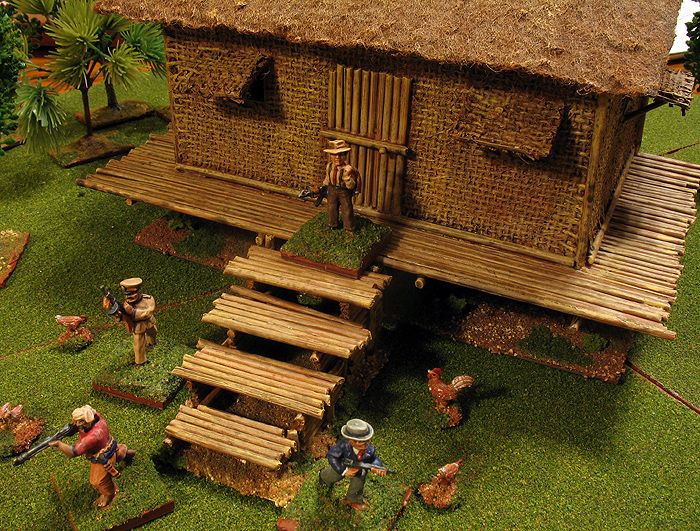
The second scenario saw Dakota Smith and his rivals discovering Brother Virigi's mission station on the mainland raided, smoking, and with no signs of life...


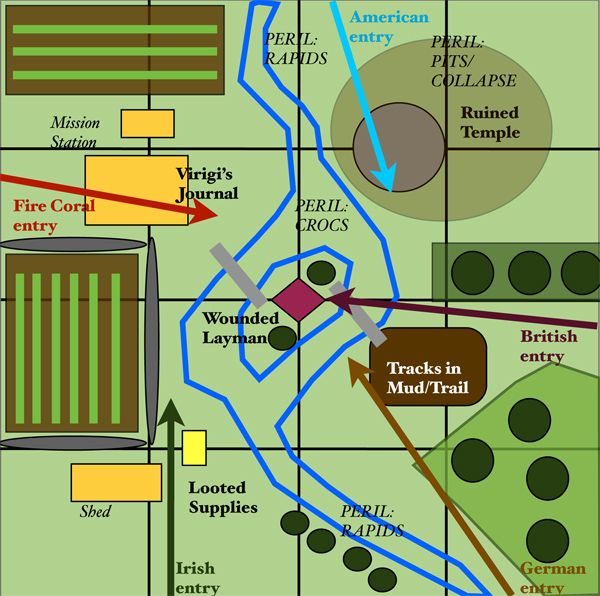
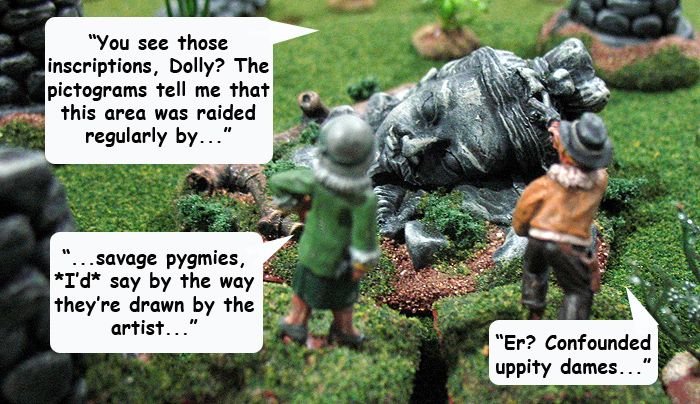
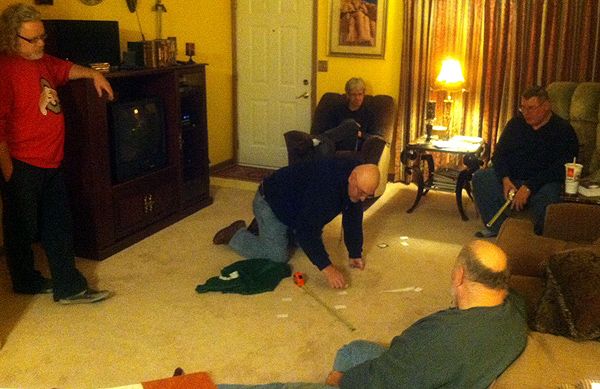
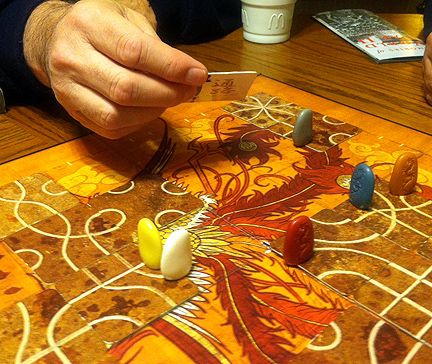
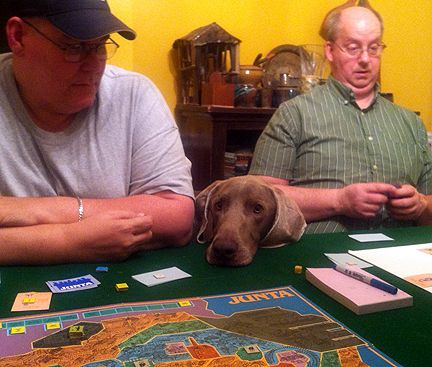
So, after our first game of Pulp Alley, I was trying some changes to adapt the game to the large number of players. Once again, we had five players and myself for our Sunday evening game. This time, though, each player had only 3 characters under his control -- a leader, sidekick, and ally. That is, except for the Order of the Fire Coral, who had sidekicks for all three characters. I shrank the board to 4'x4', and placed the 4 minor plot points 12" from each edge. The major plot point was in the center of the table. The major plot point was a badly-wounded survivor of the raid that had apparently wiped out Brother Virigi's mission station. The minor ones were clues to the the identity of the attackers, including inscriptions on the walls of a ruined temple, the boxes of supplies looted by the attackers, a muddy patch with lots of footprints, and Brother Virigi's new journal.

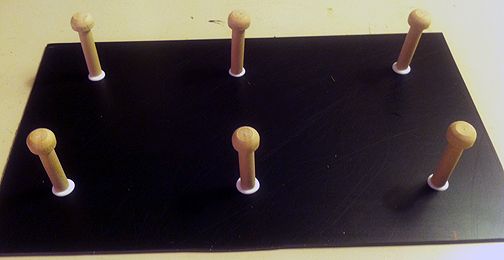
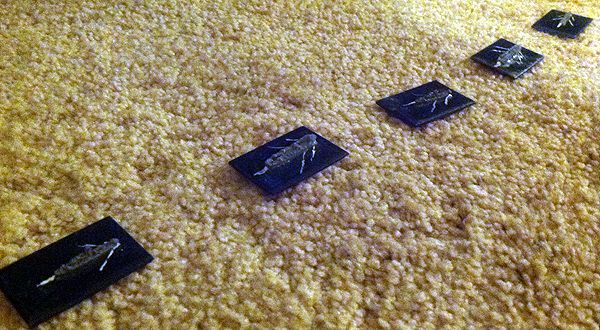
A map showing the board as I initially planned it -- some changes were made when I set it up
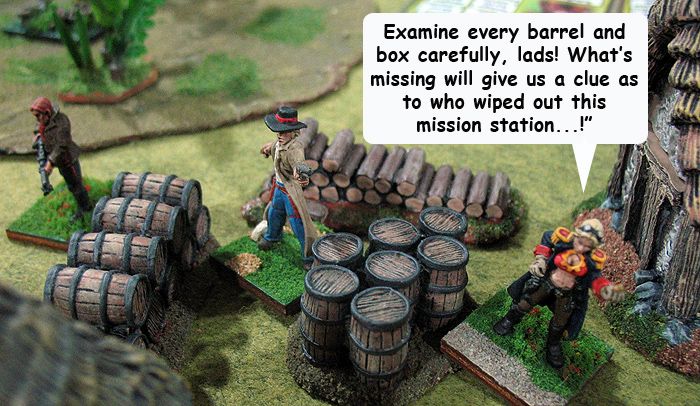
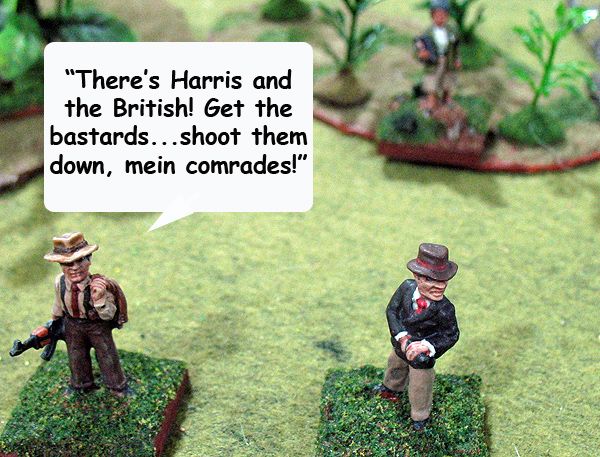
This game saw a new archeological faction take the field. Mike S had created his own Irish archeological team, and switched over to playing them. Allen, who'd been absent our first game, took over capably in playing Dakota Smith. The French player was absent, so they were obviously held up by bureaucratic duties, while the other Europeans skirted those. Each team made a beeline for the plot point nearest where they'd set up. Dakota Smith, accompanied by Dolly Flanders and Harold Fortwine, hoofed it up the hill to the ruined temple to examine it. Harold stumbled a couple times in the perilous footing -- with vegetation concealing pits and crumbling floors. His arch-nemesis, Von Jaeger, came in on the opposite side of the board and headed for the muddy patch of ground that promised to show good footprints of (and possibly identify) the attackers. The Irish came in not far from them, and advanced cautiously towards the looted supplies, hoping to gain a clue as to who the attackers were by what they took and what they left behind. Harris McLeod and the British hurried towards the swampy patch of ground where the raid's lone survivor lay hidden. And finally, Opay, Tat-Ko, and Jaz Minh infiltrated through the mission huts. Tat-ko searched the monk's quarters, while the other two stealthily closed in on the Europeans.

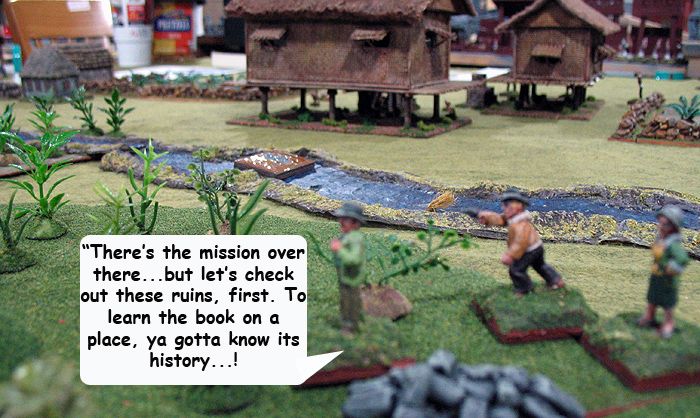
Dakota Smith passes up on checking out the village to instead examine the temple ruins at the top of the scrubby hill, hoping to get some clues about the history of the area

The steely-eyed Von Jaeger notices something odd left by the footprints in the mud
The mystery of the raided mission station distracts Lady Shannon -- always ready for adventure -- from her hunt for a Buddhist tomb
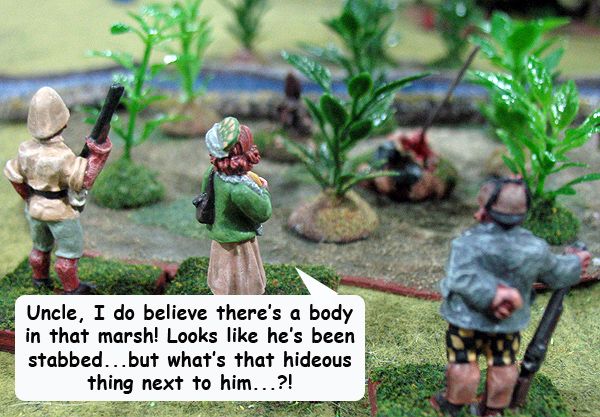
The British come upon a grisly discovery in the marshy patch in the center of the table. They are stunned to find the horribly stabbed Chinese man still alive, but even more astonished by the stunted, misshapen body of what wounded him...!
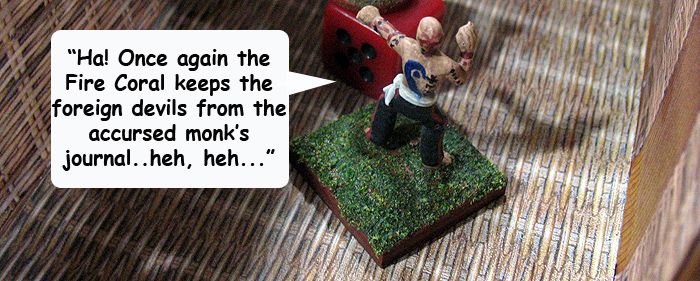
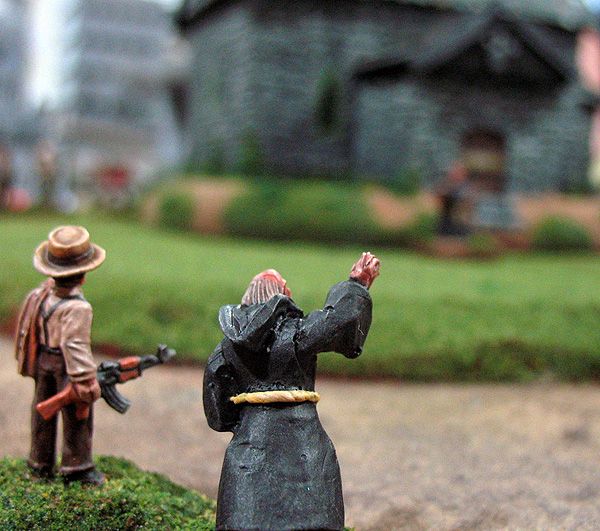
Once again, the mission of Opay and other members of the Order of the Fire Coral is to frustrate that of the westerners, and keep hidden the mystery that Brother Virigi must have stumbled upon...
All leagues except the Fire Coral ran afoul of an occasional perilous area, but no lasting damage was done to any. This time, I put markers on the table for the perilous areas -- venomous snakes in the jungle patches, crocodiles in the river, feral chickens near the huts (just kidding, but there were some angry, neglected water buffalo that the adventurers gave a wide berth to...!). To be honest, this is probably an area all the players need to improve upon. We still need to learn how how to best play Fortune cards to the maximum effect against their opponents -- especially when characters enter perilous areas. Last game, Tom was particularly effective doing this. However, everyone struggled this game to make much offensive use of them against their rival leagues.

The perilous areas on the board slowed down the occasional character, and even temporarily downed Fraulein Blucher (German ally). However, she recovered quickly. All hands were available at the bullets began to fly, shortly...
By turn three, all five plot points were in the hands of the characters. There was a humorous moment when the players turned to me and asked, "Is the scenario over?" Once I explained that you could take away plot points from other characters, and that they were worth more experience, they quickly caught on that their next objective was each other!

Dakota was a bit miffed that Dolly sauntered in and finished off his deciphering of the minor plot point. This didn't prevent him from taking a quick pencil and paper rubbing of the temple inscriptions...
Now, the bullets began to fly (there had actually been a "Parley" card played on Turn 3). Predictably, the bloodthirsty Von Jaeger and his Nazi thugs started it. Otto Tulmann wounded Harris McLeod, who managed to dodge the follow up gunfire of Von Jaeger himself. The next turn, Otto poured more fire into Harris, wounding him further. Steve played a "Stay Down" card to keep Harris from recovering. The portly hunter quickly shuffled away, leaving Major Speke-Eastman and his niece Clara to deal with the vicious Nazis.
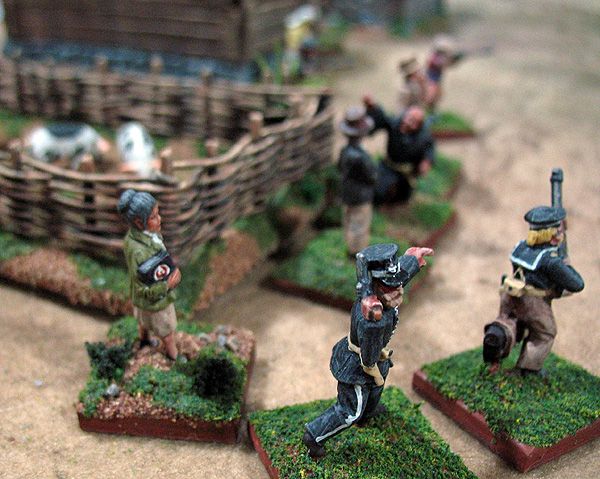
Guns blazing, the Germans chase after the British and the major plot point
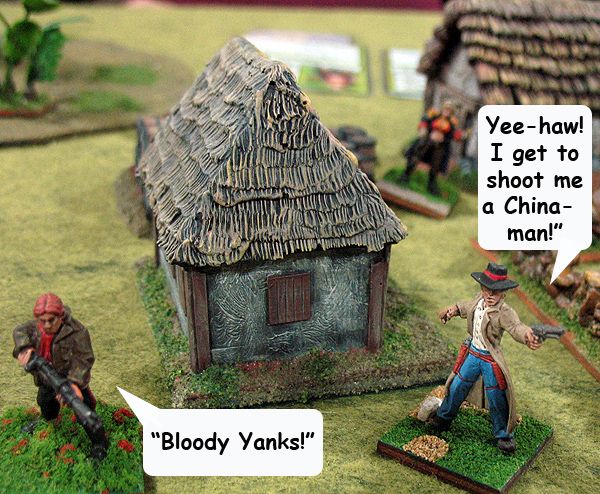
Lady Shannon's Irish also showed a tendency to shoot first and ask questions later. Her sidekick Ryan and her cowboy ally, Tex, whooped as they blazed away at Jaz Minh and Opay. Meanwhile, inside the hut, Tat-Ko located Brother Virigi's new journal and hid it inside his robe.

Ryan O'Shea and Tex open fire on the Order of the Fire Coral
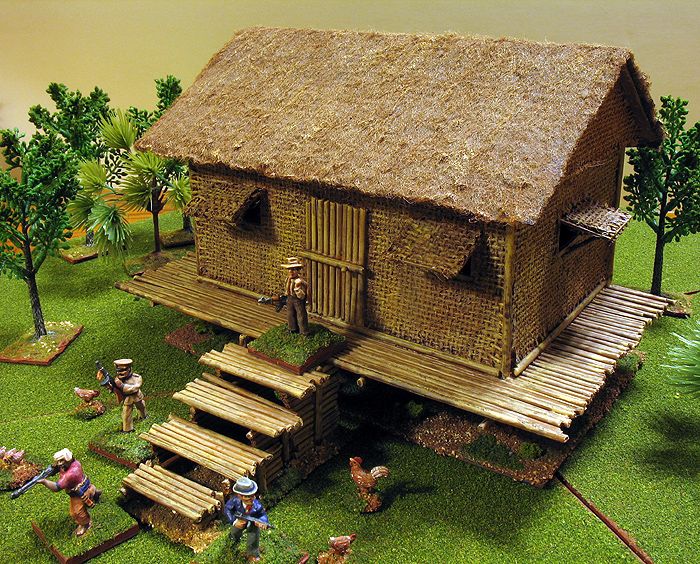
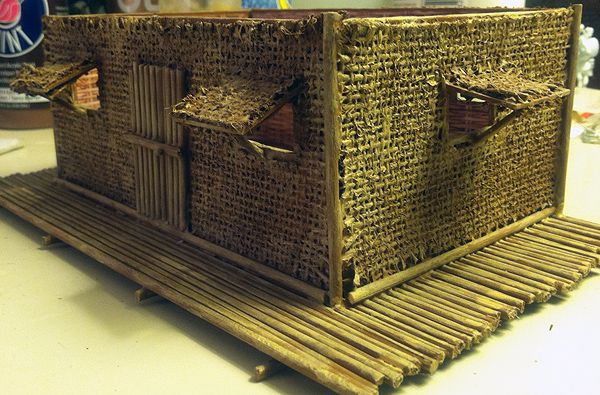
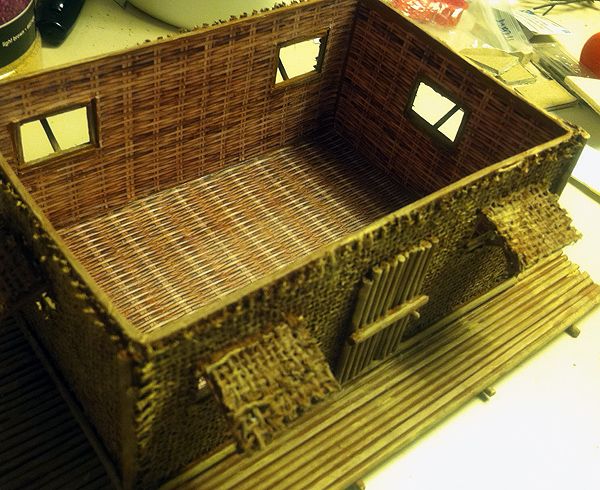
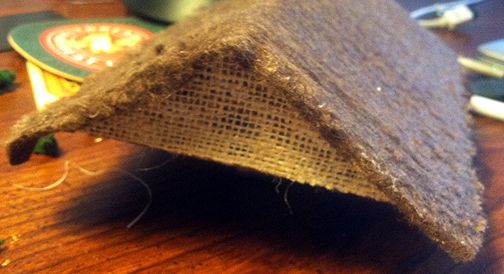
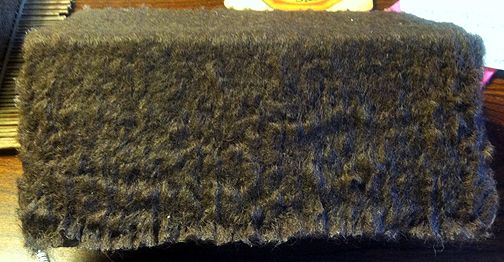
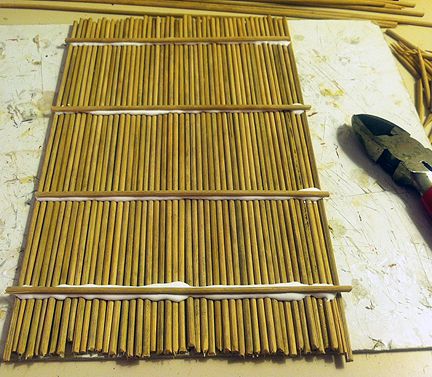
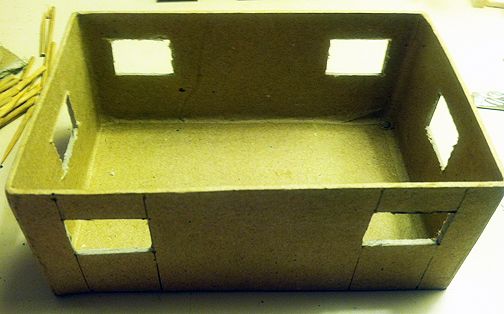
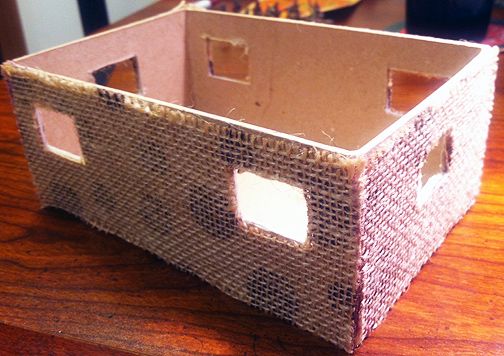
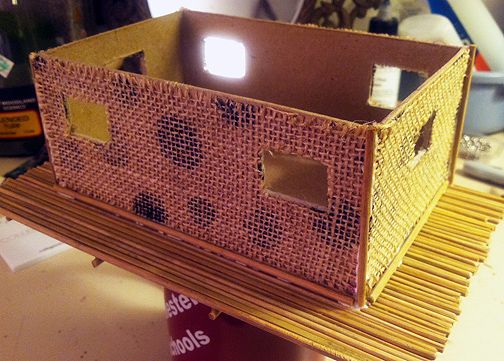
Inside the jungle huts which composed the Portuguese mission (and newly-constructed for this scenario), Tat-Ko discovers the missing Brother Virigi's new journal and swipes it
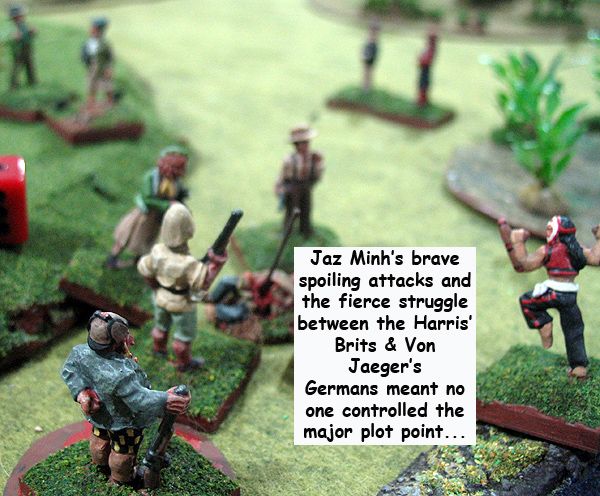
Drawn by the desire to capture the wounded Chinese survivor of the raid, all the teams except the Irish closed in on the center. Fraulein Blucher boldly charged up the hill, fists flying, at an astonished Dakota Smith, who had seized the opportunity to open fire at the hated Nazis. Harold Fortwine, an ex-boxer in his undergrad days, waded in and belted the stout, gray-haired matron to the ground, though. Harris McLeod recovered his nerve enough to turn and let loose a fusilade at Von Jaeger, who returned fire. Both were wounded. Major Speke-Eastman also fired off a flurry of shots, further wounding the German. Jaz Minh and Opay avoided crocodiles to dash across the river. As the Irish continued to take pot shots at the martial artists, Jaz Minh skipped back across the river and kicked Ryan O'Shea's gun from his hand.

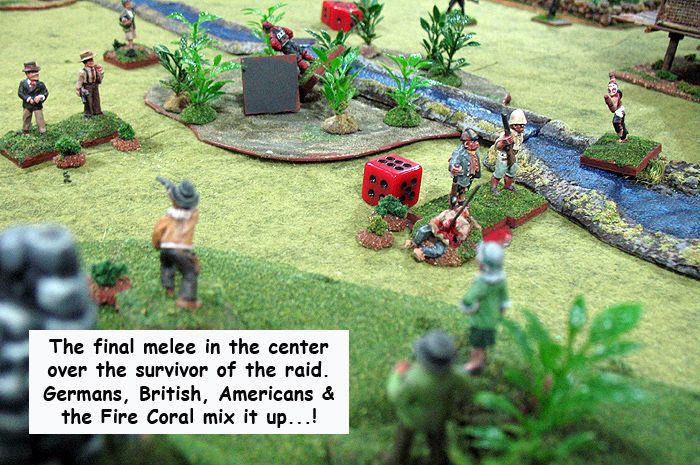
The melee in the center is furious, and the Germans are in the thick of it. All teams are eventually drawn into the brawl, though.
A couple of the players had the foresight to send their plot points off towards the board edge, in the hands of one of their characters, though. Dakota handed the temple wall rubbing off to Dolly. The socialite needed little encouragement to dash off down the hill and away from the gunfire. Tat-Ko sprinted for the edge of the board, but his movement drew the attention of Tex. As his companion Ryan knocked down Jaz Minh, Tex drew a bead on the fleeing martial artist. His shot rang true and Tat-Ko fell to the ground, the journal flung free of his robes.

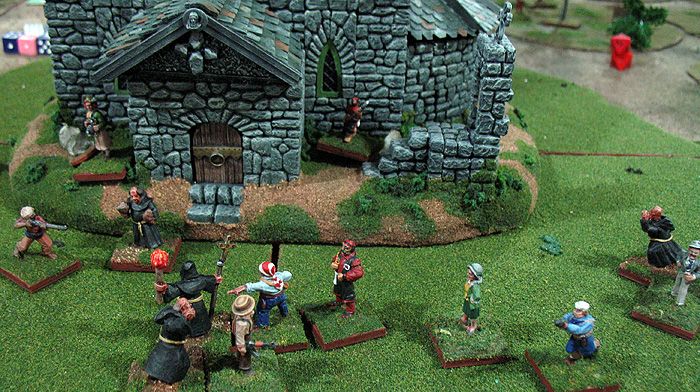
Bullets and fists fly as the characters all compete to drag off the howling, wounded survivor of the raid. They know he had key information on how to track down the attackers, and hopefully, rescue Brother Virigi.
The sixth turn drew to a close with the major plot point having been wrested from the British, but under no one's control. The grisly tug-of-war with the horribly wounded survivor saw Clara McLeod dig her heels into the ground and prevent Von Jaeger from carrying the man off. It ended the game under no one's control. The Fire Coral also lost possession of the journal to a long-range shot which put Tat-Ko down and out. The Americans, Germans, and Irish all retained possession of one minor plot point, so came out on top.

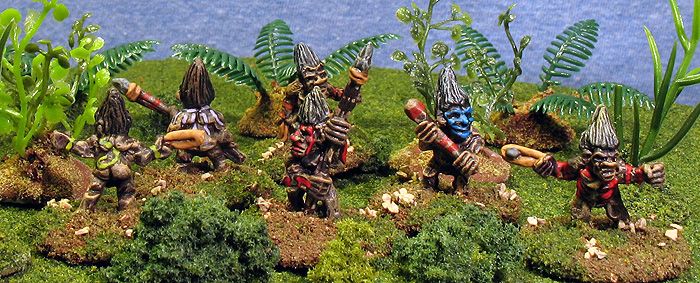
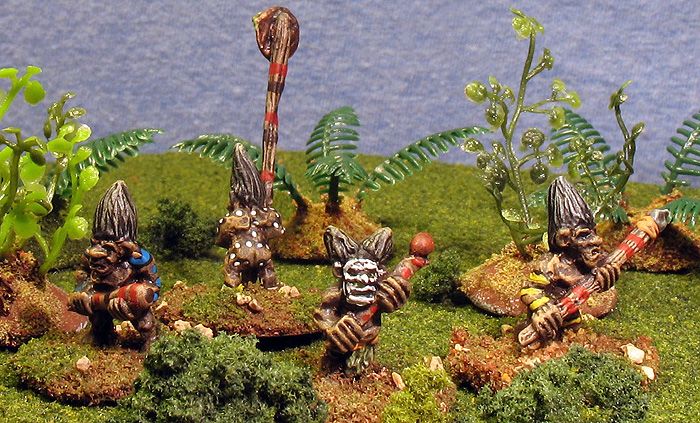
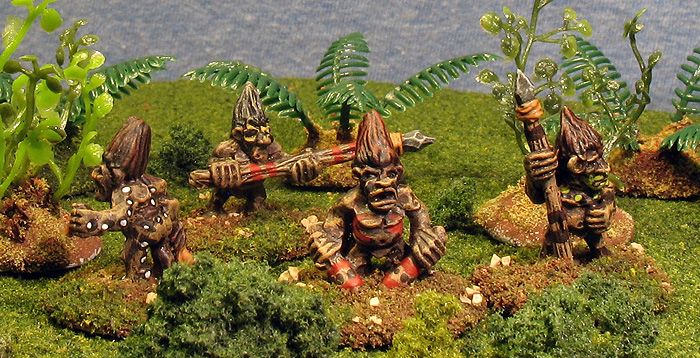
As the leagues retreated from the bloody fray to bandage their wounds and take stock of the situation, they knew they all had one piece of information. The monks of the Portuguese mission station had been kidnapped by a tribe of savage pygmies known as the Ta-bo. The wounded survivor's words still echoed in their ears, "Save the brothers, please, masters! The Ta-bo are cannibals...!" If they were ever going to find the location of the lost city from Brother Virigi, they'd first have to rescue him from pygmy cannibals of the South Seas...!

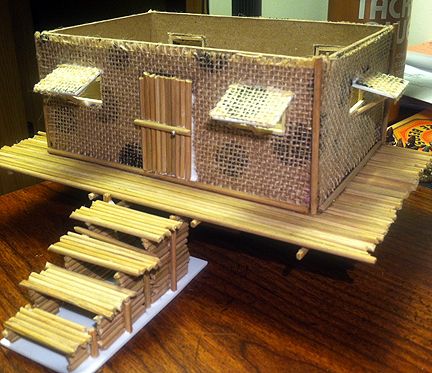
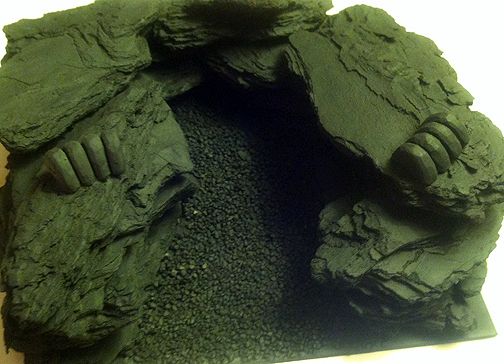
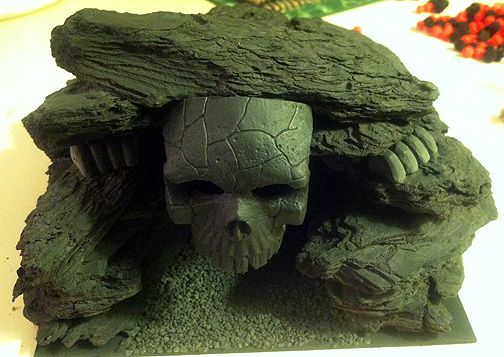
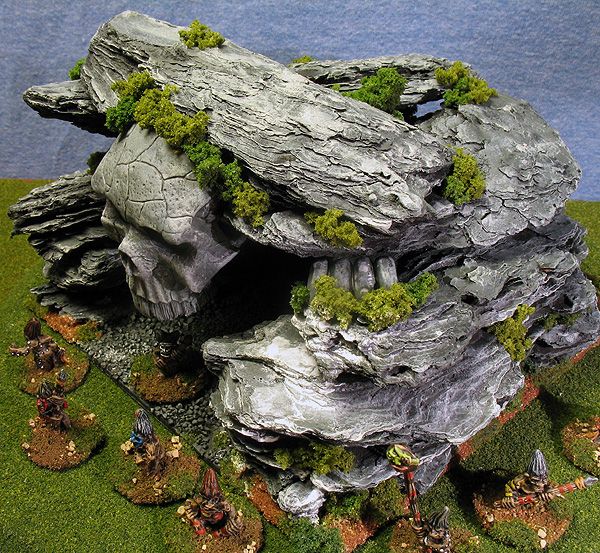
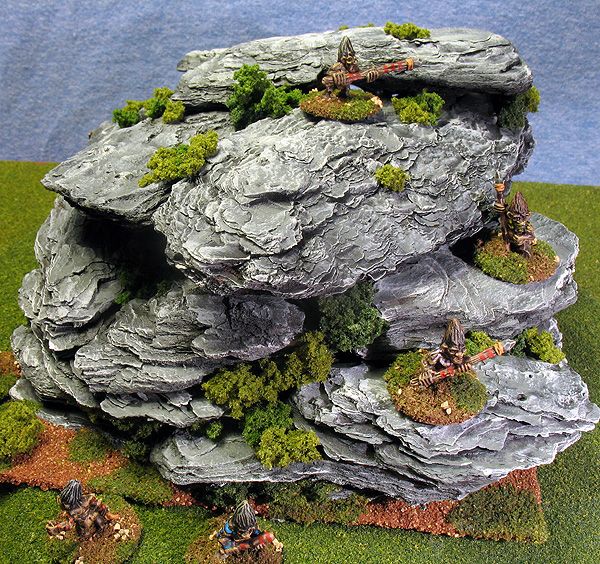
Everyone seemed to enjoy the game, and got into the fact that they were bitter rivals eventually. Pulp Alley is still a new rules set for our group, so we are still learning tactics and strategy. I am still learning at how to incorporate the perilous areas into the game, and keep the storyline of them coherent, pulpy, and well, as believable as a rousing pulpy yarn should be...! I'm sure I'll get better at the storytelling aspect of the game as we play more. The guys are helping out, though, and suggesting reasons for outcomes that make good "B movie" sense. It'll probably be January before I run Scenario 3 (The Search for Skull Cave), as our Sunday night schedule is filling up. That's fine, though, as I have lots of jungle pieces to create. Plus, I have a hankering to make a rope bridge, and what can be more "Indiana Jones"-like than that...?


Thursday, November 28, 2013

Jungle Hut -- Southeast Asian building, Part 3

The jungle hut completed...and overrun by a collection of surly, 28mm Pulp characters. The platform is permanently attached to the base with stilts. The roof comes off, though, of course.
I left off in the last post with the jungle hut all painted and washed, and the roof complete. All that was really left was to create the stilt base. I cut another rectangle of black styrene to the appropriate size. Things were getting trickier here than you'd think, though. I wanted the stairs to slide right under the platform so the heights of the two had to be just right. I measured and double-checked. It looked like it would be a perfect fit.

I figured these flat-headed wooden pins would be perfect for the stilts of my jungle hut. The rounded flat part at the top would be hidden by the platform, but would be wide enough to give a good grip and hold tight.
I Tacky glued 6 wooden flat-heated pins that I bought in a bag at Hobby Lobby to the styrene base. Although they have a flat surface on the top and bottom, I thought I might need to use some blue tack to hold them upright. As it turned out, Tacky glue is thick enough that this wasn't necessary. Next, I flocked the base completely. I did not want to have to be reaching my brush underneath the platform once it was glued on. Okay, I lied. I glued the platform on top of the pins before I put my final layer of 50/50 white glue and water on it. I got impatient and really wanted to see how it would look all put together!

A close up of the front of the jungle hut. This will doubtless be the scene of many Pulp encounters in the jungles of southeast Asia!
Although you can't see them in the picture, I put a lot of clump foliage on the base to represent undergrowth sprouting up beneath the platform. It looks nicely, and as you can see, I did measure correctly (or get lucky), and the stairs slide neatly underneath the platform.

All in all, I am incredibly happy with how this turned out. To me, it really looks like a building you'd find in a jungle clearing.

Monday, November 25, 2013

Jungle Hut -- Southeast Asian building, Part 2

Stage two of the Jungle Hut build began with paint...lots of it! As I mentioned in the first article, I made a mistake when I did not paint the paper mache box my base color before I glued on the burlap. I paid the price for it during this stage, and it actually took two coats before I was satisfied you couldn't see bare cardboard inside the tiny squares inside the weave of the burlap. My base color was a new one I'd purchased for it called "Raw Siena," a cheap craft paint from Ceramcoat. I would say 80% of the paints I use are from Ceramcoat. I just don't see the point of paying hobby paint prices. A few specialty paints -- like Steel and Bronze metallic -- are from Iron Wind. Most of my "dry brush" colors are Howard Hues, because they are thicker. My "rank and file" paints, though, are Ceramcoat that I buy at Hobby Lobby or Michaels.

The hut after a Raw Siena base coat and Khaki dry brush. This is before the Dun highlight and the black ink wash.
For some reason, I took fewer pictures as the building progressed. I didn't take any of it with just its base coat. It wasn't until after I'd done the Khaki dry brush that I took the next shot. At that point, I was wondering if I should do a further highlight using Iron Wind Metals "Dun" -- a nice dull yellow color that dry brushes well. I decided what the heck, and went ahead and put it in the areas that would be sunlit. I liked how it looked. Then I debated whether to do a black ink wash over it. The hut looked pretty good as it was. If the ink wash messed it up, I might be a bit peeved. What's more, I might even lose my temper and do something rash. Which reminds me of my favorite story of a gamer losing his temper after a painting disaster. A friend of mine had constructed a very fiddly 1/72 scale biplane model, lovingly painted it with interesting patterns, and then spray sealed it. Yep. The sealant fogged the paint job, and none of the normal remedies fixed it. Well, that plane went on its first and only flight, at a rapid pace, into the nearest wall...!

I'm happy to say the Jungle Hut did not become a Jungle Hut ruin. I really like how the ink wash made it look more realistic and three dimensional. The burlap looked less like fabric glued down and more like an actual hut made out of woven material. So, it was a success. And I really liked how the ink wash made the bamboo platform look.

The printed image of wicker flooring and walls turned out very nice...so nice my friends asked me why do I even bother texturing the walls. I should just print the whole thing. "Thanks, guys..."
 Next up (not really, I'm a bit out of order now) was the interior. Once again, I went to the CG Textures website and found high quality images that would work for the interior. I picked out a few woven patterns and resized them in photoshop. I even found a door and resized and colored it and placed it on one of the wicker walls images. I printed them out on my color laser printer and said, "Wow!" The patterns looked really sharp -- even better than my 3D burlap prior to the ink wash! To size them up right, I took a sheet of printer paper and trimmed it to the size of the interior walls (including spacing the windows) -- one each for the long and short walls. I then trimmed the printed patterns to the right size with an Xacto knife. I had previously painted the interior the same Raw Siena when I'd base-coated the outside. Now, I used an old brush to paint the surface where the printed image would go with white glue and positioned the image over it. I did each of the four walls, and then the floor. Once again, I let out another "Wow!" I am really liking this technique of using printed images for the interiors!
The multiple layers of the roof: black styrene base, foam core eaves (here covered by the burlap already), cardstock roof base, and Teddy Bear fur.
Now it was time for the roof. I cut a piece of black styrene so that it would overlap the roof by about 1/2" on all sides. I cut the triangular-shaped eaves out of black foamcore and glued them upright with Tacky glue. To keep them straight, a giant 28mm ape held them so they were perpendicular. Thanks, Kong! I measured the length of the eaves and cut a stiff piece of cardstock for the roof base, sizing it to overlap by about 1/2" all the way around. I folded it and then tacky glued it to the eaves, turning it upside down and putting a weight on it so that it pressed it firmly against the eaves.
I was very proud of myself when I remembered to paint the triangular eaves BEFORE I glued on the burlap...proving no matter how old the dog, tedious work covering up for a mistake can teach him a lesson...!
For the thatch material I'd decided to go with "Teddy Bear fur" -- which you can get in a roll from Hobby Lobby. Note: No actual Teddy Bears were harmed in the making of this Jungle Hut. This was synthetic fur. I've been told that synthetic Teddy Bears feel no pain. Anyway, I measured and cut the chocolate brown fur so it would overlap the roof base. I used Tacky glue to affix it to the roof. Once it was dry, I mixed up a batch of white glue and water 50/50. I painted the fur with this mixture, then combed it from the apex of the roof to the ends, which gave it a nice "rowed" looked. After waiting a couple hours for it to dry, it became apparent there wasn't enough glue to stiffen the fur. So, I painted on pretty much straight white glue, which mixed naturally with the soaked fibers. I combed it again, and then let it sit overnight.
The fur before dry brushing but after it has been painted with white glue. You can see the vertical pattern made by combing...well, *I* can (he says, justifying do the work).
The thatch was indeed hardened, and took two coats of dry brushing easily. I used the same Raw Siena for my first coat and followed it up sparingly with Khaki. I really like how the thatch turned out. The Teddy Bear fur was a definite success. One of my friends said it is the best model thatch he's ever seen. I am not sure if I would got that far, but it is the best model thatch I've done, in my opinion. I cut a rectangle of black foamcore to glue to the underside so it would fit securely inside the walls of the hut and not slide off.

At this stage, all that is left is the flocking and the stilt base! I'll finish that off in part three.

Sunday, November 24, 2013

A Sinking Tribute to PT 109 and JFK

Some would say we're getting a little old for crawling around on the floor doing WW II Naval miniatures! Here Mike S closes with the Japanese flotillas, while Allen, Joel, Keith and Steve look on.
 So, Allen had been wanting to run a World War II General Quarters game with American PT boats against Japanese destroyers. Mike S, Joel, and I were all volunteered to follow in John F. Kennedy's shoes and face down a night convoy of Japanese destroyers and barges. Each of us was given a force of 4 PT boats and we waited in the dark waters for the Japanese fleet to sail by us, when we would attack.

We'd never played theses rules for such a small action, though. General Quarters is more designed for fleet actions with the bigger ships. How would it work for such small scale engagements? Well, according to us would-be JFKs, not very well! The rules' move/countermove system allowed the Japanese destroyers to ram us easily and at will, slicing through 1-2 boats every turn we were close enough. Our torpedoes had a range of only 12" and they had a movement of 13", which meant they could virtually outrun our torpedoes. Never mind the fact that I have always stunk at this aspect of the rules. With GQ, you guess whether your torpedo target will maintain course, go to port, starboard, or reverse course. To get within range of them to launch torpedoes, we had to weather the storm of their gunnery (and more dangerous) their ramming.

Our target: A Japanese supply convoy headed towards Guadalcanal (1/2400 scale miniatures)
 The game ended with all three American flotillas destroyed or fleeing off table, and not causing a single point of damage to the Japanese or their barges. Needless to say, we need a little re-working on this scenario before it is tried again! I pointed out the worst part is the PT boats are sitting ducks under the move/countermove system. Either the turn they close with the destroyers or the turn following, they will move first. That means the Japanese can slice them in two fairly easily.

Tsuro: The Game of the Path is a quick, fun 15-minute board game
 Since the game ended so quickly, we broke out the boardgame Tsuro. This tile-laying path game is always a fun, quick play. Keith and Steve V (who had played the Japanese in the naval miniatures game), ruled at this game as well. It was a night to be Asian, we decided! Steve won the first game and then he and Keith tied in the second game.

Next week, we will do the second scenario of my Pulp skirmish games. I'm busy finishing up the terrain for this game, as you can see on my post about my Jungle Hut.

Jungle Hut -- Southeast Asian building, Part 1

I've had an Airfix 1/72 scale plastic "Jungle Outpost" for a number of years, and been tempted several times to build it. Every time I pull it out, I look at it and think, "Too small." Then a year goes by and I pull it out again, hoping it has grown, I guess. No matter how long I store it away in the closet, though, it never comes out big enough to use for 28mm figures. Maybe I should sit out where it can get some sunlight...
The inspiration -- a too-smail piece of 1/72 scale terrain
Seriously, I've been telling myself that as soon as I find a likely material to simulate the wicker walls I'll just go ahead and scratch-build a version of it. I love the way it is on stilts and has a platform, thatch roof, and so on. It is intended for the Vietnam War, but is a fairly timeless style of building. I was at Michaels Craft store the other day, picking up plastic plants to use a jungle pieces. So, I decided to cruise the aisles hoping for inspiration. I spotted a roll of burlap and immediately went into "Hmmm..." mode. The weave was too wide, so I kept looking until I found some with a tighter weave. I picked it up, and then swung by the paper mache boxes that I used for the Southeast Asian temples. They had a pack of 3 of different sizes for less than $2 each, so I grabbed them, too.

The bamboo platform, made from bamboo skewers cut to length quickly with a wire cutter
 Once home, I began to pull out different materials I'd need from my storage. I had three packs of bamboo skewers that I knew would come in handy. I mean, what better material for a jungle hut than bamboo? In particular, it would make a great platform for the hut to sit on. So, that was the first step. I decided to be smart and build just one hut on the first go-around so I could see what works and what doesn't. I measured the middle sized building, 5"x7". I wanted at least an inch of platform space as a balcony. So, I grabbed a pack of bamboo skewers, the wire cutters, and began trimming them up to size. Actually, there was a strange, blackish powder all over the skewers, so I had to wash them first and let the dry.

Once I had the right amount, I bunched them tightly together and drew four lines of Tacky glue onto them. I placed another bamboo piece across them atop each Tacky glue line to bind them together. I was surprised they didn't shift much. Step one, the platform, was a snap to create. I left it on the desk in the spare bedroom to dry.

The framework for the building -- a paper mache box from Michaels with holes cut out for the windows
 Next, I grabbed the box and a ruler and measured out where I wanted the windows. I know it'd be easier to make if I made them closed. Then all I would have to do would be to glue the wicker shutter onto the wall. But this is southeast Asia! It is too stinking hot to close the windows...plus Airfix's "Jungle Outpost" showed propped open window shutters on the box's picture. I wanted propped open shutters, too! So, once I'd measured each 1"x3/4" window, I cut it out of the paper mache box with an Xacto knife. If I was smart, I'd have grabbed a fresh, sharp blade...but see the above comment about the windows and draw your own conclusion! Before long, I had two windows on each of the long sides, and one each on the short side.
The box covered with burlap from Michaels craft store (white glue works fine to attach it to the paper mache)


The next step was to see if my burlap inspiration was a good one or not. I plopped the box down on the burlap, traced the outline in felt tip marker, and then trimmed out each side. I smeared the surface of the box with white glue and pressed the burlap onto it.  Yes, I know what you're thinking. "Hey, dimwit! You just covered up the windows!" Ha, ha...I fooled you. I did that on purpose! I figured it would be easier, once the burlap was dry, to simply use an Xacto knife again and trim off the burlap covering the window opening. Not to gloat, but I was right (see...teach you to question me...). Later, I was to find out that I had just made my life a lot more difficult. I should have painted the hut walls my base color first, before gluing on the burlap. It was quite the pain to get the base coat inside the weave of the fibers and fully cover the hut...!

The building affixed to the platform with Tacky glue. Note the extra bamboo pieces at the base of the building and at each corner.
Here is a picture of the building Tacky glued down to the platform. Those weird circles are actually part of the pattern that was on the burlap, so I glued them "face down" so I had the weave as the texture. As you can see, I glued down a piece of bamboo along the base of each side of the building, as well as on each corner wall. This gives it a nice framed appearance.
The shutters -- probably the most "fiddly" part of the build. I trimmed a "mini-dowel" to be the prop. Then I used tacky glue to attach the shutter to the wall, and the prop to the shutter and wall. It was left upright so gravity would keep it in place while the glue dried.
Next up was the most fiddly part of the build -- the shutters. I trimmed a piece of thin styrene to the window size. I then cut two squares of burlap to that size, gluing one to the front side and the other to the back. Next, I cut some "mini-dowels" from the craft store to be props, holding the shutters open. I put a thick line of Tacky glue at the top of the window. I put a blob of glue on both ends of the prop. Then I placed the shutter against the line of glue, and wedged the prop between it and the window. I set it upright so gravity would hold it in place against the prop while the Tacky glue dried. I was really dreading this part, thinking my fumble fingers would make a mess of it. However, it worked like a charm, and after about 20-30 minutes drying time for each face of the building, I had six windows propped open just like in the Airfix building!

A top view of the stairs before painting
 Since the building was going to be sitting up on a platform, I would need stairs to lead up to it. I decided to use bamboo skewer pieces again. Rather than make a complicated framework, I decided to go with piled bamboo logs for the framework. I decided each level of the stairs would be 3 pieces tall. So, I made a pile of 3, 6, 9, and 12. They were attached by a simple bamboo "stake" or vertical piece Tacky glued onto them, as you can see in the picture above.

Side view of the "stacked logs" framework of the stairway.
The next step was to assemble them into a stairway. I cut a piece of thin styrene for their base, and then simply Tacky glued each piece upright. Some needed propped by blue tack or other methods to stay upright, other stood on their own fairly well. As you can see in the side view photo above, the pieces alternated going inside then outside of the other. Once the framework was dry, I simply glued six more bamboo skewer pieces across the framework. Once done and painted it is a functional (if not architecturally beautiful) set of stairs. Since it is a jungle village piece, I figured the more crude the better -- and this stairway fits that description!

The hut, platform and stairs, assembled and waiting for paint. I was to find out that I should have painted the hut BEFORE gluing on the burlap for the wall texture...
Here's a shot of the building and stairway at this stage. I designed the end of the stairway to be slid under the platform...so hopefully I don't screw up the measurements! As you can see, I also made a door with bamboo pieces and glued it straight to the wall. The crossbar is another bamboo piece, with a hole drilled in it to insert a straight pin as the knob.

I have to say, I'm pretty happy with how it looks at this stage...!

Thursday, November 21, 2013

Pygmy Headhunting Cannibals of the South Seas

"Good God, man! Not Pygmy Headhunting Cannibals of the South Pacific...!" These are 15mm "Cave Imps" from Splintered Light Miniatures
Ever since watching the movie "The Mummy Returns," I felt I had to have a horde of pygmy headhunters to plague my players. Of course, the movie versions are zombie pygmies, but once I spotted these 15mm "Cave Imps" from Splintered Light Miniatures, I knew they'd fit the bill. Besides, ZOMBIE Pygmy Headhunting Cannibals of the South Seas is just too long of a name. Pygmy Headhunting Cannibals of the South Seas is fine, but sometimes that one extra word takes it over the top.

Tattoos, face paint, and decoration on the weapons makes these guys look like they belong in some undiscovered jungle valley...
 Anyway, I painted up my first batch of these as an entry into the first Lead Painters League that I entered a year and a half or so ago. I had about a dozen of them left and knew I'd get around eventually to painting them up. They have wonderful character and manage to pull off looking menacing and comical at the same time. Some of that is due to the hilarious upright hair on them, ala Heat and Cold Miser's imps from "Santa Claus is Coming to Town" (my favorite Christmas special).

Woe betide the Pulp adventurer who chuckles when he sees a horde of these emerge from the underbrush...
 They stand about half the height of an average 28mm figure. There is great sculpting of muscles, hair, and weapons on them that allows for easy dry brushing. I started with a base coat of dark brown. I dry brushed them Iron Wind "Asian" flesh, and added a final highlight of "Warrior Flesh." To give them that extra twist, I painted individual tattoos on all of them. For the eyes, I just went with all black. I even decorated the weapons with colored stripes or dots or whatever.

For all that detail, they paint up quickly. I think that is probably because of the lack of equipment...er, I mean weapons and such. Even clothes. But now that I mention it, I *am* kind of glad they don't have...well, a normal naked man's "equipment"! They look more exotic -- and less like simply short humans -- this way.

My photo of the original batch of Pygmy Headhunters the Lead Painters League in 2012
For the heck of it, I am also putting in a picture of my original batch I painted of these from the Lead Painters League. I do feel I didn't 100% match the skin tone, but it is close enough that I can live with it. My players in my Pulp games should encounter these little menaces shortly, so it'll be fun to get them out on the tabletop...!

Skull Cave -- Pulp Skirmish terrain

Skull Cave -- home of the Pygmy Cannibals of the South Seas -- a scratch-built piece of terrain for my Pulp Skirmish games
 Ages ago, I'd picked up a skull mask in metal from Iron Wind Metals loose bin. I saw it and thought, "Wow, wouldn't that look cool hanging over a cave entrance in some native-haunted jungle?" Well, now that I'm actually running Pulp skirmish games, I figured it was time to construct that cave! My experience making the cliff sections for my French & Indian War games taught me the wonders of pine bark as a stand-in for rocky outcrops.

Several layers of pine bark glued one atop the other formed the cave walls
 This was really an easy build. I went out to the garage where I stored the leftover pine bark chips that I'd dried out for the cliff sections. I plopped them down in the desk in the spare bedroom where I do my messier work. After cutting a piece of black styrene to the size I wanted, I began sorting through the pine bark pieces. I decided to do a relatively straight-forward "U"-shape. I began stack pieces on top of each other until I was happy with how they were sitting, trying to minimize gaps. Once I felt I had a few layers ready to go I began Tacky gluing them down to the styrene. I globbed it on fairly thickly, as the pine bark is brittle and will shed in layers. I wanted to maximize the amount of surface that was adhered to another.
The U-shaped cave walls with a coarse ballast floor after they've been spray primed black
 While my U-shape was drying, I took three larger pieces and glued them together as a roof for the cave. Once both were dry, I played around and set the roof on top of the cave walls. I quickly realized the bowed shape of the roof meant that when I glued the heavy skull piece to over the cave entrance it would tip the roof forward. I needed something to prop it up and prevent that, so dug out some Hirst Arts stone pieces and glued them atop the cave walls. I wanted the roof to be removable so that miniatures could be placed inside the cave and accessed easily. Once everything was dry, I turned the roof upside down and used liberal amounts of Tacky glue to attach the metal skull mask to the part of the roof that would hang over the entrance. A little blue tack kept in place while the Tacky glue dried.
Testing out how the roof sits on the cave walls. I wanted the roof to be removable so miniatures could be placed in the cave recesses...like soon-to-be-sacrificed (and eaten?) victims that the players must rescue...!
The next day, I took both pieces outside and spray coated them with acrylic black primer. I then flipped the roof upside down and sprayed the underside, as well. Once that was dry, I mixed up some black acrylic paint about 50/50 with water, and coated the pine bark thoroughly. This makes sure the areas missed by the spray paint are black, plus fixes the pine bark a bit for the dry brushing. The next day, the dry brushing began. It was a fairly straight-forward job of a first coat of dark gray, and second coat of light gray.

Skull Cave fully drybrushed and sealed. Note the clumps of foliage to mask the join between the skull and the pine bark cliff pieces.
Then, I looked for gaps where the pine bark wasn't flush with one another, and filled those with Woodland Scenics clump foliage. I squirted glue into the crevices and shoved in the foliage. I also added some pieces here and there to represent vegetation growth on the surface of the rock, too. The final stage was to flock the styrene base that was showing in the corners. I used my usual medium ballast, sand, and paint method. A little more Woodland Scenics flock and foliage and Skull Cave was ready to be "sealed."


The rear of Skull Cave. Once again the pine bark chips did an excellent job of simulating rock.
I could simply use multiple coats of Dullcoate, but I think the pine bark needs extra protection against wear and tear. So, I mix white glue and water about 50/50 and load it up in a spray bottle. I squirt the terrain piece down really good. Don't worry about bubbles, they seem to pop and work themselves out. Once it is dry, it is ready for one final Dullcoate.

I was really surprised by how quickly I constructed this and completed it. The pine bark was easy to work with and looks great, I think. I briefly toyed with the idea of putting gem eyes in the skull, but decided not to do it. Maybe later....who knows?

Sunday, November 17, 2013

Junta -- politically incorrect and hilarious


 It was an easy sell when Joel suggested we break out the board game Junta after at least a year or two since the last time we've played. Before we even opened up the game, emails were flying around the group arguing over who should begin the game as El Presidente. Joel has the original West End Games version of this politically incorrect spoof of the shenanigans going on in an anonymous Latin American banana republic.

The players represent families vying to tap the most foreign influence money being channeled into the country from the America. Whoever can squirrel away the largest amount in their Swiss bank account is the winner. Players divide up positions -- such as Minister of Internal Security, President, various Generals, Admirals and Air Force Commanders. These become important when the frequent coups break out. Surprisingly, we had only two coups -- if I remember correctly -- during our game. One replaced Joel as President, and the other deposed his brother Allen and installed Ptom.

Another feature of the game is players sending out assassins to kill the other players -- particularly, when they decide to visit the bank! For some reason (perhaps the oft-repeated cries of "Mike's winning" on Sunday nights?), I was a frequent target of assassination attempts. I decided to hold off visiting the bank until I had two turns in a row of very low amounts funneled to me. Hoping it was out of players' mind that I had yet to visit the bank, I snuck off only to be gunned down by Mike S.

This caused a piranha frenzy over the money I'd been squirreling away all game waiting for a chance to visit the bank. Mike S and Ptom decided to split it up, which immediately made it a three-way race between them and Steve. I'd used my university faculty influence earlier in the game to peek at Steve's total in Switzerland and it was impressive.

Going into the final turn of the game, Brutus decides whether to throw his weight in behind Steve or Ptom. The dog made good choices because Steve eked out a victory over Ptom by a paltry 1 million pesos (the smallest number in the game!)...
On the final turn of the game, assassination attempts flew back and forth. I targeted Ptom at the bank (correctly), but he had a "Bribe Assassin" card. Joel used a Psychotic Assassin card on him at the bank, as well. Joel's committed suicide instead, and Ptom paid my amateur off. The 2 million pesos it cost him ended up costing him the game, though. Steve S squeaked out a victory over Ptom by 1 million pesos, and prevented Mike S from winning by assassinating him at the bank that turn. Junta is always a hilarious game, and it was fun even though I came in last.

Next week, Allen will be running a WW II Naval battle here at my place, and the following meeting will be the Battle of Manzikert. Soon after, I will run a second Pulp Alley game. So, stay tuned for more Sunday night gaming...!

Saturday, November 16, 2013

Chickens and Goats

A few of my purchases at Historicon 2013 this year were farm or village animals in 28mm. I figured they'd be useful for skirmishes for everything from the Dark Ages to the French & Indian War to Pulp or modern games. I already had painted up cows, horses, and pigs. I jumped when I saw a dealer selling 28mm chickens and goats, and snagged a pack of each. Sorry, I can't remember which dealer it was (but I do remember they were very reasonably priced). If anyone recognizes these figs and knows the manufacturer, feel free to comment.

28mm chickens doing what chickens do...

Anyway, here are the chickens first. I was happy with the color patterns and think they turned out well. They will probably appear in a number of games from this point on. I mean, everybody likes chicken, right? It tastes just like....well, chicken! I based them up first on tiny washers, then used white glue to attach them to cardboard to hold onto while painting. I used a base coat of "Autumn brown," then dry brushed them Khaki very lightly. I added splotches of white after pulling up some images of chickens on Google. I think it is very important to look at photos of the animal you're trying to paint and not just do it form memory. There are often subtle colorings that you may have forgotten about that make them look realistic when complete. I added a red-brown "combs," dun-colored beaks, and black dots for eyes and they were done.

28mm goats near a Celtic hut from Acheson Creations...Jenny insisted the white one be called "Cuddles" after a goat her aunt owned...!
The goats to a little more time -- mainly because I decided to paint them in a variety of colors. I used a Google image search to select 6 colorings and saved the photos onto my desktop. I then painted them either white, "Bambi Brown," or dark brown for a base coat. A lighter dry brush was followed by splotches of white or darker coloring to reproduce the photos. These painted up quickly as well, and will also likely see use in a variety of games. Sometimes, it is the little touches like barn yard animals that can make a game table look realistic and complete.

Next up are some Pygmy Cannibals of the South Pacific...seriously! Or was that Pygmy Headhunters? I painted a batch of 10 a little more than a year ago, and now I've got the rest of the pack to finish up. And yes...expect them to pop up in my Pulp skirmish games...!

Monday, November 11, 2013

Dakota Smith's Oriental Adventures - Part 1, Brother Virigi, Wherefore art thou?

Keith, Mike S, and Tom hot on the trail of Brother Virigi -- a Portuguese monk from Macau in the 1930s
 I had 5 players for my first-ever Pulp Alley game. I had been working my way towards this for many, many months. So, it was nice to get all those 28mm figures I'd been painting out on the tabletop. I'd asked Keith, who was hosting, to set up the table with a 6'x4' area. After the terrain was all laid out, I discovered it was a bit bigger -- nearly 5' across, not 4. So, I told the players controlling the four Western archeological teams to deploy within one foot of each of the corners. The Order of the Fire Coral would begin the game disguised as Chinese peasants scattered throughout the board (roughly 1 in 3 would be agents, the rest actual peasants). The player controlling them secretly marked the bottoms of the figures representing agents with tape. To move, they had to "cast off the peasant garb" and be revealed. The four minor plot points were just over a foot away from each starting location, with the major plot point being hidden inside the church's Chancery in the center of the board. They discovered the location of the major plot point (Brother Virigi's journal) only by taking control of one of the minor ones (monks from the monastery).

Fraulein Blucher is escorted by two German sailors, while Von Jaeger and Ottom Tulmann interrogate Brother Malachi by the pig pen
 Since these were brand new rules that we'd never played as a group, I had a number of worries heading into the game. My first worry was that I wouldn't have enough Fortune Cards if the players decided to hold onto them. I have just the starting deck of 25. With each player receiving 3 at the start of the game and a further one at the beginning of each round, I was wondering if the deck would ever grow dry. At first, the players were hesitant to use them. Eventually, they got the hang of using them to frustrate their opponents -- especially the weaker characters belonging to other players, who may have trouble passing the tougher challenges.

Reporter Eric Bylan and socialite Dolly Flanders, tagging along uninvited on Dakota Smith's expedition, approach the monastery graveyard
 My second worry was there would be no way the characters could accomplish their goals in the game's six turn limit (cards can be played to extend it a 7th and even 8th turn). The board looked simply too big. I think that worry was borne out by the events. Only one character actually entered the church by the end of the game. Of course, the two "Parley" cards played over the course of the first six turns really slowed things down, too. I almost feel like making a change so that is a one-shot card, and not letting it be played a second time. To not be able to attack or run for 1/3 of the game's turns seemed a bit extreme.

Harold Fortwine guards the rear of the American column, unaware of the agent from the secret martial arts society, Order of the Fire Coral, hiding in the shadows behind him
 The rules explanation at the beginning went fairly well. Of course, true to Sunday night form, my gamer friends were more off-task than my 7th grade students are on average. I expected that, though. It is part of the fun -- the random comments, the digressions in conversation, and so on. The players picked up the rules fairly quickly, it seemed. The one fairly consistent mistake we made was that wounded characters roll dice no higher than their current health level. I'd predicted we'd miss that one and we did a few times. It took a turn or two to wrap our heads around the Challenges, when to play them, and how that is different than passing a plot point. We did it right, but had a couple players question the proceedings. I have to say I was fairly happy with how we caught changes in Initiative -- how it gets traded back and forth between players -- although I would not be surprised if we missed one or two.


Keeping together tightly, the British party is shadowed and harassed by the Order of the Fire Coral all along its advance towards the church
 The only real issues anyone had with the rules was when the German archeological team got pinned down by the French sidekick Jacques Nero. The best gunman of the French, he got into a covered firing position and started gunning down Germans as they passed in front of him. The player was upset that Jacques' "Hardened Veteran" ability meant he could keep shooting with no "Multiple Combats." That, and Dr. Lambert's "Deductive" ability meant the French league snagged an extra Fortune card nearly every turn. I showed the Germans how he had a character with the exact same stats. He had just rolled worse when Jacques Nero and Otto Tulmann had their gun battle. I explained that one extra Fortune card among 5 players should not imbalance the game. The British had a character with the "Deductive" advantage, too.


The French league nabs a plot point, discovering that Brother Virigi has left for the mainland mission station. His journal with maps and drawings was left behind in the church Chancery, though (major plot point)!
 So, what happened? All four archeological teams moved fairly steadily towards the closest Minor Plot point (the monk nearest them) and took control of it. The Order of the Fire Coral focused its attacks on the British and German teams, harassing them with attempted attacks on its weaker characters. They seemed to focus less to the French and American leagues. All the players got into the act of trying to zap each other with Challenges as characters entered perilous areas. None of the sidekicks or leaders went down and out, but the German Otto Tulmann was knocked out momentarily. The Order of the Fire Coral lost the most agents, but its characters were weaker (9 total characters vs. 4-5 for the Westerners).


Brother Malachi points Von Jaeger towards the major plot point, Brother Virigi's journal inside the church Chancery...
That brings me to the next issue with a five player game. I think we had too many characters on the board. A few of the players commented that the game moved a little slowly, although part of that is probably due to the too-large board. Another part could be that it was our first time with the rules. I may experiment with smaller leagues (less than the normal 10 slots) in games with 5+ players. I can't imagine what it would have been like if I'd had my 6th player had shown up with the Bandits and their 11 character league! Perhaps I'll trim down the two most excessively-sized leagues (Fire Coral at 9 & Bandits, 11), giving them tougher characters, which may make play go quicker. I think a smaller board would help, too.


 The players said the rules were "interesting" and seemed willing to give them another go. They understood it was our first time playing the game. Everyone seemed to have fun, well, except for the German player. And he seemed to be having a good time until his league got pinned down. There are a lot of subtleties -- especially in the use of Challenges -- that we need to wrap our head around. Tom, the French player, did the best. He seemed most attuned and goal-oriented of the archeologists. His leader, Pierre Fournereau, was the only European to enter the church, though he never made it to the Chancery.


And all five leagues come together in the middle! The French had an advantage, and were able to elude the concentrated attacks of the others. Of course...I *have* to say it: "Tom's winning!"
 So, the game ended up with a massive-sized scrum and logjam at the entrance to the church. The leaders of all five leagues were present in the donnybrook. The Americans blocked the Germans from entering the church, the French got in via clever use of Dodge moves, and the British and Americans appeared like they'd need to take a number. The carnage of so many figures in such tight quarters would have been interesting to play out. It was 11:20 pm, though, and most of us had to work the next day. We had played the six turns in about 3 hours (once rules explanation was done). That is not bad for a 5-player game that no one had played before. As I said, most seemed willing to give it another go and learn the system better.

Sorry this is more of an analysis than straight-up, after action report. I did not take notes on the nitty gritty. I did snap some close up shots of the action, so I hope you enjoy those. Next game will see them follow the trail of Brother Virigi to the mainland and the Portuguese mission station in the Ta-bo Hills. Feel free to comment on my thoughts about larger games, or make suggestions.