 |
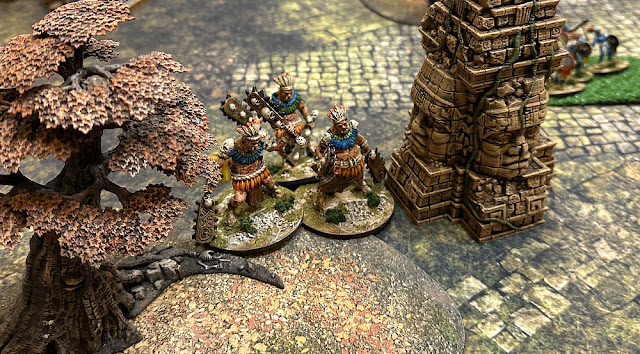
Headed down to 'Gator Country' for Siege of Augusta - very cool pool terrain with lurking reptile
|
It had been quite a few years since I had driven south to
Siege of Augusta. My friend Jason, who lives in Columbia, SC, regularly prompts me to come down. Now that I am retired, I don't have the excuse of not enough days off for another convention...ha, ha! So, Jenny and I drove down Thursday, spent the evening with him and his family, and then headed to the convention on Friday.
I'd looked at the games on the Siege of Augusta website, and there were a
few that I was interested in. We planned arriving before the noon
session of games so that we didn't have to get up ridiculously early.
Jason lives about an hour and fifteen minutes away, and Siege's first
session begins at 8am, so there was no way I was getting there Friday in
time for the morning session! Siege has an unusual system for attendees
to sign up for games: it doesn't have one! You have to find the table
and ask the GM if he or she has room. Nothing at the registration desk,
no sheets on the game table (well, the chariot game had a signup sheet,
but that was the only one I saw) -- nothing! I have to confess that I
was disappointed with this aspect of the convention.
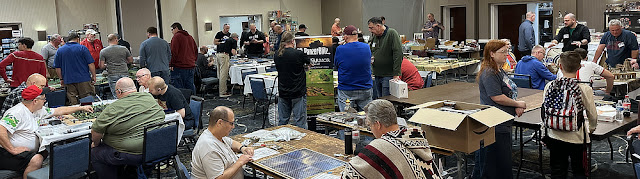 |
Main hall at Siege of Augusta -- I got to hang out with Jason, play in fun games, & meet nice people
|
Another thing I wasn't thrilled about was that start times are v-e-r-y approximate. The GM
can list a firm start time in his description. If not, you have to assume it starts when the session starts. Except that they don't always do that. For example, I was told by people who got up early enough that the "8am" games that most didn't start till 9am. However, you don't know that. Since you can't sign up for it in advance, if you really want to get in a game, you have to be there at 8am. Or actually sooner, as spots are given to the first players to arrive (assuming the GM hasn't already promised spots to someone). All in all, it encouraged me skip the first session on Saturday morning. I just didn't want to deal with the uncertainty.
As Jenny and I made the rounds checking out the games Friday, we ran into another problem. Which games were which? There was no schematic or map anywhere to be found, so we had to deduce that from the event titles. The event descriptions were online (if you brought your laptop with you). However, the Siege website doesn't work well with mobile devices and condenses the nice, easy-to-understand grid into spaghetti. So, that part is hit or miss, too. We did our best to match the terrain and figures we saw on the tables with event titles on the handout we'd picked up from the registration desk.
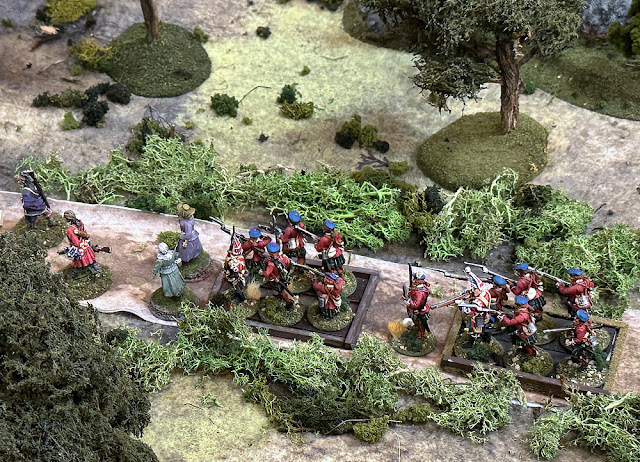 |
Col. Munro leads his daughters & a British column through the woods in Magua's Revenge
|
One of the games we talked about getting in was "Magua's Revenge" by Les Faison. He was just setting up when we walked by. We saw the trees and dirt road and figured that was it. We asked if this was the right game, and if he had spots open. Les said he had one of his five spots left. I encouraged Jenny to play, as I had some serious shopping to do from the nice selection of vendors (see yesterday's post on my
Siege of Augusta purchases).
 |
Hawkeye & Chingachgook escort Cora Munro while in the distance Uncas helps Alice
|
It would have been fun to play, though. As some of you may know, I am the author of the rules he was using --
Song of Drums and Tomahawks. I watched a bit of the game in between my shopping. I was hesitant about stepping in and explaining the rules when players had questions. Les had listed in his description that it was a modified version, so I didn't want to tell anyone the wrong thing. After the game, when he found out I was the author, he said I shouldn't have been so shy. It was only his second time playing the game and he had questions. Jenny has run Song of Drums many times, though, so she was able to assist when I was off wandering around. Les' tabletop was very cool and his 40mm French & Indian War miniatures were awesome. Jenny said she had fun and was able to recreate movie history by having Hawkeye and Chingachgook rescue Cora Munro and get her off the table. Uncas did rescue Alice Munro, but both them were shot down by treacherous Huron as they tried to flee off-table.
 |
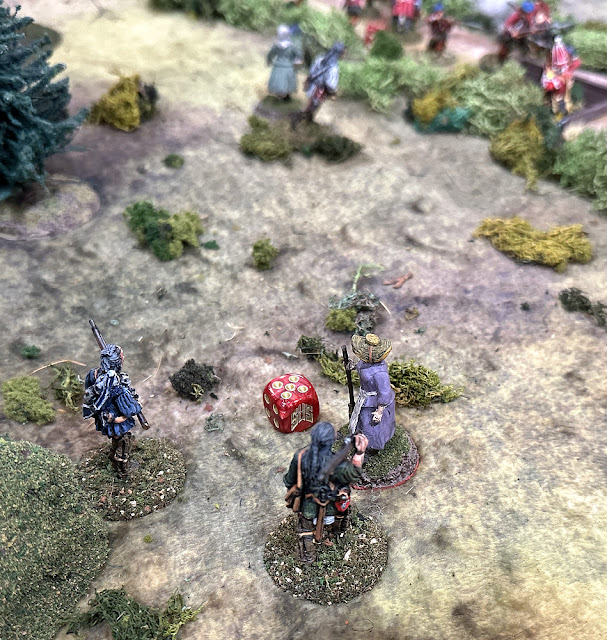
Les, the GM (in red), assists one of his layers as he moves up his Huron to ambush the British
|
I spoke with Les for a bit after the game and praised his game and adaptions to the rules. I gave him my email address in case he had further questions. I liked how he adjusted the turn sequence so that players would not necessarily have to wait too long if they "crapped out" early on their activation rolls. Typically, I do four players maximum in one game to avoid player frustration when their dice are not cooperating. His system of using a card deck to determine whose turn it was alleviated some of the bad things that poor dice rolling can make occur in multiplayer games of Song of Drums. For only his second game with the rules, he did a great job!
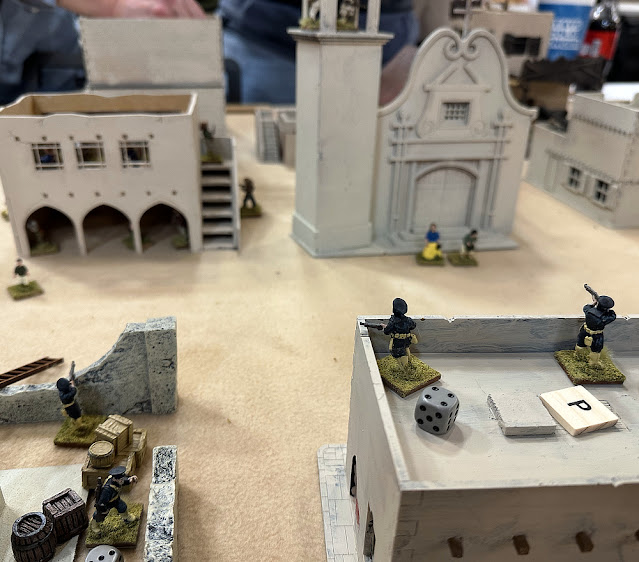 |
A U.S. naval landing force of sailors takes position on the rooftops looking for downed airmen
|
Jason and his high schoolers, Lily and Graham, showed up a bit before the 4pm session. We all decided to get in Mark Young's Banana Wars Mayhem game together. He could take up to nine players and ended up with somewhere around seven, if I remember right. Each of us controlled a faction in early 1900s Nicaragua -- U.S. Marines, Banana Corporation private security, bandits, rebels, and more. I took control of one of the two rebel factions. We each had about 15 or so miniatures (except the more elite Marines and U.S. Naval landing force). The activation order was randomized each turn, which in the end, worked out really well, allowing my rebels to execute their nefarious plans.
 |
My force of Nicaraguan rebels arrives on the board ready to cause trouble in Banana Wars
|
Besides being rebels and killing government troops (Jenny's Federales -- I would end up pitted against her all weekend...ha, ha!), we were also on the lookout for two downed U.S. pilots. It would be a feather in our rebel sombreros if we could take possession of them and give them to the leader of our rebel movement (presumably to ransom back to the U.S. for lots of money!). Wouldn't you know it, but the Naval landing force (their to rescue the pilots) came on board to my right, while Jason's bandits entered the table on our left. I immediately began politicking and dissembling. I told the Naval player that we had nothing against the United States. It was our own government we hated and wanted to overthrow for the horrible way it was treating its people. He let me know he was looking for the pilots (everyone had a secret mission), and I told him that I would definitely not fire on him or the pilots. If I found them, I would let him know (heh, heh...).
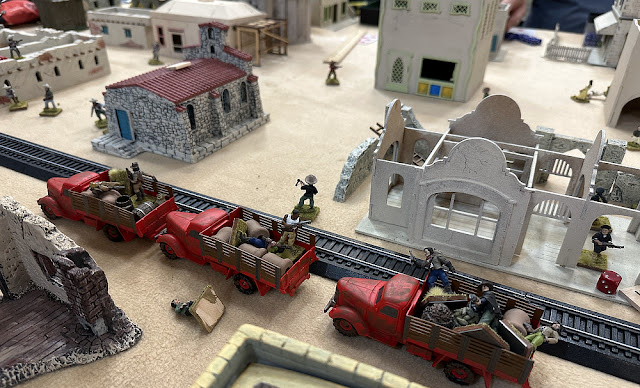 |
Dole Corporation's trucks ferry a shipment of bananas through town, guarded by private security
|
I moved from the board edge to a large building to our front, and then to another one in front of that on the next turn. We manned the second story windows of the second building looking down the main street. And who should appear in our gun sights but the hated Federales? We shot up Jenny's troops for several turns, though her leader did use his Jedi mind tricks on us to make us miss several times after we'd hit. Apparently, her leader was in charge of the secret police and causes fear in anyone his malicious eyes are turned upon! After a few turns, we'd killed all of Jenny's visible troops (she had others on the opposite sides of buildings, and was busy shooting at pretty much everyone else on the table). She did a great job making the Federales the hated force that they were!
 |
Jason's bandits arrive on board, hungry and looking for some bananas to steal from Dole
|
Just then, a rocket flare went up not far from us. I guessed it was the pilots signaling the U.S. forces of their location. We returned closer to our board edge, which fortunately was near where the pilots had secretly moved. The Naval player asked what I was doing and I said that we'd killed all the Federales. Did the sailors need any assistance? He was suspicious, but I'd done nothing negative to him all game, so he seemed satisfied. Soon enough, the pilots ran to the building the sailors had occupied, adjacent to the neighboring building where all my men were huddled. As the last turn began, I hoped we would move after everyone else. Fortune smiled on the Revolution -- everyone else moved before me.
When our turn finally came, we sprang our treachery and dashed into the sailors' building, seizing control of the pilots. It was likely the last turn, but there was no guarantee I would be able to maintain control of my hostages if we'd played another. So, I told the player controlling the landing party maybe we could come to an agreement. The pilots were apparently carrying a wad of cash to bribe their way out of trouble. I suggested we do a trade. They hand over the cash and I would give them their pilots. He agreed, and thus I declared a "cinematic victory." After all, our fearless leader off-table was going to ransom them anyway, right? I just saved him the trouble! Victory -- with an asterisk!
 |
A gorgeous looking game I would have LIKED to get in -- 'Mythic Earth' run by Mike Frang
|
Jason and Lily decided they wanted to go to dinner and skip the evening session of games. Jenny and I agreed, as spending time with them was the main reason we'd decided to attend the convention. Graham is a hard core convention goer, though, and he stayed and played in Renaissance Naval Warfare game. When we returned from dinner (bringing carryout for Graham), we walked around and shopped a bit. Jason and I marveled at the 3-D printed terrain that Bryan Stroup of
Garrison 3D had brought. He picked up some Egyptian statues from him, and then admired an Ancient, domed temple. I could tell he wanted it, but Jason is a very deliberate shopper. He's not prone to impulse purchases and likes to think things over. I warned him it might be gone tomorrow, but he stayed true to his nature and held off buying it (until the next evening!). We closed out the night with a game of Settlers of Cataan, which I somehow managed to win (no asterisks this time).
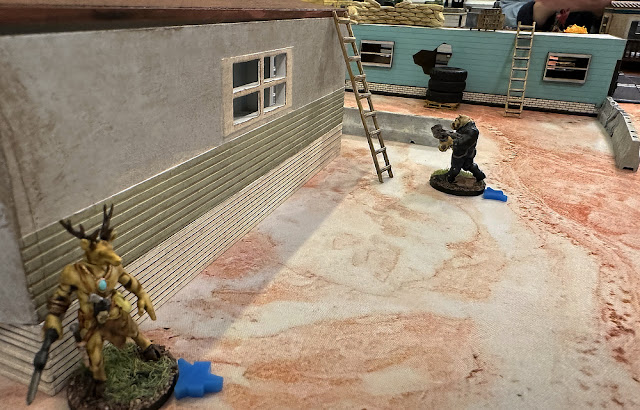 |
Deer Hunter, left, moves up to guard our flank while Pork Chop hurries towards cover
|
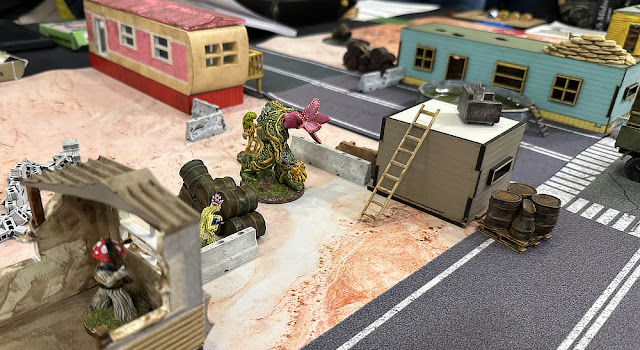
As mentioned earlier, I skipped the early session of games. Thankfully, the folks at
Bad Goblin Games had saved Jenny and I a spot in the noon running of
Trailer Park Warlords of the Apocalypse. We had both played in this game at
Historicon 2024 and had a blast. I had chatted with three members of their group Friday and had been encouraging them to follow through on their idea to run it at
Cincycon 2025 this March. Two of the members will be in town for work, and they thought, "Why not stay in town for the weekend and attend the convention?" They live in Florida, though, and are flying to Cincinnati. I offered to bring down my own trailers I had bought from them, as well as a game mat and other terrain for them. I hope they follow through. I think Cincycon players would enjoy playing their game.
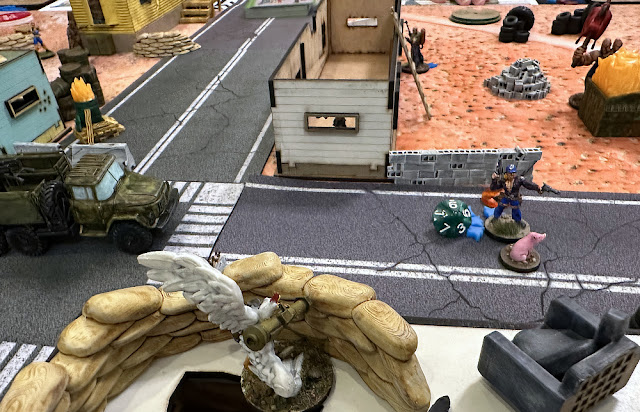 |
Monster truck in the center of the board (at left), is everyone's objective - but first, you need the pig!
|
It was the same scenario I had played at Historicon, and I even controlled the same faction, aka the "awakened" mutants of
Team Road Kill. Jenny had won that game in cinematic fashion. The goal is to seize control of a pig who has a surgically implanted monitor which deactivates a kill switch on a Monster Truck that all four factions were drooling over. If you try to start the truck without the slippery pig with you in the cab...BOOM! The other factions included Jenny's "Bubbas," Dave's Childen of the Soil plant mutations, and Lily's Bubbas. We each began in a corner of the 4'x4' board out of sight of the other factions.
 |
Col. Clucker takes advantage of the cover in the trailer park to move towards the board's center
|
Over the first few turns, we crept forward utilizing the cover (chiefly provided by eight of their trailers, as well as various other buildings, walls, and dumpsters. I really like their activation system. You begin the turn rolling 1d10 per figure you control (we all started with four). Then, each round you secretly choose one of those dice to use that turn. First to activate are 10's, then 9's, and so on. That way, the order of activation switches each round. Some turns you may want to move (or fire) first, other turns you may want the react to what the other players do. There is a card deck, too, which can affect Initiative, protect you from damage, give you an extra turn -- all kinds of interesting possibilities. You draw back up to five cards at the beginning of each turn, though there are some cards you may want to hang onto. I hung onto one the entire game in case a player got a "kill shot" on one of my figs, which thankfully never happened.
 |
On our left, the Children of the Soil move towards the center, threatening our flank
|
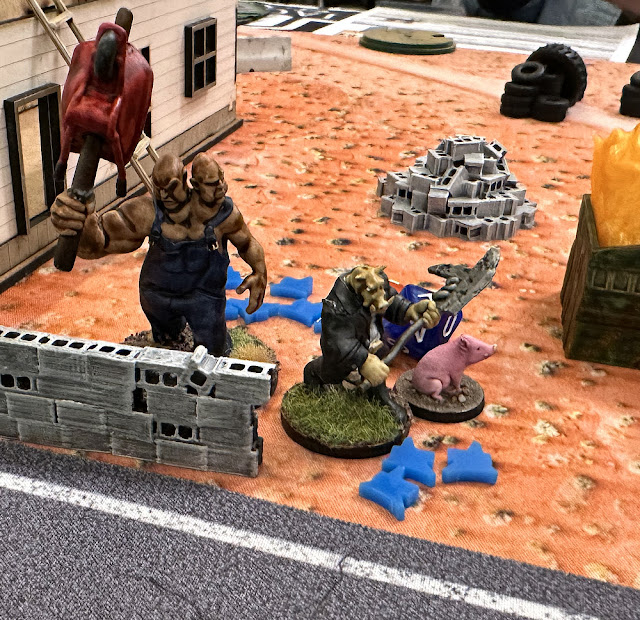
The pig begins the game on the truck, but then moves about the board controlled randomly by one or more players each round. If the 10-sided die you used to activate that turn matches the one rolled for the pig that round, you get to move it. In a weird statistical occurrence -- which my friends would laugh at and say is just my bad luck -- I think I activated the pig only twice over the entire game. Jenny was fortunate on pig activations, and was the first to grab the pig. Unfortunately for her, that also made her the target for the other players. My leader, Col. Clucker (a mutated chicken) blasted away at Joe, her leader, a couple times along with other players and Jenny was soon down one gang member. I had placed Deer Hunter (a deer armed with a hunting rifle) on my left to keep a bead on the plant people. He ended up killing their Mushroom Man and wounding his large carnivorous plant, Audrey (yes, from the movie).
 |
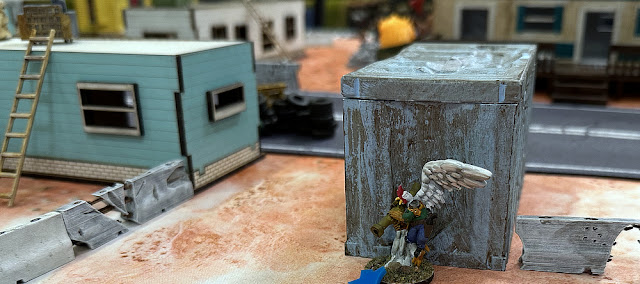
Pork Chop's gambit - sprinting across the street and snatching up his distant porker cousin
|
My own mutated pig, Pork Chop, dashed into the trailer bordering the street where Joe lay bleeding. Using an extra action card, he dashed across the street, snatched up his distant cousin, all the while keeping an eye on huge, lumbering two-headed Jethro in his bib overalls not far away. Naturally, someone else activated the pig before Pork Chop could carry it towards the monster truck, and I lost the opposed die roll with my 5d10 vs. the pig's 2d10 (there's that statistical occurrence again!). He squirmed away, squealing, "Four legs good, two legs bad!" (Hopefully, some readers get the Animal Farm reference!) Things got real confusing after that. Lily's faction entered the fray, blasting away at Jenny's depleted ranks. She returned the favor, lining up her flame thrower to fire up three of Lily's gang members with one shot!
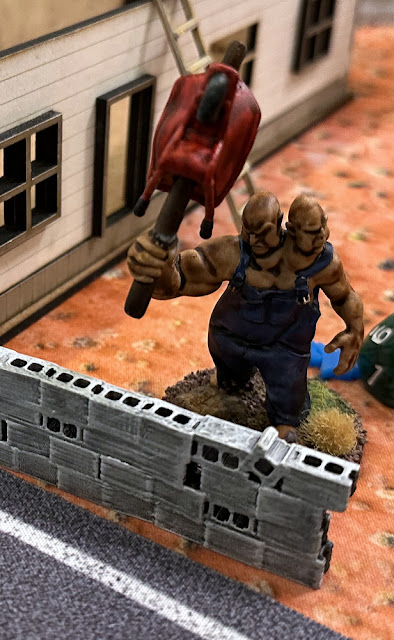 |
The other players, including Jenny's 'Jethro' here, would keep Porkchop from succeeding
|
As we headed into the last turn, Jenny looked ready to pull off her trailer park magic, again. She played the right combination of cards and one of her gang members scurried to the cab of the monster truck with the pig. Unfortunately for her, she had moved first in that round. EVERYONE opened up on her. Jenny was secretly holding onto a card which allowed her to heal 1d10 wounds immediately. She played it after her last character moved, but before my final one. If she rolled high, she would survive and win. If she failed, I had -- you guessed it -- another nefarious plan. I m-a-y have chanted, "One, one, one!" to influence her roll, which was indeed a "1"! With that, Col. Clucker fluttered down from the sandbag emplacement on a nearby trailer and hopped into the cab with her many-holed corpse, but more importantly, the pig. We pressed the start switch and lobbied for a cinematic victory. I did not have control of the pig, true, but it was already in the cab. So, the truck should rumble to life and not explode, right?
 |
As it turned out, the Children of the Soil didn't cause my Team Road Kill any harm
|
The GM conferred with his partner, and they said they do like to allow for the "Rule of Cool" in their games for strange things that occur. So, they admitted they were leaning towards awarding Team Road Kill the victory, albeit with another asterisk! Either way, it was once again a very fun game that came down to the last turn to decide who would drive off with the monster truck. If you get a chance to play in their game at an upcoming convention (or buy their
rules), I encourage you to do so.
With that, Jenny and I decided to hightail it out of Augusta, Georgia, as snow was forecast the next day in the mountains for our drive home. We stole a march on Mother Nature and made it home shortly after 1am Saturday. I had fun hanging out with Jason and his kids, played in some really fun games, and bought cool stuff from nice vendors. A successful trip to Siege of Augusta! Will I be back next year? Hmm...I do wish they'd fix their event registration system. If so, definitely. If not, I would have to think about it...
MINIATURES Acquired vs. Painted Tally for 2025
- Miniatures acquired in 2025: 7
- Miniatures painted in 2025: 4
TERRAIN Acquired vs. Painted Tally for 2025
- Terrain acquired in 2025: 5
- Terrain painted in 2025: 4
SCATTER Acquired vs. Painted Tally for 2025
- Scatter acquired in 2025: 9
- Scatter painted in 2025: 1


