Saturday, May 29, 2021

Second Batch of Mounted Carolingian Nobles

    My latest batch of 28mm Gripping Beast Carolingian mounted nobles
I'm onto the second half of painting my Carolingian army. Not counting the warlord, I plan on fielding two units each of mounted hearthguard, foot warriors, and foot bowmen. With this batch of mounted nobles completed, I over the hump, so to speak, and hopefully cruising downhill on finishing this army. The plan is to start playing it at our monthly Saga game days in preparation for this fall's Saga tournament at Cincycon 2021, Oct. 23. 

    Two of the riders had cloaks and two of them were just in chainmail, tunic, and pants
These four mounted spearmen were all armored in chainmail, while the first batch had scale armor. Two of the riders wore cloaks and the other two were more simple. All four looked like they would paint up quickly, having a minimum of equipment festooned on them. As usual, though, I started with the horses. I pulled out my horse painting chart and picked four of the colors and patterns. I was really happy with how they turned out, my favorite being the red dun horse. The gray turned out particularly nice, too. The black wash I put over him at the end really gave it a depth of tones from gray to white. 

    A good look at the four horse patterns/colors that I did with this second batch of mounted nobles
Since these were nobles, I added splashes of detail here and there, including borders and patterns on the saddle cloths. I go back and forth, though, on whether I like 28mm horses with eyes painted or not. These I painted black with a couple dots of brown. I'm not necessarily sure I like these any better than the eye sockets just given depth with the wash. Horses have different looking eyes than people, and though I have seen miniature painters paint them like human eyes, I always find that startling looking. Almost cartoonish, so I am still experimenting.

    The clothing of the nobles is painted in richer colors -- blues, reds, and greens
When it came to the riders, I used brighter and richer colors than I tend to do on the rank and file in the army. As I've mentioned in previous posts, I'm trying to go with a theme color combo of red and green with this army. So, most figures have some green or some red on either their tunic, sleeves, or somewhere in their equipment. I added in borders and designs on the rider's clothes, too. I was really happy with how the borders on their cloaks came out. 

    Once again, I hand-painted the shield patterns. I think they came out good - not stunning, but okay
As also mentioned in earlier blog entries about my Carolingians, I had made the commitment to hand-painting the shield patterns for this army, too. I keep threatening to try out shield decals, but it won't be on this army. I've swtiched over the years from obtaining source materials -- Osprey books and the like -- to simply making Google searches. It is really surprising how often commercially available shield decals show up in my searches. So, I use them as inspiration as well as other "hits" that appear. I usually simplify the shield pattern for more complicated ones, or jazz up ones I feel are too simply for nobles. Nothing too incredibly fancy on this batch, but I think they came out solidly, and give the proper effect of Carolingians Franks.

    I was happy with the cloak borders and the how the patterns of tiny dots came out
One thing I have started doing with my last handful of batches of miniatures is doing a final, brush-on matte finish. Even my favorite Testors Dullcoate seems to have a satiny sheen, nowadays. So, I have begun painting on Vallejo clear matte after the final spray coat. This gives a truly matte finish that Testors used to give. As I was painting that last step on the miniature, the next batch -- Carolingian foot spearmen -- had just received their base flesh tone. They'll be my next batch, and give me five of my six Saga army points for this army. After that, its eight more archer, and then the warlord's command stand. So, the army of Count Drogo gets closer and closer to the tabletop!

    A good closeup of the "Red Dun" horse colors - definitely one of my favorites from this batch

    I like my brown or black wash at the end gives the horse colors a more mottled look

    Count Drogo's Carolingian forces is now up to 4 points of Saga troops - 3 more batches to go!

Tuesday, May 18, 2021

Moors Repel Reconquista at Dragons Guildhall

    Moors and Crusaders clash in another battle of the long, bloody Reconquista of Spain
Majik Ibn Battuta al-Waqaa stroked his beard as he looked to where the scout was pointing. Far away in the dusty distance, he could see the column of Crusaders as it entered the Emirate of Cordoba's lands. By the Prophet's Beard! These Franks were relentless in their desire to seize the lands that Allah had granted them at the point of the spear, hundreds of years ago! Just last month, he had repelled a similar invasion by the Christ-worshippers. Majik nodded his head as he considered the land the lay between the invaders and his own border force, a short ride away. Most of these Franks were on foot, so he knew where he would meet them in suitable open fields that favored his mounted troopers' style of warfare.

  Moors deployment and the Ted's Crusaders after their first turn of movement in Clash of Warlords
It was the third Sunday of the month, which meant more than a dozen Saga enthusiasts were gathering at the Dragon's Guildhall for the second of our two monthly game day. Once again, Crusaders were in abundance, along with Vikings, Romans, Last Romans, Byzantines, Milites Christi, Moors, Saracens, Jomsvikings, Pagan Rus, Normans, and even Skraelings! I was paired up with Ted H, one of the newer players from Cincinnati, to help him hone his Saga warlord skills and have fun. Ted was playing the Levantine Crusaders. Of course, in the mind of my warlord, these were more Spanish crusaders bent on pushing their merciless Reconquista and trying to retake Spain. 

    Ted's mounted knights aggressively advanced towards the center of the battlefield on turn 1
Ted chose "ordinary" pilgrims as his one Levy unit - not the fanatical pilgrims they can take. He also picked two units of 8 warriors with no special equipment, and one unit of warriors with bow. For hearthguard (or knights in the Crusader list), he chose one unit of four on foot and one mounted. To his credit, Ted was choosing units that matched the figures he had available, so this might not have been his most combat effective or deadly list he could have taken. Still, the Crusader board can be nasty against opponents, so I was curious to see how Ted would use its multiple weapons.

    The knights attract the Moors notice and go down under a hailstorm of arrows and javelins
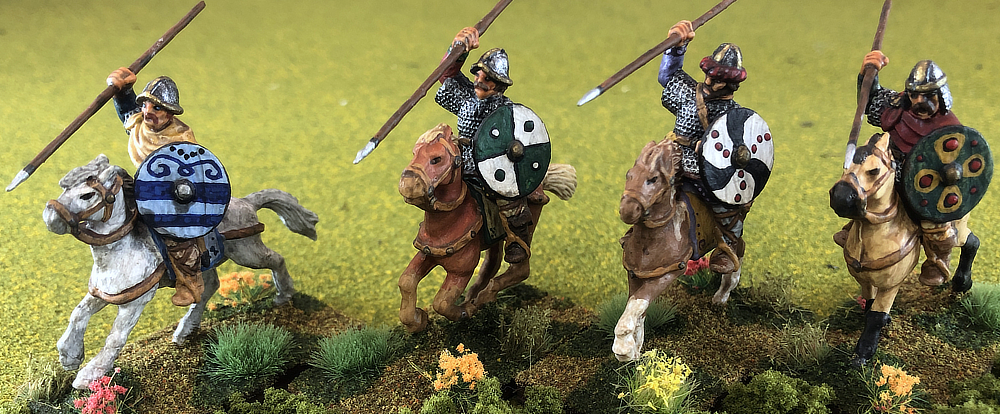
Majik fielded his normal warband -- I haven't changed my list since the first game. I really like its ability to counter multiple threats and play a skirmish style game or use in-your-face, charging tactics. My two units of 6 hearthguard armed with javelins are my primary weapons. Safeguarding them and optimizing my dice to benefit their attacks is my main focus when placing Saga dice on my battle board. I also use two units of 8 foot warriors (spearmen) and one of 12 Levy bow. The foot are my defensive wall that the cavalry shelters behind on the opponent's turn and that stands in the way of enemy advances. The bowmen seize whatever cover is available on the battlefield and try to be able to shoot at the same target that the cavalry is targeting with their javelins.

    As is our preferred way of fighting, the cavalry was pulled back behind our lines after their attack
Ted opened up terrain placement with a medium-sized woods on his center right. I placed a large, gentle hill in the center of the battlefield. Next, he placed an area of scrub along the middle of the board edge on his left. I chose not to place any other terrain and nudged the woods a Medium towards the board edge, leaving the center more open. Ted decided that battlefield looked good enough for my Crusaders. Since most of his troops were on foot, I think he was more worried about terrain slowing down his advance than about providing cover from my shooting. 

    The knights' deaths inspired these guys - warrior spear - who would be Ted's heroes this battle
I opened up deployment with my levy on my far right as close to the scrub as they could get, while the two spear units stretched from their flank towards the center. The spear were not as far forward as I could deploy them, but far enough off my board edge that the cavalry had room to shelter behind them. Ted deployed his entire army with the pilgrims poised to enter the scrubland, followed up by a unit of warriors to their rear. The archers guarded their right, whose own right was guarded by the foot knights. The mounted knights, the other unit of warrior spear, and the mounted warlord all were pushed forward on his right to advance up the center hill.

  Forgot to take photos - so here you see the end of the Warrior Bow, who the Moors attacked on Turn 2
I placed my two cavalry units on either side and behind my left hand spear unit. Examining the Crusader's roster, I had planned to target either his mounted knights (armor 4) or his foot bow (armor 3), if given a chance. Ted would oblige with an aggressive advance up the hill by his mounted knights, urged on and supported by their warlord. "Deus Volt!" they shouted, and the foot warriors took up the cry and hurried along behind them. We were playing Clash of Warlords, so Ted had only three Saga dice on the first turn. That wasn't really enough to launch a spoiling attack, so he contented himself with a move towards the center of the table. 

    Ted's second wave, pilgrim levy spearheads and advance including foot knights and warriors
Those who have read reports of my Moors' battles can probably predict what happened next. I moved the archers to within range of the Crusader mounted knights and loosed a volley. Next, both units of Moorish cavalry darted out and threw javelins at the small unit of knights. The knight's dreams of glory died under a hail of arrows and javelins -- 18 dice worth in Saga terms. I then used Perseverance to pull back both units behind my spearmen to await his next move.

    Through the first 3 turns, the battle seemed to be going in the Moors favor...
Ted wanted revenge for the death of his nobles, so brought his warrior bow forward and loosed two volleys at my Levy, killing several. On his right, the warrior spearmen also shouted for revenge and crossed over the summit and began descending towards my Moorish spearmen. On his left, the pilgrims sang praises to the knights, doubtless entering Heaven at that moment, and rushed into the scrubland. Ted regularly queued up The Peasant's Crusade all game to give all his warriors and levy a free activation -- one of the many great abilities on his board. He also used Happy are the Humble to make his pilgrims fight as armed warriors rather than Unarmed Levy. I noticed how both those abilities need pilgrims to be useful, so planned to do something about his single unit of pilgrims if given a chance!

    Ted's heroes charge my foot spear and hurl them back, opening the Crusader counterattack
By moving into the gap between the scrub and the hill, the warrior bow had raised their hands and volunteered to be the next target of my missile fire. My remaining archers fired, along with both units of Moorish cavalry cantering forward and flinging javelins. One lone archer remained after our shooting, who quickly took to his heels on Ted's next turn. I could see the dilemma of facing the Moors with a slow moving army was hitting home to Ted. He was also now out of shooting units, so would need to charge me in melee to attempt to rebalance the score.

    Ted's pilgrims charge, then charge my Moorish archers a second time, reducing them to 1 figure
Ted had no problem doing that, though. The Peasant's Crusade allowed him to hurl his warrior spearmen into one of my units of Moorish spear and his pilgrims into my Levy. In fact, the levy were even able to charge home a second time. My poor archers were no match for their enemy's fired up 12 attack dice and only a single archer remained at the start of my turn. That was certainly tit-for-tat, and I saluted Ted's aggression and clever use of his board. Much to my surprise, his warriors spearmen also savaged my Moors. I had closed ranks and played Forest of Spears -- which usually means I take one or even no casualties. Instead, we withdrew, reduced almost to half. It was dawning on me that Ted was not going to sit back and let me pick my battles, and would go down swinging (if he went down at all)!

    Of course, the Moorish cavalry exact revenge on the pilgrims, riddling them with javelins
The pilgrims' follow charge meant that they had extended themselves towards my battleline. They were the obvious target for next turn. Luckily, I also rolled a rare dice, so queued up Torrent of Iron. It takes a lot to kill 12 figures in Saga. That is one of the advantages of Levy in these rules is they can weather a lot of casualties and still be a presence on the battlefield. In this case, my cavalry was going in alone -- no prepping the target with levy bowfire. Each unit threw their javelins once, then for Torrent of Iron, I took the extra shot. When my mounted hearthguards charged home, inflicting another fatigue, seven of the 12 lay on the ground transfixed by javelins. The remaining five were killed to a man in melee. My Moorish cavalry were proving quite the deadly one-two punch, again! Three turns, essentially three eliminated units.

    After both units soften the target up, one charges in with Torrent of Iron, wiping them out
On turn four, I think Ted realized he was running out of troops. The warrior spear on the right continued to be the heroes of the battle. They shouted praises to God and charged home against their previous opponent. Once again, my infantrymen closed ranks, and this time managed to take only one casualty. We had yet to cause a single hit against his hero spearmen, though! Ted brought up his warlord, protected in front by his foot knights - closing in on my other spearmen unit. Despite my playing Forest of Spears to bump their defensive dice, the poor bloody infantry were definitely having a rough day of it (and would continue to do so). However, I felt good that I had basically weathered his turn 4 with no major losses, and that his second warrior spear unit was mired in the scrubland and would likely play little role in the rest of the battle.

At this stage of the battle, Majik paused and surveyed both his and the enemy battle lines. The Crusaders had suffered ruinous losses, but were still moving forward energetically on the attack. How to dishearten them? He looked down to his side where his pet cheetah, Scirocco, watched the mayhem with a typical big cat's disdain. Nothing would deter the speedy hunter -- short of something happening to Majik. That was it, by the Prophet! The enemy leader was the key. Nothing would bring despair into their hearts more than seeing their Crusader Lord fall. He called to a pair of messengers, relayed his commands, and watched them speed off to his cavalry units...

    The battlefield after the Moorish cavalry's first "drive by shooting" of the enemy warlord

As Majik had determined, my next target would be the enemy warlord. I rarely do "Assassin's strikes" on enemy warlords. However, all four foot knights were within Short (Bodyguards) range of their leader. Still, I rationalized, what better way to target foot hearthguard (armor 5) than by shooting at their mounted warlord (armor 4)? It was time for what Ted jokingly called a "Drive By Shooting." Both cavalry units galloped towards the warlord, pausing to throw their javelins, then continued a Long move away. Ted was faced with a dilemma. Should he take the fatigue, making his warlord vulnerable to a charge, or cancel the hits by removing his foot knights. Ted wisely chose neither and both, and split the casualties among fatigue and the bodyguards.

    Ted's heroes -- still full strength -- continue to attack my Moorish spearman units
Next, Ted launched his foot knights and heroic spear unit into the fray against my full strength spearman unit. We closed ranks -- just surviving was the key thing -- and actually repelled the heroic warrior spear for the first time this game. We even killed four of them! The enthusiasm of the Crusaders MUST be on the wane, I hoped. When the foot knights charged in, we did no casualties, but ended up repelling them because we closed ranks and outnumbered them. That was Ted's gambit for Turn 5, which left me open to retry my drive by shooting on my half of the turn.

    After another turn of throwing javelins at the Crusader warlord, the Moorish cavalry charges in
Majik's bannerman waved the great banner of Cordoba and the Moorish horsemen shouted and waved their javelins in acknowledgement. Once again, a dozen horsemen thundered in and hurled their deadly shafts. Once again, Ted was given the choice between taking bodyguard casualties or warlords fatigue. He took some of each. That was enough for me to play Torrent of Iron again. The uphill unit charged down upon the warlord, who was now Exhausted from fatigue. Since hearthguard casualties are one-for-one victory points in Clash of Warlords, we violated the maxim and removed all of the warlord's fatigue. Two were used to raise our armor to 6 (making us invulnterable to an Exhausted unit), and the other to lower his armor. With our javelin +1, we'd be hitting on 3+. I rolled eight hits on 18 dice (I had played Wholehearted to get 6 bonus attack dice for his 3 fatigue) -- definitely under average. However, Ted chose to kill his warlord rather than eliminate the hearthguard unit AND have his warlord be still Exhausted.

    Ted's heroic spear unit meets an end worthy of song, ridden down by the Moorish cavalry
At this point, the game was pretty much over, we both acknowledged. I finished out the next turn with a couple charges, mopping up the heroic spearmen with another Torrent of Iron and that lone archer from turn 2 who was trying to hide behind the bushes. It had been a fun game. Ted never gave up, and charged and charged till he had little left to melee with. I was surprised he never played Find Chinks in Their Armor for its bonus 4 or 6 attack dice. I don't think a turn goes by that Thomas M doesn't play that battle board ability! Still, in his remarkably few games of Saga, Ted proved he is picking the game up very quickly. After my three quick kills on turns 1-3, Ted pretty much won rounds 4 & his half of 5 on casualties, I felt. Still, the Moors continued their winning streak, and the reputation of Majik grows ever higher in the courts of the Emir of Cordoba!  

Here are the results from the games we played at Dragons Guildhall:

  • Jenny T's Vikings defeated Daniel M's Vikings 24-15 in Battle of Heroes (Tactical Version)
  • Jason S's Byzantines defeated Thomas M's Levantine Crusaders, 34-12
  • Bob B's Last Romans defeated Aaron J's Normans, 30-24
  • Adrian J's Saracens defeated Tom's Crusaders, 11-4
  • Mike D's Moors defeated Ted H's Crusaders 26-11 in Clash of Warlords
  • Dave E's Romans defeated Michael C's Milites Christi, 22-12
  • (2nd Round) Jim B's Skraelings defeated Jason S's Pagan Rus (no score)

Sunday, May 16, 2021

Mean Streets is back! Demo games ran at Drums

    The Santanas and the Mohawks rumble in the Mean Streets of Columbus at my demo at Drums 2021
Prior to this weekend's Drums at the Rapids convention at Fort Meigs in Perrysburg, OH, my last convention I attended was Cincycon 2020. At that con, I ran the final playtest for my Mean Streets rules. It is only fitting that I ran demo games of my gang warfare rules in my first convention after COVID-19. In the ensuring year-plus off, the rules were published and are now available for purchase in print and PDF download.

    The Indianola Mohawks cruise past the graffiti-spattered streets, ready for a fight
Although COVID restrictions are easing, some were still in place - including a 4-player limit to games being run. I set up a game featuring four of my newer gangs that I have painted up -- the Indianola Mohawks, the Santanas, the Franklinton Flippos, and the Eastmoor Kings. Each gang had its own separate primary mission to complete on the opposite side of the board from their starting point. They also had identical secondary missions of "tagging" buildings with their gang logo. I had printed up little foam circles with each gang's logo that they could lean up against the building they were tagging. They were even permitted to come along and tag over a rival gang's logo! And finally, the standard victory points for knocking out rival gang members (plus negative points for those of your own gang knocked out) were in place. 

    A look at the urban tabletop I set up for my demos at Drums at the Rapids
I was running the game on the Friday afternoon session and the Saturday morning session. Normally, Drums features evening sessions, too, but COVID restrictions eliminated those. I like to schedule the final Friday session and first Saturday session when I go to cons to run games to ensure I have to set up my game only once (and can leave it set up overnight on Friday). I had a full table both sessions, along with great, fun-loving players who certainly got into completing their missions. I also normally add a secondary mission of double points for knocking out gang members of a particularly bitter rival on the tabletop. This is to encourage them to "rumble" and not just run around the table tagging buildings and avoiding the other gangs. I'd left that out this time, which I personally think was a mistake. 

    The Franklinton Flippos spy a Mustang that looks ripe for ripping off from the Shell Station!

In both sessions there were gangs who minimized the fighting and instead focused on stealing the car, going on the beer run, or roughing up the restaurant owner (to get put on the "protection money" take). So, next time, the rivalries will be back in play. Of course, if this were a campaign game between players in a regular club, those rivalries will come about naturally. You will want revenge to beat down those low lifes who roughed up your gang members last time! So, next time I run it at a convention (currently scheduled for Advance the Colors and Cincycon in October of 2021) I will put those rivalry bonus points back in place for knocking out members of certain other gangs. 

    Julio, Gang Boss of the Santanas, leads Ramona and El Lobo (two Punks) down the street
I was pleased to see how quickly rules explanation went. Mean Streets is meant to be a fast, easy-to-learn system that lets you get started playing at the convention or club game right away. I gave each player six gang members, a Gang Boss, Warchief (second in command), and four "Punks" (normal rank-in-file). There are a number of Skills they can be customized with, so I gave each Gang Boss, Warchief, and one Punk a skill. The other three had none to minimize the learning curve in what would be most players' first games, I assumed. Once you've played the rules, you could easily handle more than six member gangs. However, I have found in convention games, it is better to err on the side of simplicity and small than go too big.

    Kira, Julius, and Iggy jump a member of the Eastmoor Kings as he trespasses on their turf

The games were, in the words of one of my players, a "hoot" and there was a lot of laughter and ribbing as one gang put the beat down on another. My favorite moment of the two games was when a husband and wife team played in the same session. The hubby sent one gang member across the board by himself into his the territory of his wife's gang. He confessed they had discussed a "truce" beforehand, knowing I love to run free-for-all type gangs. However, when his wife saw this gang member show up in her turf, she had her gang jump the poor Punk and he was quickly knocked out of action. This started a gang war as Wifey put the beat-down on Hubby. A third gang joined in, and it was a wild and woolly melee that raged across one street corner for most of the game.

    The Franklinton Flippos move out from their turf near O'Brian's Pot O' Gold Motel
 
I was really happy with how the miniatures and buildings and other terrain looked on the tabletop. I still have tweaks that I want to do to my urban battlefield, but I really like my Sarissa Precision 28mm MDF buildings. They look perfect, and provide a variety of settings for missions, such as Wallace's Brewpub lets gangs go on "Beer Runs" or Sams Quickie Mart lets another initiate a gang member by having them steal something from the shelves. Lately, I have been buying Terrain Crate plastic/resin terrain from the local game stores to stock the interiors of the buildings. This will only give me more ideas and options for gang missions to perform.

    The Eastmoor Kings move past the kiosks on the roadside, looking for some rivals' heads to beat in
On Friday night, the Eastmoor Kings (controlled by Jim W from our HMGS Great Lakes group) narrowly won the session, scoring 24 points (edging out the Indianola Mohawks and their 23 points). Saturday, the Franklinton Flippos (controlled by Mike S from our Sunday night gaming group) parlayed their intimidating looking creepy clown masks into a comfortable victory with 22 points. It was really fun to see the miniatures that I had spent so much time on and tried to breathe so much personality into interacting on the tabletop. I have named each miniature. Players were given a roster with pictures so they knew who was Sid, Iggy, or Julius from the Mohawks, or Julio or Cruz from the Santanas. I am contemplating attaching something to the base of the figure itself to help identify them, but still not sure about that. I normally don't like figures running around the tabletop with labels on them. So, it needs to be somewhat unobtrusive if I decide to do it.

    A very busy street corner in the Saturday session saw three gangs rumbling in front of the brewpub
In evaluating the missions, I think I made the Flippo's "Steal a Car" too easy with my tabletop setup. Both players succeeded. The other three missions succeeded at about a 50% rate. So, in my opinion, they were "just right" -- not too easy. I will adjust for future missions. Other tweaks that I would like to make with future runnings of Mean Streets demos include jazzing up my streets themselves. I have an asphalt-looking gray-black felt groundcloth I use for my games. However, I may purchase additional lengths of it and paint on yellow road stripes. My center medians with flowers look okay, but can't carry the street look themselves, I feel. I certainly need more of my sidewalks, made from gray ballast flocked MDF boards. I should have a good variety of them in more standardized sizes so that building blocks line up to create streets better.

    In their first rumble on the tabletop, the Indianola Mohawks proved they were up for the fight!
I know I am probably being too picky, but part of any miniatures game is the "Wow!" factor of an excellently staged tabletop. I think I am partway there, especially with the Sarissa buildings and their graffiti-splashed walls. I also need some more scatter. The dumpsters and the gas pumps and various WizKids pieces look great. I need more, though. I created some street lights that I forgot to pack in my boxes, and also need to paint up those electrical poles I have obtained from the local train store. Plus, my friend Tim P sold me a bunch of cool resin pieces like newspaper vending machines, trash bins, and more that need to be finished and added to the tabletop scenery.

Close up of one of the foam circles I created to mark spots gang members (like Ramona) had "tagged"
Despite all of this to do, I was very pleased with how the game looked on the tabletop. I was even  more pleased with how it ran. Both games flowed quickly and smoothly and finished in a reasonable amount of time. No one seemed to feel cheated that it finished too early, and no one looked like it was dragging on and on. Good sign! So, if you are interested in recreating wars in the streets between rival gangs, I encourage you to check out my rules. They're only $20 print, or $10 PDF, and include LOTS of background information. 

    Jenny, playing the Santanas, sends a gang member into Wallace's Brewpub to steal some beer
I hope you enjoy the photos, and feel free to comment on here with questions. If you are on Facebook, join the page I created for the rules, here: https://www.facebook.com/groups/403568800749744

   Manana of the Santanas shows no fear taking on Julius and Iggy of the Mohawks

Warchief Archie leads a contingent of the Eastmoor Kings, tagging buildings at they roam the streets

    
All caught up on the news, the Frankinton Flippos set out to bust some heads on the streets

    And it looks like the Flippos have found a fight with the Eastmoor Kings behind Wallace's brewpub!

    Manana, Jeffe, and Cruz of the Santanas prowl the streets looking for a fight

    Mike ran the Flippos on Saturday, while Heidi in purple ran the Mohawks, and Jenny the Santanas

    Close up of one of the biggest rumbles of the weekend with the Mohawks, Santanas & Kings

Thursday, May 6, 2021

Moors Feast as they Take Home the Bacon

Crusaders advance to contest control of the flocks of pigs we used as objectives in Feasting & Pillaging
Much to my surprise, here I was getting in a second round of Saga at our monthly game day. Normally, I facilitate the matchups, and get in only one game, myself. However, Jason and I finished our first round about the same time his cousins Daniel and Thomas M concluded their match. I tried to talk my friend Allen into a second game against one of them, but he wanted to watch, instead. No one else was available, so I squared off against Thomas. His Crusaders had been on a steamroll since we restarted our Saga Ohio game days, sitting at 3-0 in his last three games.

Thomas usually plays the Levantine Crusaders with a healthy dose of fanatic pilgrims. I had faced him once before, when I was playing Scots and he was just learning the rules. I'd barely come away with a victory, so was really worried how this game would turn out with him being much more experienced. In my opinion, the Crusader board is the strongest in the Age of Crusades book. Thomas changed it up, though, and decided he wanted to try the Baltic Crusader version of the list. We consulted the book and went over the differences. He said he was cool with them, and picked out his six points for a very different looking army than I'd been dreading playing.

    The Crusaders and Moors deploy somewhere in the Iberian peninsula, fighting their timeless war
We decided on "Feasting & Pillaging" from the Book of Battles for our scenario. Thomas said he was open to any, so I picked that one. I think it is a fair one, plus I am leaning towards using it in the Saga tournament at Advance the Colors Oct. 2, 2021. And, most importantly, I don't think I had played Feasting & Pillaging yet! We used my pigs for the three objective markers, placing them on the centerline of the table, spaced apart one Long from each other. We reviewed the rules for seizing -- and more importantly -- moving with them in your possession. Although you may think a mounted army would have an advantage getting to objective markers first, the rules penalize them by essentially giving them a fatigue marker on any turn they move with them (and at a reduced Short distance).

I was first player again, so placed my obligatory large, gentle hill in the center left of the board in Thomas' area (since it had to be a Short distance away from the objective markers). He countered with a piece of terrain on his left towards his baseline. I placed the final piece, one of my new rocky ground pieces, in my center a Short distance from the center objective. I then began my deployment by occupying that rocky ground with my Levy archers. I placed a warrior spearman unit opposite each of the other two objectives, rationalizing that it was an infantryman's game to move the objective markers off the table. As I had placed half of my troops, it was his turn to deploy his army.

    The Baltic Crusader's left of levy bow and center of 8 dismounted knights (foot hearthguard)
Thomas had chosen two levy units, one of bows and the other crossbows, along with a unit of warrior foot and mounted warrior sergeants. The remaining two points were invested in an infantry hammer -- an 8-man unit of foot hearthguard -- dismounted crusader knights. The levy bow guarded his left, the dismounted knights deployed to seize the center objective, and the crossbowmen were set up to advance up the hill I'd deployed on his side of the board. On his right, he had his foot warriors, and on the far right wing, his mounted warriors. I deployed both of my 6-man, mounted hearthguard with javelins opposite them. I had checked their stats and saw they had an Armor of 3 vs. shooting. They would be my first target, hopefully destroyed entirely with javelin shots!

Feasting & Pillaging starts each army off a Short distance from their baseline. On my opening turn, I moved my spearmen and levy forward with Maneuver actions, then moved the Levy again with a Saga dice. I wanted them to be in position in the rocky ground, able to fire on any Baltic Crusader who tried to take the flock of pigs in the center! My cavalry edged forward slightly. I measured to ensure that his mounted sergeants would be outside of their charge range. With all the deadly melee abilities on the Crusader board, it was key that I dictate melees. They have quite a few abilities that give them handfuls of attack dice, I'd learned.


    The Crusader foot sergeants were the Moorish cavalry's first victims, killed to a man on Turn 2
Thomas rolled forward in a general advance, including his mounted sergeants, who came almost to the centerline of the table. "Big Mistake, Indy!" I thought to myself. Sure enough, on my turn, my warlord Majik Ibn Battuta al-Waqaa waved his noble riders forward. Both units advanced to within Medium (javelin) range. Each hurled their javelins, whittling the enemy down. I had also queued up my favorite ability, Torrent of Iron. In galloped the far left unit of riders, slaying the last of the sergeants to a man. Frustratingly, for Thomas, I then pulled back both units with Perseverance. 

    "Eh, you! Hands off my bacon!" shout the Crusader archers as they pincushion the spearmen

I think Thomas was a bit shocked how quickly his unit evaporated. He got revenge, though, with his Levy archers. They advanced and shot twice at my spearmen on the far right, killing three of their eight. The foot knights closed in on and seized the flock of pigs in the center, intent on bringing home the bacon for their Baltic brethren. That caught Majik's eye. On the next turn, the foot knights faced a flurry of missiles. The levy archers fired at them, and both units of cavalry galloped forward and hurled javelins at them. My attack rolls were above average, and Thomas' saving rolls were terrible. After the last missile had been shot or hurled, and both of my cavalry units had withdrawn, only one foot knight stood, trying to hustle the pigs back towards their lines.

    The foot knights are eager to bring home the bacon for their Baltic brethren
Thomas' riposte was once again with his levy, this time with the crossbowmen. He fired two volleys at my left hand unit of warriors, which was closing in on the objective in front of them.  This time, his dice were not nearly as effective. My spearmen actually survived with no casualties! However, the crossbowmen had advanced further along the hill towards the center, which brought them within range of my cavalry. I had wanted my levy archers to shoot down the last foot knight, but Thomas saved all of their hits. So, one of the cavalry had to throw their javelins to finish him off. 

This left me with only one cavalry unit to take on the 12-man crossbowmen unit, though. A shortage of Uncommon dice had left me unable to queue up Perseverance, so there would be no pulling back my cavalry at the end of my turn, this time! Majik nodded to his bannerman, who waved the standard of Cordoba to signal the riders to attack. They galloped forward, hurled their javelins, transfixing some of the crossbowmen. They then charged in with Torrent of Iron. I played Wholehearted to gain additional attack dice from their fatigue, and we managed to eliminate the entire unit. I was worried that with bad rolls, we'd be sitting ducks if the crossbowmen were still around to shoot back next turn.

    Midpoint of the game, Crusader crossbowmen first from the hill while one lone foot knight remains
Thomas is an aggressive player, and wasn't long in deciding upon his response. His warlord charged in at my fatigued -- and uncharacteristically exposed -- cavalry unit. Thomas heaped every ability he could upon their attack, maxing out at the full 16 dice. He rolled enough hits to eliminate the entire unit, but we put four hits on him in return. I teased Thomas that if he whiffed on all four saves his warlord would be dead. Thomas grinned and rolled, getting one save. His warlord survived, but was exhausted.

    After his successful charge, the Crusader warlord about to be charged by the Moorish cavalry
The inevitable Moorish response followed. My remaining cavalry unit charged in (no Rare dice, so it was a non-Torrent of Iron charge). However, we played Wholehearted again, giving us six extra attack dice from his 3 fatigues. We used two of those to raise our armor to 6 so he couldn't cause any casualties. Yes, some say never take fatigue off an enemy warlord, but this is the way my Moors fight: unfairly. If we can charge and have zero chance of casualties, then we do it in fine, light horse style! I rolled my dice, producing quite a few hits, which Thomas was unable to save enough of to keep his warlord alive.

After this, we agreed to call the game. I was in possession of one flock of pigs and was ready to seize the other two. Yes, yes, I know...Moors are Muslim, but these were kosher pigs! Thomas was impressed with the deadliness of the Moors hit and run tactics. I reminded him that it was the first time he'd played the Baltic crusader list, so essentially, he was playing against them with a new army. He reflected that he enjoys the Levantine list much more, and thinks it is much more lethal. I agreed. 

    With the enemy heavy units dead, Moorish spearmen are free to round up the pigs
The Moorish army went home to Cordoba, feasting after their successful pillaging. It was another victory for Majik, and he rode home confident that his status in the eyes of the emir would continue to rise. At his side, his pet cheetah Scirocco prowled, eyeing the pigs being driven along by the foot soldiers, looking forward to his own feast that evening.