Showing posts with label Saga Battle Reports. Show all posts

Tuesday, August 9, 2022

Romans Defend Idols Against Crusade

    My Roman legionaries moment of glory - 5 Warrior infantry repel the charge of 8 mounted knights
We had 9 players at our August monthly Saga game day at Guardtower East. Jenny graciously bowed out as the extra person, which allowed my Republican Romans to take the field at second time. This time, we were matched against the black-robed crusaders of Lee P's Milites Christi. I encouraged players to try out one of the scenarios we will be using in the upcoming Advance the Colors Saga Tournament (Oct. 8). Two groups of players chose Wrath of the Gods, a scenario designed by Joe M of the Northern Tempest Saga Podcast. I apologize if this is a nuts and bolts analysis of Saga game mechanics - so, if you're not interested in Saga, you may want to skim this report!

    'Wrath of the Gods' scenario involves players trying to seize control of 3 pagan idols on the board
In this scenario, players are attempting to control one of three objective markers in the center third of the board. If they have a unit within Very Short (2") distance and there are no enemy within Short (4") of them, they may force the opponent to remove 1 figure per objective marker controlled. These count as losses and the game is scored with Massacre Points. I had recently created a bunch of appropriate objective markers for the pagan idols that the scenario encourages you to use. My favorite were the tree idols made using the Enchanted Tree Stumps from Bad Squiddo Games.

    Two tables played 'Wrath of the Gods' - Lee and I in front and Bob B and Mike S in the back
The first marker goes dead center of the board, and each player places another. Both Lee and I placed our markers as close to our side (just past 12" Long distance) of our board edge, and moved up to the markers with our first turn movement. I had a quandary on how to take the battle to Lee, though. I knew he had one unit of Warrior crossbowmen and a mercenary unit of Turcopoles. So, once again, my Republican Romans were up against a warband with significant shooting capability. I view that as the chief weakness of the battle board, though after Game 2 with them, I think there are some other vulnerabilities. I decided to make a strong push in the center with 3-4 infantry units. My Velites were my only shooting unit, and I was worried about a long range charge against them by Lee's 8-man, Hospitaller knights. So, I moved them forward then into the heavy cover of the ruins in my center half of the board.

    View from the Roman side at the end of our Turn 1, making a general advance towards the objectives
I deployed my big 8-man unit of Roman legionaries on the far right to contest Lee's control of the objective marker closest to him. It was a waste of time and resources, though. After moving them up on the first turn, I never moved them the rest of the way to get within Short of his Hospitaller foot sergeants that had seized the objective. Otherwise, it was a steady advance by my Roman legion. Lee responded with a similar advance, but also proved that his shooting was going to be something I would have to worry about. In one shot with his crossbowmen, he killed three figures of a six-man unit (one Saga dice down already!). His Turcopoles also shot down another legionary from the unit which had moved up to contest the center objective. In my five, supposedly 50% chance saving rolls, l had made only one roll. Sigh. I sometimes wonder why my Romans even wear armor??

    Each of us seized our closest objective on Turn 1 - here my legionaries defend one pagan idol
I did have a slight edge in this scenario as the Milites Christi are not allowed to take any Levy troops in their list. So, when I forced him to lose figures with the Wrath of the Gods, he was losing Warriors while I would be losing Levy (until he eliminated that unit on turn 3!). On my Turn 2, I brought my Levy out of the rocky area, tempting his knights to charge. Meanwhile, I advanced to control the center pagan idol, and would hold it for a couple turns. I left my board loaded up with defensive abilities for his counter-thrust, which I had a good feeling was coming on his half of the turn.

    I kept pushing forward with my legionaries, reaching the center page tree idol and controlling it, too
Luckily for me, this time his shooting did little damage. He planned to make up for that, though, with the charge of his knights -- two full points of mounted hearthguard against one unit of 5 Warriors. Slam dunk, right? However, this was the strength of the Romans (supposedly). I had played Exhortation at the start of his half of the turn, giving all my units within Long distance of my Roman Consul warlord two bonus dice (either attack or defense) in melee. I also had queued up three melee abilities on my board. I closed ranks, but still would roll 9 attack dice and receive 6 bonus dice. This combat would prove to be my high water mark for die rolling for the whole game, though! The five Roman legionaries shrugged off more than a dozen hits from his knights. Lee had played a number of dice on his Orison battle board ability, too, allowing him to shrug off our hits, as well. Neither side suffered casualties, so his knight recoiled.

    The 'one that got away'...15 shots against Armor 4 mounted knights result in only 2 casualties!
On my next turn, I decided to go after those knights with shooting. Mounted hearthguard are 4 vs. shooting, but armor 5 in melee.  So, I moved up my Levy and took two javelin throws with them. In addition, another 6-man unit of legionaries tossed their pila (3 more shots) and charged in. I rolled 15 shots at a 50% chance to hit (7.5 hits, right?). We killed just two knights with the shooting instead of the four we should have, and two more in melee. His unit of 8 was down to 4, but my 6-man unit failed every single save and was eliminated. My streaky/bad die rolling with the Romans was continuing and would keep it up all game.

    Lee's one that didn't 'get away' - his Hospitaller knights prepare to charge and wipe out my Velites
With the eliminated legionary unit, the Velites received a second fatigue. Of course, on his next turn, his knights charged and totally destroyed that Levy unit. Despite inflicting 1-2 casualties on Lee through Wrath of the Gods every turn, I began to feel that my army was  coming out on the wrong end of the casualty exchange. His shooting was wearing my legionary units down, and more importantly, I was not capitalizing on my attacks where I had the advantage. With the missed flubbed shooting turn and my charge that killed only two figures, I felt I was losing. However, during his half of the turn, I counted up the casualties. To my surprise, we stayed surprisingly close all game. 

    Romans are stubborn, and keep up the pressure. My Triarii (right) cutting down his crossbowmen
I sent my legionaries in against his knight unit, which had been whittled down to 2 figures. I played "Pilum," and an extra dice in combat bonus. This time, our javelins finally struck home and both knights fell! On the next turn, I brought my Triarii hearth guard forward and charged into his crossbow unit. We ended up killing all but two. Things were finally getting better, it seemed. At this stage, I might even be ahead, I felt. 

    Hospitallers don't give up either - his Turcopoles mercenaries ride down a battered legionary unit
Lee still had his warlord and mercenary Turcopoles, and they both charged home next turn to redress the odds. My dice deserted me again and his warlord not only completely destroyed the Triarii, the Turcopoles also wiped out the remnants of the legionary unit next to the center objective. This set up my turn 6, though, and I felt I knew a way to seal the win. His warlord was Exhausted, meaning one more casualty would eliminate him. I set up my remaining Saga dice and prepared to see my legions through to victory.

    Another vicious, hard-fought battle was Mike's Jomsvikings clash with Dan N's Poles
However, it was not to be. Lee received an urgent text from his wife and had to pack up and leave right away to take care of a family matter. We didn't have time to count up points. So, sadly, this hard-fought game had to be called with no winner and no loser. I think I could have pulled out a victory by eliminating both his warlord and the remaining two crossbowmen. However, the dice had not been kind to my Romans this game, except for a couple of instances where our saves were good. So, my final strike could have fallen flat. Equally, Lee could have turned the tables in his half of the 6th turn. We'll never know, though. 

    Poles and Jomsvikings batter each other in this brutal, 23-23 tie in Clash of Warlords
After the game, I reflected again on the Republican Roman battle board and warband. We covered this faction in depth on the most recent Saga Ohio podcast. Three other Republican Roman players and myself analyzed the board in a great conversation. As I expressed in that podcast, I don't know if the Romans have a "Plan B" if getting to grips in melee is not successful. In the beginning, I thought loading up on defense dice and letting the enemy wear itself out in fruitless attacks would be a winning strategy. After two games, I'm not so sure. 

    Earlier in their match, the Jomsvikings on left close with the Polish battleline
Perhaps another big vulnerability is whether an army that relying on mostly Warrior infantry can roll enough "Common" Saga dice to be able to move and maneuver its army? Some of the better abilities on the board also require Rare dice. In both my games, I have failed to roll Rare dice on most of my turns. In fact, I think I rolled a Rare on only two of six turns against Bob's Age of Invasions Romans. I know I rolled them on only one of my five turns against Lee. So, that's three of eleven rolls with no equivalent "6" on a Saga dice for an army that generates seven dice when fresh. Crucially, if the Republican Roman player rolls no Rares and instead mostly Uncommons instead of Commons (as I did at least a couple of turns in each game), they are severely handicapped. So, at this stage, I think the jury is out on the effectiveness of this army. 

    Joe D (L) teaches his friend Bob how to play Saga in a Viking vs. Viking battle
Perhaps even more key, I am simply not having a lot of fun with this army. Loading up defensive abilities to blunt an enemy's attacks is not the most exciting part of a game of Saga. Their ability to launch offensive melees is also not overwhelming. Since most of their battle board abilities are Melee oriented, and if they really aren't that great in melee, uhmmm...what can they do?? I think I will give the army one more try, though. If third time is not a charm and I am not having a lot of fun with these guys, it is likely they will go on the shelf except for Age of Hannibal type events.

    Bob B's Byzantine army takes control of the center objective in his 'Wrath of the Gods' match
Elsewhere, my game with Lee was definitely NOT the only close game. In our four games that day, three games were ties (counting mine as a tie). Here are the results from our game day:

  • Dan N's Poles tied against Mike H's Jomsvikings in Clash of Warlords, 23-23.
  • Lee P's Milites Christi tied against Mike D's Republican Romans in Wrath of the Gods (unknown score).
  • Bob B's Byzantines defeated Mike S's Milites Christi in Wrath of the Gods, 56-8.
  • Joe D's Vikings tied Bob's Vikings in Clash of Warlords, 29-30.

    Byzantine and Knightly cavalry struggle for control of one of the objectives on the flanks
Both boards that played Wrath of the Gods said they enjoyed it, so looks like we have a fun scenario lined up in October for the Advance the Colors tournament. I hope folks can make it out for this event! 

    Vikings vs. Vikings in a Clash of Warlords, somewhere in Scandinavia

Monday, July 4, 2022

First Test of Battle for the Republic's Legionaries

    My new Republican Roman Saga army faced a stiff first test in a civil war against Late Romans
I had to skip our Saga game day in June, so I was really looking forward to July’s game day at the Guardtower East. I hadn’t played Saga in awhile, and was eager to roll some dice and try out my new Republican Roman army. We had 10 players show up, another good thing, as it meant I wouldn’t be “odd man out." Once we were sure we had everyone, I let folks choose their matchups. I ended up squaring off against veteran Ancients gamer Bob B, who I always have close, gripping matches with. This one would prove no exception.
    
    My Roman army hides in the shadow of gentle hill, trying to avoid 2 bolt-shooters behind the bog
Bob was fielding his Age of Invasions Romans, so we had a civil war, of sorts. My Republican Roman list is quite different, though. Most of my faction’s advanced Saga abilities are usable only by the heart of the army, the legionaries. In fact, only ONE of the 10 abilities does not specify which of your units can use it. They go from being as permissive as “Infantry” (two abilities), to as restrictive as Hearthguard defenders. Most abilities specify as being usable only by Maniple units, which are Roman warrior or hearthguard  infantry in units originally of eight figures or less.

    Facing off against the Republican legion in the center are a large unit of legionaries & cataphracts
So, the Roman battle board pushes its players to use small units of legionary infantry. I conformed to this historical list building and had four units of 6-man warrior Hastati or Princeps infantry and one unit of 8 figures. I also had one unit of 4 Triarii (hearthguard foot), and one of 12 levy javelinmen known as Velites. There were no mounted troops in this army. Instead, only lots of plodding heavy foot.

    As historically, the Roman Velites skirmishers screen the advance the army against missile fire

Examining the advanced abilities revealed they have excellent defensive capabilities. However, crucially those defensive abilities work ONLY in melee. Their anti-shooting abilities were weak, being limited to one ability which was usable only by Maniples. So, what did Bob field with his variety of Romans? LOTS of shooting capability! The Age of Invasions Romans are known for their ability to field a manuballista, or artillery bolt shooter. Most players take the ballista, but Bob decided to up the ante and fielded two! In addition, he fielded his legionary foot in two large, 10-man units to take advantage of the Plumbatae ability. This represents the small javelins thrown by late Roman legionaries. Plumbatae allow Romans to fire 1:1 with these, which means he’d be rolling 10 attack dice on his shots with them.

    The Velites place themselves between the bolt shooters and the heavy infantry, taking casualties
So, my number one goal would be to not have my heavy foot shot to pieces as we closed with his battleline.  Bob was 1st player, and surprisingly, placed a large, gentle hill in the center right of the battlefield. I had already been planning on playing a hill to block the line of sight of his ballistae, so deployed a large steep hill in the left center. This gave me two tall pieces of terrain to hide behind, at least on my initial advance. Next, Bob placed a marsh towards his center. With three pieces placed already on the board, I could eschew placing another one and instead move one of his. I chose to scoot his bog towards his baseline so he couldn’t hide the ballistae behind it. Bob’s last name IS Boggs, so he placed a second marsh on his left for his ballistae to hide behind, after all. Our battlefield was now set.

    Bob's cataphracts open the melee portion of the battle, hurling back a unit of legionaries
In the Clash of Warlords scenario, the 1st player deploys half his troops. Then the 2nd player deploys his entire army, followed by the 1st player setting up his remaining troops. Luckily, Bob deployed both his ballistae in the first half - behind the marsh, as I’d suspected. Unfortunately, their 24” range on a 4’x3’ battlefield would allow the artillery to shoot just about anywhere they wanted that was not blocked by the hills. Now, I could have sat back on my baseline, out of his range, and said, “Come get me!” There are Saga players who would do this. My number one goal, though, is to have fun. That would NOT be a fun game. So, I bunched up my army in the shadow of the gentle hill, preparing to march down the valley between the two hills. Bob deployed one of his large legionary units near his baseline opposite the valley, backed up by a 6-man unit of mounted cataphracts. Cataphract armored cavalry is an excellent troop type added in the Age of Invasions book. They are slower in “Moves” (but not “Charges”) than traditional mounted hearthguards. However, they are one better armor class. This would be a key point as my Velites javelinmen would try to harass them through a good half the game.

    Late and Republican Romans charge and countercharge, while another tries to circle the steep hill
In Republican Roman legionary tactics, the Velites are the screen - deployed out front of the heavy infantry to absorb enemy missile fire. That would be their job in the opening phases of this game, too. They absorbed volleys from both ballistas and one of Plumbatae from the enemy legions. When they were reduced from 12 to six figures, I scurried them away from the center and screening role and onto the slopes of the steep hill. They would remain out of range of the ballistae for the remainder of the game — barely. However, they would toss javelins from the slopes at the enemy horsemen whenever they got a chance.

    Bob's left wing finally arrives with a thundering charge by barbarian cavalry Foederati
Speaking of those cataphracts, Bob opened up the hand-to-hand portion of our battle with a charge from them against one of my small units of legionaries. A wily general, Bob had noticed I had queued up two abilities (Close Formation and Tenacious) which grant me attack or defense dice when outnumbered by the enemy. It’s the whole reason that many Republican Roman Saga players go with 6-figure units. However, his cataphracts were also six figures, which meant I couldn’t really use either of those. I was taking advantage every turn of Exhortation, which gives every friendly unit in melee within a Long distance of my warlord two bonus defense or attack dice. Once again, NOT against shooting, which was where Bob would do at least half of his damage in this game. I was finding that our late Roman cousins were NOT a good matchup for my Republican Romans!

    A Roman saying says that a battle is a grim one when the Triarii veterans have to enter the fray
Bob’s charge shattered my legionary unit, who recoiled away onto the hill slopes where the cavalry would be unlikely to follow. However, this finally brought two of Bob’s units (the legionaries and the cataphracts) in range of my legionaries’ charges. Up to this point in the game, we were suffering the casualties and the late Romans were the ones dishing them out. I launched a very disappointing charge against his big legionary unit (13 dice causing only two casualties). This established a new theme for the second half of the game: Bob’s saving rolls. To this point, I had been rolling above average saving rolls against his shooting. However, Bob would prove to roll incredibly well in melee saves. His shooting may be subpar, his melee rolls were about average, but he shone all game in saving rolls.

    Bob's sole remaining cataphract won him the game with his heroic saving rolls against all odds
For several turns, we traded charges, Bob chewing up my small legionary units (always softening them up with their Plumbatae missile attack). I was simply not doing enough in return on my counter-strikes, though. He was winning the war of attrition. The Velites were slowly but surely whittling down the enemy horsemen with their javelins. I thought the cataphracts would finally be eliminated when they charged my Trairii. I rolled four casualties in melee against their two remaining horsemen. In Saga, you save against melee hits only on a 5 or 6 (1/3 chance). So, how many of those four hits did Bob save? Three of four — 75% of them!

    We had 10 players show up for our July Saga game day fielding 9 different types of armies
Still, when he charged in his mounted general to finish off one of my legionary units, I thought I had a way of winning the game. If I could kill that last cataphract, its loss would inflict a fatigue on three of his units, including his general. I could then charge in my fresh, 8-man legionary unit against his general  and hopefully kill him, too (as he would have two fatigues). How did it work out? Bob proceeded to roll a half dozen saving rolls in a row for the lone cataphract, effectively clinching his victory.

    Jenny's war wagon in her Eastern Princes army takes a historical opponent in Dan's Poles
When we counted up the points, it would have been a Draw if I had killed that last cataphract. However, since I couldn’t take him out, Bob eked out a victory. We both agreed that that horseman would be awarded medals and honors for his heroic stand. I had lost, but honestly, I felt I did as best I could with a brand new army and a matchup that was disadvantageous. Whereas before I felt that the Republican Romans were somewhat weak against enemy shooting, I think this game confirmed it is worse than I thought. They are highly vulnerable to enemy shooting. I think I am going to have to rethink my army composition against “Shooty” armies. It may be time to hire some mercenary Cretan archers or even recruit another unit of Velites. With an armor of 4 and my small unit sizes, I can foresee bad things happening against our missile-rich Numidian, Carthaginian, and Spanish enemies in the Age of Hannibal book. And that doesn’t even factor in all of the ahistorical Shooty armies like my own Moors. Or the Irish. Yikes!

    Dan's Polish knights resplendent in their individual medieval heraldry triumphed over their foes
Still, solving tactical puzzles is one of the strengths of Saga as a game. I will have to figure out a way to overcome that, just as the actual Roman generals did two millennia ago when they conquered the Mediterranean and built an empire.

Here were the results of the games from our July Saga game day:

  • Bob B's Romans (AOI) defeated Mike D's Rep. Romans in Clash of Warlords, 16-11
  • Andy S's Rep. Romans defeated Mike C's Jomsvikings in Battle of Heroes, 10-0
  • Lee P's Milites Christi defeated Tyler P's Irish in Battle of Heroes, 23-13
  • Dan N's Poles defeated Jenny T's Eastern Princes in Clash of Warlords, 16-12
  • Mike S's Vikings defeated Tom G's Welsh in Clash of Warlords, 19-11
  • (Rematch) Tom G's Welsh tied Mike S's Vikings in Clash of Warlords, 22-22 

Thursday, May 5, 2022

Dozen Generals Gather for Saga Game Day

    Bob B's Republican Romans charge into the rocky ground to dislodge pesky Pictish crossbowmen
We had a great turnout of a dozen players for our monthly Saga game day in May at the Guardtower East in Columbus, OH. It was a nice variety of warbands being played, too. We had two Republican Roman armies from Age of Hannibal, Picts and Romans from Age of Invasions, Vikings and Jomsvikings from Age of Vikings, and Byzantines, Poles, and Milites Christi from Age of Crusades. Oh, and even a Skraeling player! Two players were relatively new, as well, so we continue to recruit new blood for our Saga battlefields.

    Front, Mike C's Vikings advance against Dave's Romans, while Lee and Andy maneuver for position
Prior to Sunday, I was undecided about what I wanted to play. The last two times out I had gone back to playing my Moors, but prior to that I had been playing Picts regularly. I even considered trying a new faction from Age of Invasions. I have figures for most of the warbands in that book (no Sassanid Persians or Romans, though!). I considered running Franks, Britons, Saxons, or even Goths. In the end, I decided to stay with the Picts. I am actually glad that I did because Saga gentleman Bob B asked to play me, and he wanted to do 8 points worth of troops. I had 8 points of Picts, but probably would have struggled to field that many points of the others.

    The Romans prepare their battle lines to receive the frenzied charge of the Vikings
Honestly, I wasn't 100% sure I had those 8 points until I pulled the figures out of the box! In the end, I decided to not use a third unit of levy and instead use the Molossians mercenary wardogs, again. This would be the third time I used them, and guess what? In two of the three games I've used them, they have done nothing at all. This would be one of those frustrating times. On the turn I planned to send them in, I actually rolled all Uncommon dice, meaning I could not activate them at all! Sigh. One day, maybe, the pooches will see action. But -- as Aragorn says -- it was not THIS day!

    The armored fist of Bob's Roman army, deployed to strike quickly across the field at my Picts
Bob was playing Republican Romans. He really wants to settle into this army and learn it more, so I was happy to give him a chance. Bob doesn't mind legendary units or mercenaries (and actually prefers using them, I believe). So, he was using Marcellus, "Sword of Rome" -- a legendary warlord that actually costs 0 extra army points. He also fielded the Cretan archer and Thureophoroi mercenaries. In the end, like the dogs, I think this was a bad choice for him. So many of his abilities on his battle board are meant for "maniple" or "warrior infantry" troops and are NOT usable by mercenaries. Similarly, he decided his unit of 8 Roman warrior cavalry was not a good choice. On the turn they charged into contact he had four melee abilities queued up. And because they were neither infantry nor maniple, he couldn't use any of them.

    After turn 1, the Picts are much more spread out than the closely-ordered Roman legion
Bob and I decided to play a straight, Clash of Warlords game since we were doing 8 points and would have enough to manage without adding in special scenario conditions. Bob deployed in a tight block on the right half of his side of the table. I spread out more, using the ruins, rocky ground, and forest as cover for my levy troops. The Romans deployed first, which meant that after seeing me spread across the table, Bob was able to condense into an armored fist facing my left. He would jab quickly with that fist across the table and had me back on my heels reacting to his aggressive attack from turn two.


    Romans are pushing the Picts out of the rocky ground and beginning to shred their left wing
I had deployed my levy crossbowmen in the rocky ground, and moved them up and shot them once at the closest unit of Roman warrior legionaries. Bob cleverly deployed in two ranks with the warriors in front and his double-strength hearthguard Triarii and mercenaries in the back. I played my usual Stalking advanced ability, giving me 9 attacks at +1. From the beginning, it was obvious the rolls might not go my way this day. Needing a 3+, I should have scored 6 hits getting on average three kills. I did get two, but that left the 6-man unit at 4 figures, still generating a Saga die. I declined to shoot a second time, perhaps unwisely, as I didn't want the crossbowmen to be charged with two fatigue markers. I probably should have shot, especially considering how melees were going to go in this game.

    On the table next to us, Jim B (one of the true gentlemen of the hobby) enjoys a game with Karen
In the end, I won only *1* melee the entire game. Bob's saves in melee were above average and mine were phenomenally bad. On one turn, he scored 10 hits. I had played the Feint Saga ability which meant I saved on 4+. I scored ONE saving roll out of 10, instead of the average five. On another turn, my troops were in solid cover AND had Feint played, meaning they score saves on 3+. In answer to the 9 hits the Romans scored, I rolled 3 saves and 6 misses -- exactly opposite an average roll. It quickly became demoralizing for me. If it was a melee, my rolls to hit and to save were poor. Bob's were above average or good -- not ridiculously so, though. However, mine WERE ridiculous. Badly so.

    Picts have lost their left and been driven from the ruins and now struggle to bring up more troops
My Picts didn't give up, though. Despite being pushed out of the ruins by his Triarii and a legionary unit, and despite one of his legionaries eviscerating a larger unit of Pictish warriors, we kept hammering back. And failing. A key moment came when he left Marcellus, his legenary warlord, exposed. I galloped my 4-man mounted hearthguard unit forward and tossed javelins. I played Stalking, which gave me 7 attacks (hitting on 4+). We scored 1 hit. I decided to throw caution to the wind and charged them in. In 12 attack rolls, hitting on 4+ against his warlord, we caused only three casualties. He had one figure of Triarii within range to employ as bodyguards, so the Sword of Rome survived by one casualty.

    Bob's warlord, Marcellus - Sword of Rome, survived two charges that could easily have slain hiim

What's more, I had another opportunity to take out Marcellus towards the end of the game. It was similarly handicapped by poor die rolling on my part and above average saves on Bob's part. Probably the biggest thing that hurt my end game was rolling 0 Rares on my last three turns. What's more, on Turn 4 I rolled all Common dice. On Turn 5, I rolled all Uncommon (that was the turns the Molossians were whining to get into battle but couldn't). 

    End game: the doughty Picts refuse to give up, but simply haven't killed enough Romans
I know this account has focused on my poor die rolling. I do want to point out that Bob commanded a good game. His quick march and attack on my levy crossbowmen by his Trairii (using Quincunx to move up and Pila to throw javelins and charge in) caught me by surprise. And I should probably have used Secret Ways more. Marcellus' biggest advantage as a Legendary warlord is that Pila becomes a basic ability - Bob could load up the dice on it and use it for his charges for his legionaries. However, if I had queued up Secret Ways, my Picts could have scampered off to a terrain piece far away after the javelin toss and not had to weather the charge. My mistake, definitely. I finally had a terrain and deployment setup where I could actually use Secret Wars (the Pictish "teleport") and I had a brain freeze and didn't use it.

    Dan, in orange, maneuvers his Poles, while Jim R and Adrian pause in their match
In the end, I was too willing to sit there and let the Romans come at me and engage my Picts in melee. I should have not relied on the counterpunch and instead maneuvered for my own attacks against his more vulnerable troops. Of course, seeing how the melee dice went (I DID save well against his shooting), it might not have made a difference anyway. One of the humbling things about Saga is that you can give it your best, fighting and scrap the entire game, but if the dice gods do not favor you that day, it will likely be for naught. That said, I had a sneaking feeling today would be a bad luck day. The night before, I had played board games with some friends and won both games. And the weekend before, I had done the same thing and swept the evening. I was due for a comeuppance and the Picts were just at the wrong place at the wrong time. Congratulations to Bob! He did everything he needed to not make mistakes that gave me an opening and to command his legion to victory. Ave Marcellus!

    Andy's Republican Romans advance quickly to take the battle to Lee's Milites Christi
On the other battlefields, we were having a lot more close games than mine. Another Republican Roman faction, commanded by Andy S, faced Lee P's Milites Christi. They were playing Battle of Heroes and fought to a 13-12 tie. On the table next to me, another Saga gentleman, Jim B, was using his beautifully-painted Skraeling army in a historical matchup against Karen's Vikings. Their game surged back and forth, with each scoring successes. It also ended in a hard-fought tie.

    Mike S's Vikings advance upon a new and different foe - the Poles!
Fresh off his Saga Ohio podcast interview, Jim R had challenged Adrian J to a battle right away, and the two were the first paired up. Jim R ran his Byzantine army against Adrian's deadly Jomsvikings (that he won the 2021 Advance the Colors tournament with). Jim had some traps in mind to spring on Adrian that he had mentioned in our podcast. However, Adrian is also a wily commander (I put Jim and Adrian as in the top three of Saga Ohio players, skillwise). Adrian was able to surge at the end and the Jomsvikings defeated the Byzantines 25-20 in Feasting and Pillaging.

    An early game view of Andy's Republican Roman legion deployed for battle against Lee's crusaders
Another of our Romanophiles, Dave E, played his Age of Invasions Romans against one of our newer players, Mike C, who was running Vikings. To keep it simple, Dave walked Mike through Clash of Warlords, helping him with terrain placement and more. Dave has probably been playing his Romans longer than any other Saga player has been running their current army. He was able to turn back the Viking onslaught, and triumphed 29-17.

    Another view of Mike C's Vikings and Dave E's Romans closing to battle
Our other relatively new player, Dan N, brought out his Poles, again. Each time, more and more of the army is painted and it is looking really good. The Poles are one of the lesser-played armies in Age of Crusades, and certainly are not a common sight in our Saga Ohio games to this point. As such, Mike S faced a new foe and the newbie was able to turn the tables on the veteran player. The Poles defeated the Vikings 31-18 in another running of Battle of Heroes. 

    8 points of Picts and Romans deployed for battle in a Clash of Warlords
 All in all, it was a great day of Saga. I hope that we continue to grow in this post-Covid return to normal gaming. I also hope that our game days grow even more now that the bumper crop of tournaments has subsided for the moment. I think the next tourney in the Saga Ohio area isn't until DayCon 2022 on Saturday, July 16. Adrian will be running this, so keep an eye on the Saga Ohio Facebook group for more details. I am thinking that I will likely NOT be participating this time at DayCon. I want to run some of my First Command Wargames there, so will have to forego the fun of the tourney this time. 

Otherwise, players interested in tournaments can plan on attending Advance the Colors 2022 in Springfield, OH, on Saturday, Oct. 8. It will be an Age of Melee (all historical periods). Further into the year, I will also run a Saga tournament at Shieldwall Gaming Club's new convention Shore Wars in Mentor, OH (Cleveland area), Dec. 2. It will be a "team" tournament. Players sign up in two-man teams. One member of the team runs an Age of Vikings army, the other runs Age of Crusades. Players will be matched up only against their own Age, and scores will be combined to determine an overall winner. It will hopefully be an interesting take on a Saga tournament!

Until then, make plans to attend Saga at the Dragons Guildhall on May 15 at noon!


Friday, April 15, 2022

An Intriguing Idea for a Saga Tournament: 8-point Armies

    As always, the workhorses of my Moorish Saga army are my mounted hearthguard with javelins

It was an intriguing idea for a Saga tournament - using eight points of troops instead of six. In addition, players would be permitted to use Legendary warlords or units. I'm not a huge fan of legendary troops. In fact, I don't think I've ever used them in a game of Saga. However, I have played against others that have. I was planning on using my Moors for the tournament. Looking at the Moor troop list, I actually didn't have miniatures for either the infantry Black Guard or Camels painted up. Being able to field those troops was supposedly one of the main bonuses of using a legendary warlord. So, Legendary warlords or units were out! 

My next decision was whether I should use a mercenary unit? I checked, and I had exactly eight points of worth of Moorish troops painted up. The two new units I would be adding in were another unit of 12 levy bowmen and a unit of 8 mounted warriors. I've heard mounted, javelin-armed warriors can be effective in Saga, so I was interested in using them. They would be very vulnerable to missile fire, even more so than my armor class 4 mounted hearthguard with javelins. Saga Thorsday's Monty Luhmann had referred to them as a "magic missile," meaning you can send them to make an effective strike on an enemy unit. They'd likely be shattered after the charge, but the 12" range charge and +1 bonus for javelins charging seemed like a fun weapon to try, so I eschewed mercenaries as well and decided to go with a "vanilla" warband.

    My Round 3 matchup against the Saxon hordes of Alfred the Great
The tournament was held at Game Table Adventures in Newark, OH. This would actually be the third Saga tournament GTA had held since the start of the year. I had won the first one with my Picts, but did not play in the second. I set a goal for myself to win two games. There's no way I could get the combination of luck and beneficial match-ups or scenarios to repeat as champion, I warned myself. Just like in January, we had 14 players show up. From earliest to latest by time period, here were the armies and players that entered (with Legendary warlords in italics). Six of the 14 used Legendary warlords, but a number of others (1 Viking, 2 Byzantine) used Legendary units.

    Legendary warlord Scipio Africanus leads Michael Cooper's Republican Roman warband

  • Republican Romans (Legendary: Scipio Africanus), Michael Cooper
  • Ostrogoths, Jeff Gatlin
  • Vikings, Mike Stelzer
  • Vikings, Schawn Hennessy
  • Carolingians (Legendary: Charlemagne), Jason Stelzer
  • Anglo-Saxons (Legendary: Alfred the Great), Andy Swingle
  • Normans, Dennis Lockhart
  • Muttatawi'a (Legendary: Abduallah ibn Yasin), Joe Merz 
  • Crusaders, Ted Hehemann
  • Moors, Mike Demana
  • Eastern Princes (Legendary: Alexander Nevsky), Jenny Torbett
  • Mongols (Legendary: Subotai), Joe Dihrkop
  • Byzantines, Bob Boggs
  • Byzantines, Jim Randall 

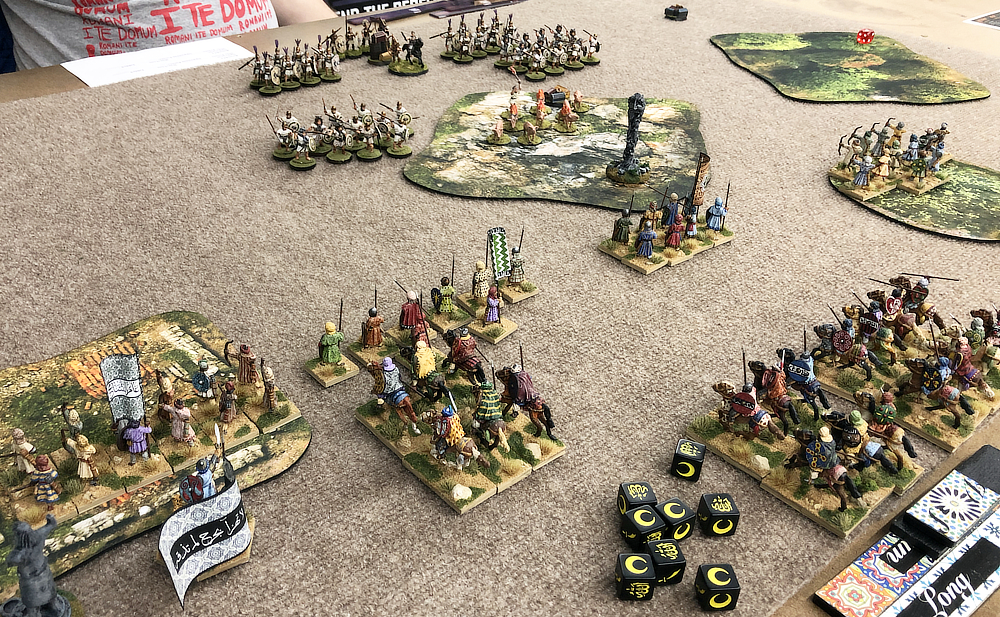
The next very important consideration was which scenarios would we be playing in our three rounds? First up was the standard Clash of Warlords. Round 2 would be Desecration, and Round 3 was Change of Plans. Overall, I was happy with the choice of scenarios. None are ones I dislike and equally these didn't seem to be a bad pick for my Moors. We were told we would be given 2.5 hours per rounds, though I think in Rounds 2 & 3 the tourney director was squeezing that time be 15 minutes or so. In all three games, I came close on time limits - hopefully not because of slow play on my part!

I think most of us were also surprised to find that we would be deploying our own terrain. Typically, many Saga tournaments set up terrain ahead of time. Perhaps this is a good way to shave a few minutes off of the time needed for each round? Most agree that placing terrain is part of the skill at the game. However, as long as the tourney director does a relatively fair job of with their preset terrain, most Saga players don't seem to mind. I have been to only one tournament where players (including me) felt the terrain was unfair and hindered certain types of armies. Game Table Adventures provided each table with a packet of the mouse pad material 2D terrain for Saga. Of course, we didn't get to keep it - not that I would expect that!

My Moors deploy against Dennis Lockhart's Norman army - a force that has given me fits in the past
Round 1: Normans

My opponent for Round 1 was someone I hadn't seen in a long time, Newark gamer Dennis Lockhart. I used to see him at the local and regional conventions regularly, but hadn't seen him much lately. His Newark area group is very active, so my guess was he's been getting his fix in locally. He and a half dozen or so others were playing Saga regularly at the game store on Thursdays, so I was curious to see if there was anything different about their style of play from our group. His force was very weighted towards mounted knights - five units of four figures, and one point of 8 warriors split into two units of four. He also had two units of levy archers to use the dreaded Norman battle board ability, "Volley Fire," which allows them to shoot out to 24".

    My warlord encourages his infantry forward to protect the cavalry from Norman arrows and charges

We deployed terrain, with him placing a field in the middle of the board on my left. I countered with a ruins in my right center. He placed a rocky ground in his center rear. I took the opportunity to move his fields onto my half of the board so that I could have terrain to place each of my levy archers in. This seemed to wrong-foot Dennis. especially when my two warrior spear units deployed to the right and rear of each feature and my mounted units clustered along my baseline. We were playing Clash of Warlords, so he generated only 3 Saga command and control dice on round 1. He moved his archers up and loosed a Volley Fire, which caused a couple casualties among my center unit of spearmen.

    Moorish cavalry launches a 'Torrent of Iron' counter-attack against exhausted Norman knights
I countered by shooting with my levy archers and sending my mounted hearthguard forward to toss javelins. Our fire was ineffective, killing only one Norman heavy cavalryman. When he saw me pull back the cavalry and screen them with my infantry -- my normal Moorish tactic -- he seemed a bit surprised. Even though my shooting was poor, he recognized that it should have caused more casualties. He decided to test the strength of my infantry spear wall. One Norman cavalry unit galloped forward and charged into my spearmen guarding the right. We closed ranks and played "Forest of Spears," which ended up meaning we each took one casualty, and he recoiled. On my turn, I sent forward my mounted hearthguard and they slammed into the Normans, destroying them. We then pulled them back again behind the infantry. 

    Another unit of Norman knights prepares to charge the Moorish infantry, while my cavalry wait
On my left, I continued to send volleys of arrows and javelins into his mounted units, killing a figure or two with each shot. In response to his shooting, I made sure only infantry could be targeted, either keeping my horse out of Volley Fire range or tucked behind another unit. He sent forward another unit of Norman mounted hearthguard on my right and test my spear wall, again. Once again, we took few casualties. I was careful to NOT use his fatigue in melee vs. the infantry, ensuring he would end the turn with two. This meant my Torrent of Iron charge would inflict the third fatigue, leaving him exhausted for the fight and unable to hit my cavalry (once I used his fatigues to raise my armor to 6). Also, those 3 fatigues gave me 6 extra attack dice with "Wholehearted." My tactic of taking his blows with my infantry and counter-attacking the fatigued attackers with my mounted hearthguard was working perfectly this game. 

    Late game: Left, Norman cavalry has been whittled down by repeated volleys of arrows & javelins
After the game, we agreed he should have been more aggressive, and not sent just one unit forward each turn. Instead, he was loading up his Combat Pool to aid his shooting and setting up dice for just one mounted attack each turn. He did whittle down my center infantry to just two figures by the end of the game. However, as cynical as it may sound, that is the role of my warrior foot. They are there to be a wall that the enemy wastes their strength slowly wearing down. On my left, I was more aggressive and sent my other unit of mounted hearthguard forward to toss javelins, sometimes even accompanied by the mounted warriors. The infantry in the field kept up fire, too, supporting their volleys with their own. By the end of the game, his forces were worn down enough that I sent my cavalry forward to charge them rather than skirmish with javelins.

    Dennis' grandson cheers on the Normans while he surveys the battlefield and offers sage advice
All in all, it was one of those rare games where everything pretty much goes according to plan. Once we counted up points at the end, the Moors had a solid win. It was a good start to the tournament, and nice for my Moors to get some revenge against their hated Norman foes!

Round 1 Results

  • Mike D's Moors defeat Dennis L's Normans
  • Joe M's Mutatawwi'a defeat Ted H's Crusaders
  • Jason S's Carolingians defeat Andy S's Anglo-Saxons
  • Joe D's Mongols defeat Mike S's Vikings
  • Jim R's Byzantines defeat Jeff G's Goths 
  • Bob B's Byzantines defeat Schawn H's Vikings
  • Jenny T's Eastern Princes tied Michael C's Republican Romans

    Republican Romans and Moors compete to desecrate each other's objectives (end of turn 1 picture)

Round 2: Republic Romans (Scipio Africanus)

Our round 2 scenario was Desecration, and my opponent was Cincinnati-area gamer Michael Cooper. He's been a regular player in the various tournaments and game days for a year or so. He's done a lot to help recruit and build the community in his area. He was playing his new favorite army, Republican Romans. He'd chosen to use not only the Legendary warlord Scipio Africanus, but also a unit of war pigs! The miniatures are great, with flames curling up on the back of the swine, who are herded towards the enemy by their handlers. He admitted that in a tournament with no elephants, they were of limited effectiveness, but had been looking forward to using them since he painted them up. This tourney gave him that opportunity.

    War pigs, Hastati warriors and Velite levy javelinmen make up the vanguard of the Roman advance
For terrain, I'd placed a ruins on my far left and a marsh on my left, with the intention of hiding objective markers that he had to attack behind them. Michael placed a large steep hill in the center and a woods guarding his left flank. Only one objective may be placed inside terrain, so I stuck mine on the closes edge of the hill, but so that he would have to cross 2/3's of it before he could get to it. My thought was the terrain would slow him down but provide no cover to my shooting. Little did I know that warpigs are no effected by terrain! Still, my archery and javelins should make approaching the objective marker dangerous. Michael did a similarly good job of hiding the objective marker. I identified one in the open just beyond his woods as being the most likely one I could take.

    As war pigs fall due to missile fire, the Velites backed by Hastati continue the Roman advance
Michael opened the game with an immediate advance by the vanguard of his army, which included the war pigs as the tip of the spear, squealing as they labored up the steep slopes. Supporting the swine were a unit of foot warrior Hastati and a unit of levy javelin-armed Velites. The rest of his army (two more units of warriors and one of Triarii hearthguard hung back with Scipio. On my half of the turn, I moved my archers in the ruins towards the center so they could begin to loose volleys at the war pags. My mounted warriors race up to the edge of the steep hill and hurled javelins. They would pull back after throwing, to remain out of charge range of the Romans.


    Michael's Velites toss javelins at my Moorish spearmen, who stand like a wall protecting the cavalry
 
Michael continued the advance of his vanguard, with the velites slipping in front of the Hastati to screen them and toss their own javelins. I continued to pour archery and javelins in an attempt to stop the implacable Roman advance. War pigs squealed and died on the slopes, and Velites fell. The Hastati shouldered past the skirmishing youths and prepared to charge. The Moorish warriors leveled their spears and made ready to repel their charge. Once again, my Moors closed ranks to minimize casualties. And once again, the cavalry launched a Torrent of Iron counter-charge on my turn and wiped out the tired enemy. The infantry climbed onto the slopes to place themselves between the enemy and our objective marker to protect it.

    The Velites withdraw and Hastati ready their pila for a charge into the men of Andalusia
Once Michael saw his legionaries eliminated and the ranks of the Velites depleted, he began to move his reserves to his right to reinforce the attack. This was the opening that I'd been waiting for. My mounted warriors darted forward and charged into the objective marker that was now unprotected. With 8 dice hitting on 4+, I should have caused four hits. However, I caused only one. Michael rolled two dice to save the objective marker and rolled equally badly, missing both. This gave me the comfort to stay back, defend my objectives, and keep wearing down his troops. With the last war pig dead and one unit of legionaries gone, I felt I had  a comfortable lead.

  Desecration is the scenario's name, and my mounted warriors obliterate a Roman objective marker 
I sent my units of mounted hearthguard forward to begin harassing the advance the Roman reinforcements. The Velites had retreated to the steep hill slopes to avoid the cavalry. Scipio advanced on two fronts with his reserves. Half threaded their way between the hill and the forest, while the others advanced across the open at the waiting Moorish cavalry. The terrain and forces I had defending the objectives proved too much, though. The Romans were unable to attack any markers and their charges were frustrated by closing ranks and defensive abilities of the Moors. 

    The infantry open lanes for the Moorish horsemen to ride through and harass the Roman advance
Meanwhile, the cavalry continued to dart forward, toss javelins, then retired out of range or behind the infantry. The Romans still had a strong force left, but they simply ran out of time and could not come to grips effectively to score enough points to win. Although I had my challenges with dice rolling this game, I was able to do tactically what I set out to do. Once again, I think things might have ended differently if my opponent had advanced more aggressively. However, I was 2-0, which was my goal in this tournament -- to win at least two games.

Round 2 Results

  • Mike D's Moors defeat Michael C's Republican Romans
  • Jason S's Carolingians defeat Joe M's Mutatawwi'a
  • Bob B's Byzantines defeat Andy S's Anglo-Saxons
  • Mike's Vikings defeat Jeff G's Goths
  • Jim R's Byzantines defeat Joe D's Mongols 
  • Schawn H's Vikings defeat Ted H's Crusaders
  • Jenny T's Eastern Princes tied Dennis L's Normans

    My 3rd round opponent would by Alfred the Great's Anglo-Saxon horde of 84 levy figures!

Round 3: Anglo-Saxons

I fully expected to be matched up against one of the other three undefeated players this round -- Bob B's Byzantines, Jim R's Byzantines, or Jason S's Carolingians. I wasn't sure which army would be the better matchup, as all would likely have significant missile fire to counter my own. Much to my surprise, Andy waved me over and said he was my opponent for the final round. Andy was 0-2, though his first game against Charlemagne's Carolingians was a squeaker, I was told. He was fielding an all-levy Anglo-Saxon horde. The scenario was Change of Plans, which I also don't mind. The goals of the first two scoring phases are to kill enemy troops while preserving your own, which I think is pretty much the goal of any wargame, right? And with no missile troops of his own, shouldn't my cavalry have free rein to run forward, toss our javelins, and retire to safety?

    The Anglo-Saxon hordes raced down upon my left, outnumbering it quickly

Andy had other plans, of course. He was playing Alfred the Great who has incredible command and control ability. Every turn, he starts off the Orders phase placing any two of his Saga dice on whatever ability he wants and with whatever face he desires showing. Plus, he generates two Saga dice. So, the chances of whittling down Andy's levy forces enough to make him run short of Saga dice this game were slim. The net result would be Andy could move the bulk of his forces forward aggressively and more quickly than you could imagine. We were riding the horses, but they would be moving around the battlefield almost as quickly.

    As more Saxons flooded my left, the Moorish cavalry began shifting to the right
Another thing I hadn't counted on was a repeat of what happened in my last game against Andy. His dice -- particularly when it came to saving throws -- were phenomenal. At one point, one of my cavalry charges caused 14 casualties. He saved 10 of them! I got an early inkling as the game got underway. I raced my cavalry forward to throw javelins at his advancing troops and he kept saving against my hits. Repeatedly. After two turns, I had caused less than half a dozen casualties. Meanwhile, his pell-mell double advances had allowed him to crash into one of my Moorish warrior spear walls. His Anglo-Saxon levy smashed that wall down to half strength in one attack. On the next turn, he followed up and eliminated it. 

    The Moors pinwheel to the right leaving the Saxon hammer blow to fall on empty air
I tried my tactic that had worked earlier. I did not use his fatigue when he charged my foot, and then counter-attacked with my cavalry on my turn against his units with two or three fatigues. When my Moorish riders charge home with Torrent of Iron, it tends to completely wipe out enemy units. In this game, Andy would close ranks and I would cause perhaps 2-3 casualties. That simply wasn't going to do it against an army of seven units of levy foot (84 figures). Andy was ahead on points after the Turn 3 scoring. I kept hammering, though, hoping for his saving dice to cool off. Half the game was still left. A cold streak could make up ground quickly. 

    The ruins in the center was hotly contested - many Saxon charges were beaten back by my archers
Meanwhile, my cavalry retreated around behind the center ruins, where both my archer units were huddled, and towards the right flank. Andy did his best to follow my pinwheeling movement, but even with Alfred the Great's command and control, he was still foot troops trying to chase down cavalry. I actually was able to pull ahead on Turn 5 when we counted up Survival Points. Here, though, I made a critical error. The right hand spear warriors moved into the ruins to try to interpose themselves between the Anglo-Saxons and my archers. I should have been advancing them towards the enemy half of the board in preparation for the Conquest Points counting at the end of the game. I should have realized that after Turn 5 casualties are completely irrelevant. All that matters is you cross the midpoint of the battlefield completely with your unit. The more figures in your unit, the better.

    Andy was thinking ahead, and knew he had to get his levy "bum rush" across the center line
My attacks finally began to hammer a few of Andy's units, but then again, did that matter? He had rolled great saving rolls for the part of the game where it mattered. His aggressive advance had ensured the bulk of his army crossed the midpoint and scored as best as they could as levies. Only my mounted troops were able to cross the midpoint -- the surviving three foot units were mired in the ruins, which were on my half of the table. I think Andy cleverly realized the shift in focus of the game before I did. Still, it would be close. 

We counted up points and it was a dead-even tie! We recounted them to be sure, and it remained 47-47. The Anglo-Saxons' tough survivability coupled with Alfred's excellent command and control effectively countered the Moors maneuverability and punch. Andy played his army excellently. He used his battle board abilities in the correct order and with great effectiveness. Although it was not a loss for me, it still felt like one. With all of the Moors shooting and melee punch, plus my fairly extensive experience with them, I could not overcome the Anglo-Saxons in a fair fight with favorable terrain.

Still, it was a fun game (it is always fun playing Andy), and a great tournament. I had attained my goal of winning at least two games. To me, it proved January's victory wasn't an anomaly in view of my previous snake-bitten, Saga tournament performances. The only questionable part of the day was the questionable way the tournament director ran it. Not only were winners not matched up against winners for the most part, he used a bizarre scoring system that somehow failed to award victory to either of the 3-0 players. He declared a player who was 1-2 as victor, which left us all scratching our heads. Somehow, he said I was second, but with both Jim and Bob being 3-0 with their Byzantine armies, I counted myself as third place, at best.

Round 3 Results (scenario: Change of Plans)

  • Bob B's Byzantines defeat Jason S's Carolingians
  • Jim R's Byzantines defeat Michael C's Republican Romans
  • Mike D's Moors tie Andy S's Anglo-Saxons
  • Mike's Vikings defeat Jeff G's Goths
  • Joe M's Mutatawwi'a defeat Joe D's Mongols 
  • Jeff G's Goths defeat Schawn H's Vikings
  • Ted H's Crusaders defeat Jenny T's Eastern Princes


TOURNAMENT WIN-LOSS STANDINGS

Finished 3 wins, 0 losses

  • Bob Boggs, Byzantines
  • Jim Randall, Byzantines

Finished 2 wins, 0 losses, 1 tie

  • Mike D, Moors 

Finished 2 wins, 1 loss

  • Jason Stelzer, Carolingians
  • Joe Merz, Mutatawwi'a

Finished 1 win, 1 loss, 1 tie

  • Dennis Lockhart, Normans

Finished 1 win, 2 losses 

  • Schawn Hennessy, Vikings
  • Joe Dihrkop, Mongols  
  • Ted Hehemann, Crusaders
  • Mike Stelzer, Vikings
  • Jeff Gatlin, Goths

Finished 0 wins, 1 loss, 2 ties

  • Jenny Torbett, Easter Princes

Finished 0 wins, 2 losses, 1 tie

  • Andy Swingle, Anglo-Saxons
  • Michael Cooper, Republican Roman