Showing posts with label Southeast Asia buildings. Show all posts

Thursday, July 3, 2025

Miniature Building Authority Vietnamese Farm Buildings & Scatter

   A patrol stocks up in a VC-friendly hamlet including my 2 MBA Farmer's House & Barn buildings
Now that I am finished with the miniatures for my 28mm Vietnam project, it is time to slip into "terrain mode." First up in the buildings I will be readying for the tabletop are from Miniature Building Authority. I purchased these from Kirk at Buckeye Game Fest this past May. When I unpacked them, they looked oddly familiar. Turns out, these were originally created by Acheson Creations and now are stocked by MBA. They are ACH-TC85 Vietnamese Farmer's House and ACH-TC88 Vietnamese Farmer's Barn.

    Originally produced by Acheson Creations, these MBA buildings were easy to ready for the tabletop
Unfortunately, I didn't realize they were originally Acheson ones until after I spray primed them and added the 50/50 mixture of acrylic black paint and water. It was then that I noticed some of the paint pulling away from the more raised areas. Uh-oh. I hadn't done my usual first step with Acheson products and run them through the dishwasher to get rid of the residue from Acheson's mold release. Once I realized it, I had two choices: strip them and start over or pile on the paint and sealant heavy enough that the paint does not wear away. I chose the latter, as I had no idea how to strip the Krylon Fusion Matte primer off without marring the surface of the buildings. These are great buildings, but I highly recommend you do the dishwasher thing before painting them, as for all Acheson's excellent products.

    The rear of the two buildings -- all it takes to paint these is prime, wet brush, & dry brush...easy!
I decided to do the interiors first. I gave them a thick Leather Brown base coat. I let them dry overnight and then dry brushed the interiors khaki. I painted the window trim and door frames a darker brown, then similarly dry brushed them khaki. The exteriors were painted dark brown first. I let the buildings dry overnight again, then I followed up with my typical "wood pattern." I applied a Camo brown wet brush followed the next day by a Khaki dry brush. I really like the look of the aged wood it gives, but still retaining a brown tone rather than a (probably more realistic) gray. 

    The interiors of the two resin buildings with their mud walls and wooden floors
The floors were done like the outside walls, skipping the khaki dry brush. I wanted them to be darker, figuring the farmer's family regularly tracked in dirt into their home. In fact, I was surprised the home and barn were modeled with wood flooring. I wonder if dirt would be more accurate? Perhaps in some areas and not others? I can't claim to be an expert on farmer home construction during the Vietnam War! Finally, I did the thatch roofing. This began with Camo Brown, followed by a Dun Yellow wet brush, and finally a very light gray dry brush highlighting. Once dry, I gave the thatch a black vehicle wash. 

    My larger jungle scatter pieces I created, with a patrol of Viet Cong marching past
Since I was worried about the paint not adhering to the resin properly, I gave the buildings a brush on clear coat using Liquitex matte varnish instead of spray. To hold the flocking in place on the base, I used a coating of white glue and water. So far, I don't see any signs of paint scraping off, but I guess I will find out for sure once I start using them in game.

    I used circular wooden bases, palm trees, and a variety of plastic plants from the craft store for these
The other terrain I finished this week for Vietnam were larger jungle scatter bases. I picked up two packs of six 3" round wooden discs at Hobby Lobby to supplement the smaller ones I had done previously. In the center of each of the large bases, I epoxied in a plastic palm tree. I dry brushed the trunk khaki and then added a dark brown vehicle wash over it. The plain green plastic palm fronds were dry brushed here and there a light olive drab. Next, I painted the edges of the bases and flocked them with my usual method I used for miniatures. I let them flocking dry completely for a day before beginning the next step.

    A close up of one of the bases with a VC soldier - note the effect of the brown wash/varnish
I assembled my ziploc bags of various plastic plants that I'd picked up from the local craft store. I snipped off ends of various plants for vegetation to surround the palm tree. Once I felt I had enough (I didn't -- I went back and snipped more), I drilled holes into the base with a pin vice so I could insert the plastic stems. I dabbed each hole with two-part epoxy and forced the stems about a quarter of an inch through. I also added individual fallen leaves and fronds from the plastic plants to the ground. Once done with this stage, I set them atop some old dice I use so they were raised off the surface of my desk. I didn't want the stems being pushed one way or another and messing up the way I had the plants sticking up.

    Another look at one of the bases surrounded by others, with two VC stalking through the vegetation
The next morning, I turned the bases over and trimmed off the stems with a carpet knife. Finally, I added the tiny leaves that I've been adding to the base of my Vietnam figures. There was one more important step to go, though! As I mentioned in the post for the smaller jungle pieces, I think that plastic plants on their own have too shiny of a look. I mixed up a batch of Liquitex matte varnish with a few drops of brown paint. Then I painted it over all of the plants and also the fronds of the central palm tree. Not only did this dull down the sheen and make it look more natural, it also added a brownish look of dying vegetation. 

    I like the combination of palm trees with miscellaneous craft store plastic plants -- very "irregular"
I really like how these larger scatter pieces came out. I am planning on doing one more batch of the smaller ones and another of these larger ones before I'm done. When added to my fairly decent collection of palm trees, I feel they should give a nice jungle-like look. They are time consuming to build, with all the trimming of the plastic plants and drilling holes for the stems. However, they add variety to the tabletop. I'm really looking forward to what my Vietnam battle board will look like. The little vignettes I set up to photograph to display the miniatures or terrain I've painted look nice, I think. A whole table in that fashion should look great!

    A final look at my most recent additions to my Vietnam terrain -- will the VC take the chickens, too?
So, what's next on my painting desk? For miniatures, I've started a batch of 28mm resin Fishfolk that I also purchased from MBA. I wanted to practice on them before doing the more expensive Beldolor Studies ones I got at Origins. I've also primed three more buildings for the Vietnam project. So, I guess I am keeping up with my strategy of juggling of a batch of miniatures with a batch of terrain at all times. So, look for these in future posts!

MINIATURES Acquired vs. Painted Tally for 2025

  • Miniatures acquired in 2025: 237
  • Miniatures painted in 2025: 132

TERRAIN Acquired vs. Painted Tally for 2025

  • Terrain acquired in 2025: 21
  • Terrain painted in 2025: 43

SCATTER Acquired vs. Painted Tally for 2025

  • Scatter acquired in 2025: 115
  • Scatter painted in 2025: 112

Monday, June 18, 2018

Aquarium Pieces as Ruined Temples

An Aquarium piece from Blue Ribbon representing Cambodia's famous Bayon Temple at Angkor Wat
One of the perks of the long hours and hectic schedule of teaching in a public school is that I often receive gift cards for Christmas or at the end of the school year, as thanks from appreciative parents. I'd accumulated a few Amazon ones this year, so decided to finally pick up some aquarium pieces I'd seen others using and I had been wanting for a long time. Specifically, the Blue Ribbon Angkor Wat pieces. My Frostgrave: Ghost Archipelago campaign will be set in a post-Apocalyptic Southeast Asia, so they will go great with the scratch-built temples I made for my Pulp games a couple years ago.
The ruined Bayon Temple looms out of the jungle, encrusted in vegetation
I was able to get three of them. Number one on my list was the Bayon Temple -- the famous ruin with the heads which look out in four directions. The piece is fairly large -- 9 1/2 inches tall by 6 inches wide. The first thing I noticed about these pieces is how well painted they actually are. I had assumed it would be a cheap, assembly line paint job and that I would be repainting them. Instead, I decided to keep the paint jobs as is.
I was surprised by how good the "out of the box" paint job was, so decided to keep it, adding only flocking
The only thing I did was re-flock the vegetation on them. In this temple's case, I added quite a bit. First, I painted select parts of the temple with white glue, then I flocked that glue with Woodland Scenics mixed green. Once that was dry, I blobbed on white glue on top of the flocking and applied darker clump foliage by Woodland Scenics. This gives it more of a three dimensional effect, as well as makes it look more encrusted in jungle vegetation.
A giant Khmer head rises up out of the jungle
 The next piece I purchased was a giant statue of a Khmer head. All of the vines you see are part of the terrain piece -- the only thing I did was to apply actual flocking to the piece. I thought the factory artists did a decent job of dry brushing the brown of the vines over a black base coat. I really like how this one has a tumbled column in front of it. The size is fairly massive, too -- 7 inches tall by about 6 inches wide. The back face of it (not shown), is simply carved into stone blocks. 
A close up of the statue, showing the clump foliage and flocking I applied.
I thought they did a good job creating this statue, realistically showing the seams in the stones that were used to create the massive face. They also got the thick, Khmer lips and drooping ear lobes right, as well. Good research and nice sculpting.
A Kneeling Buddha rises out of the jungle, a relic of lost civilizations
The third and final piece is a kneeling Buddha statue, holding a broken column in its cupped hands. Strangely, this one was already covered in the factory's poor attempt at flocking. They used a tall, green static grass that looked very odd and unrealistic. I painted over all of this with white glue and re-flocked it all. This piece definitely required the most reworking. However, it fits well with the Southeast Asian theme for my archipelago.

All in all, a great addition to my terrain for my games. I can't wait to see my table layed out with all of the temples! Should be fairly striking...

Saturday, December 9, 2017

SE Asian Jungle Ruins: Staircases, Statues, & Columns

A row of statues of ancient warriors being slowly reclaimed by the jungle
Here are some more jungle ruins I created for my upcoming Furgrave (Frostgrave:Ghost Archipelago) campaign. I'm really happy with how they turned out.  I decided to do some research into what a temple ruin looks like when found in the jungle to get some ideas for small pieces to scatter here and there about the board. I pulled out a book I'd bought long ago about Angkor Wat called, "Angkor: Heart of an Asian Empire" by Bruno Dagens. This small paperback has a wealth of paintings, sketches, and photographs of the Cambodian temple complex when Europeans first stumbled upon it. I grabbed a post-it note, and began to leaf through the pages, writing down notes like, "Lion on pedestal," "Row of warrior statues," "Staircase," "Pools," and "Bridge."

This 1995 book by Bruno Dagens was the inspiration for this batch of terrain

Next, I went through the various boxes and ziploc bags of figures and terrain items, waiting for inspiration to strike. I had the Hirst Arts plaster terrain that my friend Tim had given me earlier this year, which included lots of stone pediments of various sizes and shapes. I got the idea to assemble a staircase out of these. On either side of the staircase, I would have a statue on a pedestal. Looking through my lead animals, I found a pair of Iron Wind Metals 25mm lions. They were rearing and striking out with a paw and looked perfect for the part. I needed to make the steps wide enough that my 1" figure bases could fit on them, so I pulled a bunch of pieces out and decided on three steps. I decided that the jungle had overtaken whatever the staircase led to and would simple glue on foamcore and set various plants into it.

Construction done on the ruined staircase
It took only an evening's work to assemble the staircase, simultaneously doing the other three pieces below. I used Tacky Glue to hold the plaster pieces together, and epoxy for the lions atop their pedestals. I like how building it up with various layers of the pavement pieces gives it a worn and deteriorating look. You can see the blue foam core, which I trimmed to a slop with an X-acto knife behind the statues. Once assembled, I spraypainted the entire piece matte black.
The finished ruined staircase - note the model railroad bushes (pink, red, yellow) glued into the ruins itself before flocking.
Since spray paint never seems to get into all the crevices of plaster or resin terrain, I coated the entire piece with a 50/50 mix of acrylic black paint and water afterwards. It sat out to dry overnight, sinking into all the recesses and shrinkwrapping itself onto the stone cases. This made it easy for the next step, which was dry brushing. First came a medium gray dry brush, then a lighter gray in highlight areas. Then I turned to the foam. I pulled out a handful of wire small trees and shrubs from the model railroad terrain lines out there. I poke a hole in the foam and then filled it with Tacky glue. The wire stems were inserted into there.
Another picture of the staircase - I love the way the lion statues on either side set off this terrain piece!
The ground flocking came next. I painted the areas that would be covered by grass with white glue, sprinkling on Brown medium railroad ballast. This was followed up by a 50/50 glue and water coating on the ballast, which was sprinkled with Woodland Scenic Turf Earth. The next layer was more Woodland Scenics blended green turf. Finally, various pieces of clump foliage were glued to the ruin, in cracks in the pavement, leading up the sides to represent the advance of the jungle, and onto various pieces of stone.
The two rows of warrior statues assembled
I really liked the idea of a row of warrior statues on an extended pedestal -- perhaps used to line a walkway to a temple? However, I had no suitably scaled SE Asian figures (all of my Ancient SE Asian armies were in 15mm). When digging through my various bins of unpainted stuff I found a bag of plastic figures of warriors from different periods from history. I think they belong to a board game called "Mythology," maybe? Even though they weren't technically Asian, I thought they'd look good as statues.
Squirrel adventurers explore a temple complex guarded by a row of warrior statues
Once more I assembled the pedestals using Tim's generously donated Hirst Arts plaster blocks. I decided to go with two rows of 4 statues. I would base them as two separate pieces so I could either have them facing each other in an entrance way, or create one longer walkway. I used the identical method to prime, paint, and flock the two warrior rows. I was really happy with how they turned out. Now, I'm thinking I need to make a row of paving stones to create an overgrown walkway alongside the statues to really make the piece jump out on the tabletop!
This was perhaps the easiest of all four of the pieces to assemble -- the wooden pegs make great columns, I feel!
Finally, I thought of creating some random groups of columns to show portions of temples or buildings peeking through the jungle. I had in my previously purchased boxes a half dozen wide, wooden pegs that look for all the world like fluted columns. I decided to take more of the plastic figures from the Mythology game and place them atop the pedestals on the columns. More Hirst Arts plaster pieces, and some smaller bits atop the columns, and this piece was assembled and ready for painting.
Looming from the jungle, a row of 3 columns marks the location of an overgrown building to be explored
Painting and flocking was done identically as above. I am thinking that it would be neat to have a number of these types of pieces for the tabletop. It would be especially cool to have some pieces with random, tumbled columns, or broken statues on the ground. Definitely food for thought! An added bonus is that I purchased nothing for these pieces -- it was all stuff I had sitting around in my collection, in various drawers or closets.

Sunday, December 3, 2017

SE Asian Jungle Ruins

Splintered Light Miniatures with Hirst Arts ruins pieces flocked to represent overgrown jungle terrain
Earlier this year, a friend of mine, Tim Peaslee, very generously handed me a box of Hirst Arts plaster pieces of ruins, caverns, boxes, barrels, etc. I quickly painted up the boxes for this year's "That's My USAid!" scenario using my Wars of Insurgency modern skirmish rules. When I decided to begin my Frostgrave: Ghost Archipelago campaign, I pulled the box back out and sorted through the pieces. I organized them by size and the full scale of Tim's generosity finally sunk in. There were a LOT of pieces, here!
A couple merged photos showing what I called the "Single Pieces" -- roughly 1 inch square
I decided to paint up some of them as broken down and overgrown ruins of various temples, palaces, or other stone buildings. There were three basic sizes, and at least two different styles within each size. There were what I called the "Single Pieces" -- small, square ruins pieces about one inch (25mm) square. First, I glued them to a square of styrene or bass wood. Then, I spray painted them flat black. Once dry, I went over the black thoroughly in a 50/50 mixture of glue and water -- my typical method for painting resin terrain. A dark gray then dark dry brush followed. After flocking the bases, I added Woodland Scenic clump foliage to show the ruins beginning to be overrun by the jungle.
The Double Pieces measuring roughly 1"x2"
The Double Pieces were about 1"x2" rectangular sections of crumbled ruins. One of the styles included the stump of a tree growing out of the wall. This was particularly appropriate since you see that time and again in SE Asian ruined temples such as Angkor Wat, in Cambodia.
The Large, roughly 1.5"x3" pieces
Finally, there were the Large Ruins pieces, which measured roughly 1.5"x3". There were two main styles, both of which had a tree stump growing out of them. I suppose I could have hunted and found a tree to fit on the stump and have it be a live tree, but I wanted to keep these pieces quick and simple. They did paint up very quickly. Just as much time was spent flocking the bases as was on prepping, priming, and dry brushing them. They did not take long to paint up, and felt they looked great. The clump foliage glued onto the stones themselves really give them an overgrown look.

Next up is another batch of ruins created with Tim's Hirts Arts. Here I will be assembling pieces to recreate a crumbled down staircase, gallery of statues, and section of columns with statues atop them. Stay tuned!

Tuesday, November 28, 2017

SE Asian Temples: Two Smaller Temples & a Stupa

Originally built for my 28mm Pulp campaign, these temples will find use in my upcoming Frostgrave one, as well!
This will finish out my SE Asian temples built earlier for my Pulp campaign. For the full thread on how I built them, please check out Southeast Asian Temples (actually, eight separate blog entries -- here's a link to the first): http://leadlegionaries.blogspot.com/2013/10/southeast-asian-temple-part-1-materials.html
I like how these scratch-built temples are mostly made from various bits and pieces that I picked up at the craft store.
These two temples are a great size. I can really see them coming in handy for my Frostgrave: Ghost Archipelago campaign. Expect treasure counters to be located in them regularly!
The second temple, a twin of the first, with Pulp explorers posing in front of it for a photo op
Printed interiors look the part, I felt, and add that extra bit over an all black or blank inside


Round Stupa
A common feature of SE Asian archeological sites are these round stupas, that look for all the world like a giant, stone tea bell sitting on a platform. They are usually solid state with a relic of the Buddha inside. However, being a fantasy/Pulp piece of terrain they HAVE to feature a hidden entrance into the interior (where doubtless great treasure is secreted away!).
A round paper mache box, a craft food finial, some beads, stone spray and voila! A SE Asian stupa!
The upper portion pulls off of its base to reveal a hidden chamber!

SE Asian Temples: The Forbidden Temple

Scratch-built SE Asian temple (warrior statue is from a pet store "lizard aquarium" section)
Here are pictures of what I call the Forbidden Temple. This is also a big temple -- the biggest part being the statue from the "lizard terrain" section of a pet store. To read the blog entries about how it was constructed, go to my blog post on it ("The Forbidden Temple"): http://leadlegionaries.blogspot.com/2014/07/the-forbidden-temple.html
The friezes on the sides are actually are downloaded and printed out on a color laser printer from an Architectural website, and depict Angkor Wat
I called it the Forbidden Temple because it was the one I used in my series of Pulp games in which adventurers were looking for the Eye of the Buddha (found inside). It will see new action on the tabletop when I begin my Frostgrave: Ghost Archipelago campaign soon.
Another shot of the paper friezes glued onto the temple's sides
The interior of the Forbidden Temple - also printed patterns

Monday, November 27, 2017

SE Asian Temples: The Big Temple

Three quarter view showing the entire temple
 Here it is, the grand-daddy of all my SE Asian temples that I have built (so far...?). I call it simply, The Big Temple. Creative, isn't it?
Detailed shot of the roof of The Big Temple
Photo of the interior of the temple with the printed architectural patterns

View of the entrance to the temple and the styrene brick pattern sheet and Hirst Arts blocks entranceway
Anyway, to read how I created it, you'll have to go back to the original thread from 2014: "Snowed In? Build a Temple!" It may seem strange that I am duplicating the finished photos here, but...sigh...there is a reason. My previous image hosting site, Photobucket, has decided to charge more than $400 for "third party hosting" -- in other words, "hot-linking." That's when you upload a photo to their site and link back to it on another, such as a blog. Why Photobucket is essentially committing business suicide, I don't know. No one that I know of will pay that ridiculous amount when there are perfectly sensible free options. Such as a Google blog!


Monday, July 14, 2014

The Forbidden Temple


    Top-down view of my newest Southeast Asian temple
It may seem weird that I felt compelled to construct a new temple for the upcoming scenario of Dakota Smith's Oriental Adventures. After all, hadn't I scratch-built four of them already? They certainly filled up the game board when I ran the "Dakota Smith and the Lost City" scenario.

My storyline for my 28mm Pulp miniatures games has the archeologists searching for the temple containing the legendary relic, "The Tears of the Buddha." It is meant to be hidden away from the rest of the world. Thus, the explorers had to cross "The Valley that Time Forgot" to get there. I envisioned it as a solitary temple, high in the mountains. Sure, I could simply have used one of my earlier builds and placed it there, saying it was the Forbidden Temple. However, I wanted this one to have secret rooms they would have to discover. To go along with that, I wanted to use the really cool piece of Lizard Terrarium terrain -- a statue of a sword-armed deity -- that I'd picked up at Petsmart earlier this year.

    Sighted through the tress, the Forbidden Temple...!
So, my thought was to simply use two boxes for the Forbidden Temple itself -- disguised as a two-layer, rectangular plinth for the statue, which would sit atop them. Each box would represent a hidden chamber inside the temple. I wanted to be able to lift off the roofs and place an altar and set of spiral stairs inside each, too. The construction of the whole thing would be modular, so that I could use each layer of it individually as well, if I wanted.

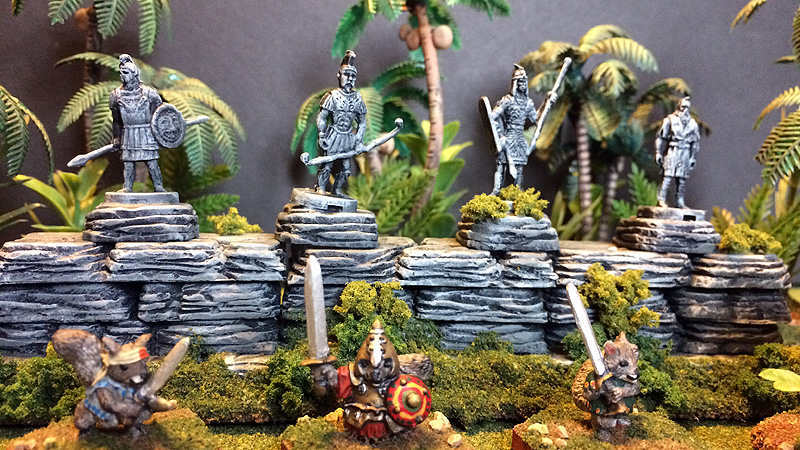
The statue was actually already completed. I used it in the Pulp game I'd run in March at Cincycon 2014. I'd picked it up on clearance for just a couple bucks, making me wish the Petsmart with Lizard terrain was closer to my house! I had painted over the whole thing -- not liking the garish gold paint on the sword and other parts of it that it came with. Instead, I wanted a gray stone statue overgrown with encroaching jungle. So, first, I painted the entire thing black. I then wet-brushed a dark gray, followed by a light gray dry brush. A black wash then was applied to the whole statue to soften the brushwork lines. To give it the overgrown, jungle appearance, I used Woodland Scenics flocking liberally over various surfaces. Different shades of green clump foliage was glued into places that I thought vegetation would sprout most. As a finishing touch, I used a hot glue gun to affix two wire flowering bushes from model railroader's terrain. This gave it that "Angkor Wat"-style overgrown look. The statue is really an incredible piece, and all of this brought out its detail.

    Two boxes sit atop each other, held in place by their decorated, styrene roofs
As I said, the statue would sit atop the two boxes, forming the decorative base or plinth for it. Since this is for a Pulp game, there HAS to be hidden doors which lead to interior compartments. That simplified my job, meaning I didn't need to actually construct a visible entrance to them. They could appear solid state. I already had one good sized box that I planned to use for one level. A quick trip to Hobby Lobby scored a paper mache box to utilize for the second level. The first step was to create a roof for each box. I cut two rectangles of black styrene plastic for these, and then affixed a rectangle of foam core material to the underside so that these set inside the box and kept the roofs from shifting around too much. The roof of the first level would also form a base for the second level to sit upon.

    A close up of the roof decoration assembled from odds and ends from craft stores that I had in my boxes
 For the first level's roof, I cut a rectangle of wooden decorative molding and epoxied it to the stryene base of the roof. I sized the rectangle so the second level would fit snugly inside the moulding, keeping it in place and from sliding off and bringing the whole three-level structure crashing down. Some beads were glued down along two edges of the roof for decoration, as well. The roof of the second level was what the statue would sit upon. I decided to decorate the edges of the roof with various bits of birch wood odds and ends I'd purchased over the years at Hobby Lobby, Michaels, or JoAnne Fabrics. Four, stupa-like mini towers rise from each corner. Their base is an upside down "flower pot." On top of that rests a wooden spool. And finally, crowning each is a plastic, fasceted "gem." More gems were glued along the edge of the roof. Once put together, both roofs were then sprayed with black, acrylic paint. I dry brushed them in a darker and lighter shade of gray, and did an final ink wash to give them a stone appearance that I hoped would match the statue's. The roofs turned out okay, but the lack of a real texture to their surface means they don't necessarily match the nicely-pitted statue that well. I should have sprayed them with "stone paint" or something similar to make the match better.

    Close up of the Khmer frieze (printed paper) from downloaded and Photoshopped from CG Textures
For the walls of the boxes, I wanted to try something different than I'd done in the past with my temples. I was intrigued by a comment from one of my friends, Keith, and wanted to try his suggestion. He had been looking at the interior of one of my jungle huts. For those, I had simply gone to the CG Textures website and downloaded high quality photographic images that looked like the wicker floors and walls I wanted to represent. Like Keith, I was impressed with how they had turned out. His comment was that you could possibly use the images for the exterior of buildings, too. CG Textures is an amazing resource, which I thank one of the posters on the Lead Adventure Forum for suggesting. Among their many excellent images is a selection of ones from Angkor Wat and other Khmer temples. I decided to utilize one of their stone carved friezes of seated gods. I measured the box sides, then opened the image in Photoshop. I resized, cut and pasted the images, finally printing them out on my laser printer. I did the same for the interiors, selecting a rough stone wall and mosaic floor pattern, as well.

I measured the inside and outside walls carefully and then cut each paper print out to size. I then painted the top and bottom edges of the boxes in black paint. I did this with the interior seams between the four walls with each other and also with the floor.  This is in case any of the paper doesn't extend all the way to an edge. The gap shows  black and gives the appearance of shadows or cracks. To affix the paper images, I painted each surface, one at a time, with straight white glue, then quickly applied the image. I smoothed it out, then went on the next. I did the floor interior last, after completing the outer and inner walls.

    As always, the interiors look great using the printed paper. Note the spiral staircase and the Buddha altar inside the hidden chamber of the temple.
I wasn't sure how well the marrying of two dimensional, paper walls with the 3-D roofs and statue would look. If I were to do it again, I would probably play with the color of the images more in Photoshop to try and get them to match the tone of the painted pieces. All in all, it looks okay, I think. I don't like it as well as my completely scratch-built temples. However, it was quick and easy to do, I think will look acceptable on the tabletop. Would I do it like this again? Hmm...probably not. However, I really wanted a temple with a Khmer-style frieze since my scenarios are set in French Indochina. It will work for the game, and I'm sure my players probably won't grouse about playing on second-rate terrain...ha, ha!