Thursday, September 15, 2016

Beaver Wars in Ohio playtest, Turn 9


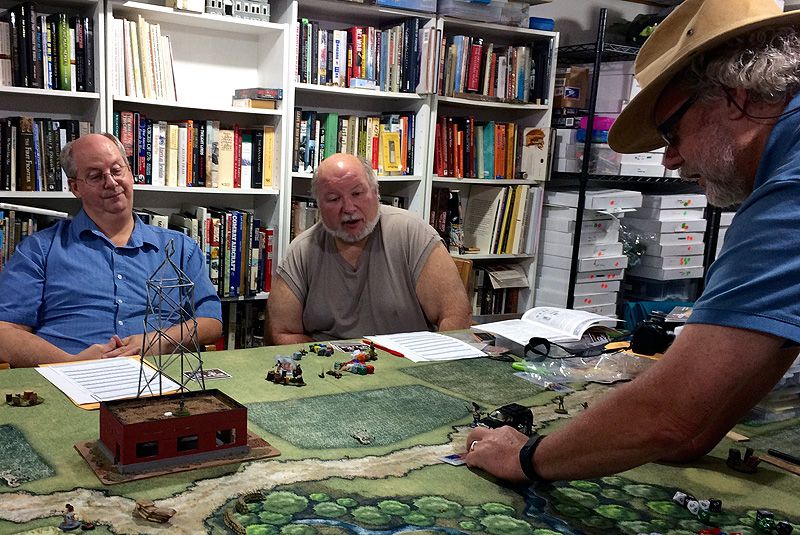
Four games were running as the campaign comes down to the wire to see which tribe will be victorious


Our next-to-last turn of the final playtest of the Beaver Wars campaign rules took place last weekend at the local pizzeria. All players were in attendance, so as GM I sat out with my Erie tribe. An interesting dynamic had developed in the strategic card play phase of the game over the last two turns. Early on, most tribes played Hunt cards, to obtain more beaver pelts. Now, there was a preponderance of War cards as tribes competed to be near the top of the order for launching attacks. Both 2nd and 3rd place tribes (Neutral and Mohawk) chose high value War cards and both chose to attack tribes far beneath them in the standings. Each player claimed that they did that because they had not fought that particular opponent in the campaign yet, but I’m not so sure they weren’t targeting a tribe that would field a potentially less powerful force (as far as firearms and trait upgrades go).


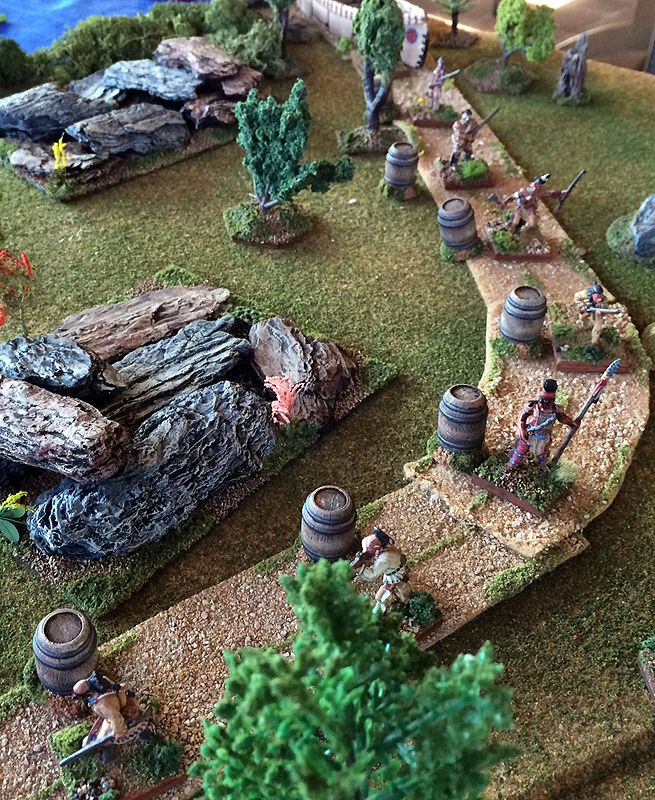
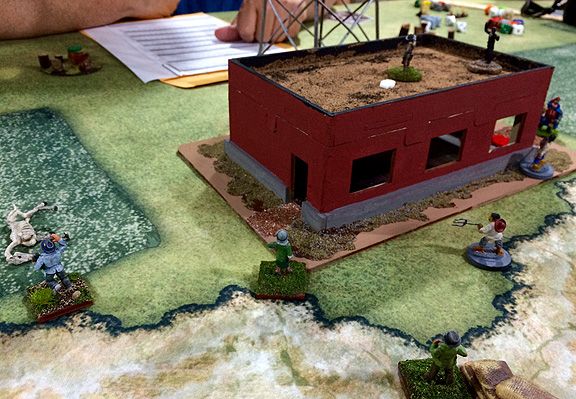
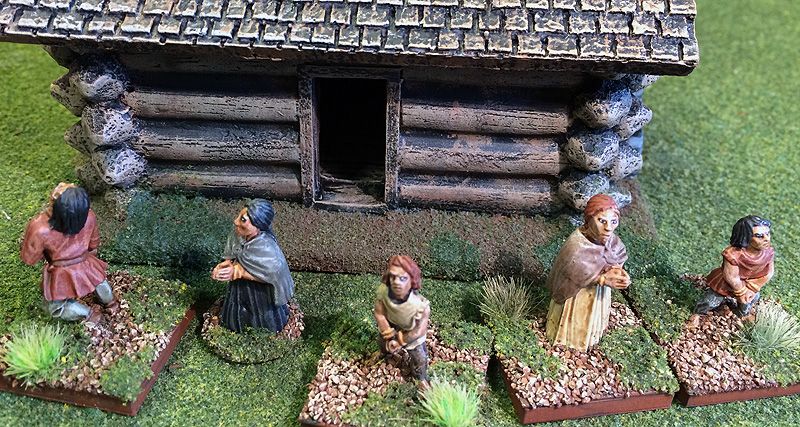
The Honniasont quickly cut off the pathway, forcing the Neutral Scouts to fight


The first battle saw the Honniasont turning the tables on the Neutrals in the Ambush the Scouts scenario. The Honniasont are our last-place tribe — mainly because Bruce joined the campaign several turns into it and has been unable to close the gap on points. His strategy of fielding a force of all Youths with one Chieftain has been challenging to everyone he has faced. Keith’s Neutrals were the first opponent to take a Youth-heavy force to oppose the Honniasont. The Honniasont moved to block the Neutrals path, and sabotaged Keith’s idea of racing around the enemy to exit the table (as the victory conditions required).


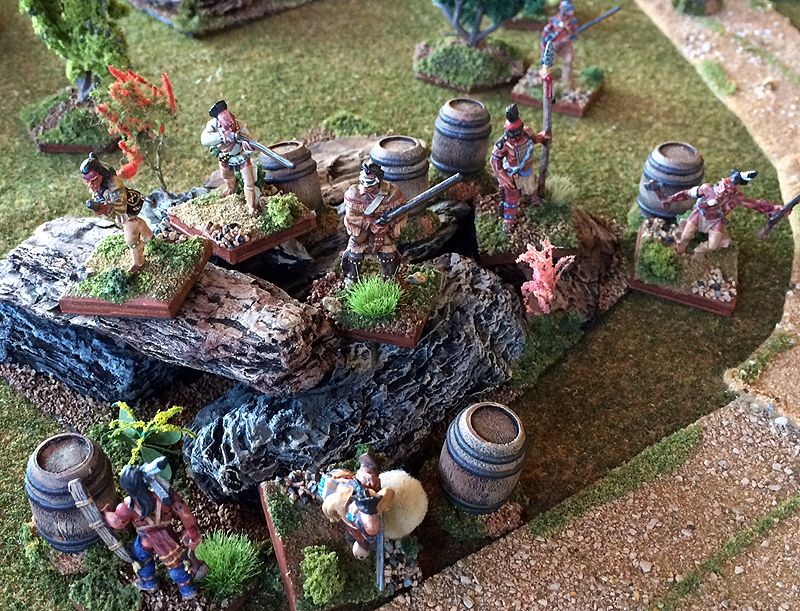
The Honniasont spring their ambush and charge in to catch the Neutrals unaware


Bruce’s rolls were good and soon he had slain several Neutrals. Bruce was living up to his reputation of giving everyone he faced a challenging struggle. Keith’s favorite tactic in this campaign, though, has been to try to kill his opponent’s chieftain. Anytime an enemy leader enters the fray (or gets within his movement range), Keith will try his best to swarm him and force his opponent to take the required morale test if he successfully kills him. Plus, a force without a chieftain is more vulnerable to activation turnovers than one that is well-led. This tactic has served Keith well in the campaign, as the Neutrals’ position in the standings will attest.


Keith points out how he plans to kill the Honniasont leader to Bruce


Keith’s bid to kill the Honniasont chieftain was successful, and Bruce’s forces were scattered by morale failures. With that, his good fortune at activation rolls seemed to disappear. The game quickly went from a hard-fought struggle, with the Honniasont having the edge, to a mopping up operation by the victorious Neutrals. It was a Major Victory for the Neutrals, with the score 18-3 in victory points.


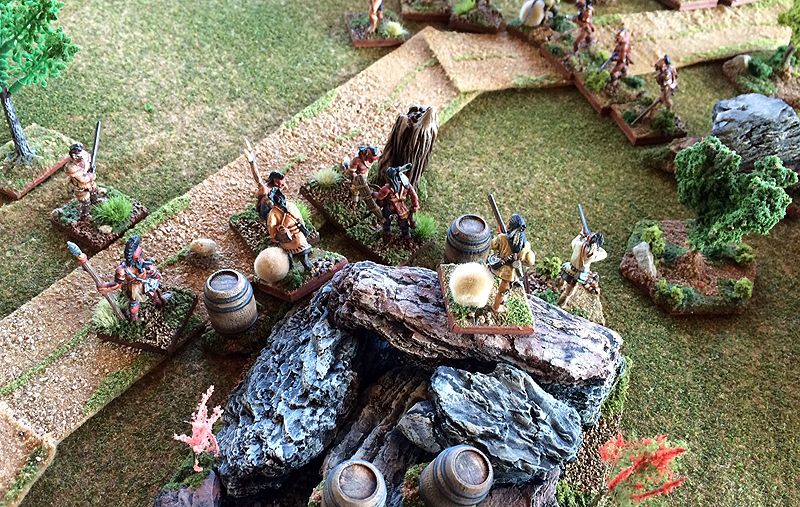
The Mohawk advance through the Susquehannock town, driving the defenders before them


The Slaughter Amidst the Lodges scenario that pitted the Mohawk attack on a Susquehannock town catches the battle in the middle of all its fury. The entire board is an Indian town, with the players using the birchbark longhouses and various skin-stretching frames, sweat lodges, and fish-drying racks as cover. The Mohawks had used their upgrades to make many of their warriors Strong (+1 in melee). So, they were quick to close with the enemy. Although they lost a couple warriors, the Mohawks quickly began tomahawking their enemy. Soon, Steve’s forces fell below half and were scattered by the mandatory morale check.


Steve moves his Susquehannock warriors to try to stave off the Mohawk attackers


The chieftain and three others remained on the table, and bravely continued the fray. The Susquehannock leader even rushed to attack a Mohawk warrior, but was soon outnumbered and cut down. His remaining warriors fled the village with his loss, leaving the Mohawk in possession of the town. This battle was actually our biggest margin of victory, with the Mohawks triumphing 19-2 over the Susquehannock.


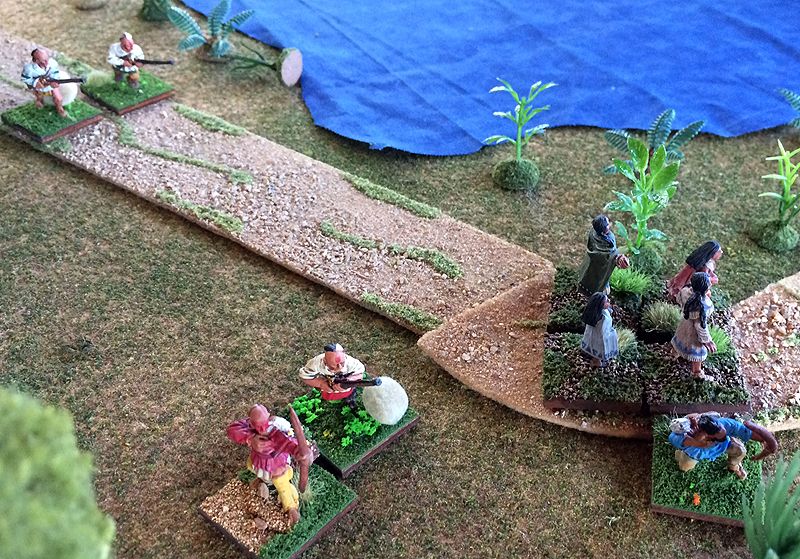
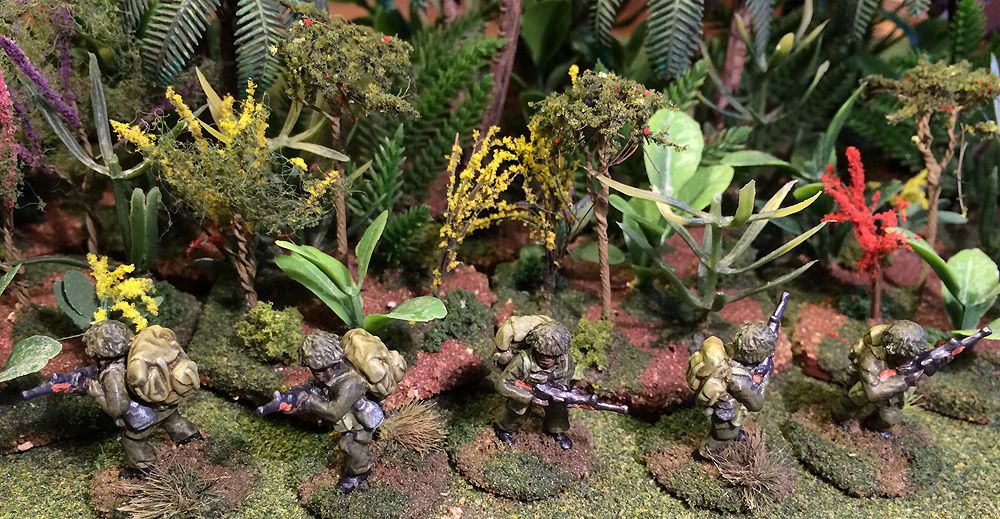
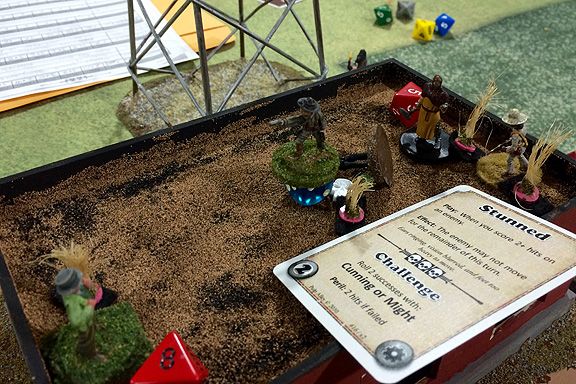
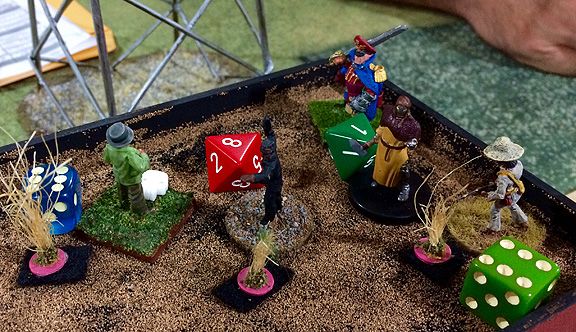
As the Miami spring their ambush, the Seneca hunters drop their bundles at the portage


The third battle was another ambush — this time of a Miami raiding party catching Seneca hunters at Ambush at the Portage. The Miami concealed themselves and waited until the Seneca were very close to spring the battle. Apparently, there was confusion among the Miami, as the warriors did not recognize the signal to attack and remained frozen in place. The Seneca took advantage of the Miami activation failure and dropped their bundles and quickly closed with their ambushers. Seneca matchlock fire was deadly and soon Miami warriors were dropping as the momentum quickly swung in favor of the defenders.


Jenny looks on in despair as the Seneca aggressively charge her Miami and begin to cut them down


As more and more of their warriors fell, the Miami knew their attack was doomed to failure. The Seneca showed little mercy — scalping their opponents and continuing to close on the reeling and disorganized enemy. The Miami did account for three of their attackers, but lost eight of their own, including their leader. It was our third Major Victory of the turn, as the Seneca rolled 18-3.


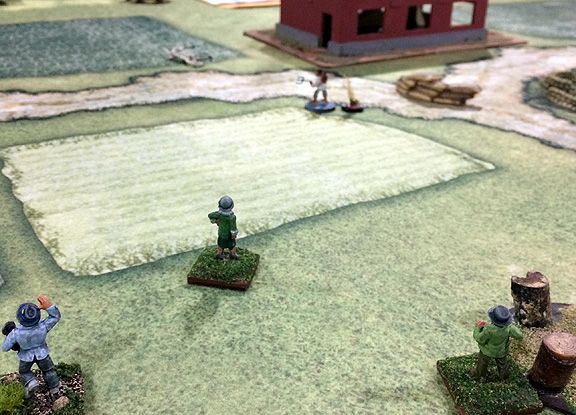
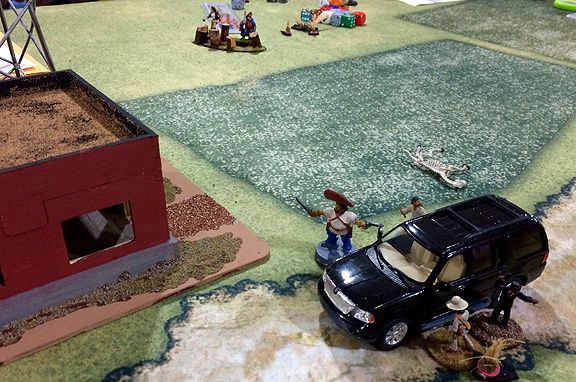
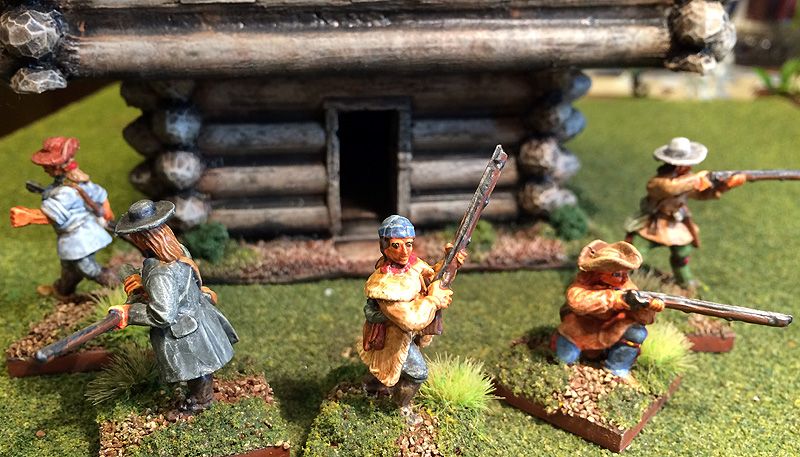
The Kickapoo traders stalk forward, certain that some of their goods have been stolen by the Shawnee also visiting the fort


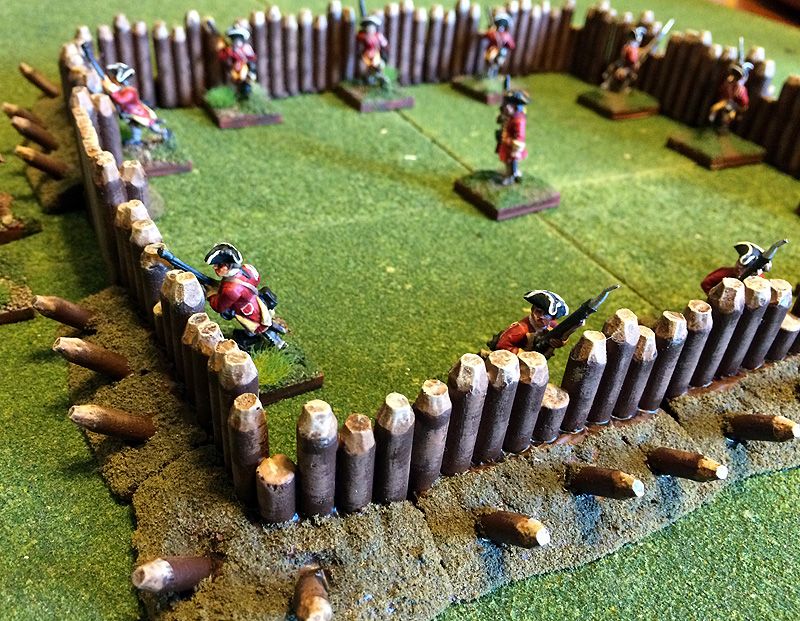
The final battle took place between two trading missions that encountered each other within the walls of a European fort. Both had arrived within a day of each other and had just concluded trading their pelts for firearms, powder, and European goods. Unfortunately, the white man’s curse, whisky and rum, was also sold to the Indians. Combined with past wrongs, that sewed the seeds of conflict between the Kickapoo and Shawnee parties.


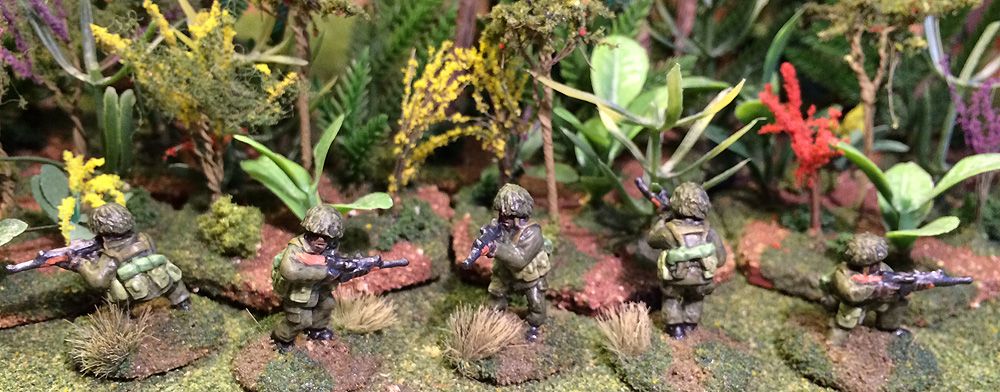
Andy's Kickapoo -- I really enjoy how so many of the players have painted up their forces as the campaign progresses


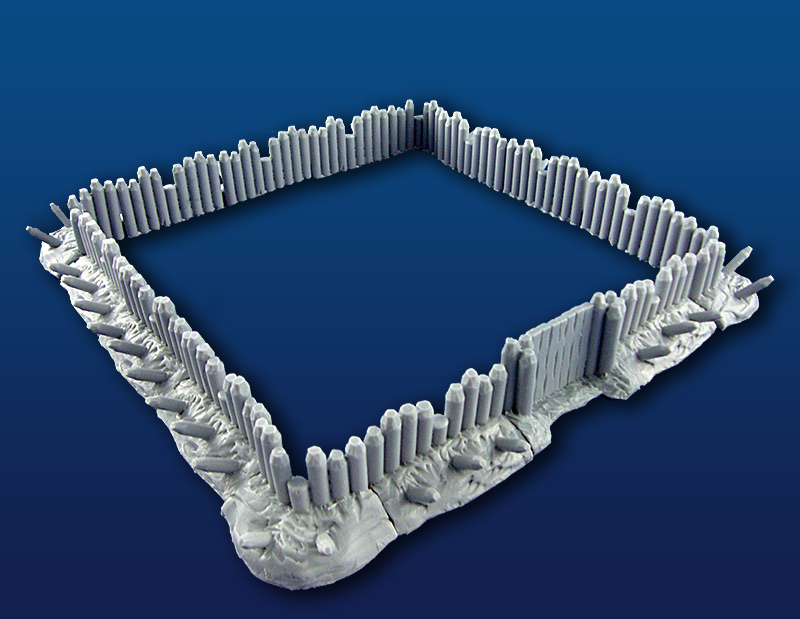
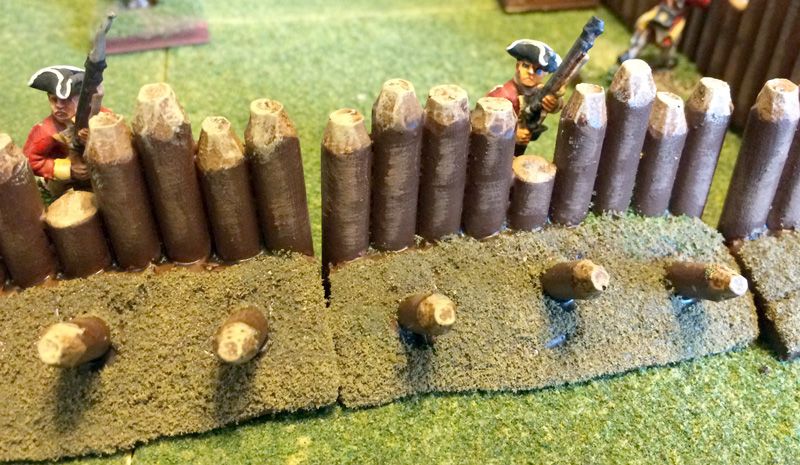
The entire battlefield of the Who’s a Thief? scenario is contained inside the fort, with cabins and warehouses as cover. A special scenario rule has a hostile soldier appear anytime an Indian tries to enter a cabin or climb atop the palisade. Neither side risked angering the soldiers, though. The warriors instead massed towards a passageway between the walls and a warehouse. The Shawnee quickly gained the upper hand in the fighting. As a warrior fell, more entered the dusty lane. Soon, the Kickapoo began to retreat and fled back towards their encampment. Once again, the Shawnee held the upper hand in a battle. Their 14-4 victory maintained their position as the most dominant tribe in the Ohio Valley by 1 single point! I'm sure that both they and the Neutrals will be examining the categories to determine how they can move up in the categories they are competing in.

Tribe
Place
Victory Points
Shawnee
1st
25.5 points
Neutrals
2nd
24.5 points
Mohawk
3rd
22.5 points
Seneca
4th
18.5 points
Kickapoo
5th
14 points
Miami
6th
12 points
Erie
7th
11 points
Susqehannock
8th
8 points
Honniasont
9th
3 points

Tribe
Prestige Points (PPs)
Neutrals (Keith Finn)
22 (7 MajV, 1 MinD)
Shawnee (Joe Merz)
22 (5 MajV, 3 MinV, 1 MinD)
Mohawk (Dave Welch)
15 (4 MajV, 1 MinV, 1 MinD)
Seneca (Mike Stelzer)
15 (3 MajV, 3 MinV)
Miami (Jenny Torbett)
11 (2 MajV, 2 MinV, 1 MinD)
Kickapoo (Andy Swingle)
10 (3 MajV, 1 MinD)
Erie (Mike Demana)
8 (2 MajV, 2 MinD)
Susquehannock (Steve Phallen)
5 (1 MajV, 2 MinD)
Honniasont (Bruce Adamczak)
3 (1 MinV, 1 MinD)

Tribe
Scenario Victory Points (SVPs)
Neutrals (Keith Finn)
124
Shawnee (Joe Merz)
121
Mohawk (Dave Welch)
101
Seneca (Mike Stelzer)
98
Miami (Jenny Torbett)
83
Kickapoo (Andy Swingle)
72
Erie (Mike Demana)
65
Susquehannock (Steve Phallen)
62
Honniasont (Bruce Adamczak)
36

Tribe
Beaver Pelts
Shawnee (Joe Merz)
54
Mohawk (Dave Welch)
47
Neutrals (Keith Finn)
43
Kickapoo (Andy Swingle)
42
Erie (Mike Demana)
37
Susquehannock (Steve Phallen)
36
Seneca (Mike Stelzer)
33
Miami (Jenny Torbett)
32
Honniasont (Bruce Adamczak)
23

Sunday, August 21, 2016

Modern African 20mm Leaders


An officer of the UN Contingent from Ghana talking on a radio set. I think this figure began as a WW II American command set.


I am in the process of getting my modern Africa rules ready for publication by our company, First Command Wargames. One of the tweaks I am adding is a leader figure for each player's force. The only problem with that is I have not painted any figures up to specifically be leaders. There is one with sergeant stripes here and there, or ones waving their arms forward that players could use, sure. But I wanted ones that would stand out a bit more.
An officer from the Belgian-trained paratroop battalion of the Congo. Yet another figure I have no idea where it is from -- it was given to me in a pack of several figs by a friend who knew I was doing 20mm Moderns
I scoured my bags of unpainted 20mm modern miniatures and picked out 10 of them. Well, one was actually already painted -- a gift from a friend (but I planned to redo him anyway). I cleaned them up, primed them, and then designated which force they would be painted up to lead. Throughout the process of fielding my 20mm modern Africa figures, I have purposely utilized a variety of uniform styles so each player's faction would stand out on the tabletop. Some are more obvious -- like the United Nations troops in their blue helmets, white mercenaries in khaki, or the paratroopers in camouflage and red berets. Others are more subtle variations -- a couple different types of camo patterns, troops in olive drab, or khaki.


A mercenary commander from the same mystery pack. I called this one "Rambo" while I was painting it.


I wanted to ensure I had a figure that could be used for each grouping, so that would make painting this batch a lot like when I did the same with the RPG and LMG armed batch I did awhile back. Still, with organization, it shouldn't be too tedious. I tried to trick out the figures a bit more -- give them more flash on their uniform. Many had red epaulettes or even campaign ribbons on their chests. The militia ones were harder, so I gave one gold chains and another gray hair and beard (which I am going to have to go over again, as the black wash darkened up too much).


A militia commander, bedecked with gold chains, leads his boys through the streets


As a final touch, I made their bases raised a bit. I took wooden stars from the craft store and glued them onto the washers I used for my 20mm figures. I beveled the edges of the starts down with an X-acto knife to give a more sloped surface. The figures were glued to this raised area, which hopefully will look like a small mound the leader is standing on. Or even better, not be directly noticeable but just subtly make the figure stick out more.


Three officers in OD uniforms, the center one with campaign ribbons on his chest, direct their commands after dismounting from jeeps


I'd also recently painted a ruined resin building for terrain for this period. It belonged to my friend Keith and was cast in a white, sparkly material. I'm not sure where he got it, but it looks like a Dollar Tree or similar pickup. The scale is about right, and the building looks perfect for a gaming. So, I offered to paint it up so I'd have some more modern buildings to use in games. The front and back are significantly different, and the sides are essentially brick walls. I was really happy with how it turned out. So, it appears in all of the photographs on this page -- different sides, faces, or corners used for different officers. I also posed some of the already-painted rank and file from the squads the officers were meant to match alongside them.


A lieutenant leads his squad on a patrol through the streets. Note the raised bases to make him stick out more visually.


I like how they turned out, for the most part. Painting 20mm moderns is vastly different than 28mm Indians -- that's for sure! In my opinion, they are more akin to 15mm. You simply don't get as much detail to paint on them. Still, they go quickly! So, I'm sure I'll be scraping another batch together soon for the painting desk!

A good look at the resin building I recently finished off. Saluting out in front is an officer in dress uniform that I repainted as part of this batch of 10.
Another militia officers. I need to go over his gray hair more -- it was to subtle and had partly disappeared in my final black wash.

Tuesday, August 9, 2016

Beaver Wars in Ohio Playtest, Turn 8

Attack at the Portage was my scenario for this  round, and saw my Erie hunters spread out carrying our canoe and bundles of goods past a section of rapids
Being out of the country for 5 weeks this summer meant our playtest of the Beaver Wars in Ohio Campaign Rules and Scenario Book was put on hold for awhile. The tribes must have missed the chance to settle some scores, as more players chose "War" cards this turn than in any previous turn. The higher the value War card a player selects, the better chance he has of selecting his opponent. In particular, the tribes in the middle of the scoring range (Mohawk, Seneca, Kickapoo) wanted a chance take the leaders (Neutrals, Shawnee) down a peg.

After the cards were played and the order set, here were the declared attacks this turn:
Mohawk attacked the Neutrals, rolling “The Creek Runs Red” (War vs. War #3)
Seneca attack the Shawnee rolling “Rescue the Captives” (War vs. Hunt #6)
Honniasont attacked the Erie, rolling “Attack at the Portage” (War vs. Hunt #3)
Kickapoo attacked the Miami, rolling “Give Them Time” (War vs. Hunt #1)

To read the account written by Keith covering his Neutral tribe's battle against the Mohawk, visit his Game Reports page.

With an odd number of players, as GM (and Erie tribal chief) I sit out some of the turns. However, this turn the Susquehannock player was feeling under the weather on the morning of our meeting, so I substituted in for him. I was actually happy that I got a chance to play the "Attack at the Portage" scenario, because I think it is tactically a very interesting game.
My battle plan would be to have my Erie hunters carry their bundles to the rocky outcrop, left center. We would deposit them there, and consolidate to make our stand against the Honniasont
I chose my standard force -- one Chieftain with matchlock (Q3, C3, Marksman);5 Warriors (Q4, C2) with matchlock; 2 with Bow, Light Armor, and Primitive Weapon; and two Youths (Q4, C1, Wavering) with Bows. Taking a couple figures with Light Armor was a new one for me. My tribe's Beaver Pelts accumulated so far meant we could upgrade only 6 figures of our 10 with Matchlock. I always give one to the chief, and the remainder to the Warriors. That left two armed with Bow. I knew I would likely send them forward into melee, so I figured I'd see how this strategy worked out of giving them a Primitive Weapons -- think Last of the Mohicans, the big sword club -- but protecting them with Light Armor. As it turned out, I liked it quite a bit. I knew I'd be involved in melee regularly, facing the Honniasont. So, I figured it was best to come armed for it.

Why was I expecting a melee rather than a shooting match? Well, Bruce -- who plays the Honniasont -- has hit on a favorite tactic of maxing out his troop list with Youths. He seeks to overwhelm the enemy with numbers. He's had mixed success with the tactic, but is having fun tweaking it to see how he can make it work better. So, my 10 Erie would face a force of 17 Honniasont (1 Chieftain, 16 Youths). It provides for some interesting, though a slight bit longer, games. The key to me is to try to pick off his Chieftain so you can force a morale check. The Youths all have the Wavering trait, which means they should begin to flee fairly quickly once he's gone. Otherwise, it can be a long and dangerous process wearing them down to 9 losses (more than 50% is the point where you check morale if your leader has not died).
My troops have almost all made it to the rocky outcrop. Note the warrior with wooden armor holding the spear on the right side of the rock
The other reason I expected a close quarters game was because of the scenario. The background story is an Erie hunting party is portaging their canoe and supplies across a stretch of rapids. My two Youths were carrying the canoe (hey, put those young muscles to work!), while the rest of the men carried a bundle of supplies or goods. While carrying those supplies, we fought at -1 in melee, and could not move more than one Movement distance per turn. We were carrying our loads along a curving path through rocky areas and forest. We were dispersed along the path, and only a handful of my men would be within command range of the chieftain in the middle.

My battle plan was to have all of my men move to a rocky outcrop inside the bend of the road. We would drop our bundles there, and consolidate against the more numerous Honniasont. My command rolls on my first turn were abysmal. I think out of 14 die rolls I scored no rolls above a "3" -- not a great start! The Honniasont had split their forces into one advancing from my right and another blocking the trail ahead. My rolls improved enough that slowly, my men moved to the rocky outcrop, put down their loads, and readied their weapons. The Honniasont also began to take shots, and edged closer. He began to rush in Youths, attempting to gang up on my Warriors and force an even-up or roll at an advantage.
And here they come! The Honniasont Youths begin to throw themselves against my Warriors (two are in contact in the center of the picture, while another line advances from the top)
My advantage was on the counterstrike, though. When he put two against one, all I had to do was move one of my Warriors into contact with one of those two and they'd be a severe disadvantage. Slowly, I began to whittle his forces down. He scored several kills against me, too. I made it a point to grab any scalps of Honniasont I killed immediately when I had a chance for the victory points. I never did get a clear shot at his leader, though. However, my own Marksman leader began to score kills or wounds against the Honniasont clustered beneath him atop the rocky outcrop. I used my Warriors with Light Armor as the point of my spear, so to speak, though I did lose one. We stayed consolidated where my leader could use his command influence to keep my men activating, shooting, reloading, fighting, and moving to where they were needed.
What our enemies saw -- the view from the woods as Honniasont Youths work up the nerve to assault my troops clustered around the rocky outcrop
Eventually, his ninth Youth died, and the Morale tests began. Some fled offtable immediately, while others fell back a great distance. We managed to kill another, and these morale checks spelled the end of the Honniasont threat. Bruce acknowledged his forces could not win, and withdrew from the field. We were successful because we kept our men together. Whenever one Warrior was drawn into a melee, others would immediately go to his aid. Although he outnumbered me in total forces, at the point of attack, it was either even up or we had the advantage. This ended up being my most overwhelming victory, points-wise, of the campaign, so far. We scored a 27-3 victory -- killing 10 of the enemy, taking 7 scalps, and maxing out on the points for staying in control of the bundles.

As it played out, Turn 8 belonged to the Defender. All four attackers lost. Sadly, for the middle pack who'd initiated the attack on the leaders, they failed. The Neutrals and the Shawnee entered the turn tied for the lead. Both scored major victories -- the Neutrals over the Mohawk and the Shawnee over the Seneca. On the remaining battlefield, the bitter foes the Miami and Kickapoo met again, with the Miami getting the upper hand, again.
One of the other scenarios: At top left, Shawnee braves pursue a force of Seneca who have raided their town and taken some women and children captive
There are two turns left before this playtest ends. I am happy with how the rules work, but I want to more playtests of the scenarios that will be included with the rules. I also want to see how the numbers play out -- if I need to increase the maximums, so that players don't max out early on Scenario Victory Points or Beaver Pelts. Plus, the players all seem to be having a good time. So, no reason to cut the fun off early!

Here is the score in the campaign, so far. The Shawnee have edged out in front of the Neutrals! The Mohawk, despite their loss on the battlefield this turn, remain in close contention for the lead. We'll see next month if that means the two front-runners will face off, or if they will continue to fight off attacks of the other tribes.

Tribe
Place
Victory Points
Shawnee
1st
26.5 points
Neutrals
2nd
23.5 points
Mohawk
3rd
21.5 points
Kickapoo
Tied 4th
14 points
Seneca
Tied 4th
14 points
Miami
6th
13.5 points
Erie
7th
10 points
Susqehannock
8th
9 points
Honniasont
9th
3 points

The victory points come from three categories. First, Prestige Points (PPs), which come from battlefield success:
Tribe
Prestige Points (PPs)
Neutrals (Keith Finn)
19 (6 MajV, 1 MinD)
Shawnee (Joe Merz)
19 (4 MajV, 3 MinV, 1 MinD)
Mohawk (Dave Welch)
12 (3 MajV, 1 MinV, 1 MinD)
Seneca (Mike Stelzer)
12 (2 MajV, 3 MinV)
Miami (Jenny Torbett)
11 (2 MajV, 2 MinV, 1 MinD)
Kickapoo (Andy Swingle)
10 (3 MajV, 1 MinD)
Erie (Mike Demana)
8 (2 MajV, 2 MinD)
Susquehannock (Steve Phallen)
5 (1 MajV, 2 MinD)
Honniasont (Bruce Adamczak)
3 (1 MinV, 1 MinD)

Next, is SVPs, or Scenario Victory Points, which come (unsurprisingly) from fulfilling your objectives in the scenarios you play in:
Tribe
Scenario Victory Points (SVPs)
Shawnee (Joe Merz)
107
Neutrals (Keith Finn)
106
Mohawk (Dave Welch)
82
Seneca (Mike Stelzer)
80
Miami (Jenny Torbett)
80
Kickapoo (Andy Swingle)
68
Erie (Mike Demana)
65
Susquehannock (Steve Phallen)
60
Honniasont (Bruce Adamczak)
33

And finally, the Beaver Pelts. The higher value "Hunt" cards you play, the more pelts you collect. This also translates into the more Firearms upgrades you obtain for each battle (those Europeans will give matchlocks for quality beaver pelts).
Tribe
Beaver Pelts
Shawnee (Joe Merz)
45
Mohawk (Dave Welch)
43
Neutrals (Keith Finn)
41
Kickapoo (Andy Swingle)
36
Susquehannock (Steve Phallen)
32
Erie (Mike Demana)
31
Miami (Jenny Torbett)
29
Seneca (Mike Stelzer)
23
Honniasont (Bruce Adamczak)
22


Thursday, August 4, 2016

I miss the rains down in Africa...

20mm Liberation Miniatures modern Africa figures. The minis themselves were from their Falklands War line, painted to go with my Africa collection
 A storm has been building in my gaming world. The longstanding supremacy of the French & Indian War on my hobby time is looking to be replaced. Oh, I will continue to promote and run my Song of Drums and Tomahawks rules and games at conventions -- at least for the rest of this year. After that, one of my coauthors will be making the thunder at conventions.
A great series from Casemate Publishers: Africa @ War
So, what will I be doing? I'm going back about 10 years and digging out my 20mm modern Africa figures and games. I've been building to that in my reading, lately. I've read a few books on 20th century Africa, and at Historicon, I discovered a new series of publications called Africa @ War. They are carried by Casemate Publishers here in the United States. I have a contact there who sends me occasional new releases to review, so I emailed her and she sent me one of them: Rhodesian Fire Force: 1966-80. It was a great read, and definitely got me interested again in gaming the small scale, low intensity conflicts that accompanied Africa's struggle towards (and since) independence.

Of course, if I'm interested in something, it likely means I'm painting it. I grabbed a batch of 10 unpainted 20mm Liberation Miniatures that have been sitting for years in my drawers of unused lead. I had a good time painting them. I remembered 20mm figures go much faster than 28mm ones (especially, highly-detailed, tattooed Native Americans!). I was very pleased how quickly I was able to get them done. I liked how they turned out, too.
Another batch of 20mm modern African soldiers out on patrol in the jungle. Note the non-matching variety of equipment colors on the figures
African flesh tends to be much darker than African-American flesh here in the U.S. So, I used a very Dark Brown as a base coat, and hit the highlights lightly with Howard Hues Camo Brown to give the facial features some definition. I painted the uniform shirts and pants a base coat of a dark olive drab craft paint that I own called English Yew Green. I dry brushed them with a light olive drab craft paint called Timberline Green.

My philosophy on painting equipment for the ragtag forces of 20th century Africa is that there was likely a lot of non-standardization. So, I don't paint everything the same color -- as if it were some U.S. recruit walking out of Basic Training with his newly-issued kit. My favorite of these color variations are the huge backpacks on the first group at the top of the page. I painted them a very light gray-green craft paint called Stonewedge Green. Then I did a couple washes of Timberline Green over it until I was satisfied. All in all, I'm very pleased with how they turned out.

Expecd more Africa stuff soon...!

Tuesday, July 26, 2016

Pulp Alley, Junta style!

Allen (Black Marketeers) moves his SUV towards the radio station, while Tom (Political Refugees) and Keith (3rd Brigade) look on skeptically
 One of our regular Sunday gaming group, Joel, is know for crafting oddball scenarios for miniature gaming. He correctly decided that it was high time we played Pulp Alley again (Dakota Smith seems so long ago...), but gave it a twist. He set his campaign in the world of the boardgame Junta. Each of us would play a faction from an anonymous South American republic in the game. Mike S controlled the minions of the Minister of Internal Security, Keith some flunkeys from the 3rd Brigade, Allen had a group of Black Marketeers, Tom had nefarious Political Refugees, and I controlled the University Faculty.
The University Faculty faction sprints for the radio station, with their way blocked by a less-than-effective Psychotic Assassin
Here was Joel's setup email to us:
Subject: Pulp Alley - Junta
Location: Third World Banana Republic
Teams:  Rebel or Loyal (hidden agenda) 

Situation:  El Presidenta is opposed by a weak divided Chamber of Deputies, and a court system missing too many judges to be effective.  El Presidenta has increasingly gone beyond the boundaries of the Constitution, which brings howls from opposition (but nothing else).  El Presidenta has a not-too-secret offshore island detention center which houses people without charges or hearings.  Election time approaches, and it looks like friendly associates will be elected. Enter the Rebels.  Major Punto de Trama (major plot point) has occupied the radio station W.Z.A.P. and is broadcasting  a cycle of propaganda, a call to arms, and Slim Whitman music.  Players are to search the area, secure the radio station, and round up suspected rebels.

Leagues & their Perks-

Black Marketers: Network of Supporters
University Faculty: Bastion of Science
Political Refugees: Nefarious
Ministry of Security: Stealthy Agents
3rd Brigade: Mastermind
The Black Marketeers leap from the SUV and prepare to enter the radio station
Setup: The radio station sits in a jungle clearing north of town.  The major plot point is a rebel Major de Trama, in control of the station.  Minor plot points are gold coins ('pay roll'), weapon cache, psychotic assassin (list of names in pocket), and the bomb at the base of the radio tower.  Players are to clear the station in six turns, or less, or the Navy gunboat S.S. Pueblo will begin to opening fire. 

Play will open with a roll d10 for scenario set up -
Choose groups- secretly assign rebel/loyal (50% mix).

The Grad student investigates a suspicious box underneath a dead horse, Prof. Emilia prepares to chase down the Psychotic Assassin, while Duarte cleverly keeps close to cover in case any stray bullets come his way
 We were playing the "large group" league variant with a Leader, Sidekick, and Ally. My Leader was Professor Duarte, along with his surprisingly combative colleague, Professoressa Emilia. They were assisted by a grad student who opposed guns ("Animal" ability -- no Shooting). We quickly sprinted towards the radio station when we saw the Black Marketeers careering wildly that way in their SUV. A former student of Duarte's had been hiding in the back seat and quickly changed sides to ours when he saw his beloved teachers (a Fortune card gave me control of a Level 1 Backup, which had to be placed in contact with another player's character). Although the student never accomplished much, he certainly made the other factions wonder whether to attack him and risk my faction's ire, or leave him alone.
The Black Marketeers seize the SUV, and then ponder what to do next
The lady professor immediately charged the Psychotic Assassin and landed two solid blows that would have knocked out a lesser man. He did try to flee, but Emilia caught him and finally knocked him out. The grad student investigated a box poorly hidden underneath a dead horse and found the payroll for some government organization. Duarte assured him it was doubtless meant for the university, and he should bring it along. Meanwhile Duarte edged cautiously towards the radio station, leery of the gunfire going on inside.
Mayhem erupts inside the radio station, bullets fly, and pieces of equipment crash over onto characters
Peering through a window, he saw a battle between the Black Marketeers and the Refugees over the Rebel de Trama. The Refugees had him by his collar, and several others entered the radio station only to be sent flying by gunfire or falling debris dislodged by the scuffle. When he judged the two (three? four?) factions inside had worn themselves down sufficiently, the professor entered. He was clipped by a bullet shortly afterwards from the gunfire blazing inside. Duarte pulled out his trusty revolver and squeezed off a few shots at the hoodlum holding onto Major de Trama.

Suddenly, the opening Duarte was watching for happened. The hoodlum went down, and the rebel rolling free, but bumping his head into a desk and stunning himself. The Professor of Science activated his experimental Bullet DeMagnetizing Aura and raced forward and snatched up the rebel. All guns were trained upon the goodly professor. Under the onslaught, the aura flickered, then failed, and Duarte felt several bullets strike him. Nothing was fatal, though, and he edged towards the door with the rebel in tow.
Duarte seizes his chance! Springing forward, he grabs the hapless rebel and then turns to face the combined fury of three of the other factions
Far in the distance, several loud thumps could be heard, along with a steadily increasing shriek of incoming artillery. The damned Americans were firing to silence the radio station! All factions broke for the exits when the detonations began to strike the ground and shake the building. Bleeding but triumphant, Duarte was helped to safety by his colleague and student. Together, they escaped, and fled back to the university to examine their findings...

I had actually thought this was merely a one-off game, but Joel assures us it is part of a campaign. If that is the case, my faction is off to a solid lead with the Major Plot Point, and two Minor ones from this battle. Hopefully, more updates in the weeks ahead on Pulp Alley in the world of Junta...

For another (and more humorous account of the game, read Keith Finn's (3rd Brigade) Game Reports blog.

Friday, July 22, 2016

Flocked and Highlighted Acheson Log Stockade Fort

Corner of what I am calling my "Hasty Fort" -- a very affordable terrain pieces from Acheson Creations
 One pleasant surprise from my purchases at Advance the Colors last year was the Acheson Creations Log Stockade Fort I bought. I got it home, opened it up, and discovered it was painted. Everything I had previously bought was unpainted. This fort, which includes a gate, 11 straight sections, and four corner sections, is for 28mm figures and represents a hasty fortification built by Colonial forces.
A photo of the Acheson Creations 28mm Log Stockade Fort unpainted from their website
 The pieces were painted a deep brown with tan on the tips of the logs. There was a dark brown wash done over it all, both on the logs and the ground. Although it looked perfectly acceptable, I decided to touch it up a bit before I used it on the tabletop. I dry brushed the dark brown sections a medium brown, and then the tan sections a light khaki. This gives it more depth and a less flat look. Next, I painted the ground sections with white glue and dipped them in Woodland Scenics Turf Brown. Previously, the browns of the earth and the logs matched, but now they were obviously different. Since this is a hasty fortification, I decided not to add any grass or greenery to the turf.
The perimeter of the fort -- all of the pieces (except the 28mm minis, of course) are included in the set
You can see pictures of the fort above. Not sure when I will use it, but I'm thinking I'll set up an ambush of a woodcutting party scenario. I can have stockade on one table edge, and make it the objective of the colonial forces to escape the Indians, who will be between them and the gates.
Close up of one section of the Hasty Fort -- you can see each includes a firing port sized for 28mm figures
Unfortunately, I don't remember how much Acheson sold the painted version for, but I know it retails on their site unpainted for $25. It must have been a good deal, as I had no idea it would come painted!

Thursday, July 21, 2016

New Settlers for the Ohio Territory


28mm Blue Moon frontiersmen from their Ohio Valley pack
I had hoped to get this last batch of Blue Moon frontiersmen completed before I left for Historicon, but it did not happen. I ended up not needing them for my game, but when I came back, they were first on my list to finish off. I enjoyed painting the Blue Moon boxed set. The figures were interesting, even if they were not sculpted to the standard of the Conquest Miniatures I normally paint. There were some mold lines that I could not cover up with a hobby knife, and a decent amount of flash to clean off. Still, once painted, they look nice on the tabletop.
Five women and children settlers -- not sure of the manufacturer, as I bought them painted and touched them up
I also finally got around to touching up some settler women and children that I've had for years. I am not sure who makes the figures because I bought them painted off of a friend years ago. They were not badly painted, but I wanted to base them up to match the rest of my figures. As long as I was doing that, I figured that I may as well touch them up. All I really did was a bit of highlighting and drybrushing to give them more depth. That, and I added eyes. The figures were previous painted with just a black slash for eyes, so I gave them my usual 28mm treatment. The figures are actually meant to be captives -- you can see the leather wrapped around their wrists. I briefly toyed with the idea of looping several together on a multiple base. It would look nice with wire or something to show them roped together. I ended up decided not to do so because in my games, players can rescue individual captives. I let players cut one captive free, and a multiple base would complicate that (or force me to change my rules!).

I think that after painting these figures, I'm going to take a break from the French & Indian War. I will still work on terrain for it, but I think I have plenty of miniatures painted up at this point. What's next? Stay tuned, and you'll see...!