Monday, August 7, 2023

First Star Wars Skirmish Using Galactic Heroes

    Keith dug out his old Wizards of the Coast Star Wars Miniatures for a game of Galactic Heroes
We have been using the Wiley Games rules for a number of different miniatures games. After watching Rogue One the other night, and reading some really cool threads on the Lead Adventure Forum, I was itching to give it a try. The only problem was I have zero Star Wars miniatures, and only a handful of Sci-Fi ones.

    My four Rebel troopers deployed on the edge of the ruined spaceport overlooking our goal
No problem, though. Keith has Star Wars figures. Keith has everything! So, all it took was a casual mention of how, "Gee, I really think we should give it a try..." and Keith volunteered to run a game of Galactic Heroes (Wiley Games' Sci-Fi skirmish using their Fistful of Lead engine) for us. Success! It HAD been awhile since he ran a game, so doubtless he was ready to give it a go. Plus, he said he has dozens and dozens of the prepainted plastic figures produced by Wizards of the Coast back in 2004. Keith was obviously the right man for the job, and he emailed out that he'd be running a game for us on our normal Sunday evening gaming session.

    We had six players -- two Rebels, two Imperials, and two "Mercenary Scum" spaced across the table
Mike S also has dozens of the figures, too, and brought his along, as well. However, there was no need for his reinforcements, as it turned out. Hmm...if BOTH of them have way more than they need, maybe I should see if either would be willing to part with a few? I could jazz 'em up a little and...well, I did say that I don't have any Star Wars figures, didn't I??

    Mercenary Scum player Joel sent his Gomorrans to investigate the ship, getting a jump on the others
There were six players on the evening of the game, and Keith divided us up into three factions: Rebel Alliance, Imperials, and Neutral Mercenary Scum (somebody said...not sure if it was Keith or another player disparaging the mix of droids, aliens, and leaders who had "Force" powers. Keith gave each of us a mission. I was a Rebel player, and me and Mike W were to get to the starship that had set down in the center of town and see what useful technology we could scavenge from it. The two Mercenary Scum players, Allen and Joel S, had a similar goal. The Imperials -- Mike S and Jenny -- were to patrol the ruined town looking for ne'er do wells, criminals and rebels. 

    We were having none of that, and drew a bead on the pig men, firing off blasters to no avail
Keith had us toss down a bunch of cardstock ruins to simulate a war-torn spaceport somewhere in a galaxy far, far away. Keith DOES own miniatures for every period ever imagined. However, his terrain is definitely in the "quick and simple" category. Still, this was a playtest, he reminded us. I'm sure he has more fancy terrain squirreled away somewhere in his basement that will see the light of a "G Class" star someday! I know I have a handful of buildings from Miniature Building Authority in their Middle Eastern line which would certainly fit the desert planet theme of many Star Wars films. Now...does that mean I will be painting them up soon...? Well, er...I mean -- Keith has everything! Well, we'll see...

    Thankfully, Joel's Assassin Droid & Trash Can Droid were blasting away at Stormtroopers instead
My Rebel Alliance troopers (Leader, Specialist, and two blaster pistol-armed troops) set up in the ruins on the corner of the board. Our goal would be to have our Specialist with his blaster rifle provide covering fire while the two troopers dashed forward in stages towards the spaceship. The leader would cover them and be in the middle to rally any troopers who needed it. My fellow rebel, Mike W, was W-A-Y on the other edge of the board and would never make it to the spaceship. He did get in a firefight with some Stormtroopers, though, like a good rebel! The other Stormtrooper player, Mike S, was directly across the table from me, but we were using a likely too large table, so he struggled to get a shot off at my guys. Plus, Allen, the evil Mercenary Scum kept him VERY distracted.

    Meanwhile, Allen's Mercenaries were giving the other Stormtroopers more than they could handle
Speaking of which, Allen's brother Joel was immediately to my left. Joel had a force of three Gomorran grunts (remember those pigmen from the Star Wars universe?), an assassin droid, a walking trash can (the walking square box of a droid) that we finally decided had a blaster mounted to his trash can lid top, and a leader who had the Force. He was a very creepy alien looking dude who came from a planet plagued by extremely bad luck. Joel's rolls were AWFUL!

    The Gomorrans reach the spaceship and begin to investigate it with their thick, piggy fingers
Anyway, as I crept forward towards the spaceship, Joel sent his grunts (perfect name for pig-faced aliens) towards the ship, beating me there. Luckily, the assassin droid and the trash can focused on shooting Jenny's Stormtroopers instead of us. I admit that I started hostilities between Joel and I when my laser rifle-armed specialist took a potshot at a pig man. Joel's leader then used the Force to attack my specialist, who shrugged off his attack. On my next turn, he ran to the window, drew a bead on the alien-mercenary-scum-leader and blasted him, knocking him to the ground, wounded. 

    The Force was NOT with Joel's leader, as my specialist & his blaster rifle took him out of action
This started a one-sided fight between the two. Joel's leader popped back up, used the Force to push my guy out into the open (and away from the window, so he had no shot). Not content with keeping me at a distance, the creepy spindly alien leaped out of the window and engaged my specialist in melee. Joel's leader was a combat specialist (roll two dice, take the higher in melee), and my specialist was a long-range guy. Joel proceeded to roll a "1" and "2" for his combat rolls. My stalwart rebel trooper knocked him down and gave him a second wound for good measure. On my turn, he shouldered the blaster rifle and finished him off. In none of those rolls, did Joel ever roll above a "3," I believe!

Rebel trooper cleverly uses the final action to sprint to the ship and 1st move next turn to reach it

He got his revenge, though. As I was being clever, I used the last move of the turn to sprint one of my ordinary troopers across the wide open ground towards the spaceship. I used my first move on the following turn to dart him into the cover of the spaceship, right underneath the landing ramp. One of Joel's Gomorrans fiddled with some controls and released the ramp. Keith let him roll an attack with the surprise descent of the ramp and it wounded and knocked down my out-of-breath rebel trooper! As you can imagine, much hilarity erupted around the table at my expense!

    Allen's tiny alien laughs as the Gomorrans release the landing ramp on my out-of-breath trooper
Allen, who had been focusing on Mike S's Stormtroopers, decided to sneak up a diminutive alien up and try to kick my trooper while he was down. The Force was obviously with me that night (and not with those supposedly having Force powers!). My trooper defeated the tiny alien -- sorry, I forget which race he represented -- and leaped to his feet. On his turn, he snagged a communications jammer from the spacecraft and bolted away as fast as his rebel feet could carry him.

  Droid trooper uses the newly-discovered 'Ready' action to wait for someone to run into the open
Allen made up for this turn of bad luck by taking his frustrations out on a different Mike (Stelzer, playing the Stormtroopers). His Force-wielding leader dashed out into melee with a squad of Stormtroopers. Just like in the movies, he light-sabered hapless trooper after trooper, leaving a trail of crispy white plastic armor in his wake. Between the shooting kills Allen had inflicted earlier on Mike, and this melee mayhem, the squad of imperials was left with one figure. He promptly fled the scene, doubtless calling in backup!

    Allen's leader wades through Stormtroopers with his light saber like they were...well, Stormtroopers!
Seeing as how my rebels had taken out 3-4 enemy, including a leader, and had snagged some tech from the spaceship, we decided to leave the scene of our crimes against the Empire, as well. It had been a successful outing, with no losses. We rationalized the communications jammer was exactly what we had been looking for. How else would we ensure the Imperials we ambushed couldn't call for backup?

Cue the Star Wars music, and hopefully there will be a sequel soon...!

Wednesday, August 2, 2023

Painting Ancient Thracians Continues - On to the Javelinmen!

    My next batch of Thracians -- eight 28mm warriors with javelins from Crusader Miniatures
The painting of my next Saga army -- the Ancient Thracians, a Balkan people that raided the Greeks and others in the area -- started up again after Historicon. I am on to the last troop type -- the warriors armed with javelins. This will be the most numerous part of the army, as I plan on fielding three units of nine figures each (in my current warband configuration). This is the first batch of eight.

    A look at the freehand patterned cloaks and shield designs that force me to keep my batch size low!
Why am I not painting the javelin-armed contingent in three batches of nine? First, I think I may paint up some extra figures in case I want to change the configuration. The biggest reason, though, is that the Crusader Miniatures (which I purchased from Badger Games) infantry come in packs of eight. Plus, with the decorative cloak patterns, they are a LOT of work. I've found in my years of painting miniatures that if my batch size is too large, I lose motivation and stop painting. By keeping the batch size small, I see progress which inspires me to keep going.

    A look at the front and back of two of the figures in this batch of eight Thracian javelinmen
One reason I enjoy painting metal miniatures more than using plastic kits -- which seem to be more popular these days -- is the "Assembly" step goes very quickly. All I had to do for these is epoxy on their small crescent shaped shields and the javelin in their throwing hand. I know many (most?) gamers use superglue, but I stick with two-part, 5 minute epoxy. I find it holds best and I rarely have shields or weapons pop off during a game. Typically, I use poster tack to either hold the weapon or miniature in place while the epoxy dries. Sometimes, I will shave off some of the metal to give a flatter surface to join in the shield and forearm, for example.

    The detail work on the shields and cloaks is done with a mix of freehand brushwork & micron pens
I brush prime my miniatures white, and then do the flesh. I use a craft paint flesh and then do a Terra Cotta colored wash over the flesh to give it a more ruddy look. Next, I do the tunics. I chose mostly pale colors for this batch. Since the cloaks are not decorated other than a contrasting hemline color, I didn't want them to distract from the brighter, fancier cloaks. Ancient sources describe them as patterned in "geometric designs," and looking at examples that survive from Greek vases or frescoes on tombs, you have a lot of leeway in what to paint. I typically sketch out a design with notes designating colors on the cardboard base that I glue my figures to before priming and painting.

    I really like how these two cloaks came out, especially the blue one!
After the tunics and cloaks, I proceeded to the hooded headdress and the boots. All four clothing pieces receive a highlighting dry brush in a lighter color. Even the leather belts are done in two tones -- a lighter brown base and leather highlight. That's one of the main differences between painting 28mm and 15mm miniatures, I feel. Virtually every bit of detail on the figure gets a base coat and a highlight. It is still not done at that point, though! I go over all my figures with either a brown or black wash. Most figures get both -- the skin, white, yellow, and tan tones on the figure get a brown wash, while the darker colors like reds, greens, blues, and darker browns, get a black wash.

    One batch down, and 2-3 more to go on these javelinmen and my Thracian army will be complete!
Once the clothing is all done, I do the shields last. For any figure batches which I used a micron pen on, I tend to do a first clear coat BEFORE the wash. I've had the ink run because of my wash otherwise. With a spray of Testors Dullcoate, the ink seems to be pretty dry or sealed in so doesn't run. Last step is the flocking, and another Dullcoate or two, and these guys are ready to hurl their javelins at the enemy on the tabletop!

Monday, July 31, 2023

Prison Cell Block & Research Facility

    My Woodford - Prison Cell Block MDF building from Warcradle Studios that I constructed
A few years ago on a trip to St. Louis, I picked up an MDF building on a visit to a local gaming store. It was from Warcraddle Studios "Red Beam Designs" line, and titled Woodford - Prison Cell Block. It looked like the perfect thing for a Pulp or Modern game, kind of a combined research facility and row of prison cells, to my mind. What dastardly experiments were carried out there on the unfortunate detainees? Of course, I had to buy it and find out...ha, ha!

    Research facility section -- note the safety and research science posters I glued on the painted walls
Well, I finally got around to constructing it because I felt it would be the perfect building for the next chapter of my post-Apocalyptic campaign. Not to divulge too much, but such a combined research and detainment facility is the planned the centerpiece of that scenario. This was the first building I would be constructing from this company, so I was curious to see how it stacked up against Sarissa Precision (where most of my buildings are from) and TTCombat (which I had built one or two from).

Top view of the L-shaped building with the research facility on the left and prison cell blocks on right
It seemed to go together as easily as most of the Sarissa Precision buildings. I used tacky glue to affix the floors, walls, door frames, etc., together and they seemed to bond the MDF well. The thickness of the pieces seemed about the same, too. One interesting aspect was the building came in two parts, creating an "L-shape." The longer section of the "L" contains what I termed the research facility part. The shorter part contains three cells and a hallway outside of them. I was possible to glue the two halves together, but the length and width of the building would be huge! It simply would not fit in any of my 13" square carrying boxes. So, I decided to leave them as two separate pieces, and simply slide them up against each other on the tabletop.

28mm police officer patrols the corridor outside the 3 prison cells - what is inside, hidden by the walls??
That was when I discovered the most surprising thing about the Woodford - Prison Cell Block. There was no roof! The building came with no MDF piece for the roof, which is the first time that has ever happened to me. All of my Sarissa Precision buildings come with a roof, as did my TTCombat ones. Very strange! Upon looking at the image on front of the package, I admit that it shows the building roofless. I had assumed that was so you could see how it was divided into hallways and rooms, though. So, a warning out there to anyone seeking to buy a Warcraddle Studios building: Make sure you know if it is has a roof or not!

Patterned paper I cut into shape and glue into place as floors for my MDF buildings

I used my standard method for painting up and tricking out my MDF buildings. After constructing it, I spray painted it with Krylon Matte black, and followed that up with a 50/50 mix of acrylic black paint and water. I painted the interior walls of both building sections first. I then did a dry brush of a lighter color, followed by a black wash to dirty it up. Next, I cut out pieces of patterned paper for the floors. I purchase these at Hobby Lobby where there is a huge variety of textures, colors, and styles. I used a gray concrete looking sheet for the cell floors and two different patterns that looked like linoleum flooring for the hallways and research facility rooms. 

    Painting the windows is the most "fiddly" part of this building - here a guard hears a strange noise...
I also created images of steel doors in Photoshop and printed them out on my home printer. I used images I found with a Google search and then modified them a bit. Once all the doors, walls, windows, and floors were done, it was time to move on to the outside. I decided to go with a couple different texture looks for the exterior walls. There was a small lower row of rectangular stones that I painted gray and used as a stone base. Next, I did a tan-colored stone effect for the main surface of the walls. This facade has fallen away in some places, exposing a stucco like surface, which I painted in a different color.

    Sandbags atop the cork roof give the building a militarized and forbidding look
As if all that wasn't enough, I glued on a decorative wooden beam separating the top from the bottom sections on the exterior. I painted that green to match the two latticed windows. I used that same medium green for the trim around the doorways. Each of the doorway areas came with an upside down "U" frame which I think was a really nice touch in the design. Otherwise, doors in MDF buildings can look somewhat 2-dimensional. I know that on other buildings I have even added in a frame to give it a more 3-D look. 

    Exterior close up, with the tan stone, exposed stucco where the facade has fallen away, & green trim
Once the exterior was painted, I washed it more darkly with the same black wash. I then took an X-acto knife and scraped off a line of the paint to attach the green wood trim sections. I wanted to expose the raw wood so that the surface had something to adhere to on the model. I hoped this trim would make it "pop" a little, adding in another 3-D element. I was really happy with how the exterior looked. My dry brushing of the interior section of each incised square in a lighter, highlight color came out relatively well, I think. 

Since this building houses detainees, whether experimented upon or not, I figured the doors had to be fairly heavy duty. I painted the outside doors a base steel color and highlighted them with streaks of pewter color. I also did the handles and bottom of the window grills in pewter, as well. Above the individual prison cell doors I added in a sign, "Cell Block A," etc. Some of the interior doors I decided to use a printed doors, such as those for the prison cells below.

The doors, which are simply printed out on paper and glued over the outline incised on the MDF
That brings me to the posters. I like to create posters in Photoshop to decorate my MDF buildings. I think it gives them a nicer, more lived-in look -- without going through all the expense and work of painting up interior furniture for each of them. Maybe one day I will have the time to add desks, filing cabinets, etc., to this and my other MDF models. Until then, the posters will have to suffice. For these, I emphasized a lot of "Safety" posters, along with a good mix of Science-themed ones for a research facility section.  To add an ominous tone, I put in one urging visitors and workers to be prepared to "Run/Hide/Fight"! For these, I simply created the image in Photoshop and send it to my Word Processing program to arrange multiple images on so that with one page I can print multiple posters, doors, etc.

    Another look at the exterior and the scratch-build foam board covered with cork paper roof
At this stage, the building itself was done -- except for the roof. I went back and forth about what material to use for the roof. My first thought was black foamcore -- but I was worried that whatever surface I put on it would cause warping. I considered MDF and styrene plastic, too. I didn't have a large enough sheet at the time in my possession for either material. MDF and styrene would likely not warp, but would be much heavier than the foamcare (which I DID have in my possession). So, I made another trip to Hobby Lobby for inspiration. While looking at the different textures and patterns of their paper, I found one style they had that was actual thin cork with an adhesive backing. The cork surface's mottled brown look would match the exterior of the building, I thought. Plus -- attaching paper to the foam core would not cause warping. 

    This sprawling L-shaped building actually went together and painted up fairly easily
Was this the solution? The 12"x12" sheets were not large enough for the whole roof, though. I figured that if the seams looked bad, I could make a thin concrete "rib" out of bass wood and glue it atop the roof strategically to hide the seam. I also wanted to put in square strips of bass wood as lugs to hold the roof in place so it didn't slide around. That part was done easily enough and the roof fit snugly atop the MDF building. I cut the cork paper so that about a 1/4" would wrap underneath the roof, covering the "foamy" edge of the black foam core. Unfortunately, the adhesive backing wasn't strong enough to hold the paper to the foamcore for long. So, I ended up having to press them back into place and then paint with tacky glue where the cork and foam surface joined. This seemed to hold it much better.

Since it is a prison of sorts, my plan was to line the roof with sandbags. However, I didn't have enough pieces, so will be getting a friend to 3-D print me some. I will paint those up when I receive them and glue them atop the cork roof into place. So, technically, the building isn't truly complete. However, it is close enough to take pictures of and post on my blog!

Tuesday, July 25, 2023

Clifftop Battle - Song of Drums and Tomahawks at Historicon 2023

Huron raiders lead women and children captives north to Canada after their attack on a Seneca village
Most people remember the climactic skirmish on the clifftops in the movie The Last of the Mohicans. So, it was only natural that when I first got into the French & Indian War, that I'd want to re-stage that fight. I created a scenario actually using Magua, Hawkeye, and their companions and ran it years ago for Cold Wars 2015. When deciding which scenario to run at Historicon 2023, I decided to bring that one back out. Well, a version of it, that is! I didn't include the heroes, but instead players represented either Huron raiders leading away captives or their Seneca men attempting to rescue them. In fact, this scenario, Clifftop Battle, will be in our upcoming scenario book which is entering its final editing stages.

    Overhead view of the board for the 'Clifftop Battle' featuring my scratch-built cliff sections
Another reason that I wanted to bring this battle back is because the scenery is gorgeous. I feel it is perhaps some of the best that I have ever scratch-built. I created my three cliff pieces by using two different sizes of wooden boxes turned upside down and glued to styrene plastic. The cliffs were covered with pine bark which actually looks very realistic depicting a rocky cliff. For anyone interested in doing the same, I followed this series of steps:

  • Dry out the pine bark in the sun thoroughly
  • Glue it to the surface (I used Tacky Glue) and fill in whatever gaps between the pieces with Woodland Scenics ballast
  • Thoroughly spray paint it black
  • Brush paint it with a mix of 50/50 acrylic black paint and water, so it seeps into crevices
  • Dry brush it in 2-3 shades of either gray or bleached brown
  • Seal it thoroughly with clear coat

    Huron warriors leader their captives along the clifftops back towards their villages in Canada
I looked for my blog post on creating the cliffs, but I must have done them before I began this (relatively) newer Google Blog. So, don't bother searching Lead Legionaries for it -- sorry! Anyway, I really like how these cliffs turned out and they are always nice eye candy when you're trying to attract people to your table. And since getting people's attention was kind of the whole point of our First Command Wargames visit to Historicon, the Clifftop Battle was on!

    The way was long, rocky, and hard for the captives, who were suffering and exhaused
In this version, Huron warriors have raided a Seneca village while most of the men were out hunting. They captured a number of women and children and headed north across the mountains towards Canada. They plan to adopt them into their tribe to replace losses from the unending tribal warfare. The returning Seneca hunters discover what has happened and race to catch them. Using pathways unfamiliar to the Huron, they send one party ahead to cut off their march while pursuing with the rest of their force. When the battle begins, one Huron party including four captives is on the tall, center clifftop section and the other is behind it. Their goal is to make it off the opposite corner edge and off-table. The mission of the Seneca is simple -- rescue their women and children!

    Shots ring out, echoing from hillsides -- the Seneca rescuers have arrived and are attacking!
As I mentioned in the previous post, all four of our events were completely full with 8 players (four each in Clifftop Battle and four in Attack on Fort Michilimackinac). Since I was running the fort scenario, I didn't get to see much of the action in the four runnings of this skirmish. I heard everyone had fun -- which is the main point, of course. Also, the running score was fairly close. The Huron won twice, Seneca once, and they tied the fourth time. The only tweak we made over the course of the games was to allow Seneca Player One to move first before Huron One (followed by Seneca Two and finally Huron Two). Jenny said this really tightened the scenario up even more. I'll be sure to make that change in the scenario book, too -- although we have played this one a number of times, already. 

    Seneca rescuers have freed two of their women from their ropes and prepare to lead them to safety
Both sides have important tactical decisions to make. Once the Seneca catch up and force battle, they need to decide whether to focus on freeing captives or killing Huron. On the other hand, the Huron need to decide how big of a rearguard to leave to delay the Seneca and how big of an escort to send ahead with the captives. Too small of a rearguard and they will be overwhelmed. Too big and Seneca can race ahead and steal away women and children from their string of prisoners.

    The steep terrain hampered both the Huron raiders and the Seneca rescuers
The game had a suitable climactic finish in our final running. Four friends signed up to play and they were quickly lubricated with the white man's "fire water." War whoops were let out and dice rolls were celebrated -- exchanging historical Indian high fives...ha, ha! It was obvious they were having an absolute blast. Poor Phil Viverito's players gaming his World War I trench game did not seem as thrilled as the volume steadily escalated during the evening! Still, sitting down with friends, rolling dice and having fun, is the core of what we do as wargamers. It warmed our hearts to provide the opportunity for fellow gamers who would obviously go to their rooms razzing each other about each other's successes and failures.

    A string of captives descend the cliff path nearing the board edge -- their hopes of rescue dashed!
All in all, Jenny and I had a great time running Song of Drums and Tomahawks at Historicon. If you are interested in a quick, fast-moving set of skirmish rules that are easy to pick up...and ahem, obviously fun...I recommend them highly. Of course, the fact that I wrote them along with my friends Keith and Mike has NOTHING to do with that at all! At only $15 a print copy, how can you go wrong?

    A close up of my native women figures with one brave escorting them along the path

Some photos taken by one of our players at Historicon, Charles Sherrange

    Seneca warriors race to catch up with the Huron rearguard and exact their vengeance


    High above the forests below, Huron raiders lead their captives along the cliffs
    A desperate struggle ensues at the exit from the cliffs between Seneca and Huron warriors

    Massed on the cliffs, the Huron warparty readies itself to repel the Seneca attack

Monday, July 24, 2023

Using Song of Drums and Tomahawks to Restage the Attack on Michilimackinac at Historicon

    A flurry of combats rage throughout Ft. Michilimackinac, as the Ojibwe & Sauk seek to take control!
Unlike last year, when the whole First Command Wargames crew went to Historicon, this year only Jenny and myself were able to make the journey. To simplify things, we decided to run just one of our rule sets - Song of Drums and Tomahawks. Not only was it our first rules set we published (partnering with Ganesha Games), it is also probably our all-time best seller. Plus, the American frontier setting fit with the convention's theme. 

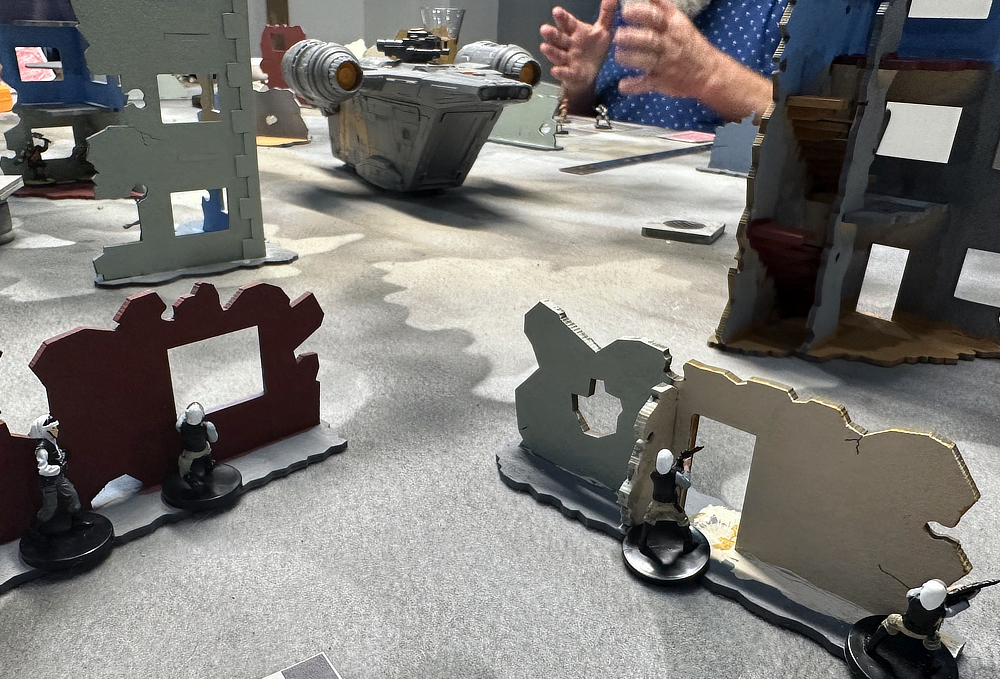
    A birds-eye view of the layout of my take on this Michigan fort during Pontiac's Rebellion, 1763
I chose two 4-player scenarios to run side-by-side. I wanted them to be highly visual, but adapt well with either the full four players or also with just two in case we didn't fill up. I need not have worried about the last consideration, as all four of our events had the maximum eight players. I was pretty happy about that, especially since my name as a GM is somewhat unknown outside of the Ohio area. Jenny was listed as GM for two of the four events, and her name would naturally be even less well known. We were full, though, and had great players for all our games.


Gate tower sentry looks on in horror as Indians stream through the gates & execute their ruse
The first scenario we were hosting was the Attack on Fort Michilimackinac. This occurred in 1763 during Pontiac's Rebellion. The local Ojibwe and Sauk tribes were upset with the British, who had taken over control of the area after their victory in the French & Indian War. A grand conspiracy was organized by multiple tribes and the Ojibwe and Sauk scored one of its most memorable successes. The Indians arrived at the fort under the guise of peace, saying they wanted to trade. They also staged a lacrosse game on the grassy area in front of the fort, inviting garrison to come down and watch. At one point during the game, the ball was tossed over the ramparts into the fort. Naturally, the players streamed after it.

    A British officer stands firm, ready to meet Indians sprinting up the tower ramp with his pistol
Once inside, the Indian women stood up from where they had been trading and opened their bulky robes. Concealed inside were knives and tomahawks that the lacrosse players grabbed and began attacking the garrison. The ruse was a brutal success and more than two dozen British soldiers were killed. For my re-staging of the attack, I gave the two Indian players identical forces of nine figures each. One figure would be the leader and eight rank and file braves. Of those, the chieftain and three braves were assumed to have tomahawked a soldier and seized his loaded musket. In addition, the Indian players would take their turns first, followed by the British. This was to represent the shock and surprise of the attack. 

    Success of the attack often depended on the initial accuracy of the British soldiers on the palisades
Meanwhile, the two British players were each given an officer armed with a pistol and six soldiers with muskets. Since the attack was unexpected, they had to first deploy all figures spaced apart from each other (Short distance, in game terms). A maximum of half of the figures could be inside the four buildings or towers. Their advantage was that ALL British figures began the game with a loaded firearm, while less than half of the Indians did so. Most of the Indians would be forced to enter melee, which is of course riskier than shooting at someone from a distance!

    In a short time, both British and Indian dead or wounded littered the ground inside the fort
My Song of Drums and Tomahawks rules are meant to be a simple, fast-play skirmish set using only six-sided dice. The way the rules work out is that if two rank & file troops are fighting each other in melee, with no tactical modifiers (like defending an obstacle, extra enemies in contact, etc., each will roll 1d6 and add +2 (the figure's Combat score). Doubling an enemy wounds them and knocks them out of action. Beating them on an even die roll knocks them down (which makes them easier to kill in follow-up attacks), while an odd number recoils them away one base depth. However, shooting at an enemy with a musket at short range adds an additional +2 for the attacker. So, potentially, before rolling their die, the Shooter is already up +4 vs. +2. Of course, cover and other shooting modifiers can adjust those numbers, too. So, you can see why I gave the British fewer figures -- they would potentially have more deadly musketry attacks.

    Fighting was desperate & hand-to-hand inside Ft. Michilimackinac, once the muskets were fired
How did the battles turn out? Great -- and fairly even! I ran the fort scenario and Jenny ran the Clifftop Battle (which I will talk about in the next post). On Thursday, the British won the first battle in the morning, while the Indians won the evening battle. On Saturday (Jenny and I played in the Saga tournament Friday), the Indians won the first game while the second one was locked in what I called a Draw. The players felt the Indians had a slight advantage. However, comparing the number of loaded muskets the few remaining figures on each side had, I think the British could easily have driven the Indians from the fort.

    Indian attackers took advantage of the ramps that led up to the corner cannon platforms
The Indians actually begin deployed inside the fort at the start of the game. I have half a dozen casualty figures littered near the gate entrance to represent the initial, shocking moments of the surprise attack. All Indians deploy within one Long distance of the gate, limiting them to a relatively small semi-circle. The more successful Indian players began their first turn firing off their capture muskets at British sentries who were out in the open on the palisade platforms. Those who tried to eliminate sentries deployed in positions of hard cover ended up fruitlessly wasting their musket fire. Also, the more aggressive Indian players were with their braves armed only with knives or tomahawks, the more successful they tended to be. Moving into contact with a British sentry and locking him in combat, meant that not only could he not be shot by that soldier, he couldn't be targeted by his fellow garrison members either.

    Another closeup of the Ojibwe and Sauk boiling through the gate in the initial moments of the attack
The more successful British players began in good cover, taking advantage of the towers as well as the log piles, buildings, etc. They immediately targeted the closest Indians, scoring initial successes to even the numbers. One of the things about my rules is that players are constantly called upon to make decisions. When a player is activating a figure, he must choose to roll for 1, 2, or 3 Activations. If the figure is within the leader's command range, he succeeds on a 3+. If outside, rank and file succeed on a 4+. The risk part of the rules is that if you fail with two attempts on a single figure, your turn is over. We call it a "crap out." Any unmoved figures lose their chance to act. 

    Cannon platforms were the scene of many bitter struggles over the course of four, hard-fought games
Obviously, you could roll only one dice for all of your figures until your final figure (when you roll 3, because your turn will be over anyway after this figure is finished). However, this very conservative path means you are often activating far fewer times than a player rolling for two or three. I advise players to prioritize. Which figure is the most important one to activate? Has your leader been knocked down? Activate him first to keep the enemy player from launching a killing blow before he can stand back up! Are any of your figures in contact with enemy they have knocked down, and can finish off by simply beating and not needing to double them? Prioritize those, as well. And finally, remember figures within range of your leader have a 2/3's chance of success to activate, while those outside have only a 50%. Many a player has unwisely chosen to begin with those out of range and lost their turn throwing poor activation dice.

    A look at the two games, side-by-side, set up and ready for its next batch of players
The players picked up the mechanics quickly, as usual. Once the game begins, I typically assist them in calculating their factors for the first couple shots or melees. After that, I go into teacher mode and ask them to calculate it for me, checking to ensure they have it right. Not far into the game, I hear the players talking to their friends excitedly about how these simple mechanics work really well. They begin to ponder taking the rules engine and applying it to another period they play.


    Released in 2014, Song of Drums and Tomahawks is still First Command's all-time best seller

We sold all but one of the Song of Drums and Tomahawks rules sets we brought with us. The rules were carried in the Exhibit Hall by Brigade Games and (I believe) On Military Matters, as well. I know they sold copies, too. So, I felt happy that the game was popular with my players. There were a lot of cinematic fun moments, too. One particular British soldier in the final game we nicknamed "Badger" for how fierce he was when knocked down. He would lose his even-up melees against Indians, only to time after time defeat the enemy who followed up to finish him off. Thursday night was a blast when my friend Jason and his two high school age kids played. Lillian did the same thing, over and over. She won at least four combats in a row when she was on the short end of a +4 vs. +1 disadvantage. Killing a rival player's miniatures is always a visceral thrill in a wargame, but the taste is that much sweeter when it is your Dad, sister, or brother! I commiserated with the Indian player matched up against Lillian as he was being hit doubly by the wargamer's maxim of "not rolling dice against women or children."

    Here is a link to my 2014 blog post about building the Acheson Creations frontier fort
The Acheson Creations fort looked great, as it always does, on the tabletop. I got lots of nice compliments about the terrain and the miniatures themselves. Most are from the old Conquest Miniatures line, and I spent a lot time detailing them with tattoos, bead work, and more. It was fun to run my first published rules, again. I had been running my gang warfare Mean Streets rules, as well as my Wars of Insurgency modern Africa game much more, of late. Historicon was a nice blast from the past and let me remember how fun of a game it is to run. 

Next up will be an account of Clifftop Battle. If you have seen the movie The Last of the Mohicans, then you have an idea for my inspiration!