Tuesday, October 29, 2013

Southeast Asian Temple, Part 8 -- Finished!

So, kind of an anti-climax for the last installment. Here are the photos of the interiors. I went with CG Textures' website http://www.cgtextures.com/index.php, suggested by someone on the Lead Adventure Forum. I simply downloaded the images, resized them in Photoshop, and printed them off. Looks so much nicer than trying to scratch-build the interior. I know some purists may feel it is crossing the line between modeling and cardstock buildings. I just didn't want to spend lots of time on the interiors, seeing how much time I spent on scratch-building the temples themselves!

The interior of one temple, showing the door
Here is the interior of one of the temples. I painted the interior solid black, then cut the floor and four walls in separate pieces. I painted the interior lightly with white glue and voila! Instant stone wall or floor. The wall with the door was done using photoshop, as well. I found a likely door, cut it out electronically and pasted it onto another image of a stone wall. I am really happy with how realistic it all looks.

CG Texture images downloaded (free!) look very realistic when printed out and glued in
I went ahead and did an interior floor for the stupa, as well. Technically, these buildings are usually solid -- there are no rooms on the inside. But hey, these are also for pulp games...so there HAS to be a secret room with a hidden latch that opens it...!

I plan on doing at least one larger one, now that I have the techniques down. Hope you have enjoyed the tutorial...feel free to leave a comment. Or heck, even subscribe (or become a Follower) of my blog!!!


Monday, October 28, 2013

Southeast Asian Temple, Part 7 - Exteriors complete!

Von Jaeger and the German archeological party discover the first of my small Southeast Asian temples. I think the printouts of the bas relief carvings on the corner columns turned out fine.
I got a little busy at school, so the temples had to sit for a few days before I got around to finishing their exteriors. I added the light gray and white dry brush coats, as I mentioned in the previous post. These also went quick and really made them stand out more and look less like monotone stone. Once all the coloring of the stone surface was done, it was time to start flocking them.

Wide angle shot of the first small temple...definitely captures the "lost in the jungle" look -- at least in my humble opinion!
 I mixed up a batch of white glue and the earth red color of paint I use for my bases (Ceramcoat Burnt Siena). I added a bit of water to get it to flow and liberally coated the styrene base, slopping some up on the lower portions of the structure on purpose. I then poured Woodland Scenics Medium Ballast onto the paint/glue mix. Once dry, I took the leftover paint/glue and watered it down even more, to close to a 50/50 mix or so. I painted the ballast with this and then poured sand over the top. In addition to doing this one the styrene bases of the two small temples, I did it to the lowest level of the stupa base. The paint mix seeps up and wets the sand from the bottom, coloring it. I then sprinkle it with Woodland Scenics brown turf to cut down on the reddish tone a bit.

Harris McLeod and Maj. Speke-Eastman pose in front of the second of my Southeast temples they've discovered in the jungles of Southeast Asia. This one differs in having the columns set out from the temple building a bit, as well as the decorative trim beneath the roof.
 Now, it was time to see if my idea for the corner columns on the small temples worked out. I had found a website earlier call CG Textures (recommended by Amlaric on the Lead Adventure Forum). They have various high resolution photographs of walls and other images. One of them, I'd noticed while checking out the site, was of Angkor Wat in Cambodia. I downloaded a bunch of the images and then resized them in Photoshop. I took strips and duplicated them, sometimes flipping them horizontally so they looked slightly different. I ended up with two rows of images meant to resemble bas relief carvings of dancers, gods, etc. Since my temples were staying with a gray tone, I made sure to change them to black and white images.

I know...not a lot of difference in this angle...but you can see the staining I did on the columns and temple surface fairly well. The British archeological party benefits from having McLeod's niece as a correspondent for the London Times!

Printing them out and then gluing them on the temples took less time than I'd figured it would. There is no mistaking it was a relatively tedious process. Nevertheless, it went much faster than I'd anticipated. The paper had no problem sticking to the wooden dowel columns. I simply painted each column with a thin layer of white glue, then wrapped the paper around the column. The hardest part was trimming it here and there to make it fit perfect and minimize any crinkling.


Close up of the Stupa and the American archeological party. You can see the sand on the surface pretty much erased the embossing (oh, well!). Not nearly as "sexy" as the temples, but stupas are an integral part of any SE Asian religious complex.
 I gave the columns awhile to dry. Then, I took straight white glue and painted it on the areas tht I wanted grass. I sprinkled Woodland Scenics Blended Green Turf onto it. I always leave areas of brown earth showing so that the grass is patchy. More waiting for it all to dry followed. This is always a "work for 20 minutes and wait" part of the process. I then broke out the three different colors of Woodland Scenics clump foliage that I own. I tore the bits into tiny pieces because it would need to stick to vertical surfaces. I then simply painted areas I wanted vegetation clingng to it with white glue. I looked for flaws in the gluing job of the column images and made sure to cover those up first. I then recreated vines and other creeping vegetation by gluing lines of tiny pieces of clump foliage all over the temple face. I ended up putting on enough that it wouldn't look pristine and out of place on a jungle board. I also wanted it to be fine in an overgrown, "weedy" sort of way if the temple was located in the plains.

As Eric Bylan gazes up in wonder at the stupa, Dakota Smith hears a noise in the jungle off to his right...
The final step for the exterior was to create stains from the moisture and vegetation. I mixed up some black paint and water (less than 50/50). I then created water tracks from high points to lower points. Once the watery black streak was in place, I watered it down even more along its edges. I'm not sure if it will actually show, but the goal was to make it look like stains from dark areas of the stone, vegetation, or something else that was streaking the flue velvet.

A final spray of dullcoate and the exteriors are done! Note that I specify this because I have plans for the interiors, as well. I will print it out more resized images from CG Textures and glue them on the inside of the boxes. Hopefully, the sides are straight enough to look nice when I glue the images in. So, until I get that part of the project done, the temples and stupas are complete. I hope you've enjoyed this tutorial, so far. These have turned out every bit as nice as I'd have hoped for. I look forward to using them on the tabletop...!

Storming the Breach at Badajoz


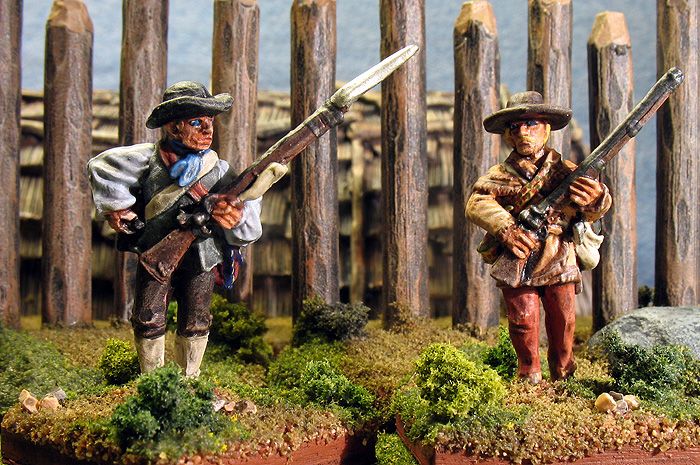
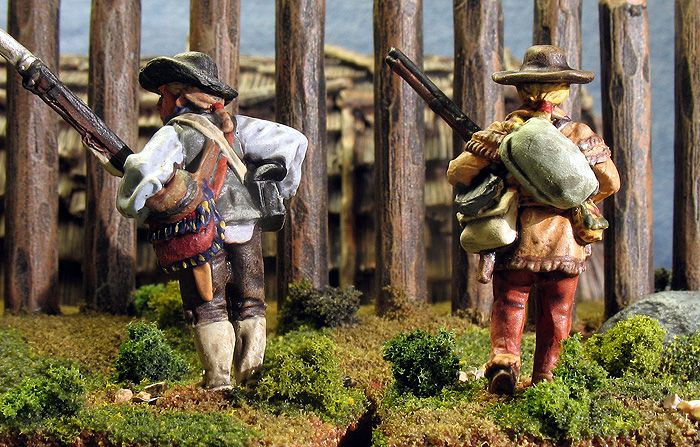
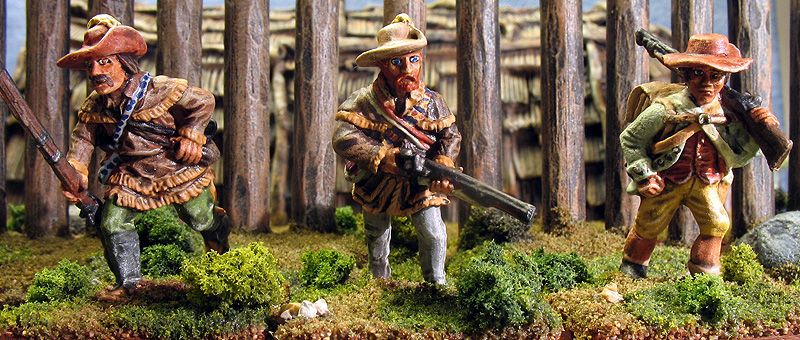
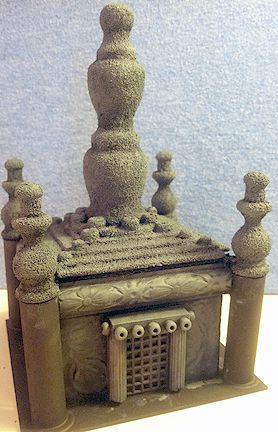
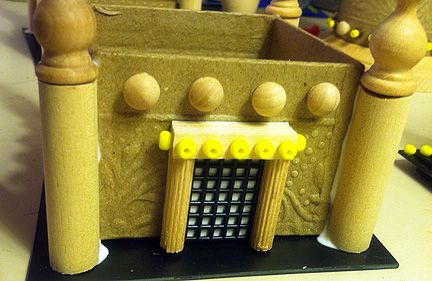
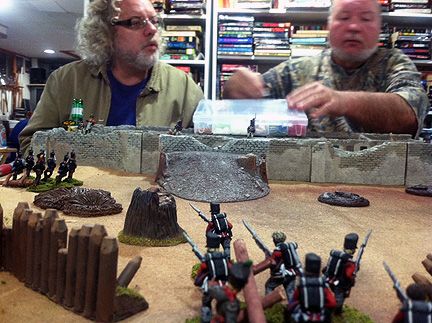
Keith, right, set up a Napoleonic era skirmish for us featuring his newly-painted walls and buildings. Allen joined him to command his right and try to hold off the English assault on the fortress.

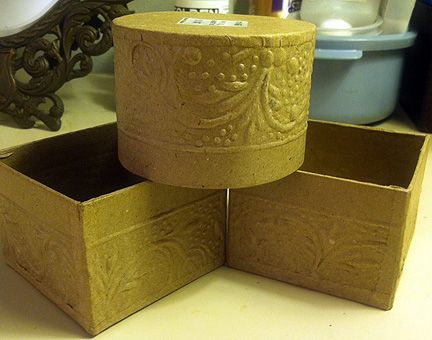
 My buddy Keith wanted to host a game to celebrate finishing his Alamo walls and buildings. Since his cowboys weren't completely finished, though, he reconfigured it to be a the besieged fortress at Badajoz during the Napoleonic Wars. He dug out a bunch of individually mounted 28mm skirmish troops and set up a scenario where the British are storming a couple breaches made by artillery. We use Ganesha Games' Song of Drums & Shakos for blackpowder era skirmishes. With six of us in attendance this Sunday evening, Keith, Allen, and Joel were the defending French and allied troops, while Steve, Mike S, and myself were the assaulting British (and allies).

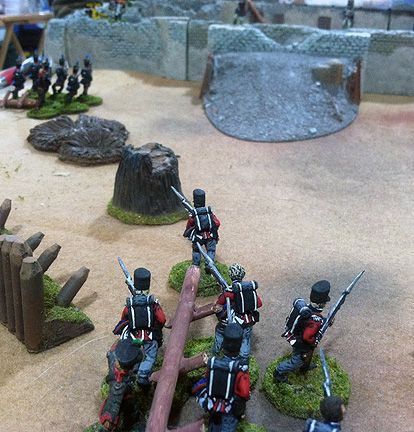
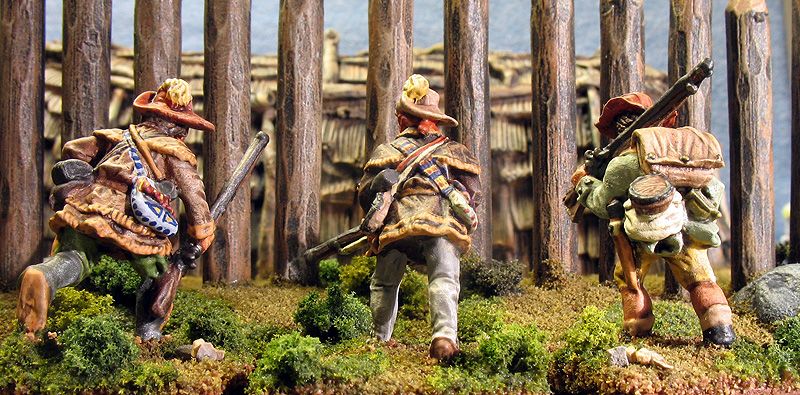
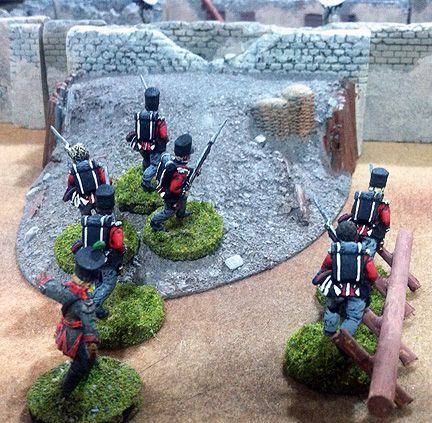
My British light infantry head towards the breach carrying a ladder (which they won't need), while Steve's Brunswick troops are almost at the wall

Steve opted to play the Brunswick troops, and Mike S snatched up the 95th Rifles, leaving me with two commands -- a squad of British light infantry and another of line infantry. Each of our squads had a ladder we could use to climb the walls, or we could go up one of the two breaches on either side of the table that our artillery had made. Half of the French troops start in the guard room, while the other half are deployed on the walls when our assault begins.

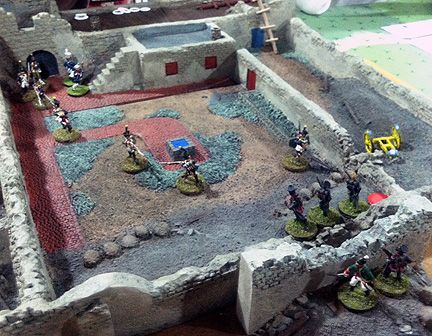
Keith watches as Mike's 95th Rifles storm towards Joel's troops on his left

 I advanced steadily, with the lights heading towards the breach and the line aiming their ladder towards the battlements. On my left, Steve raced towards the walls ahead of me, drawing the attention of Allen's troops away from my lights. On my right, Mike S stormed forward, and with a well-placed bullet, pegged Joel's officer. His troops broke in momentary panic, abandoning the walls and allowing him to seize them.

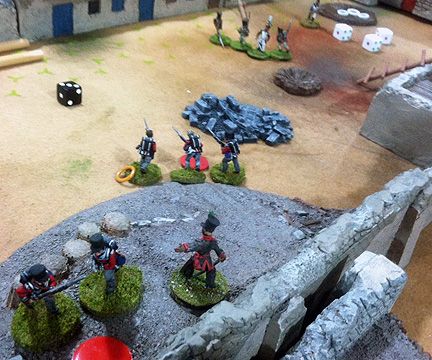
"Up the ramp, lads!" My lights ditch their ladder and race up the rubble breach. Note my ensign in the rear of the formation -- a caution or French opponents did NOT employ to their dismay

 This was a harbinger of our success all across the line. Steve slowly battled his way up his ladder and faced down Allen. My lights surged up the rubble ramp and surrounded his meager guards. My line sheltered beneath the walls for a breather, while they set up their ladder. The French were having trouble getting their troops out of the guard room, and were outnumbered at the point of attack. My lights soon overwhelmed the French facing them, and my line were able to storm up the ladder and chase off the Bavarians guarding the battlements. Meanwhile, the 95th Rifles were making short work of Joel's command.

Our ladder set against the walls, my line infantry prepares to climb to assault the Bavarian troops above them. Note: I am *NOT* a fan of old-school knitting rings for markers to show unloaded muskets (and let Keith know that...haha!)

 The scenario gives the French 60% of our force strength, but nowhere was the point total at a greater disparity than the Rifles against Joel's command. His Nassau allied troops were the worst on the board and he was outpointed by several times. My line troops actually fought their way to the top of the ladder against a superior force, albeit one that had half its strength still straggling from the guard room. Allen was facing both Mike and myself, so was also outnumbered.

The 95th Rifles, led by Sharpe and Harper, mow down the Nassau allied troops opposing them

At least for the English, it was an enjoyable game as we wore down the French and soon achieved our victory conditions. We made some suggestions on how we would balance things better the next time it is played. A big advantage of ours was tactical, though. We were able to kill the leaders of all three forces shortly after contact (or before, in the Rifles' case). This caused panic and confusion among the troops and allowed us to seize our objectives relatively unopposed.

The bitter end for the French: My lights have taken the breach and are advancing down into the courtyard. Their opponents panic and run back towards the guard room.

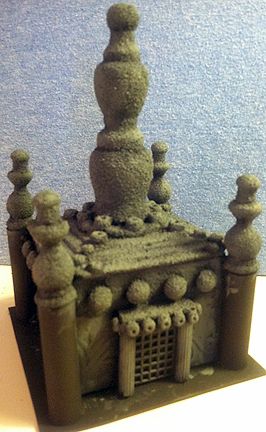
 Song of Drums & Shakos is a good set of rules, and provides enjoyable games. We did make a few tweaks, though. One of which is to drop the weapon differential rules for hand-to-hand. The other is to reconfigure group moves to include the leader as part of the rolled-for movement. Keith's walls and buildings looked great on the tabletop, I thought. It was good to finally get all those troops he'd been collecting out on the tabletop, too.

Next week we have a Halloween-themed game that Mike S has dreamed (nightmared?) up. So, that should be exciting. And the following week will be the debut of my pulp-era games using the rules Pulp Alley. So, stay tuned for lots more gaming fun...!

Thursday, October 24, 2013

A batch of Frontiersmen to add to my French & Indian War troops

28mm Frontiersmen for the French & Indian War

When I came back from Advance the Colors 2013 last month, I was really jazzed up about the success of my French & Indian War games. That next Monday I was sifting through my unpainted lead and set out these seven frontiersmen. I believe most of them are by 28mm Foundry, but I wouldn't swear to it. There looks to be two different sculptors' styles, at least.

These guys are meant to be able to play the role of settlers, French courier de bois, or even Rangers

The first week I blazed away at them fairly quickly. Then I got sidetracked by my Southeast Asian Temples, which started stealing more hobby time from finishing these guys off. So, they say about 3/4's of the way completed on my painting desk for a couple weeks. I finally got back to work on them last weekend and forged my way through "Strap Heaven." These figs have more straps with various bags and other equipment festooned all over their bodies. I like that word...festooned. I try to do each set in a different color to add interest.

A French Canadian militia man with a pirate figure able to stand in as courier de bois or other assorted inebriated frontiersman

Anyway, I am happy with how these guys turned out. The one guy is obviously a French Canadian militia, while another is a pirate figure that a friend won as a prize in a game at Historicon 2013. He looks like he'd pass as a drunk-as-a-skunk French courier de bois, so that is how I painted him up. I expect most appearances he makes on the tabletop will be as eye candy or simply window dressing. You never know, though. He could be some sort of objective in a pulp game...try to coax clues from the belligerent, drunk French woodsman!

"Zut alors, Reny! Beaujolais again...?"

I am definitely stocking up on my collection of European troops for my French & Indian War skirmishes. I suppose I'm getting close to having enough to run an Indians on settlers game. I like these figures to be able to, well, wear several hats on the tabletop. I want them to be good settlers or frontiersmen. I also want them to be stand-in courier de bois or even Rangers. Outside of regular troops, very few men wore uniforms in this period. Most had civilian dress, which I tried to recreate with these guys.


Three assorted 28mm frontiersmen

On the painting desk now are 5 Benedictine monks. They are meant to used for Dark Age skirmish games, but since monastic attire didn't change much through the centuries, I could use them in pulp games, as well. Speaking of which, the first batch of temples is nearing the end of the painting stage and about to enter the flocking one. Hopefully, I'll have figures of them soon!

I really like how the equipment -- especially the Indian-style bags -- came out

Monday, October 21, 2013

Elephants and Warbirds...oh my!

15mm Elephant Race on Steve's home-made felt track
 
Steve V would be taking his Elephant Race miniatures game up to the World at War Game Day at Fort Meigs next weekend, so he wanted a chance to get it out and shake the dust off of it. The game is a variant on the classic Avalon Hill game Circus Maximus, but with miniatures and racing elephants instead of chariots. He's thrown in random events like someone hurling a dead cat out of the stands at an opponent, flaming pigs appearing on the track (actual battlefield anti-elephant tactic by early Roman legionaries), and suddenly appearing mud holes.

Steve had created our elephants and drivers ahead of time, so it wasn't long before the jumbos were off and lumbering around the track. My Numidian elephant driver quickly proved to be clueless. Without fail, every time I "pushed it" in the turn, my elephant would go careening off the track and lose a lot of ground before getting back on. You are allowed to push it by 1-9 speed points over the recommended lane speed, making a 3d6 roll on the chart. Like clockwork, my rolls were awful and typical. Eventually, I switched dice and began to turn things around a bit. I even worked my way into second place when Allen's elephant was injured barreling through a mob of flaming pigs and stumbled. Joel was playing it slow and safe, so Keith cruised to an easy victory.

Wings of War -- I got to fly the my favorite Hanriot for the Belgians!
 
The game went so quickly, we decided to break out the Wings of War WW I planes for a quick game. Since there were five of us, Keith offered to set it up and let us play. Allen and I were the Belgians, matched up against Joel and Steve as Germans. The startup positions had me between Joel and Steve, so I hightailed it across the field to Allen, then swooped into a tight turn to face off against the other two. There was a lot of swooping around and Joel and I were flying in almost Blue Angels formation -- so close we couldn't target one another. I dealt out some damage to both my opponents, and so did Allen. I took some in return -- including a jammed rudder which prevented right turns. However, Joel  pulled the unlucky explosion card when his brother lit into him. I saw that as perfect, poetic irony. Joel always insists we include that card, while Tom (who was not present) and I lobby to take it out. Steve was heavily damaged and limped off the battlefield with two points remaining. Victory to the Belgians, and my Hanriot biplane. Back in my Aerodrome-playing days, the Hanriot was my favorite plane, and one that I always seemed to do my best flying in. So, when Keith offered it, I snatched it up!

A little bit of fratricide, as Allen shoots down his brother Joel (and one of Keith's beloved Litko markers)

A good evening of Sunday gaming at Keith's...two games in, and we got home at a reasonable hour!

Sunday, October 20, 2013

Southest Asian Temple, Part 6 - Coloring the Stone

One of the temples with the first layers of dry brushing done

 As mentioned in the last post, once the sand texture had been added to the stupa and parts of the temples, I did one final spray coat of flat black. This was to seal it in, so that when I went to paint the surface, the brush didn't scrape the sand off. After the spray dried overnight, I sat down to what I thought would be the most tedious and time consuming part. I always like to coat my temples entirely in black acrylic paint. This allows the dry brushing to show more depth and fills in those nooks and crannies spray cans miss. I diluted the black paint down to about 50/50 with water, and was actually surprised how easily it went on. I was expecting this to be a laborious process, but it went by fairly quickly.

The stupa with its black base coat, dark gray and medium gray dry brushing. Note you can barely see some of the embossed surface design which was mostly covered up by the sand.

 I let the black paint dry overnight to "shrink wrap" onto the models. Then I grabbed my darkest gray paint, a cheap craft paint by Ceramcoat, and used a "web brush" technique to cover most of the surface. I left little crevices and joins black, but the gray is so dark it is really hard to see the difference. Once again, I let it dry overnight. Then I grabbed Ceramcoat "Hippo Gray" -- a medium gray tone -- and did a thick dry brushing over the surface. However, I left some of the less raised areas the dark gray to give it some depth. For example, I made sure each level on the roofs of the temples is visible, and left parts where the sunlight would be blocked in the darker gray. Still, I was painting more than 50% of the surface, though. This is the stage at which these photos were taken.

The second temple - note I did not put the sand on the lower portion of the temple in the hopes the embossed design on the cardboard box would look nice.

You may notice I have left the lower part of the corner columns of the temples black, so far. I intend on trying to print out an image of a carved surface and apply it to them. Hopefully, it works out! Next up, though, I will do a light gray -- Howard Hues Rebel Gray -- on a smaller portion of the models. I plan on doing a final white dry brush on the highest portions. I am trying to reproduce the effects of sunlight on the surface, of course.

Thursday, October 17, 2013

Southeast Asian Temple, Part 5 - The Surface

One of the small temples assembled
 
Everything was going together well on the temples, so far. The next stage could be tricky, though. I wanted to coat the surface to make it look more like stone than flat cardboard or wood. So, I decided that first I would spray paint it flat black. Then, after dry, I would paint the surface with white glue. While wet, I would pour sand over the surface to give it a rough, stone-like texture.

The other small temples assembled
 I was worried that it might look globby (technical term), so I started out with the stupa first. I really like how the sand made the beads that I'd glued on as decorations look like actual stone carvings projecting out from the surface. The hollow oval beads were mostly filled in by the glue and sand and looked like they were carved. It did kind of dull the difference between the two different size and types of beads, though. They look more uniform, now. However, that's not necessarily a bad thing, I guess.

The Stupa and one of the temples coated with white glue and sand
 I am afraid, though, that the sand has obscured the embossed detail on the cardboard box. You can still see a little of it, but I'm not sure if with another coat of black spray paint won't blot it out completely. That said, there is a chance that once I dry brush the stone surface, the raised detail will show up again. To be on the safe side, I did not coat the decorated wall surface of either of the small rectangular temples. I simply coated the roofs, doorways, and upper wall surface of one of the temples. Right now, they look nice, I think.

The other temple with the area around the doorway, the roof, and the upper portions of the columns coated in white glue and sand
 The next stage will be to spray paint them again in flat black. One that is dry, I will go over the entire surface with watered down acrylic black paint. I'm sure the sandpaper surface will be rough on the brushes, but I need to have the black thoroughly coated before I dry brush it. I will dry brush the temples and stupa in two shades of gray.

I was happy with how they looked when they were all assembled, but I have a feeling they'll really pop out when they are painted.

Sunday, October 13, 2013

Southest Asian Temple, Part 4 - Construction done, ready for paint


The round stupa with all construction done

The addiction continues. I should be grading an assignment my students turned in on Thursday, but I'm putting the last bits of construction together. The temples continue to come together wonderfully, though I think I've hit my first snag. The roofs are going to have a hard time fitting once the corner columns are in. I'm thinking I'll have to snip a bit of the roof off at the corners, but we'll see.


The "secret compartment" for Pulp Explorers to find

Anyway, both temples and the stupa are pretty much done with their construction. The stupa is the simplest, though gluing on the decoration took the longest. I even went to Michael's craft store last night to pick up some decorative, flower-like beads to glue around one of the upper levels. A southeast Asian stupa is generally solid -- there are no inner rooms or sanctuaries. They are supposed to contain a Buddhist relic inside. However, since these will be used for Pulp games, I've made mine with a secret compartment. Some Indiana Jones on the tabletop will likely find the vial of the Lost Tears of Buddha hidden within -- or something like that! The construction was straight forward. I glued the top finial to the top of the upside down round box. Then I cut out a circle of foam core that the box will j-u-s-t go around, providing a tight fit, and glued the foam core to the circular plywood base I bought at Hobby Lobby. The most time consuming part was gluing on the beads and decorations on the outside.

The first small temple with its roof next to it. The spindles atop the columns m-a-y cause problems...

The temples went together nicely, as well. As you can see from the picture, I got the idea to cut out and glue onto the door a black mesh knitting screen. Hopefully, when painted up, this will make the door look like it has recessed panels. The last stage was to glue the four columns to each corner of the building. I had to saw away at some of the decorative moulding to provide a tight fit for one of the temples. And here is where I think I'll have fitting problems. The spindles glued atop the columns probably flare out too much and will bump against the roof. If this happens, like I said, I plan on snipping off the corner of each of the roof's four corners. That should allow it to fit. We'll see...I'm waiting for the tacky glue to dry before I try to fit them on.

Detail of the first small temple. I like the way the decorative moulding compliments the embossed design on the cardboard box

 These actually are looking much better than I had hoped. I can't wait to start the next phase, painting and texturing. I am thinking I'm going to go with a black/gray/white look to the stone. I have been to a number of Southeast Asian temple complexes in three different countries. The red sandstone ones seem to be peculiar to Angkor Wat. Both Bagan in Myanmar and Ayyuthaya in Thailand are a stone covering over brick. Maybe for my next one I'll show some exposed brick. I wanted to keep theses simple, though, for my first attempt. I have plans for the interiors, but we'll wait until I get to that stage to talk about them.

The second small temple. No moulding, but instead a row of "furniture buttons" along the top edge.

Feel free to leave a comment, if you like. I hope to start the painting process early this week.

Close up of the second temple. I really like how the black plastic screen gives the door a more decorative look.

Saturday, October 12, 2013

Southeast Asian Temple, Part 3 - Doors & Roofs

I'd forgotten how addictive working on scratch-built terrain can be. I've been working on and off on these for about two hours. As they progress, I keep thinking how cool they are looking, which makes me want to do the next stage, and next stage, and so on! Kind of like a computer game that keeps pulling you in to do one more turn...! Anyway, today's step was to scratch-build the doors and roofs for the two small temples. Meanwhile, I keep gluing on the decoration for the round stupa.


The doors were fairly easy to build. I started with a very thin piece of styrene plastic. I cut it out into the size and rectangular shape I wanted the door plus columns and lintel to be. I figured it would make it easier to attach to the embossed cardstock surface if I glue it on as one unit. For the columns, I used ridged wooden pegs which look in this scale exactly like fluted columns. I've used them before on scratch-built ruined Greek temples and such. I trimmed the tapered ends off and cut them to size with my hobby saw. The lintel was a simple square dowel cut to size so it rests on the columns. I glued it all together with tacky glue, and then decorated the lintel with tiny beads. The doorway itself looks kind of plain, now. So, I may add some decoration to it, too. Southeast Asian temples were highly detailed and decorated.


The roofs were also very easy to create. In Part 2, I talked about the finial which is the centerpiece of the roof. The roof itself is made from successively smaller black styrene plastic squares glued atop of each other. The finial is glued to the smallest, center one. I then decorated the roof with different sizes of beads. I thought about placing something inside the beads, sticking up out of them, but decided not to. I may still add that later. The last touch will be to glue a square of foam core to the bottom of the roof to fit inside the temple walls and hold it in place.


I am liking how they are looking (as I mentioned before), so far. They are moving along fairly fast, too!The next step will be to attach the temples to their base and glue down the columns to the corners.

Friday, October 11, 2013

Southeast Asian Temple, Part 2 - Assembly

So, having purchased most of what I need for these first three temples, I began assembling them that same night. The first step was to take the dowel and slice it into columns. I used my craft saw and did my best to cut it straight and level, though I'm sure it wasn't always successful. Each column was 2 inches tall. It was then capped by a wooden wooden spindle. The spindles needed the bottom peg portion sliced off, and then needed in turn capped by a small "furniture button."


I used tacky glue to assemble the pieces, one step at a time. The button went on the spindle first, then those two were glued atop the columns. I used blue tack to temporarily hold the columns in place, first. The larger finials, which would be the central roof stupa, were glued to wooden disks.


 Next, I began decorating the rectangular temples. I used the small furniture buttons to create a ring of projections along the top edge of one of the rectangular temples. There is a bare, unembossed portion of the cardboard box which the lid would normally cover. Although it was simple and easy to blue tack them to the box, it should give it a more intricate and exotic look. For the second rectangular temple, I went back to Hobby Lobby and bought a package of 18 "Artistic Mouldings" made of bass wood (I believe). I chose one of the narrower ones and cut it into 4 pieces that I could glue along the bare portion of the box. I will eventually have to shave the corners down, though, to make the columns fit snugly.


 I also began decorating the round stupa. I decided to go with alternating furniture button and wheely-gear-like beads I have leftover from another purchase. While at Hobby Lobby, I picked up a round plywood base for the stupa to go on, too.


 These purchases added $5.36 to the supply costs. However, I am using only one of 18 mouldings, so I should realistically divided that cost out among several projects! Total so far, $19.67.

Stay tuned...more to come!

Thursday, October 10, 2013

Southeast Asian Temple, Part 1 - The materials

So, the only thing keeping my 28mm Pulp project from seeing the table is...well, a table! More specifically, I need terrain for various European archeologists and Indiana Jones wannabees to explore. Sure, I could put them on a regular gaming table of woods, hills, ordinary buildings and such. But considering how much time I spent painting the figs, I may as well wait until I have a suitable canvas to roll them out onto!

I have American, German, British, and French archeological teams all set to explore the hidden temples of Southeast Asia. So, what will the first terrain pieces I'll build for this project? Well, temples, of course! So, the picture below is one I took in 2003 when I visited Myanmar and the temples at Bagan. This is the look I'm trying to recreate. These Buddhist/Hindu temples should look exotic on the tabletop. I can put them on the plains of Bagan or in the jungles, like Cambodia's famous Angkor Wat, and they shouldn't look out of place.
 
Since Pagan has about 3,000 temples in an area the size of the county I live in, I will need a number of them to make the tabletop look right. So, that means one thing: scratch-building. I stopped by Hobby Lobby, a discount craft store here in the U.S., on the way home from work. I cruised the aisles looking for ideas on how to make a few smaller temples to start off with.

I found the boxes below for a little over $1 each. They are made of very stiff cardboard that I think should hold up to paint and the wear and tear of the tabletop well. The thing that attracted me to them was the design embossed on the surface. It could represent bas relief carvings on the temples and make decorating most of their surface as simple as a good dry brush to bring out the design. I intend to add a decorative molding or something along the top, too. The roofs will be separate to make gaming with them on the table easier. I'll construct those out of styrene or bass wood -- I haven't decided which, yet.


I intend to add columns at each of the four corners, and a bell-shaped stupa tower to the roof. I perused Hobby Lobby's selection of craft wood pieces. I decided to go with a thick dowel for the column's length, and top it with a couple pieces to represent the decorate bell-shaped capitals. I snagged packages of wooden spindles, finials and "furniture buttons." These should all fit together well enough (I hope) to give the feel of Bagan's temples. I'm not modeling after any one building, but rather just going for the general look.


I was disappointed I couldn't any decorative bass or balsa wood trim pieces at Hobby Lobby, Jo Ann Fabrics, or the local Hobbyland. I know I've seen them carried in those stores before. I wanted to line the top edge of the temple with one to represent the fancy stone carving on the temples. I haven't given up, though. I have another idea or two how to recreate it without too much time, effort, expense. Speaking of expense, so far I have spent $14.31 in materials for what will be two small rectangular temples and one round stupa.


Stay tuned for more updates on this project!


Tuesday, October 8, 2013

Board games at Allen's

So, it is not miniatures, but four of us got together on our usual Sunday gaming evening for some board games. Our group readily substitutes in a board game evening when no one has anything prepared miniatures-wise for our entertainment. We hadn't been to Allen's for gaming in awhile, so it was nice to show up and relax there. It used to be our "go-to" spot when his children were younger and his wife worked evenings.


We began the evening with a game of Pandemic. I've always loved this cooperative game, and to this day, can still count on one hand the number of times we've won. We still play the "introductory level" version (read = easiest), and still don't win all that often. This time was one of the exceptions, and we b-a-r-e-l-y squeaked out a victory. If it had taken one player's turn longer, we would not have cured the last disease in time. I played the "Scientist" role, and oddly enough, cured no diseases. I kept drawing event cards or a variety and others were better at doubling or tripling up. So, I fed them the cards and they cured the diseases. It worked out, and we won...though I think Joel will insist we step it up to the next difficulty level when we break out this game again...!

In honor of the nostalgic location for our game, we broke out the venerable, old Empire Builder train game as a follow up. Mike S had never played it before, and was interested in giving it a whirl. Joel advised we play the "fast" version, but Allen was having none of that. It had been so long since we'd played it, we'd forgotten how long of a game it actually was. Needless to say, 11:30 pm rolled around and nobody had attained the $250 million victory conditions. We counted up our profits, and they declared me the winner since I had the most by a fairly comfortable margin. My routes between the southeast (New Orleans/Atlanta/Savannah) and the Canadian border were lucrative and seemed to come up often enough to cash in. Throw in my lines to the New York area and I always seemed to have two decent train loads on board.


I really want to get back in the groove of running some miniatures games, myself. The last couple years I've been a slacker and not staged much for the guys. I'm painting a decent amount, and building a lot of terrain, but I don't seem to be running much for the Sunday night guys. Hopefully, the reduced workload at school will allow me to do that soon. Stay tuned, and we'll see...!

Tuesday, October 1, 2013

Ambush the Caravan!


So, in honor of getting his basement gaming area cleaned up again and ready to host, my friend Keith ran an impromptu fantasy miniatures battle scenario this past Sunday. The rules were Song of Blades and Heroes -- one of our favorites. They provide for a quick game. The flow is unpredictable and player decisions have a big impact on the course of the battle.


Keith's scenario has a supply column of dwarves escorting a dissembled artillery piece needed to reduce an orc fortress passing through a narrow valley. For warbands composed of goblins, orcs, and uruk-hai have combined to block its progress. Allen, Mike S and myself were the Orcs, while Keith, Joel, and Steve V were the dwarves. We set up to hit the dwarves from all four sides, but ran into some snags along the way.


Our first problem was that both of the forces on the opposite side of the road from where my uruk-hai set up suffered horrible activation rolls and ended up stalled. Allen's "Hee-Hee" goblins received their nickname from the giggles that their leader received from the pack when he ordered them to advance. The mass of them hung back, only to expose their leader to dwarven crossbows. Mike S's Orcs gave my uruk-hai a head fake, leading the charge on the front of the caravan, only to hang back and lob long-range arrows at the dwarves.


My force and Allen's other Orc warband crashed into the dwarves and had some initial success. However, as no second wave hit, the dwarves shifted troop reinforcements over and outmanned us at the point of attack. Allen's Orcs were running back across the hill and my uruk-hai were edging backwards when we finally called it.

Thanks for running the game, Keith...it was fun to return to the basement abode...!