Thursday, July 21, 2016

New Settlers for the Ohio Territory


28mm Blue Moon frontiersmen from their Ohio Valley pack
I had hoped to get this last batch of Blue Moon frontiersmen completed before I left for Historicon, but it did not happen. I ended up not needing them for my game, but when I came back, they were first on my list to finish off. I enjoyed painting the Blue Moon boxed set. The figures were interesting, even if they were not sculpted to the standard of the Conquest Miniatures I normally paint. There were some mold lines that I could not cover up with a hobby knife, and a decent amount of flash to clean off. Still, once painted, they look nice on the tabletop.
Five women and children settlers -- not sure of the manufacturer, as I bought them painted and touched them up
I also finally got around to touching up some settler women and children that I've had for years. I am not sure who makes the figures because I bought them painted off of a friend years ago. They were not badly painted, but I wanted to base them up to match the rest of my figures. As long as I was doing that, I figured that I may as well touch them up. All I really did was a bit of highlighting and drybrushing to give them more depth. That, and I added eyes. The figures were previous painted with just a black slash for eyes, so I gave them my usual 28mm treatment. The figures are actually meant to be captives -- you can see the leather wrapped around their wrists. I briefly toyed with the idea of looping several together on a multiple base. It would look nice with wire or something to show them roped together. I ended up decided not to do so because in my games, players can rescue individual captives. I let players cut one captive free, and a multiple base would complicate that (or force me to change my rules!).

I think that after painting these figures, I'm going to take a break from the French & Indian War. I will still work on terrain for it, but I think I have plenty of miniatures painted up at this point. What's next? Stay tuned, and you'll see...!

Monday, July 18, 2016

Tomahawks to Historicon 2016

Raid on the Ohio Frontier and my rules, Song of Drums and Tomahawks, had a great visit to Historicon 2016
 We took my "Raid on the Ohio Frontier" game to Historicon 2016 last weekend. It was set up for 6 players, 3 scenarios running side-by-side. We could easily have filled more slots, though. It was great to see the interest, even if I didn't like turning people away. My coauthor Mike Stelzer ran two of the four games, while I ran the others.
A family runs the gauntlet of raiding Indians to reach the local blockhouse
The Historicon Event Coordinator was very accommodating and helped us schedule the events so we could leave the table set up and not tear down after every game. We ended up running it Friday afternoon and evening, and Saturday morning and afternoon. All of the players seemed to have fun, even if their dice weren't always cooperating!
Players had a great time taking on the role of frontiersmen or raiding Indians
Sales were good. We sold 14 copies of Song of Drums and Tomahawks to convention attendees, and Mike arranged a sale of 8 copies to Brigade Games on one of his visits to the Vendor Hall. So, there's another place to pick up copies of Song of Drums and Tomahawks, now -- Brigade Games! We also sold a copy of First Command Wargames' For Queen and Planet, and a copy of Ganesha Games' Song of Drums and Shakos.
The burning log cabin made with LED votive candles was a hit with attendees
I received a lot of positive comments about the board, though I think this setup doesn't have the eye candy that some of the other ones do (no cliffs, no Indian longhouses, no fort). I think the burning log cabin with the LED votive candles made some people smile. It was nice to talk to folks who were regular readers of this blog. They said they recognized my terrain, and enjoyed seeing it in person. I think what amazed most gamers were the $2.99 log cabins and how good they look on the table with just a little bit of tricking out.
Frontiersmen and Indians exchange shots in the square of a small hamlet in the disputed Ohio territory
Here are some photos of our events -- hope you enjoy them! I had a good time running the games, and an enjoyable weekend overall.
Three different scenarios challenged the players with different objectives and tactics

The local tribes were angry with the constant encroachment on their hunting grounds by settlers
Protecting civilian women and children was a big consideration for the players controlling the frontiersmen
"There's one now! BLAM!!!" 
Indians encircle a burning cabin in "Raid on the Ohio Frontier"
Indian raiders rush across open ground to attack the defenders of a farmstead

Friday, June 17, 2016

Tricking out another log cabin

Darice log cabin with scratch-built chimney added to it
 Because I can't possibly NOT modify and add things to the incredibly cheap wood dowel log cabins from Darice, here's a new one I just built. The big thing for this cabin was I added a stone chimney. This was scratch-built using some Hirst Arts plaster blocks from a leftover project (thanks, Zeke!). I wanted the chimney to have a portion of it on the inside and outside of the cabin. So, it took a bit of doing to match up the blocks. I am happy with the results, though.
The roof, windows, shutters, and bits on and around the door are modifications to the store-bought package
So, what's modified? Number one, the chimney. The package (available at Hobby Lobby and other stores) comes with a small wooden block to sit atop the roof for a chimney -- nothing on the interior. Number two, the roof. It is created from a "scalloped" bass wood piece picked up at the local hobby store. A piece of cardstock joins the two halves. Number three, the windows and shutters. I used more scalloped bass wood and glued these in place on either side of the window opening which I cut into two of the dowels. Number four, the floor. I once again used bass wood trimmed to fit inside and around the chimney to better resemble a wooden floor. Number five, the door. I added wood framing on either side of it and a handle. Otherwise, it is out of the box.
The interior of the cabin, with its plaster block chimney and bass wood floor installed
I tried using Vallejo Plaster Putty to simulate the mud chinking between the log dowels. It was a mess to use, plus it shrank up so much you can't even really see it. So, I did not bother painting it a different color.

Finally, the painting method was similar to previous ones -- black prime, wet brush Howard Hues Camo Brown, and follow up with a dry brush Colonial Khaki and Rebel Gray. I think it creates a very serviceable log cabin which will see action on my tabletop soon!

Wednesday, June 1, 2016

Beaver Wars in Ohio playtest, Turn 7

We are in the home stretch of our second playtest of the Beaver Wars in Ohio campaign rules. I'm very satisfied with this version of the campaign framework. The turn by turn record keeping is minimal, and is easily handled by the GM. My players have said that it would be very easy for the GM to be a player in this campaign. There really is no advantage to what he "knows" or doesn't. I know from past experience that, when a GM doesn't get to play in the campaign as well, it is harder to keep up a level of interest that you would have as a player. The Beaver Wars allows the GM to take on the role of a tribe, as well, and get the same enjoyment out of it that his players are receiving.
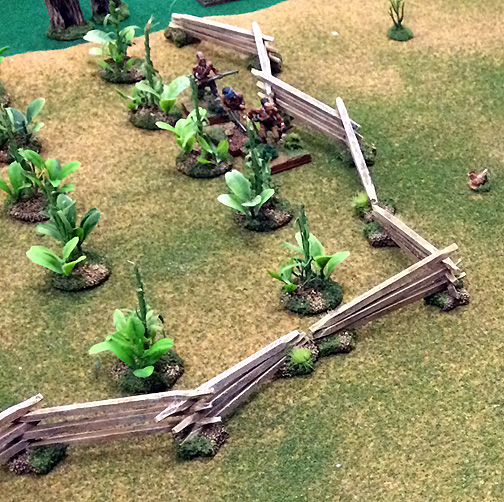
Seneca warriors rush the gates of a Neutrals town in "Hold Them at the Gates"
We had four battles generated on turn 7, and they were bloody and brutal ones, at that! The way the Song of Drums and Tomahawks rules work, battles usually end when one side falls below 50% of its starting forces and their morale begins to falter. It is rare when forces fight to the last man (just as it was rare in history). One side will usually run away before that happens. The campaign's "Scenario Victory Point (SVP)" system also encourages a player who's down to his last few guys to not futilely sacrifice them, as he will generally just give his opponent even more SVPs. Players are free to voluntarily withdraw their forces so that they can "live to fight another day."
Cheers rang out in the pizzeria's party room as the battles went down to the bitter end on Turn 7
That said, we had two of our four battles go down to the last man, this turn. If I'm not mistaken, this was the first time it has happened all campaign that both sides were whittled down to a single warrior. I know my Erie tribe had a battle that went down to a 2-on-2, and we have had forces entirely eliminated. However, to have two games come down to the last swing of a tomahawk was fairly unusual, as well as very gripping for my players. There were mighty cheers resounding in the local pizzeria's party room that Saturday morning. As GM, it was gratifying to me to see them still enthusiastic about seizing victory after seven turns of campaigning.

One of the games that went down to the final deadly swing pitted our second and third place tribes, Dave's Mohawk vs. Joe's undefeated Shawnee. The scenario was "Collision on the Forest Path," and is a fairly straight-forward encounter scenario. The opposing tribes have sent raiders towards each other's lands, and these forces bump into each other on their way. Dave knew that the Shawnee warriors were deadly Marksmen (Joe had armed most of his warriors with that Trait), so closed quickly to hand-to-hand to minimize that advantage. Three Mohawk fell quickly, though, and Dave began to worry that the Shawnee reputation for prowess in battle was well-deserved. He battled back, though, and soon enemy warriors began to fall. The Mohawk were the first to fall below half, and saw their battleline fragment as warriors panicked momentarily. The Mohawk chieftain kept them together, though, and soon the Shawnee faltered as their losses fell below half. Warriors kept falling on both sides, though, until only two were left. They traded blow for blow until, at last, the Shawnee fell. The Mohawk held the field, although at great cost. The final score was 15-11, a Mohawk victory (and the Shawnee player's first battlefield defeat).
The Miami warriors are caught by surprise while reclining around their campfire, but soon turned the tables on their Kickapoo attackers
The 18 scenarios that will be included in the Beaver Wars in Ohio campaign rules feature a mix of setups and tactical puzzles. While setting up, the Miami player complained that "Blood on the Campfire" was too disadvantageous to the defender. Most of his forces begin prone around a campfire, with one alert guard keeping watch. The Kickapoo player decided to make it even tougher on the Miami by purchasing the Sprinter Trait for a number of his warriors. This enabled them to rush the prone warriors and attack before they had a chance to rise to their feet. Both shook their heads ruefully at the forthcoming slaughter. Both were surprised by how the game turned out. Yes, the Miami did lose a few drowsy warriors to quick attacks. However, when they counterattacked the Kickapoo leader, who'd entered combat, they slew him, sending panic rippling through the attackers' ranks. The momentum had shifted, and it was Kickapoo warriors who were being chased down and killed by Miami roused from their evening rest. Both players joked that Miami must be VERY grumpy in the morning, and it is probably best to leave them alone until they've had their morning coffee! The Miami scored their first Major Victory of the campaign, winning 11-3.
Seneca warriors flood the passageway into the Neutrals town, but stop to exchange shots with the town defenders
One of the strategic aspects of the campaign is in choosing which "Hunt" or "War" card your tribe will play for this turn. Some, like the Mohawk, have played mostly Hunt cards, which score the tribe more Beaver pelts (one of the three categories tribes are competing in for the victory). Others prefer to be able to select their opponent and choose War cards. The Seneca have chosen that strategy more often than not (and somewhat historically, too!). They played their highest War card this turn so that they could once again attack the Neutral tribe, which was still in 1st place. I rolled up "Hold Them at the Gates" as the scenario for Mike and Keith. This features a struggle for the entrance of the defender's town. Indian towns during this period were usually encircled by palisades that often did not have gates. Instead, they had a looping entranceway that attackers would be exposed entering. Mike's Seneca charged quickly into the entrance, but then took up position along the palisade, firing into the town at the Neutral defenders collecting to oppose them. The Neutral charged to shove them back from the palisades, but lost several warriors. They fell back to defend the longhouses. The Seneca dithered for a few moments before charging into the town and engaging the Neutrals. A couple Seneca braves fell, but when their full might got to grips, the Neutrals began to fall in greater numbers. Soon, the Neutral force broke away from contact as they fell below 50%. Keith chose to have his warriors keep running, even though his losses had not fallen that low. This surrendered the town to the Seneca, who scored a Major Victory, 19-2. 
A small creek runs red with slaughter as a party of Susquehannock hunters is attacked by Honniasont youths in "A Shot Rang Out"
The final scenario pitted the Honniasont against the Susquehannock. In this battle, a party of Susquehannock hunters have shot a deer and are gathered around it to butcher the kill. They are surprised by a force of Honniasont Youths led by a veteran chieftain, who challenge their rivals right to hunt on their ground. A steep-bedded, but shallow, creek divides the two parties. The youths raced to attack the trespassers in hand-to-hand immediately. Meanwhile, the Honniasont preferred to shoot at their enemies from across the creek. Although the firearms of the Susquehannock caused losses in the more numerous Honniasont, the teens were able to gang up on the hunters and began to kill a number of them, as well. The enthusiasm of the Honniasont youths enabled them to withstand the worrisome sight of their friends' and companions' deaths. Even when their numbers fell below 50%, many remained to continue the fray as stalwart as veteran braves. Soon, the Susquehannock numbers dropped below half, and their hunters began to leave the field. The youths remained steadfast, and dealt killing blow for killing blow. Amazingly, it came down to the leaders of each force, trading blows in hand-to-hand. The Honniasont avenged his slain youths, and felled the leader of the Susquehannock hunting party. The spirit of the deer was kept in great company by the numbers of the brave slain. The score was tied at 15-15, but victory was awarded to the Honniasont as they had possession of the field.

In the end, both our 1st and 2nd place tribes lost this turn -- the 1st-place Neutrals losing badly. How did this affect the standings after 7 turns? The Neutrals dropped to a tie for 1st place with the Shawnee. Instead of being 3 1/2 points out of first place, the Mohawk closed to within 1 1/2 points of the lead. The Seneca jumped over the 4th place Kickapoo to be next on the Leaderboard.  Here are the overall standings, followed by each individual category.

Tribe
Place
Victory Points
Neutrals
Tied 1st
24.5 points
Shawnee
Tied 1st
24.5 points
Mohawk
3rd
22 points
Seneca
4th
16 points
Kickapoo
5th
15 points
Miami
6th
12.5 points
Susqehannock
7th
11 points
Erie
8th
7 points
Honniasont
9th
3 points

Tribe
Prestige Points (PPs)
Neutrals (Keith Finn)
16 (5 MajV, 1 MinD)
Shawnee (Joe Merz)
16 (3 MajV, 3 MinV, 1 MinD)
Mohawk (Dave Welch)
12 (3 MajV, 1 MinV, 1 MinD)
Seneca (Mike Stelzer)
12 (2 MajV, 3 MinV)
Kickapoo (Andy Swingle)
10 (3 MajV, 1 MinD)
Miami (Jenny Torbett)
8 (1 MajV, 2 MinV, 1 MinD)
Susquehannock (Steve Phallen)
5 (1 MajV, 2 MinD)
Erie (Mike Demana)
5 (1 MajV, 2 MinD)
Honniasont (Bruce Adamczak)
3 (1 MinV, 1 MinD)

Tribe
Scenario Victory Points (SVPs)
Shawnee (Joe Merz)
97
Neutrals (Keith Finn)
92
Seneca (Mike Stelzer)
79
Mohawk (Dave Welch)
76
Miami (Jenny Torbett)
66
Kickapoo (Andy Swingle)
62
Susquehannock (Steve Phallen)
60
Erie (Mike Demana)
38
Honniasont (Bruce Adamczak)
30

Tribe
Beaver Pelts
Mohawk (Dave Welch)
43
Neutrals (Keith Finn)
37
Shawnee (Joe Merz)
35
Kickapoo (Andy Swingle)
32
Susquehannock (Steve Phallen)
25
Miami (Jenny Torbett)
22
Erie (Mike Demana)
22
Seneca (Mike Stelzer)
22
Honniasont (Bruce Adamczak)
19


Wednesday, May 25, 2016

Scratch-built "Snake Rail" fence sections

A close-up of my scratch-built, Snake Rail Fencing used in one of my French & Indian War games
This year's slate of French & Indian War games I will be running using my Song of Drums and Tomahawks rules will feature native raids against European settlements. In the past, I've had a lot of big eye candy on the table -- Indian bark longhouses, stockade forts, cliff sections, and so on. I've kind of ignored the more common things to make settler farmsteads look good on the tabletop. One of those things I knew I needed was fences for fields of crops.
The "real deal" -- snake rail fencing in colonial America
I'd seen some posts and discussion of "snake rail" (often called split rail) fences. The advantage of them is there is no need for posts. The alternating, zig-zagging posts stack on top of each other and provide a quick way for a frontiersman to fence his fields without time-consuming digging of post holes. I looked at pictures of a number of them online and discovered there was some variety in how they were constructed. So, I had some leeway in representing them on the tabletop.

My first question was fence sections vs. based and flocked fields surrounded by fences? Considering how my 28mm terrain boxes are bursting out of my closet already, I chose sections as they'll have a smaller storage footprint. The next main question was what to do about the ends of each section? I'd seen commercially produced ones that have the three rails "hanging in air" at the end and did not like how that looked. I thought about "X-shaped" support braces at each end, which I'd seen in pictures. I ended up deciding to go with simply having the three rails sloping down to where they lay atop each other on the ground. I'd also seen this in photos, and it seemed the easiest and least eye jarring way to go.
In the center of the photo, towards the bottom, you can see two "ends" of my snake rail fence sections
The third question was how many zig-zags per section? I decided that I wanted each section to be a little less than a foot long (my terrain boxes are stackable, 13" square plastic containers). I cut up pieces of cardboard and played with what looked best. In the end, I simply went with an aesthetic choice. Since each end would feature the three rails simply laying atop each other -- and there would be (by definition) two ends to each section -- I went with four. That way, there would be three places in each section where the rails interlock and only two where they lay flat. It is easier to show with pictures than describe (see above).
The bass wood rods that I purchased at the hobby store to create my snake rail sections
I took a 28mm Conquest Indian figure to the local hobby store that has a good selection of bass and balsa wood. I stacked the various sizes up and compared them to the figure to decide which size to go with. I ended up choosing 3/16"x1/4" rectangular bass wood rods. They were each about two feet long, and I cut 8 of them into 3" sections. I did one prototype first, and then once I was happy with it, went back and assembly-lined the whole batch. That produces a LOT of little sticks.
However, the next step goes much faster than I would have thought. I took a sharp hobby knife and trimmed each end down to a blunt point. I considered trimming the entire length of each of the four edges, but decided not to do so. I know it would make them look more irregular, but the point of these is to give the effect of snake rail fencing -- not necessarily scale them down exactly.
You will need LOTS of these little 3-inch sections...12 per fence section, if you do it as I did!
Once all the sections were cut, it was decision time, again. Do I base each section on a full length rectangular base, or put smaller bases under each intersection. I decided to go with the second choice because I felt it would look better. The fence would blend in to the tabletop better that way. Also, I wanted to avoid any situation where the base of the fence section differed drastically from the tabletop. I purchased a couple bags of 3/4" wooden star shapes from the hobby store to rest the fence rails upon and act as mini-bases.
Trimming down the ends to points was not as time-consuming as I thought it would be...
I decided it would be easier to do at least some of the painting of the rails ahead of time. I took one of the pointed ends and punched holes in a scrap of insulation foam. This created a rack to hold the rails while they dried. I painted a base coat of dark brown, holding onto one end of each rail, then sticking that unpainted end into the foam rack. Once all of them were dry, I painted the other end, sticking the opposite -- now dry -- end into the hold to hold it.
The insulation foam rack I created to help me in my pre-painting of the fence sections
I followed this up with a medium brown dry brush (I like to use Howard Hues Camo Brown). Once again, I held onto one end, then placed that dry end in the rack. Later, I reversed them and dry brushed the other end, as well. The rails were now ready for gluing!
The wooden stars I used as bases for the fence sections
I set five of the wooden stars out onto a sheet of paper and placed sticks upon them, rearranging them until I was happy with the layout. I then traced around each star so I'd have a template for each section. I would use Aleene's Tacky Glue to glue the rails to the stars and the other rails. I started at one end, gluing the first rail to the first and second star base. The next rail sat on where the first one ended on the second star, and rested on the third star base. The third rail sat on the second one and fourth start, and so on. Once again, it is probably easier to show in pictures than describe in words. It is probably best to glue one layer of rails at a time and let them dry. Then, go the next four rails, and so on. If you try to do all at once, you end up with some shifting.
Base coat was a dark brown (I used a craft paint Dark Umbar)
Once they are all dried, I then do two separate dry brush colors. I go over them first with a khaki color (Howard Hues Colonial Khaki). I make sure to get the pointed ends really well with this color. And then, lightly, I finish it off with a gray dry brush (Howard Hues Rebel Gray). Most wood when set out for years turns gray. So, I would probably be more accurate simply skipping the browns altogether and going with gray. However, I like a little brown in my wood tones. So, I do a final gray dry brush to give it the effect of grayed wood.
Next comes the Camo Brown dry brush
Finally, I flocked each of the stars, and the fence sections were done! I did not bother putting a wash on them because of all the nooks and crannies that would need to be filled up. I was very pleased with the fence sections, and plan to do more of them soon!
Fence sections glue together atop the wooden stars as bases


And here is a section, dry brushed Khaki, Gray, and with the bases flocked. Note how the rails simply lay atop each other, interlocking in the middle spots.

Lead Painters League, rounds 7-11

It was a good finish to the Lead Painters League. I made the difficult decision after finishing up my Round 10 entry to forego the bonus points for a newly-painted entry for Round 11. The decision was part time constraint, part tactical. I knew with my upcoming schedule that I would be pushing it to finish an entry to the best of my ability. I also knew that -- after 10 rounds -- I would be facing an opponent whose painting was at least equal mine (and likely better!). I needed to wow the voters, and I had an idea how to do that.

But, I'm getting ahead of myself. Let's pick up where we left off!
Round 10: Safeguard the Aerie 15mm/25mm
This was a round I was worried about from the beginning of the league. It was a theme round and I had to really dig to find figures that fit it in my unpainted collection. The theme was fantasy monsters, and they were specific about no weapon-using, anthropomorphic creatures. Out went my idea for using some Splintered Light Miniatures figures! Also, it could not be real creatures -- so, out went the idea of painting dogs, wolves, deer, or other Woodland creatures I had! I dug through the drawers where I keep my unpainted lead and found a bag of 15mm hippogriffs, as well as two 25mm ones. I decided to do a mama and papa hippogriffs guarding an aerie full of younglings.

I decided to make them flashy, with realistic and interesting wing patterns. So, I Googled a bunch of paintings of hippogriffs and chose the ones I liked best. The castings are not the  most spectacular (especially the 25mm ones), so I knew this would be a tough round. I thought they figures turned out nice, and I posed them next to one of my cliff sections for some additional eye candy. However, my opponent's miniatures were not only better painted, they were an amazing, cool-looking castings. So, I lost fairly soundly, 364-107. I would enter the final round 5-5. Round 11 would decide if I came out of Lead Painters League 10 with an above or below .500 record.

Round 11: The Words of the Prophet
 

So, what was my idea to wow the voters in Round 11? Well, as you can see above, I would use quantity AND quality to do my best to win this round. I envisioned a scene with a shaman speaking to a crowd of Indian warriors around a campfire. I would use only my favorite and best-painted miniatures in the photograph. I pulled out my boxes and sorted through my 28mm Indians. I wanted only poses that looked natural around a campfire -- no aiming, slashing, running, etc. As I pulled out each figure, I sorted it into 3 categories: "Best of the best," "pretty good," and "not bad."

I ended up using only the first two categories once I began setting up the scene. I dug out my best trees and tried to make the scene look like a night-time one. It took several photographs to adjust where each figure was standing so it wasn't blocking the ones behind it. Even doing this for several shots, I still missed one or two weapons in other's faces. The picture came out great, though (I felt). My thinking, tactically, was that a win was worth 30 points while a newly-painted entry gave only a 10-point bonus. What use getting 10 to lose 30?

I was a bit worried when I saw my opponent's entry on Sunday morning. It featured an amazing Japanese kimono and very characterful miniatures. However, most of the people responding to the post praised my scene and felt it was very cinematic. I started off with a slight lead and widened it to a 296-186 victory by the end of the week.

This victory notched me 15th place out of 34 entrants. I was VERY pleased with my 6-5 record -- especially considering that with the Swiss System, you are matched against entrants with similar skill levels. All in all, Lead Painters League 10 was a success for me. I painted 10 rounds of new entries, and resorted to previously-painted (but newly-staged and photographed) miniatures only in the final round. In the end, I had reduced my unpainted lead pile by 58 new miniatures...yet another definition of success!