Showing posts with label Southeast Asia buildings. Show all posts

Thursday, February 6, 2014

Snowed in? Build a temple! (Part 3)

Where I left off -- the temple black primed...but will those smooth surfaces look good once painted?
 As I sat looking at my black-primed temple, I realized I had been in too much of a hurry. I should have found a way to put brick on the sides of the false "second story" so that it better matched the main level. It looked cool, but once I started painting it, I had a feeling that the paper mache sides of the second story would look less than impressive. The best way to salvage the temple, I felt, was to give those sides some texture. I decided to give it a rough, sandstone look. Many of the temples at Bagan in Myanmar had a stone facing that has fallen off after centuries, revealing the brick core. So, the lower level of my temple would be exposed brick, but the upper level would be standstone.

I took white glue and painted all the exposed pieces of paper mache, as well as the entire roof except for the foam block that the paper mache box fit around. This included the tin bells and acrylic rod decorative railings and the mini-stupas on each roof corner. It did not include the Hirst Arts stone pieces or the statues, though. I then poured sand across the surfaces that had been painted with glue, which stuck on nicely, giving it a rough texture.
White glue painted on the smooth surfaces and sand poured over them to add texture
 I let it dry overnight. Then I watered down black acrylic craft paint 50/50 and painted it over the sand. I was really surprised how easily and thoroughly the watered down paint covered it, making it all black again. I had expected to have to fight to get the paint in the nooks and crannies of the sand surface, but the watery paint flowed well over the surface and into every bit of it. I'd been dreading this stage, but it was actually a breeze. In addition, this glue, sand, and paint coating has likely cemented the whole build together. I shouldn't have to worry about pieces popping off again.
A base coat of brown, with two dry brushes of "Raw Sienna" and "Spice Tan" have been applied at this stage
I pulled up my travel website to look at pictures of Bagan, again, to help me choose the colors. I decided to go with a brown base coat that had just a hint of red tone to it. I took a large, flat brush and wet brushed this over fairly thoroughly, but leaving some of the black undercoat showing through. The next day, I did my first dry brush of a Ceramcoat color called "Raw Sienna." It is an orangish-brown color. I followed that up with another Ceramcoat color called "Spice Tan." This is a lighter, more yellowish color, but in the same tone as the Raw Sienna. Finally, I did highlights with "Dunes Biege." The effect on the Hirst Arts stone pieces and the wood trim and columns was slightly different than on the sand, but they don't look jarringly dissimilar.
The final dry brush of "Dunes Beige" lightens the temple up considerably
The one thing I mulling over in my head is whether to do an ink wash over this. Looking at the stone pieces, columns and wood trim, I definitely feel a black ink wash would enhance how it looks. I'm worried that putting it over the sandstone parts will hide some of the layering of the four different colors, though. I'm also afraid it will darken it up too much. I will probably wait to make that decision until after I have done the brick surface, which is next.
A close up of the roof (which comes off of the main temple), and the false second story (which pops off also, held in place by the snug fit of the paper mache box around a piece of foam.
So far, I am very happy with how this temple is turning out. Architecturally, I think it is very sharp looking. I'm hoping once the brick is done it will "tie it all together," looks-wise.


Sunday, February 2, 2014

Snowed in? Build a temple! (Part 2)

A row of tin bells glued along the roof trim made for a nice, final architectural flourish for the temple
Not a whole lot new to report on the build, so far. I finished the "construction" phase of the temple by deciding upon what decoration I wanted on the roof trim. I'd glued a piece of wood with raised rectangular sections that looked perfect to have some decorative bead or architectural flourish on them. So, I headed down to Michaels craft store and perused through the bead aisle. Nothing really jumped out at me, so I kept browsing through the store until I came upon a pack of 30 tiny, tin bells. I measured them and they would fit in the rectangular areas of the roof trim almost perfectly. The only thing I wasn't crazy about was the tab with hole at the top -- doubtless meant to tie or hang them with. Then I got the idea to thread a tiny dowel through the lined up holes. It would make a perfect decorative railing. I stopped by Hobbyland for a length of acrylic dowel small enough to fit through the holes.
Close up shows the length of acrylic rod threaded through the lined up holes in the tab at the top of each bell
Once I got them home, I found out I needed to yank out the ringer to get them to sit flat. This didn't take long, and then I simply used Tacky glue to affix each bell in its row. First, though, I threaded them along their length of dowel and lifted them up as one to the trim piece. The long sides took 7 bells each, the short sides four. It worked like a dream, and I thought I was ready for the next step -- painting. However, I hit upon an unfortunate snag. I discovered, much to my frustration, that Tacky glue does NOT stick to styrene. At all. Whatever is affixed with Tacky glue pops back off at the first jostle. I had nearly every piece that had been glued to the roof pop back off. And the top molding on the lower level popped off on all four sides. Lesson learned. I scored up the styrene to try to give is some grip, and then re-affixed them with 5-Minute Epoxy. Hopefully, this will make them hold long enough that the layers of glue, paint, and texturing cement it into place!
The temple after being spray primed black, and then gone over with an additional coat of brush-on acrylic black paint
Since it was still relatively cold here in Ohio, I set up a large cardboard box in the garage to spray prime the three temple pieces. The first day that it got warm enough to do so, I sprayed each piece down with flat, black acrylic paint. After it dried, I then brushed on Ceramcoat black acrylic craft paint over the entire surface. And that is where I am, now. The next step will be to add some texture to the non-brick surfaces of the temple.

Stay tuned for more!

Monday, January 27, 2014

Snowed in? Build a temple! (Part 1)

The big one -- at least as far as my Southeast Asian temples will go -- after two days of construction. The only thing left before painting is to find some sort of fancy bead to put along the roof edges inside those squares on the wood trim.
What do you do when snow cancels gaming, and the next two days of school? Why, build something as far away from Midwestern snowscapes as possible — a temple in the steamy jungles of Southeast Asia! I’d planned all along to build a big temple to go with the two smaller ones and the stupa I’d constructed last year. And I guess it was “next” in line for terrain I’m building for my 28mm Pulp games — Dakota Smith’s Oriental Adventures. So, as I sat around the house Sunday night moping because there was no gaming, I figured I may as well get started on it.
The walls of this temple would have a brick pattern, courtesy of a great find at Hobby Lobby!
I had a 4”x6” paper mache box to use as the core of the temple. Unlike the other boxes I used for the temples, this one did not have a patterned surface. Instead, this was plain because I was going to give it brick walls. Many of the temples at Bagan in Myanmar (the inspiration for my temple complex) are made out of brick. The plaster or other surface has worn away on many, so when I visited the complex back in 2003, you see a lot of reddish-orange brick. What’s more, I’d picked up a half dozen patterned, styrene sheets on clearance at Hobby Lobby earlier last year. They included two sizes of brick ones.
A 4"x6" paper mache box with rectangles of brick-patterned styrene epoxied onto it
I chose one with the smaller bricks and cut out four rectangles to cover each face of the box. I used two-part epoxy to attach it to the paper mache because I was worried about the styrene not sticking with white glue or Tacky glue. I attached one face at a time so they would not shift on me. The problem with simply gluing a patterned sheet to a box is, of course, the corners. How do you cover up the place where two sheets are supposed to join up? I decided to use an “L-shaped” piece of bass wood and attach it to each corner. That way, it would cover up the seam (or lack of a seam) completely. It was actually hard to find the L-shaped bass wood, and I had to resort to the somewhat pricey local Hobbyland.
How do you cover up those ugly joins between the four pieces of brick styrene? First cover them with L-shaped bass wood...
...and then you decorate it with wood trim to look like half-columns!
Each side of the bass wood is 1/2” long, and I decided to decorate that blank space with some fancy wood trim. I’d picked up a large back of various styles of decorative wood trim at Hobby Lobby when I made the first batch of temples. I found two pieces that were perfect and looked like spiral half columns once glued to the building. I actually, put the trim on the L-shaped bass wood first, before I affixed it to the building. That let me use gravity to keep it from sliding while the Tacky glue dried. I took another piece of decorative trim and lined the top edge of the building on all four sides, too. I liked the look of the temple so far, so set it aside to dry while I began working on the roof.
The core of the temple upside-down, so the top trim can dry flush and level
The base of the roof would be a simple sheet of black styrene. To keep it in place atop the temple, I cut out a piece of balsa wood the exact size of the four walls and glued to the bottom of the roof. The balsa projects down into the walls keeping it from sliding around while the styrene sits atop. While that was drying, I began working on the decorations for the roof. I wanted a bell-shaped projection atop each corner. So, I dug out my miscellaneous wood bits. By assembling an upside down flower pot, spool, disk, wooden wheel, a bead, and a 15mm spear, a very nice looking corner “mini-stupa” was created. The central, bell-shaped decoration was started, as well. It was a bit simpler and consisted of a filial, upside down wooden pot, and a disk.
The decorative bits for the roof: Four mini-stupas for each corner, and the central stupa (which will get another layer and grow even taller the next day when I find a piece to go beneath it at Hobby Lobby...!)
The next day, I took another look at my favorite picture of Bagan, and decided the roof needed to get even fancier. I decided to have a small, false upper level complete with door and roof. So, it was back to Hobby Lobby for their smallest paper mache box. I also picked up another decorative layer to add to the roof’s stupa — a flat-topped doorknob shaped piece of wood that the filial and disk would fit perfectly atop. I used Tacky glue to attach the corner mini-stupas to the roof, and cut two telescoping “levels” of balsa wood for the false second level to sit atop. I had to weight the balsa wood with glue bottles and other miscellanea to keep it flat, though, as balsa tends to warp. It was thickest material I had, though, so I decided to use it. While that was drying, I cut four more sections of decorative wood trim to go along the edge of the roof. It has a square pattern on it, and I hope to find some kind of bead that will look cool in the middle of each square.
The beginning of the entranceway -- a stone archway made from Hirst Arts curved wall pieces
 Next, it was time to begin work on the doors themselves, the false one on the second level and the main entrance. I had cruised the aisles of Hobby Lobby when I bought the box, hoping for inspiration. I hadn’t seen anything that struck my fancy, though. Eventually, I pulled out my leftover Hirst Arts blocks from when I built my Pictish broch years ago. I fiddled with various bits until something finally game to me. I would use two curved wall sections to form an arching entranceway. Attached to their front would be the door, and some flaring, decorative stone work. Many of the entrances at Bagan have pointed, decorative, arch-like entrances. I was trying to give the effect without exactly copying one. Serendipity struck when the piece I used to get it all together had a projecting stone on either side of the doorway. I looked at it, and said, “Hmmm….a statue would look great there!” I rummaged through my unpainted lead pile until I found two Khmer Maiden Guard figures. They fit perfectly on the stone ledges. The door itself was simply “scalloped” balsa wood. The ornamental door knockers were a couple beads and a pin head glued to the wood.

More Hirst Arts pieces attach to the carved stone entranceway (hidden here). The door is a piece of scalloped balsa wood with two beads and a pin head attached. The statues are 15mm Khmer Maiden Guard figures.
 I decided to do a smaller version of the fancy entranceway for the false second floor, too. I left off the door knockers, since the door was only decorative. I used smaller Hirst Arts pieces and was able to give them a stone ledge, too. I dug through my figure box and found — believe it or not — two female zombie hunter figures with axes to guard this entrance. So much of a project like this is work on something, set it aside to dry, and work on another phase or section of the build. I was bouncing between the main temple piece and the roof piece with regularity.
The roof with most of its construction done. The false level attaches to that block of foam core snugly, allowing me to remove it and store it on its side. The tower mini-stupas have their 15mm spear points glued inside the bead. The only thing missing is some sort of fancy bead in each of those rectangles on the wooden trim along the edge of the roof.
Once it came time to finish the main entranceway, I had to glue the entire building down onto its styrene base. The roof was progressing well, too. One key consideration is that I want these buildings to fit in the 13”x13”x4” snap-together boxes I use to cart my terrain around. The tough part is always the 4” high part! So, I designed this temple to be three separate pieces. there is the main building, which is about 3” tall. The roof comes apart in two sections. The false second level and the stupa tower atop it pulls off, and can be laid on its side in the boxes. The roof itself is only one layer styrene, two layers of balsa, and a layer of foam core that the false level snugly fits around. It is just a little over 2” tall — most of that being in the corner, “mini-stupas.”
And here is the more than 6" tall false level and stupa tower. I love how you can stack a bunch of these wood pieces on top of each other and it really looks like a stupa from Bagan! A small paper mache box forms the core of the false level, decorated by Hirst Arts pieces and a fake door. Two axe-wielding women guard the fake door.
All three pieces have been set aside to dry. The only thing left, construction-wise, is some form of decoration on the wood trim on the first level of the roof. I plan on going to Michaels craft store tomorrow and find some cool-looking bead to glue along the roof…well, make that 20 of them!
   

Monday, December 9, 2013

Rhinos, Hippos, and Apes, oh my!

Beware the hungry, hungry hippo lurking in the rivers of my tabletop...
I have always enjoyed painting animals, whether in 28mm or 15mm. I think that even if they're used just for scenery, they always seem to make a good table look even better. So, when I finished my Southeast Asian temples awhile back, I thought I should raid my unpainted lead drawer and see what animals I have that would fit the locale. I have a decent-sized stock, and there were bound to be some in there that I could use in my games.
A 28mm Iron Wind (Ral Partha) Rhino. This is probably my second favorite, after the hippo, of this batch of animals
 What's more, Pulp Alley -- the rules I'm using for these games -- has a concept called "Perilous Areas." This is meant to be that generic dangerous part of the miniature tabletop. It could because of treacherous footing, a creaky old rope bridge, or even savage animals that might ambush the player. In the game, opponents can play a Fortune Card on a rival player when he enters one of those areas. These are "challenges" that they must pass using a designated character's statistic -- such as Cunning, Might, Dodge, etc. I envisioned these animals I painted up as perfect "markers" for perilous areas. You want to cross that jungle stream? Well, see that hippo in the water, that means it is a perilous area...will one get territorial and attack you, or will you pass the test?
A nasty, ill-tempered denizen of my jungles are these over-sized porkers
 So, when I hunted through my unpainted lead drawer (okay, rolling set of drawers!), I found a hippo. I also found a rhino, gorilla, wild board, cobra, and two water buffaloes. Yes, yes, I know. Not all of these animals are necessarily Southeast Asian, but it is close enough. These are Pulp games after all. Once you accept that you are being attacked by Pygmy Cannibals of the South Seas, you're not going to quibble about whether the type of rhino I painted up is native to the jungles of Southeast Asia!
"Out of bananas again...? Why I oughta take the head offa the first dope who comes along...say, who's that over there?"
I painted this up as an Egyptian banded cobra because I loved the yellow and black pattern
I believe all of these except for the water buffalo are from Iron Wind Metals. The descendants of Ral Partha, this company is a regular at the conventions I attend. I love sorting through their loose lead bin, and have a hard time coming away without my hands silvery and a brown paper bag full of animals that you-just-never-know if I'll need one day. After all, look at these beauties! Who knew that I'd be needing them to mark out perilous areas on a 28mm Pulp game? But there they are! Anyway, I highly, highly recommend hitting up Iron Wind at conventions. You'd be hard-pressed to find a better assortment of animals, dinosaurs, and various other loose metal bits that what they carry. They charge by the pound, too, so you can mix and match to your heart's desire.
Two water buffalo posing by the second, smaller jungle hut I built in less than a week leading up to my second game of Dakota Smith's Oriental Adventures. Notice the improvised staircase of crates. Clever, aren't I? Ha, ha!
When I finished running the second installment of Dakota Smith's Oriental Adventures at my buddy Keith's the other night, one of my friends found these three Easter Island moai on his table. I snatched them up and told him I'd touch them up and flock them. I knew they'd be perfect for the next game. Yes, yes, I know Easter Island is nowhere near Southeast Asia! But these could fill the bill as primitive stone idols. I mean, last time I checked, Easter Island has never copyrighted the concept of a giant stone head. And if they did, their copyright expired with their civilization! Seriously, all I did to these guys was dry brush a lighter shade on exposed areas, give them a nice dark ink wash, and put flocking on the bases. It'll be a shame to give them back to Keith...I've always loved that otherworldly look of the moai. And yes, I have been to Easter Island in my travels. Here's a couple of my favorite photos from that trip to close out this post.
I have no idea where these came from -- well, other than my friend's basement! I just had to snag them, touch them up, and get them ready for my next game.
Iconic shot from Ranu Raruku -- the quarry on Easter Island
One of my all-time favorite sunset shots I've ever taken
What's up next? A small project and a really big one, size-wise...more to come soon!

Thursday, November 28, 2013

Jungle Hut -- Southeast Asian building, Part 3

The jungle hut completed...and overrun by a collection of surly, 28mm Pulp characters. The platform is permanently attached to the base with stilts. The roof comes off, though, of course.
I left off in the last post with the jungle hut all painted and washed, and the roof complete. All that was really left was to create the stilt base. I cut another rectangle of black styrene to the appropriate size. Things were getting trickier here than you'd think, though. I wanted the stairs to slide right under the platform so the heights of the two had to be just right. I measured and double-checked. It looked like it would be a perfect fit.

I figured these flat-headed wooden pins would be perfect for the stilts of my jungle hut. The rounded flat part at the top would be hidden by the platform, but would be wide enough to give a good grip and hold tight.
I Tacky glued 6 wooden flat-heated pins that I bought in a bag at Hobby Lobby to the styrene base. Although they have a flat surface on the top and bottom, I thought I might need to use some blue tack to hold them upright. As it turned out, Tacky glue is thick enough that this wasn't necessary. Next, I flocked the base completely. I did not want to have to be reaching my brush underneath the platform once it was glued on. Okay, I lied. I glued the platform on top of the pins before I put my final layer of 50/50 white glue and water on it. I got impatient and really wanted to see how it would look all put together!

A close up of the front of the jungle hut. This will doubtless be the scene of many Pulp encounters in the jungles of southeast Asia!
Although you can't see them in the picture, I put a lot of clump foliage on the base to represent undergrowth sprouting up beneath the platform. It looks nicely, and as you can see, I did measure correctly (or get lucky), and the stairs slide neatly underneath the platform.

All in all, I am incredibly happy with how this turned out. To me, it really looks like a building you'd find in a jungle clearing.

Monday, November 25, 2013

Jungle Hut -- Southeast Asian building, Part 2

Stage two of the Jungle Hut build began with paint...lots of it! As I mentioned in the first article, I made a mistake when I did not paint the paper mache box my base color before I glued on the burlap. I paid the price for it during this stage, and it actually took two coats before I was satisfied you couldn't see bare cardboard inside the tiny squares inside the weave of the burlap. My base color was a new one I'd purchased for it called "Raw Siena," a cheap craft paint from Ceramcoat. I would say 80% of the paints I use are from Ceramcoat. I just don't see the point of paying hobby paint prices. A few specialty paints -- like Steel and Bronze metallic -- are from Iron Wind. Most of my "dry brush" colors are Howard Hues, because they are thicker. My "rank and file" paints, though, are Ceramcoat that I buy at Hobby Lobby or Michaels.

The hut after a Raw Siena base coat and Khaki dry brush. This is before the Dun highlight and the black ink wash.
For some reason, I took fewer pictures as the building progressed. I didn't take any of it with just its base coat. It wasn't until after I'd done the Khaki dry brush that I took the next shot. At that point, I was wondering if I should do a further highlight using Iron Wind Metals "Dun" -- a nice dull yellow color that dry brushes well. I decided what the heck, and went ahead and put it in the areas that would be sunlit. I liked how it looked. Then I debated whether to do a black ink wash over it. The hut looked pretty good as it was. If the ink wash messed it up, I might be a bit peeved. What's more, I might even lose my temper and do something rash. Which reminds me of my favorite story of a gamer losing his temper after a painting disaster. A friend of mine had constructed a very fiddly 1/72 scale biplane model, lovingly painted it with interesting patterns, and then spray sealed it. Yep. The sealant fogged the paint job, and none of the normal remedies fixed it. Well, that plane went on its first and only flight, at a rapid pace, into the nearest wall...!

I'm happy to say the Jungle Hut did not become a Jungle Hut ruin. I really like how the ink wash made it look more realistic and three dimensional. The burlap looked less like fabric glued down and more like an actual hut made out of woven material. So, it was a success. And I really liked how the ink wash made the bamboo platform look.

The printed image of wicker flooring and walls turned out very nice...so nice my friends asked me why do I even bother texturing the walls. I should just print the whole thing. "Thanks, guys..."
 Next up (not really, I'm a bit out of order now) was the interior. Once again, I went to the CG Textures website and found high quality images that would work for the interior. I picked out a few woven patterns and resized them in photoshop. I even found a door and resized and colored it and placed it on one of the wicker walls images. I printed them out on my color laser printer and said, "Wow!" The patterns looked really sharp -- even better than my 3D burlap prior to the ink wash! To size them up right, I took a sheet of printer paper and trimmed it to the size of the interior walls (including spacing the windows) -- one each for the long and short walls. I then trimmed the printed patterns to the right size with an Xacto knife. I had previously painted the interior the same Raw Siena when I'd base-coated the outside. Now, I used an old brush to paint the surface where the printed image would go with white glue and positioned the image over it. I did each of the four walls, and then the floor. Once again, I let out another "Wow!" I am really liking this technique of using printed images for the interiors!
The multiple layers of the roof: black styrene base, foam core eaves (here covered by the burlap already), cardstock roof base, and Teddy Bear fur.
Now it was time for the roof. I cut a piece of black styrene so that it would overlap the roof by about 1/2" on all sides. I cut the triangular-shaped eaves out of black foamcore and glued them upright with Tacky glue. To keep them straight, a giant 28mm ape held them so they were perpendicular. Thanks, Kong! I measured the length of the eaves and cut a stiff piece of cardstock for the roof base, sizing it to overlap by about 1/2" all the way around. I folded it and then tacky glued it to the eaves, turning it upside down and putting a weight on it so that it pressed it firmly against the eaves.
I was very proud of myself when I remembered to paint the triangular eaves BEFORE I glued on the burlap...proving no matter how old the dog, tedious work covering up for a mistake can teach him a lesson...!
For the thatch material I'd decided to go with "Teddy Bear fur" -- which you can get in a roll from Hobby Lobby. Note: No actual Teddy Bears were harmed in the making of this Jungle Hut. This was synthetic fur. I've been told that synthetic Teddy Bears feel no pain. Anyway, I measured and cut the chocolate brown fur so it would overlap the roof base. I used Tacky glue to affix it to the roof. Once it was dry, I mixed up a batch of white glue and water 50/50. I painted the fur with this mixture, then combed it from the apex of the roof to the ends, which gave it a nice "rowed" looked. After waiting a couple hours for it to dry, it became apparent there wasn't enough glue to stiffen the fur. So, I painted on pretty much straight white glue, which mixed naturally with the soaked fibers. I combed it again, and then let it sit overnight.
The fur before dry brushing but after it has been painted with white glue. You can see the vertical pattern made by combing...well, *I* can (he says, justifying do the work).
The thatch was indeed hardened, and took two coats of dry brushing easily. I used the same Raw Siena for my first coat and followed it up sparingly with Khaki. I really like how the thatch turned out. The Teddy Bear fur was a definite success. One of my friends said it is the best model thatch he's ever seen. I am not sure if I would got that far, but it is the best model thatch I've done, in my opinion. I cut a rectangle of black foamcore to glue to the underside so it would fit securely inside the walls of the hut and not slide off.

At this stage, all that is left is the flocking and the stilt base! I'll finish that off in part three.

Sunday, November 24, 2013

Jungle Hut -- Southeast Asian building, Part 1

I've had an Airfix 1/72 scale plastic "Jungle Outpost" for a number of years, and been tempted several times to build it. Every time I pull it out, I look at it and think, "Too small." Then a year goes by and I pull it out again, hoping it has grown, I guess. No matter how long I store it away in the closet, though, it never comes out big enough to use for 28mm figures. Maybe I should sit out where it can get some sunlight...
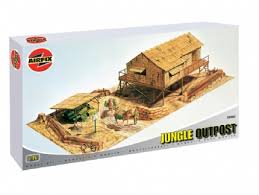
The inspiration -- a too-smail piece of 1/72 scale terrain
Seriously, I've been telling myself that as soon as I find a likely material to simulate the wicker walls I'll just go ahead and scratch-build a version of it. I love the way it is on stilts and has a platform, thatch roof, and so on. It is intended for the Vietnam War, but is a fairly timeless style of building. I was at Michaels Craft store the other day, picking up plastic plants to use a jungle pieces. So, I decided to cruise the aisles hoping for inspiration. I spotted a roll of burlap and immediately went into "Hmmm..." mode. The weave was too wide, so I kept looking until I found some with a tighter weave. I picked it up, and then swung by the paper mache boxes that I used for the Southeast Asian temples. They had a pack of 3 of different sizes for less than $2 each, so I grabbed them, too.

The bamboo platform, made from bamboo skewers cut to length quickly with a wire cutter
 Once home, I began to pull out different materials I'd need from my storage. I had three packs of bamboo skewers that I knew would come in handy. I mean, what better material for a jungle hut than bamboo? In particular, it would make a great platform for the hut to sit on. So, that was the first step. I decided to be smart and build just one hut on the first go-around so I could see what works and what doesn't. I measured the middle sized building, 5"x7". I wanted at least an inch of platform space as a balcony. So, I grabbed a pack of bamboo skewers, the wire cutters, and began trimming them up to size. Actually, there was a strange, blackish powder all over the skewers, so I had to wash them first and let the dry.

Once I had the right amount, I bunched them tightly together and drew four lines of Tacky glue onto them. I placed another bamboo piece across them atop each Tacky glue line to bind them together. I was surprised they didn't shift much. Step one, the platform, was a snap to create. I left it on the desk in the spare bedroom to dry.

The framework for the building -- a paper mache box from Michaels with holes cut out for the windows
 Next, I grabbed the box and a ruler and measured out where I wanted the windows. I know it'd be easier to make if I made them closed. Then all I would have to do would be to glue the wicker shutter onto the wall. But this is southeast Asia! It is too stinking hot to close the windows...plus Airfix's "Jungle Outpost" showed propped open window shutters on the box's picture. I wanted propped open shutters, too! So, once I'd measured each 1"x3/4" window, I cut it out of the paper mache box with an Xacto knife. If I was smart, I'd have grabbed a fresh, sharp blade...but see the above comment about the windows and draw your own conclusion! Before long, I had two windows on each of the long sides, and one each on the short side.
The box covered with burlap from Michaels craft store (white glue works fine to attach it to the paper mache)


The next step was to see if my burlap inspiration was a good one or not. I plopped the box down on the burlap, traced the outline in felt tip marker, and then trimmed out each side. I smeared the surface of the box with white glue and pressed the burlap onto it.  Yes, I know what you're thinking. "Hey, dimwit! You just covered up the windows!" Ha, ha...I fooled you. I did that on purpose! I figured it would be easier, once the burlap was dry, to simply use an Xacto knife again and trim off the burlap covering the window opening. Not to gloat, but I was right (see...teach you to question me...). Later, I was to find out that I had just made my life a lot more difficult. I should have painted the hut walls my base color first, before gluing on the burlap. It was quite the pain to get the base coat inside the weave of the fibers and fully cover the hut...!

The building affixed to the platform with Tacky glue. Note the extra bamboo pieces at the base of the building and at each corner.
Here is a picture of the building Tacky glued down to the platform. Those weird circles are actually part of the pattern that was on the burlap, so I glued them "face down" so I had the weave as the texture. As you can see, I glued down a piece of bamboo along the base of each side of the building, as well as on each corner wall. This gives it a nice framed appearance.
The shutters -- probably the most "fiddly" part of the build. I trimmed a "mini-dowel" to be the prop. Then I used tacky glue to attach the shutter to the wall, and the prop to the shutter and wall. It was left upright so gravity would keep it in place while the glue dried.
Next up was the most fiddly part of the build -- the shutters. I trimmed a piece of thin styrene to the window size. I then cut two squares of burlap to that size, gluing one to the front side and the other to the back. Next, I cut some "mini-dowels" from the craft store to be props, holding the shutters open. I put a thick line of Tacky glue at the top of the window. I put a blob of glue on both ends of the prop. Then I placed the shutter against the line of glue, and wedged the prop between it and the window. I set it upright so gravity would hold it in place against the prop while the Tacky glue dried. I was really dreading this part, thinking my fumble fingers would make a mess of it. However, it worked like a charm, and after about 20-30 minutes drying time for each face of the building, I had six windows propped open just like in the Airfix building!

A top view of the stairs before painting
 Since the building was going to be sitting up on a platform, I would need stairs to lead up to it. I decided to use bamboo skewer pieces again. Rather than make a complicated framework, I decided to go with piled bamboo logs for the framework. I decided each level of the stairs would be 3 pieces tall. So, I made a pile of 3, 6, 9, and 12. They were attached by a simple bamboo "stake" or vertical piece Tacky glued onto them, as you can see in the picture above.

Side view of the "stacked logs" framework of the stairway.
The next step was to assemble them into a stairway. I cut a piece of thin styrene for their base, and then simply Tacky glued each piece upright. Some needed propped by blue tack or other methods to stay upright, other stood on their own fairly well. As you can see in the side view photo above, the pieces alternated going inside then outside of the other. Once the framework was dry, I simply glued six more bamboo skewer pieces across the framework. Once done and painted it is a functional (if not architecturally beautiful) set of stairs. Since it is a jungle village piece, I figured the more crude the better -- and this stairway fits that description!

The hut, platform and stairs, assembled and waiting for paint. I was to find out that I should have painted the hut BEFORE gluing on the burlap for the wall texture...
Here's a shot of the building and stairway at this stage. I designed the end of the stairway to be slid under the platform...so hopefully I don't screw up the measurements! As you can see, I also made a door with bamboo pieces and glued it straight to the wall. The crossbar is another bamboo piece, with a hole drilled in it to insert a straight pin as the knob.

I have to say, I'm pretty happy with how it looks at this stage...!