Thursday, November 21, 2013

Pygmy Headhunting Cannibals of the South Seas

"Good God, man! Not Pygmy Headhunting Cannibals of the South Pacific...!" These are 15mm "Cave Imps" from Splintered Light Miniatures
Ever since watching the movie "The Mummy Returns," I felt I had to have a horde of pygmy headhunters to plague my players. Of course, the movie versions are zombie pygmies, but once I spotted these 15mm "Cave Imps" from Splintered Light Miniatures, I knew they'd fit the bill. Besides, ZOMBIE Pygmy Headhunting Cannibals of the South Seas is just too long of a name. Pygmy Headhunting Cannibals of the South Seas is fine, but sometimes that one extra word takes it over the top.

Tattoos, face paint, and decoration on the weapons makes these guys look like they belong in some undiscovered jungle valley...
 Anyway, I painted up my first batch of these as an entry into the first Lead Painters League that I entered a year and a half or so ago. I had about a dozen of them left and knew I'd get around eventually to painting them up. They have wonderful character and manage to pull off looking menacing and comical at the same time. Some of that is due to the hilarious upright hair on them, ala Heat and Cold Miser's imps from "Santa Claus is Coming to Town" (my favorite Christmas special).

Woe betide the Pulp adventurer who chuckles when he sees a horde of these emerge from the underbrush...
 They stand about half the height of an average 28mm figure. There is great sculpting of muscles, hair, and weapons on them that allows for easy dry brushing. I started with a base coat of dark brown. I dry brushed them Iron Wind "Asian" flesh, and added a final highlight of "Warrior Flesh." To give them that extra twist, I painted individual tattoos on all of them. For the eyes, I just went with all black. I even decorated the weapons with colored stripes or dots or whatever.

For all that detail, they paint up quickly. I think that is probably because of the lack of equipment...er, I mean weapons and such. Even clothes. But now that I mention it, I *am* kind of glad they don't have...well, a normal naked man's "equipment"! They look more exotic -- and less like simply short humans -- this way.

My photo of the original batch of Pygmy Headhunters the Lead Painters League in 2012
For the heck of it, I am also putting in a picture of my original batch I painted of these from the Lead Painters League. I do feel I didn't 100% match the skin tone, but it is close enough that I can live with it. My players in my Pulp games should encounter these little menaces shortly, so it'll be fun to get them out on the tabletop...!

Skull Cave -- Pulp Skirmish terrain

Skull Cave -- home of the Pygmy Cannibals of the South Seas -- a scratch-built piece of terrain for my Pulp Skirmish games
 Ages ago, I'd picked up a skull mask in metal from Iron Wind Metals loose bin. I saw it and thought, "Wow, wouldn't that look cool hanging over a cave entrance in some native-haunted jungle?" Well, now that I'm actually running Pulp skirmish games, I figured it was time to construct that cave! My experience making the cliff sections for my French & Indian War games taught me the wonders of pine bark as a stand-in for rocky outcrops.

Several layers of pine bark glued one atop the other formed the cave walls
 This was really an easy build. I went out to the garage where I stored the leftover pine bark chips that I'd dried out for the cliff sections. I plopped them down in the desk in the spare bedroom where I do my messier work. After cutting a piece of black styrene to the size I wanted, I began sorting through the pine bark pieces. I decided to do a relatively straight-forward "U"-shape. I began stack pieces on top of each other until I was happy with how they were sitting, trying to minimize gaps. Once I felt I had a few layers ready to go I began Tacky gluing them down to the styrene. I globbed it on fairly thickly, as the pine bark is brittle and will shed in layers. I wanted to maximize the amount of surface that was adhered to another.
The U-shaped cave walls with a coarse ballast floor after they've been spray primed black
 While my U-shape was drying, I took three larger pieces and glued them together as a roof for the cave. Once both were dry, I played around and set the roof on top of the cave walls. I quickly realized the bowed shape of the roof meant that when I glued the heavy skull piece to over the cave entrance it would tip the roof forward. I needed something to prop it up and prevent that, so dug out some Hirst Arts stone pieces and glued them atop the cave walls. I wanted the roof to be removable so that miniatures could be placed inside the cave and accessed easily. Once everything was dry, I turned the roof upside down and used liberal amounts of Tacky glue to attach the metal skull mask to the part of the roof that would hang over the entrance. A little blue tack kept in place while the Tacky glue dried.
Testing out how the roof sits on the cave walls. I wanted the roof to be removable so miniatures could be placed in the cave recesses...like soon-to-be-sacrificed (and eaten?) victims that the players must rescue...!
The next day, I took both pieces outside and spray coated them with acrylic black primer. I then flipped the roof upside down and sprayed the underside, as well. Once that was dry, I mixed up some black acrylic paint about 50/50 with water, and coated the pine bark thoroughly. This makes sure the areas missed by the spray paint are black, plus fixes the pine bark a bit for the dry brushing. The next day, the dry brushing began. It was a fairly straight-forward job of a first coat of dark gray, and second coat of light gray.

Skull Cave fully drybrushed and sealed. Note the clumps of foliage to mask the join between the skull and the pine bark cliff pieces.
Then, I looked for gaps where the pine bark wasn't flush with one another, and filled those with Woodland Scenics clump foliage. I squirted glue into the crevices and shoved in the foliage. I also added some pieces here and there to represent vegetation growth on the surface of the rock, too. The final stage was to flock the styrene base that was showing in the corners. I used my usual medium ballast, sand, and paint method. A little more Woodland Scenics flock and foliage and Skull Cave was ready to be "sealed."


The rear of Skull Cave. Once again the pine bark chips did an excellent job of simulating rock.
I could simply use multiple coats of Dullcoate, but I think the pine bark needs extra protection against wear and tear. So, I mix white glue and water about 50/50 and load it up in a spray bottle. I squirt the terrain piece down really good. Don't worry about bubbles, they seem to pop and work themselves out. Once it is dry, it is ready for one final Dullcoate.

I was really surprised by how quickly I constructed this and completed it. The pine bark was easy to work with and looks great, I think. I briefly toyed with the idea of putting gem eyes in the skull, but decided not to do it. Maybe later....who knows?

Sunday, November 17, 2013

Junta -- politically incorrect and hilarious


 It was an easy sell when Joel suggested we break out the board game Junta after at least a year or two since the last time we've played. Before we even opened up the game, emails were flying around the group arguing over who should begin the game as El Presidente. Joel has the original West End Games version of this politically incorrect spoof of the shenanigans going on in an anonymous Latin American banana republic.

The players represent families vying to tap the most foreign influence money being channeled into the country from the America. Whoever can squirrel away the largest amount in their Swiss bank account is the winner. Players divide up positions -- such as Minister of Internal Security, President, various Generals, Admirals and Air Force Commanders. These become important when the frequent coups break out. Surprisingly, we had only two coups -- if I remember correctly -- during our game. One replaced Joel as President, and the other deposed his brother Allen and installed Ptom.

Another feature of the game is players sending out assassins to kill the other players -- particularly, when they decide to visit the bank! For some reason (perhaps the oft-repeated cries of "Mike's winning" on Sunday nights?), I was a frequent target of assassination attempts. I decided to hold off visiting the bank until I had two turns in a row of very low amounts funneled to me. Hoping it was out of players' mind that I had yet to visit the bank, I snuck off only to be gunned down by Mike S.

This caused a piranha frenzy over the money I'd been squirreling away all game waiting for a chance to visit the bank. Mike S and Ptom decided to split it up, which immediately made it a three-way race between them and Steve. I'd used my university faculty influence earlier in the game to peek at Steve's total in Switzerland and it was impressive.

Going into the final turn of the game, Brutus decides whether to throw his weight in behind Steve or Ptom. The dog made good choices because Steve eked out a victory over Ptom by a paltry 1 million pesos (the smallest number in the game!)...
On the final turn of the game, assassination attempts flew back and forth. I targeted Ptom at the bank (correctly), but he had a "Bribe Assassin" card. Joel used a Psychotic Assassin card on him at the bank, as well. Joel's committed suicide instead, and Ptom paid my amateur off. The 2 million pesos it cost him ended up costing him the game, though. Steve S squeaked out a victory over Ptom by 1 million pesos, and prevented Mike S from winning by assassinating him at the bank that turn. Junta is always a hilarious game, and it was fun even though I came in last.

Next week, Allen will be running a WW II Naval battle here at my place, and the following meeting will be the Battle of Manzikert. Soon after, I will run a second Pulp Alley game. So, stay tuned for more Sunday night gaming...!

Saturday, November 16, 2013

Chickens and Goats

A few of my purchases at Historicon 2013 this year were farm or village animals in 28mm. I figured they'd be useful for skirmishes for everything from the Dark Ages to the French & Indian War to Pulp or modern games. I already had painted up cows, horses, and pigs. I jumped when I saw a dealer selling 28mm chickens and goats, and snagged a pack of each. Sorry, I can't remember which dealer it was (but I do remember they were very reasonably priced). If anyone recognizes these figs and knows the manufacturer, feel free to comment.

28mm chickens doing what chickens do...

Anyway, here are the chickens first. I was happy with the color patterns and think they turned out well. They will probably appear in a number of games from this point on. I mean, everybody likes chicken, right? It tastes just like....well, chicken! I based them up first on tiny washers, then used white glue to attach them to cardboard to hold onto while painting. I used a base coat of "Autumn brown," then dry brushed them Khaki very lightly. I added splotches of white after pulling up some images of chickens on Google. I think it is very important to look at photos of the animal you're trying to paint and not just do it form memory. There are often subtle colorings that you may have forgotten about that make them look realistic when complete. I added a red-brown "combs," dun-colored beaks, and black dots for eyes and they were done.

28mm goats near a Celtic hut from Acheson Creations...Jenny insisted the white one be called "Cuddles" after a goat her aunt owned...!
The goats to a little more time -- mainly because I decided to paint them in a variety of colors. I used a Google image search to select 6 colorings and saved the photos onto my desktop. I then painted them either white, "Bambi Brown," or dark brown for a base coat. A lighter dry brush was followed by splotches of white or darker coloring to reproduce the photos. These painted up quickly as well, and will also likely see use in a variety of games. Sometimes, it is the little touches like barn yard animals that can make a game table look realistic and complete.

Next up are some Pygmy Cannibals of the South Pacific...seriously! Or was that Pygmy Headhunters? I painted a batch of 10 a little more than a year ago, and now I've got the rest of the pack to finish up. And yes...expect them to pop up in my Pulp skirmish games...!

Monday, November 11, 2013

Dakota Smith's Oriental Adventures - Part 1, Brother Virigi, Wherefore art thou?

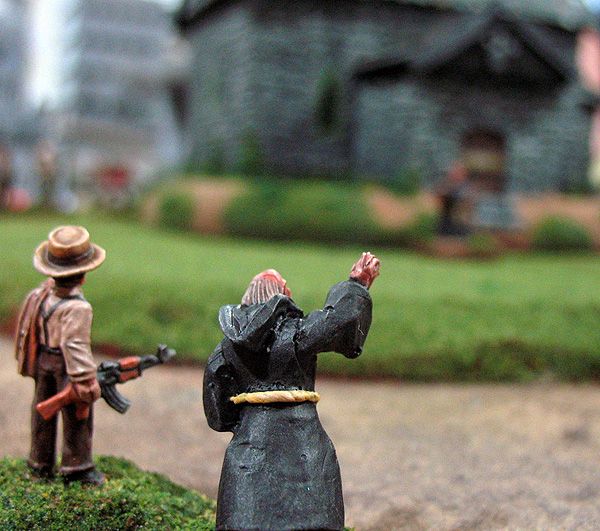
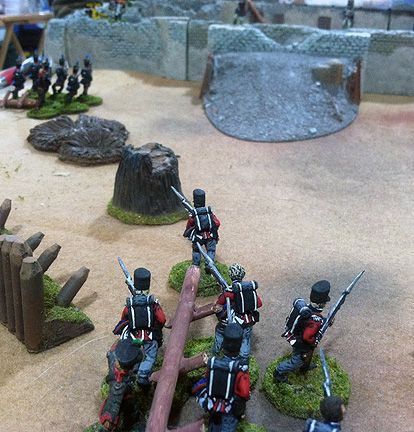
Keith, Mike S, and Tom hot on the trail of Brother Virigi -- a Portuguese monk from Macau in the 1930s
 I had 5 players for my first-ever Pulp Alley game. I had been working my way towards this for many, many months. So, it was nice to get all those 28mm figures I'd been painting out on the tabletop. I'd asked Keith, who was hosting, to set up the table with a 6'x4' area. After the terrain was all laid out, I discovered it was a bit bigger -- nearly 5' across, not 4. So, I told the players controlling the four Western archeological teams to deploy within one foot of each of the corners. The 
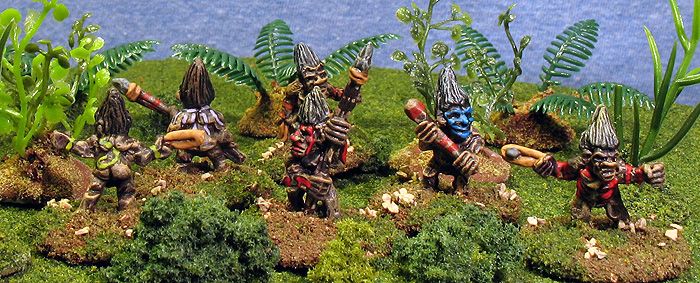
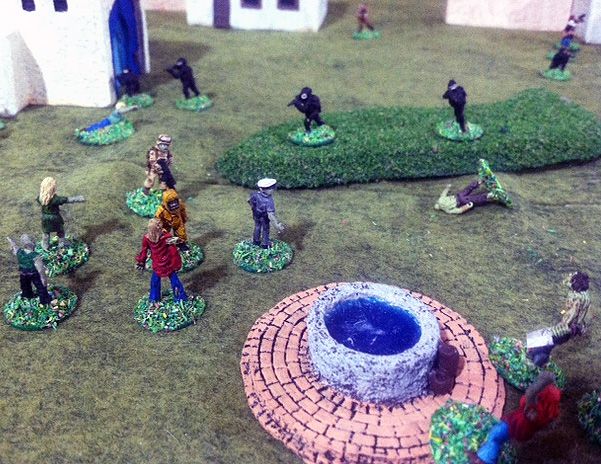
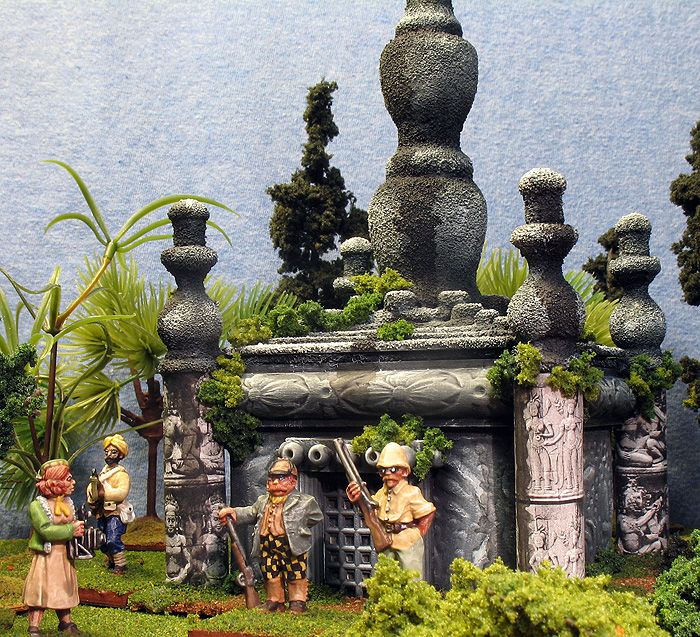
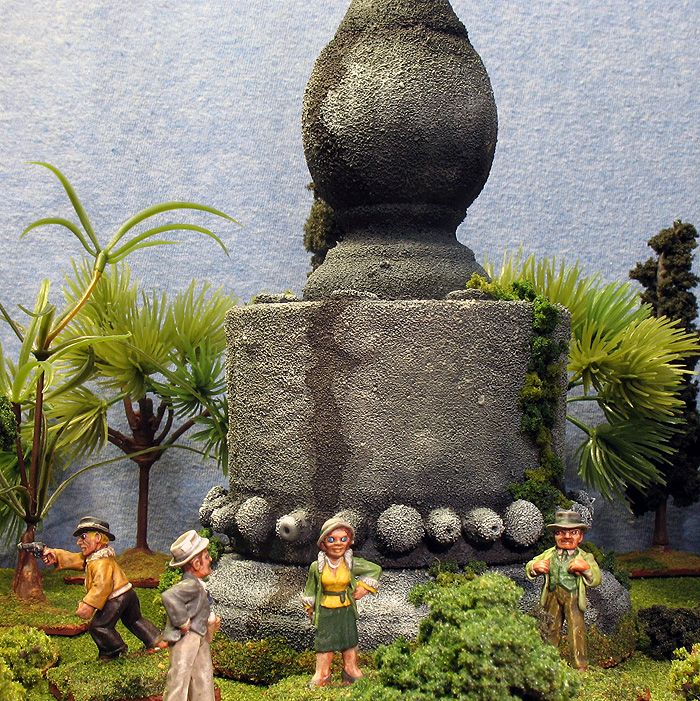
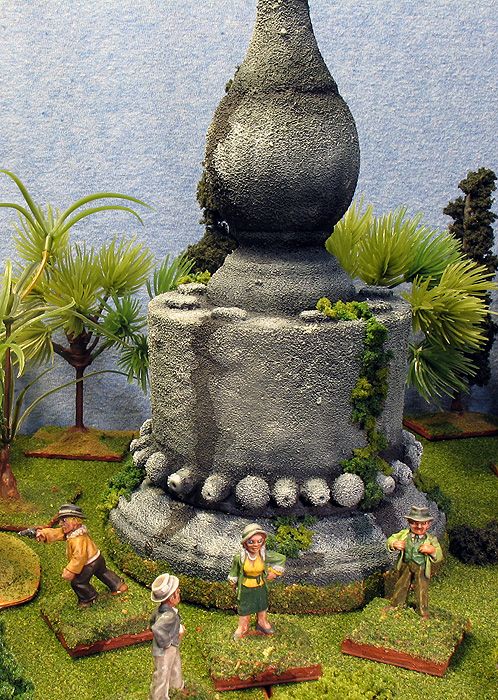
Order of the Fire Coral would begin the game disguised as Chinese peasants scattered throughout the board (roughly 1 in 3 would be agents, the rest actual peasants). The player controlling them secretly marked the bottoms of the figures representing agents with tape. To move, they had to "cast off the peasant garb" and be revealed. The four minor plot points were just over a foot away from each starting location, with the major plot point 
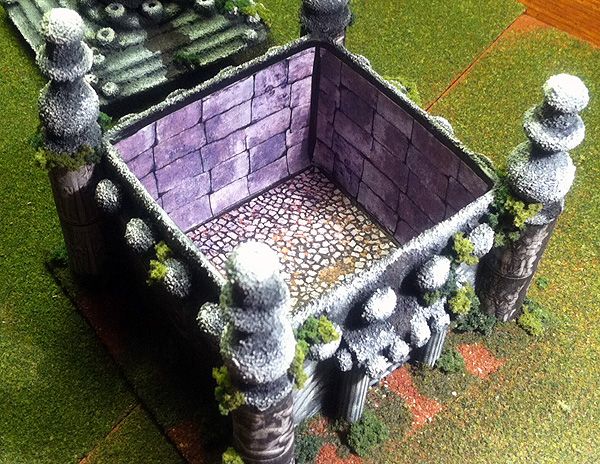
being hidden inside the church's Chancery in the center of the board. They discovered the location of the major plot point (Brother Virigi's journal) only by taking control of one of the minor ones (monks from the monastery).

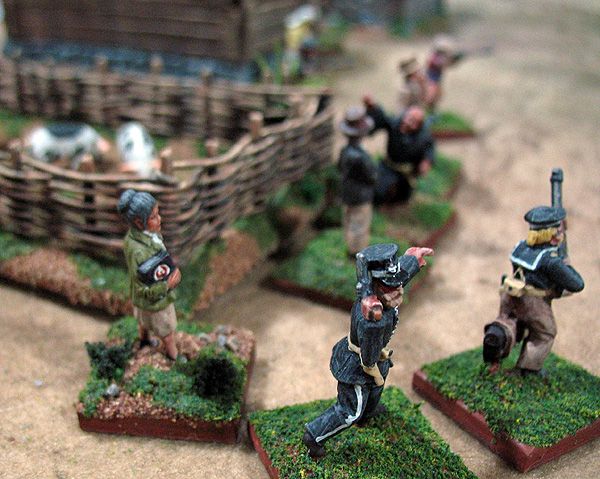
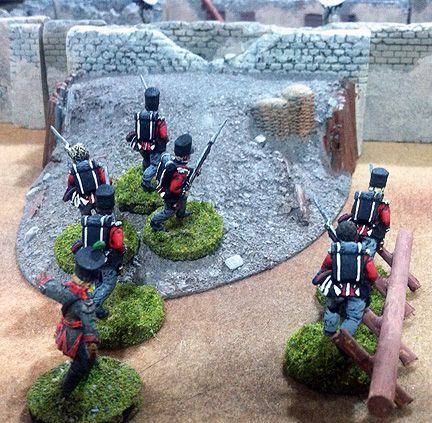
Fraulein Blucher is escorted by two German sailors, while Von Jaeger and Ottom Tulmann interrogate Brother Malachi by the pig pen
 Since these were brand new rules that we'd never played as a group, I had a number of worries heading into the game. My first worry was that I wouldn't have enough Fortune Cards if the players decided to hold onto them. I have just the starting deck of 25. With each player receiving 3 at the start of the game and a further one at the beginning of each round, I was wondering if the deck would ever grow dry. At first, the players were hesitant to use them. Eventually, they got the hang of using them to frustrate their opponents -- especially the weaker characters belonging to other players, who may have trouble passing the tougher challenges.

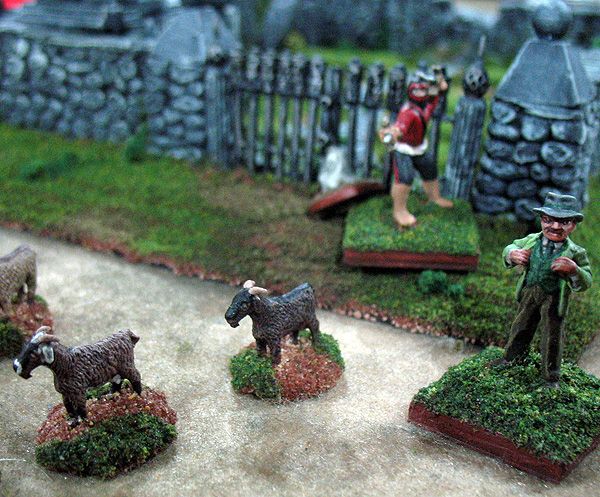
Reporter Eric Bylan and socialite Dolly Flanders, tagging along uninvited on Dakota Smith's expedition, approach the monastery graveyard
 My second worry was there would be no way the characters could accomplish their goals in the game's six turn limit (cards can be played to extend it a 7th and even 8th turn). The board looked simply too big. I think that worry was borne out by the events. Only one character actually entered the church by the end of the game. Of course, the two "Parley" cards played over the course of the first six turns really slowed things down, too. I almost feel like making a change so that is a one-shot card, and not letting it be played a second time. To not be able to attack or run for 1/3 of the game's turns seemed a bit extreme.

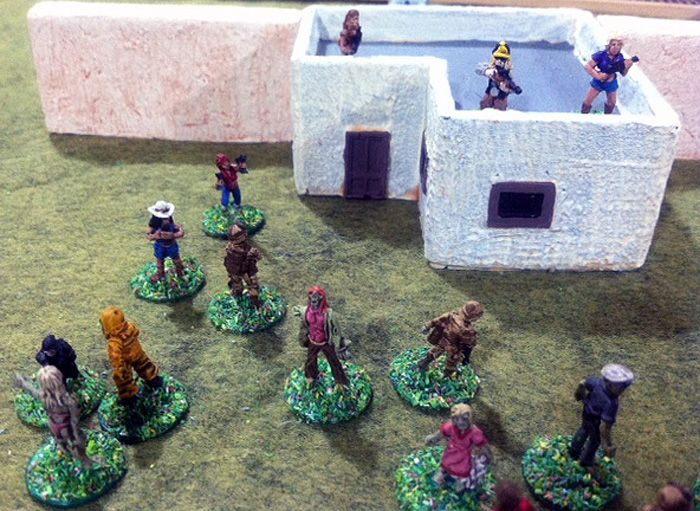
Harold Fortwine guards the rear of the American column, unaware of the agent from the secret martial arts society, Order of the Fire Coral, hiding in the shadows behind him
 The rules explanation at the beginning went fairly well. Of course, true to Sunday night form, my gamer friends were more off-task than my 7th grade students are on average. I expected that, though. It is part of the fun -- the random comments, the digressions in conversation, and so on. The players picked up the rules fairly quickly, it seemed. The one fairly consistent mistake we made was that wounded characters roll dice no higher than their current health level. I'd predicted we'd miss that one and we did a few times. It took a turn or two to wrap our heads around the Challenges, when to play them, and how that is different than passing a plot point. We did it right, but had a couple players question the proceedings. I have to say I was fairly happy with how we caught changes in Initiative -- how it gets traded back and forth between players -- although I would not be surprised if we missed one or two.


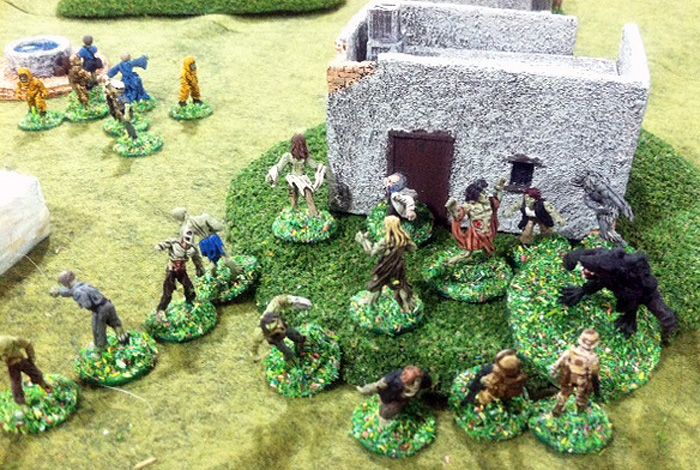
Keeping together tightly, the British party is shadowed and harassed by the Order of the Fire Coral all along its advance towards the church
 The only real issues anyone had with the rules was when the German archeological team got pinned down by the French sidekick Jacques Nero. The best gunman of the French, he got into a covered firing position and started gunning down Germans as they passed in front of him. The player was upset that Jacques' "Hardened Veteran" ability meant he could keep shooting with no "Multiple Combats." That, and Dr. Lambert's "Deductive" ability meant the French league snagged an extra Fortune card nearly every turn. I showed the Germans how he had a character with the exact same stats. He had just rolled worse when Jacques Nero and Otto Tulmann had their gun battle. I explained that one extra Fortune card among 5 players should not imbalance the game. The British had a character with the "Deductive" advantage, too.


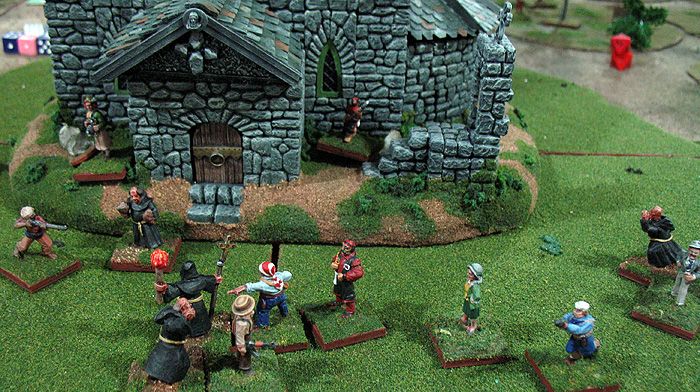
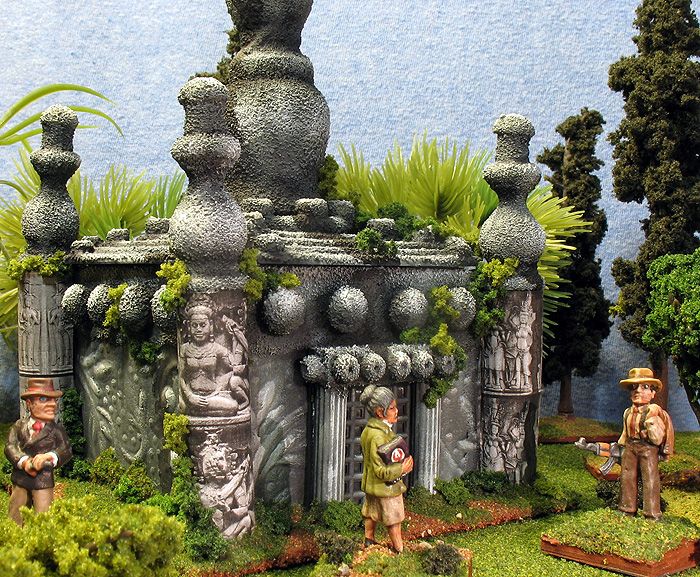
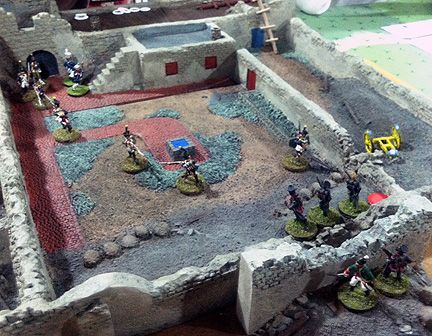
The French league nabs a plot point, discovering that Brother Virigi has left for the mainland mission station. His journal with maps and drawings was left behind in the church Chancery, though (major plot point)!
 So, what happened? All four archeological teams moved fairly steadily towards the closest Minor Plot point (the monk nearest them) and took control of it. The Order of the Fire Coral focused its attacks on the British and German teams, harassing them with attempted attacks on its weaker characters. They seemed to focus less to the French and American leagues. All the players got into the act of trying to zap each other with Challenges as characters entered perilous areas. None of the sidekicks or leaders went down and out, but the German Otto Tulmann was knocked out momentarily. The Order of the Fire Coral lost the most agents, but its characters were weaker (9 total characters vs. 4-5 for the Westerners).


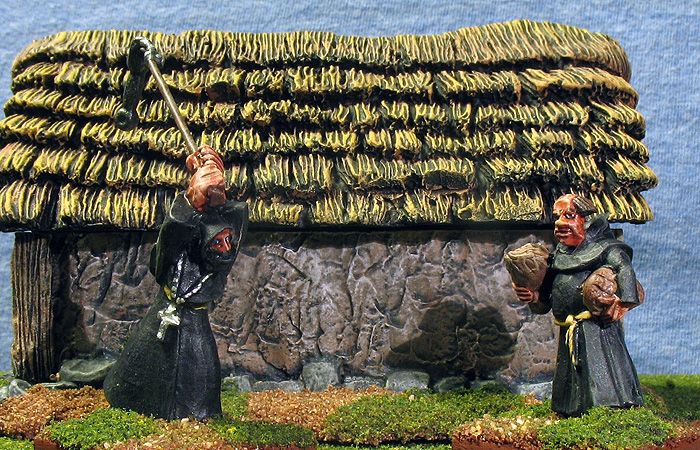
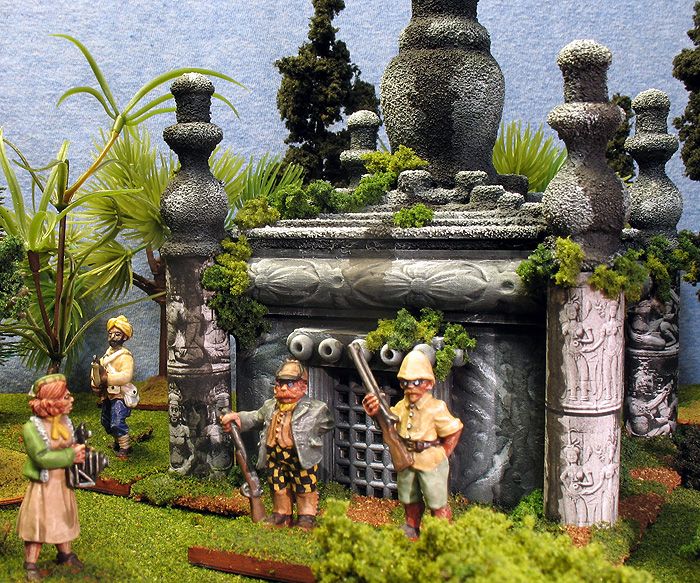
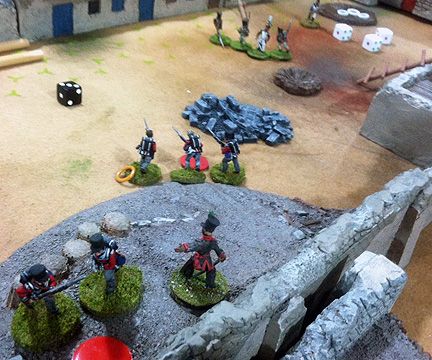
Brother Malachi points Von Jaeger towards the major plot point, Brother Virigi's journal inside the church Chancery...
That brings me to the next issue with a five player game. I think we had too many characters on the board. A few of the players commented that the game moved a little slowly, although part of that is probably due to the too-large board. Another part could be that it was our first time with the rules. I may experiment with smaller leagues (less than the normal 10 slots) in games with 5+ players. I can't imagine what it would have been like if I'd had my 6th player had shown up with the Bandits and their 11 character league! Perhaps I'll trim down the two most excessively-sized leagues (Fire Coral at 9 & Bandits, 11), giving them tougher characters, which may make play go quicker. I think a smaller board would help, too.


 The players said the rules were "interesting" and seemed willing to give them another go. They understood it was our first time playing the game. Everyone seemed to have fun, well, except for the German player. And he seemed to be having a good time until his league got pinned down. There are a lot of subtleties -- especially in the use of Challenges -- that we need to wrap our head around. Tom, the French player, did the best. He seemed most attuned and goal-oriented of the archeologists. His leader, Pierre Fournereau, was the only European to enter the church, though he never made it to the Chancery.


And all five leagues come together in the middle! The French had an advantage, and were able to elude the concentrated attacks of the others. Of course...I *have* to say it: "Tom's winning!"
 So, the game ended up with a massive-sized scrum and logjam at the entrance to the church. The leaders of all five leagues were present in the donnybrook. The Americans blocked the Germans from entering the church, the French got in via clever use of Dodge moves, and the British and Americans appeared like they'd need to take a number. The carnage of so many figures in such tight quarters would have been interesting to play out. It was 11:20 pm, though, and most of us had to work the next day. We had played the six turns in about 3 hours (once rules explanation was done). That is not bad for a 5-player game that no one had played before. As I said, most seemed willing to give it another go and learn the system better.

Sorry this is more of an analysis than straight-up, after action report. I did not take notes on the nitty gritty. I did snap some close up shots of the action, so I hope you enjoy those. Next game will see them follow the trail of Brother Virigi to the mainland and the Portuguese mission station in the Ta-bo Hills. Feel free to comment on my thoughts about larger games, or make suggestions.

Tuesday, November 5, 2013

Medieval Monks

I just finished painting up some 28mm medieval monks for my upcoming Pulp skirmish game....wait! What? Yes, even though the figures were purchased primarily for my Dark Ages skirmish games, I have a need for monks in my upcoming Pulp scenario. You see, it takes place at a Portuguese monastery in Macau in the 1930s, and monks being relatively conservative when it comes to dress and all...

28mm Medieval Monks from Old Glory. Doubtless, they will perish at the hand of many a Viking during my Dark Age Skirmish games...

 These five figures were either unarmed ones or figures I converted to appear unarmed. The guy with the flail is meant to be threshing wheat. Of course, if a raiding Viking happens to get in between his flail and a sheaf of wheat, well, God will forgive him, I'm sure! These Old Glory figures have a lot of character. I particularly like the portly monk with the turkey leg and loaf of bread. My favorite, though, is the bare-handed one with his right fist raised. He looks like he's about to pound the table (or a brother monk) to make a particularly salient religious point. Although Old Glory sculpts vary in quality, I thought they did a very nice job on his face. They eyes look intense and the teeth and jaw show his emotion.

One monk supervises while the other fleshes wheat with his flail. Figures are 28mm Old Glory.

 The one holding the torch was a conversion, of course. It was a club in his left hand, but I snipped off enough of it, then added a cloth pom-pom. I know it is not the world's best flame, but it is passable, and players will understand what it is supposed to be. The flail is also a conversion. I chopped his club he was wielding two handed over his head and drilled out the hands. I slipped in a brass wire spear shaft. The metallic thresher is simply a left over bit of jewelry, and the chain is a spear tip with pennant shaved down, trimmed and twisted around. I also felt it came out so-so. No conversions were done to the one with the gold cross clutched to his chest. I like how his bald head came out with the dry brushing and ink wash.

So, all things going well, these medieval figs will see their first action as "extras" in my first Pulp scenario this coming Sunday. Each will be one of the five clues, or "Plot Points", that the players need to obtain to locate the information source they're looking for. Hopefully, the game will turn out well -- or at least as well as these guys came out...!

Monday, November 4, 2013

Zombywood -- a Halloween Sunday Night Thriller

Mike looks over his set up of Zombywood -- a back lot movie studio. Allen plans how his government agents will close in and recapture the Gerdys, while Keith moves forward some of his zombie hordes

 In honor of Halloween, Mike S had brewed up a skirmish game using Fear & Faith rules (the horror equivalent of Song of Blades & Heroes and Song of Drums & Shakos). The action would take place on a seldom-used Hollywood back lot, featuring building props from all periods of history. Government agents were tracking down the fugitive Gerdy Family -- a brood of geniuses that had recently escaped their heavy-handed control. Thrown into the mix were a tour group with really bad timing, the laid-off actors in a high-tech bounty hunter show, a redneck family whose Duck Dynasty spinoff had been recently axed, and a secretive pack of werewolves, who had been using the back lot as their den.

Carnage reigns as zombies shuffle towards the government agents sent to recapture the Gerdys

To defend themselves from the government agents, the Gerdys had invented a virus that turned civilians into zombies, which they could then control with hand-held remotes. Keith and I were the Gerdys, and we set up in the middle of the board with our family atop roofs to better control the zombies. The government agents (Allen), bounty hunters (Steve V), and rednecks (Mike S) came in on the board edge. The werewolves did the same, but we had no idea what their mission was. We knew the others had it out for us and our zombies, though.

Zombies swarm into hand-to-hand with the rednecks and one government agent, while more rednecks take pot shots at them from the rooftops

Part of our goal was to have Gerdy family members escape off board. I sent two off to an adjacent mission style building, only to have them chased down and slaughtered by the werewolves. The rest of the zombies surged slowly towards the oncoming humans with high-powered firearms. As the other three began to gun down our zombies, more surged from our central bunker. We were able to kill a few of them here and there, while losing swaths of zombies. Our biggest loss occurred to a government grenade, but at least it landed a tad short and killed one of their own agents!

Horrified at watching his wife and daughter ripped apart by werewolves, Father Gerdy frantically summons zombies back to rescue him

Father Gerdy called some of the zombie reinforcements over to escort him off the board while more swarmed the werewolves. We managed to kill the alpha male werewolf, which temporarily scattered the pack. As the game wound down, we'd driven back the agents, but were a long way from thinning the ranks of the bounty hunters and rednecks. With zombies engaged to hold them in place, the rest of the Gerdy family high-tailed it for the safety of the far board edge with some zombie body guards to hold off the werewolves.

Zombies respond to Father Gerdy's call and swarm the werewolves, providing an escort for him to escape offtable

The game was fun, and featured lots of horrific mayhem. Mike's 15mm zombies looked great. Most of them are from Rebel Minis, I'm fairly sure. There is an incredibly variety of them in all kinds of clothes -- cheer leaders, children, National Guardsmen, guys in Hazmat suits, etc. Mike plans on continuing to tweak the scenario for a convention game, so we may find ourselves defending the back lots of Zombywood again, one day...!

Tuesday, October 29, 2013

Southeast Asian Temple, Part 8 -- Finished!

So, kind of an anti-climax for the last installment. Here are the photos of the interiors. I went with CG Textures' website http://www.cgtextures.com/index.php, suggested by someone on the Lead Adventure Forum. I simply downloaded the images, resized them in Photoshop, and printed them off. Looks so much nicer than trying to scratch-build the interior. I know some purists may feel it is crossing the line between modeling and cardstock buildings. I just didn't want to spend lots of time on the interiors, seeing how much time I spent on scratch-building the temples themselves!

The interior of one temple, showing the door
Here is the interior of one of the temples. I painted the interior solid black, then cut the floor and four walls in separate pieces. I painted the interior lightly with white glue and voila! Instant stone wall or floor. The wall with the door was done using photoshop, as well. I found a likely door, cut it out electronically and pasted it onto another image of a stone wall. I am really happy with how realistic it all looks.

CG Texture images downloaded (free!) look very realistic when printed out and glued in
I went ahead and did an interior floor for the stupa, as well. Technically, these buildings are usually solid -- there are no rooms on the inside. But hey, these are also for pulp games...so there HAS to be a secret room with a hidden latch that opens it...!

I plan on doing at least one larger one, now that I have the techniques down. Hope you have enjoyed the tutorial...feel free to leave a comment. Or heck, even subscribe (or become a Follower) of my blog!!!


Monday, October 28, 2013

Southeast Asian Temple, Part 7 - Exteriors complete!

Von Jaeger and the German archeological party discover the first of my small Southeast Asian temples. I think the printouts of the bas relief carvings on the corner columns turned out fine.
I got a little busy at school, so the temples had to sit for a few days before I got around to finishing their exteriors. I added the light gray and white dry brush coats, as I mentioned in the previous post. These also went quick and really made them stand out more and look less like monotone stone. Once all the coloring of the stone surface was done, it was time to start flocking them.

Wide angle shot of the first small temple...definitely captures the "lost in the jungle" look -- at least in my humble opinion!
 I mixed up a batch of white glue and the earth red color of paint I use for my bases (Ceramcoat Burnt Siena). I added a bit of water to get it to flow and liberally coated the styrene base, slopping some up on the lower portions of the structure on purpose. I then poured Woodland Scenics Medium Ballast onto the paint/glue mix. Once dry, I took the leftover paint/glue and watered it down even more, to close to a 50/50 mix or so. I painted the ballast with this and then poured sand over the top. In addition to doing this one the styrene bases of the two small temples, I did it to the lowest level of the stupa base. The paint mix seeps up and wets the sand from the bottom, coloring it. I then sprinkle it with Woodland Scenics brown turf to cut down on the reddish tone a bit.

Harris McLeod and Maj. Speke-Eastman pose in front of the second of my Southeast temples they've discovered in the jungles of Southeast Asia. This one differs in having the columns set out from the temple building a bit, as well as the decorative trim beneath the roof.
 Now, it was time to see if my idea for the corner columns on the small temples worked out. I had found a website earlier call CG Textures (recommended by Amlaric on the Lead Adventure Forum). They have various high resolution photographs of walls and other images. One of them, I'd noticed while checking out the site, was of Angkor Wat in Cambodia. I downloaded a bunch of the images and then resized them in Photoshop. I took strips and duplicated them, sometimes flipping them horizontally so they looked slightly different. I ended up with two rows of images meant to resemble bas relief carvings of dancers, gods, etc. Since my temples were staying with a gray tone, I made sure to change them to black and white images.

I know...not a lot of difference in this angle...but you can see the staining I did on the columns and temple surface fairly well. The British archeological party benefits from having McLeod's niece as a correspondent for the London Times!

Printing them out and then gluing them on the temples took less time than I'd figured it would. There is no mistaking it was a relatively tedious process. Nevertheless, it went much faster than I'd anticipated. The paper had no problem sticking to the wooden dowel columns. I simply painted each column with a thin layer of white glue, then wrapped the paper around the column. The hardest part was trimming it here and there to make it fit perfect and minimize any crinkling.


Close up of the Stupa and the American archeological party. You can see the sand on the surface pretty much erased the embossing (oh, well!). Not nearly as "sexy" as the temples, but stupas are an integral part of any SE Asian religious complex.
 I gave the columns awhile to dry. Then, I took straight white glue and painted it on the areas tht I wanted grass. I sprinkled Woodland Scenics Blended Green Turf onto it. I always leave areas of brown earth showing so that the grass is patchy. More waiting for it all to dry followed. This is always a "work for 20 minutes and wait" part of the process. I then broke out the three different colors of Woodland Scenics clump foliage that I own. I tore the bits into tiny pieces because it would need to stick to vertical surfaces. I then simply painted areas I wanted vegetation clingng to it with white glue. I looked for flaws in the gluing job of the column images and made sure to cover those up first. I then recreated vines and other creeping vegetation by gluing lines of tiny pieces of clump foliage all over the temple face. I ended up putting on enough that it wouldn't look pristine and out of place on a jungle board. I also wanted it to be fine in an overgrown, "weedy" sort of way if the temple was located in the plains.

As Eric Bylan gazes up in wonder at the stupa, Dakota Smith hears a noise in the jungle off to his right...
The final step for the exterior was to create stains from the moisture and vegetation. I mixed up some black paint and water (less than 50/50). I then created water tracks from high points to lower points. Once the watery black streak was in place, I watered it down even more along its edges. I'm not sure if it will actually show, but the goal was to make it look like stains from dark areas of the stone, vegetation, or something else that was streaking the flue velvet.

A final spray of dullcoate and the exteriors are done! Note that I specify this because I have plans for the interiors, as well. I will print it out more resized images from CG Textures and glue them on the inside of the boxes. Hopefully, the sides are straight enough to look nice when I glue the images in. So, until I get that part of the project done, the temples and stupas are complete. I hope you've enjoyed this tutorial, so far. These have turned out every bit as nice as I'd have hoped for. I look forward to using them on the tabletop...!

Storming the Breach at Badajoz


Keith, right, set up a Napoleonic era skirmish for us featuring his newly-painted walls and buildings. Allen joined him to command his right and try to hold off the English assault on the fortress.

 My buddy Keith wanted to host a game to celebrate finishing his Alamo walls and buildings. Since his cowboys weren't completely finished, though, he reconfigured it to be a the besieged fortress at Badajoz during the Napoleonic Wars. He dug out a bunch of individually mounted 28mm skirmish troops and set up a scenario where the British are storming a couple breaches made by artillery. We use Ganesha Games' Song of Drums & Shakos for blackpowder era skirmishes. With six of us in attendance this Sunday evening, Keith, Allen, and Joel were the defending French and allied troops, while Steve, Mike S, and myself were the assaulting British (and allies).

My British light infantry head towards the breach carrying a ladder (which they won't need), while Steve's Brunswick troops are almost at the wall

Steve opted to play the Brunswick troops, and Mike S snatched up the 95th Rifles, leaving me with two commands -- a squad of British light infantry and another of line infantry. Each of our squads had a ladder we could use to climb the walls, or we could go up one of the two breaches on either side of the table that our artillery had made. Half of the French troops start in the guard room, while the other half are deployed on the walls when our assault begins.

Keith watches as Mike's 95th Rifles storm towards Joel's troops on his left

 I advanced steadily, with the lights heading towards the breach and the line aiming their ladder towards the battlements. On my left, Steve raced towards the walls ahead of me, drawing the attention of Allen's troops away from my lights. On my right, Mike S stormed forward, and with a well-placed bullet, pegged Joel's officer. His troops broke in momentary panic, abandoning the walls and allowing him to seize them.

"Up the ramp, lads!" My lights ditch their ladder and race up the rubble breach. Note my ensign in the rear of the formation -- a caution or French opponents did NOT employ to their dismay

 This was a harbinger of our success all across the line. Steve slowly battled his way up his ladder and faced down Allen. My lights surged up the rubble ramp and surrounded his meager guards. My line sheltered beneath the walls for a breather, while they set up their ladder. The French were having trouble getting their troops out of the guard room, and were outnumbered at the point of attack. My lights soon overwhelmed the French facing them, and my line were able to storm up the ladder and chase off the Bavarians guarding the battlements. Meanwhile, the 95th Rifles were making short work of Joel's command.

Our ladder set against the walls, my line infantry prepares to climb to assault the Bavarian troops above them. Note: I am *NOT* a fan of old-school knitting rings for markers to show unloaded muskets (and let Keith know that...haha!)

 The scenario gives the French 60% of our force strength, but nowhere was the point total at a greater disparity than the Rifles against Joel's command. His Nassau allied troops were the worst on the board and he was outpointed by several times. My line troops actually fought their way to the top of the ladder against a superior force, albeit one that had half its strength still straggling from the guard room. Allen was facing both Mike and myself, so was also outnumbered.

The 95th Rifles, led by Sharpe and Harper, mow down the Nassau allied troops opposing them

At least for the English, it was an enjoyable game as we wore down the French and soon achieved our victory conditions. We made some suggestions on how we would balance things better the next time it is played. A big advantage of ours was tactical, though. We were able to kill the leaders of all three forces shortly after contact (or before, in the Rifles' case). This caused panic and confusion among the troops and allowed us to seize our objectives relatively unopposed.

The bitter end for the French: My lights have taken the breach and are advancing down into the courtyard. Their opponents panic and run back towards the guard room.

 Song of Drums & Shakos is a good set of rules, and provides enjoyable games. We did make a few tweaks, though. One of which is to drop the weapon differential rules for hand-to-hand. The other is to reconfigure group moves to include the leader as part of the rolled-for movement. Keith's walls and buildings looked great on the tabletop, I thought. It was good to finally get all those troops he'd been collecting out on the tabletop, too.

Next week we have a Halloween-themed game that Mike S has dreamed (nightmared?) up. So, that should be exciting. And the following week will be the debut of my pulp-era games using the rules Pulp Alley. So, stay tuned for lots more gaming fun...!