Thursday, March 23, 2023

Congo, Bloody Congo - Wars of Insurgency AAR from Cincycon 2023

    The Katangan Merc's armored personnel carriers roll along the road carrying vitally needed ammo
For Cincycon 2023, I wanted to play around some more with the number of "sides" in a six-player game. For many of my Wars of Insurgency games, I have done an "every man for himself" scenario with each player controlling their own faction with wildly different objectives. At Advance the Colors 2022 I ran a three side, 6-player South American game with Leftists, Narcos, and Paramilitaries. For the Cincycon scenario, I reduced this to two sides, but each of the three members would have different victory conditions and objectives. They wouldn't be shooting at their so-called allies, but they may different goals in mind. One of the advantages of this type of scenario is it will move much faster than every man for himself. All of Side A will be activating one of their units followed by all three players of the other side.

    For this 6-player game, I had two sides, but each faction had their own separate victory conditions
The "Congo, Bloody Congo" scenario was taken from the 1961 U.N. Operation Morthor, when ANC Congolese and U.N. troops attacked Katangan gendarmes, militia, and mercenaries to end the Katangan Secession crisis. This is all the operation that saw the more well known Siege of Jadotville. The mercenaries would appear in this one as one of three players on the Katangan side. They controlled three armored personnel carriers loaded with vitally-needed ammunition for their Katangan employers and allies. They would seek to move diagonally from one corner of the 6'x4' board to the opposite corner. The Katangan gendarmes awaited them at the destination corner. The road the APCs would take passed in front of a Katangan village, filled with militia who were much more concerned about protecting their homes and families than the fate of any white mercenaries!

    A player no-show put me in command of the local ANC, hurrying to get a shot at the APCs
Meanwhile, the ANC/UN side also had three players. The Belgian-trained paratroopers came in on the corner directly across the table from the mercs. Their goal was to simply to crush the rebellion, getting most of their VPs for killing enemy. The local garrison of the ANC (Congolese Army) was aiding them, but were upset with the central government. They felt starved of ammunition and equipment, and would dearly love to seize the APCs or their ammo. The UN was itching to take out the mercs (as they seemed to be historically). All point totals for the side were identical except for the mercs, who were given a supplement because they had to move from one corner to the far corner with lots of folks gunning for them with abundant RPGs on the table.

    Meanwhile, my ally, the Belgian-trained paratroopers, advance towards the Katangan village
The player controlling the Mercs had no qualms about shooting up the opposition. He immediately got into a firefight with the ANC, which deployed to his right. However, as soon as any of his APCs saw a long-range shot on the paratroopers, he was not shy about engaging them, either. Although this may seem somewhat unwise when you weren't really sure what each player's real objectives were, the Mercs had luck on their side. As it turned out, a LOT of luck. Their dice were consistently hot all night long. I ended up playing the ANC as I had a no-show player. My dice were the polar opposite and were ice cold, which also helped the Mercs.

    When one APC veered off the road, my ANC pounced and blazed away to little effect, unfortunately
The paratroopers and the opposing Katangan militia in the village were controlled by husband and wife players who delight at going to a convention and getting out their aggressions against each other. They blazed away at each other merrily all game. The militia ended up better off in the long run. They stayed hunkered down inside their huts and sniped at the paratroopers through windows and doors. Meanwhile, the paratroopers had to advance across the light cover of fields and medium cover of the bush. Whenever the heavy machine guns of the APCs opened up on them, they lost a couple troops. This turned the tide in the militia's favor in the long run. The paratroopers seemed unable to mount an effective enough assault to breach the village's thorn and wood fences.

    On my right, the Ghanaian UN contingent ran into pinning fire from the Katangan gendarmes
Meanwhile, the APCs progressed steadily across the table. The ANC fired shot after shot from their RPGs, but were unable to score a hit. The Congolese troopers did manage to slow whittle down the number of mercs, though. The machine gun required repeated re-manning in all three of the vehicles. Other shots picked off the crewmen riding in the open toppped APC, as well. However, the hope of stopping the vehicles seemed to be fading as the three APCs passed midpoint of the table. Perhaps this would not be the day the under-supplied garrison troops scored a bounty, after all.

    The Mercs' APCs begin to run the gauntlet, rolling incredible saves and dishing out stinging fire
On the right side of the battlefield, the Katangan gendarmes and the UN were locked in a long-range firefight. Each scored successes against their enemy, but casualties were relatively low. The harassment by the gendarmes kept the UN from effectively lining the road to take shots at the APCs as they came into view. The Katangan fire was keeping the UN pinned down in cover and unable to advance quickly to the roadside. Meanwhile, the UN's allies, the ANC troopers, were being worn down by the constant barrages from the mercenaries on board the APCs. The last ANC RPG gunner scored a minor hit on the trailing APC.

    Katangan gendarmes await the arrival of the APCs, providing effective covering fire against the UN
The ANC/UN's greatest moment followed that. A long-range RPG shot from the UN hit the slightly damaged APC. The player rolled maximum damage. The Merc player picked up his dice -- which had yet to really fail them significantly all night -- and whiffed all his saves. The APC went up with a flash of flame and rebounding explosion that echoed through the bush. When the Merc player rolled the saves for the men on board he failed all of those, too. We theorized that the RPG round ignited the stored ammunition, which caused a devastating secondary blast that killed everyone on board and destroyed the APC.

    Did I make the Mercs' force too strong? Or was their player just rolling too well?
The first two APCs had reached the cover of the Katangan force shortly afterwards. They gunned their engines and roared off-table to the cheers of the gendarmes. We decided to count up victory points at that stage. It would still be possible to rack up more VPs by killing enemy soldiers. However, the main action had occurred, and any losses would probably be relatively balanced on each side. Once totaled up, it was a resounding victory for the Katangans. Operation Morthor -- or at least this skirmish -- had failed to quell the secession crisis. The Katangan gendarmes had been resupplied and a victory gave them fresh heart to face down the central government. They would hope that the UN and ANC would deem their losses as unsustainable and would return to the negotiating table.

    One APC takes minor damage, but then suffers a catastrophic explosion from a UN RPG round
I was fairly satisfied with how the scenario went. All the players said they had a good time. I felt that perhaps I'd placed too much terrain on the table, which meant player forces were slower to engage. I also may have made the Mercs too powerful. Still, they suffered significant losses in men, so perhaps not. Their die rolls were incredible for most of the night. So, maybe they don't need to be cut down too much. I do think I need to do something to speed up the engagement between the paratroopers and the village militia. That was a little slow and static for what I like in a convention game. It certainly is a scenario that could use some tweaking and another running. Perhaps at Drums at the Rapids, this May? Stay tuned, and we shall see...

Throughout the game, the Katangan village militia remain hunkered inside their huts, sniping away

    Too many paratroopers died crossing the fields of millet -- both from the defending militia & APCs

    Katangan gendarmes cheer as the first APC rolls past their defenses, bringing much-needed ammo

Wednesday, March 22, 2023

Acheson Scatter Terrain for Post-Apoc & Modern Games

    Acheson Creations has always made quality, inexpensive terrain - here is some of the latest I painted
I continue to plow away on the terrain that I have purchased for my modern and post-apocalyptic games. My latest accomplishment is to paint up a number of pieces from Acheson Creations. Most were bought from the Miniature Building Authority booth at Cincycon 2023, but some have been sitting in my unpainted tubs for longer. They painted (and flocked) up very quickly, and I already have them tucked away in my downstairs closet displaying all my terrain on shelves.

My next post-apocalyptic game is planned to be on an urban battlefield, so I jumped these pieces to the front of the painting queue. I particular like the miscellaneous pieces which include tires, barrels, and a concrete slab. I grabbed four of them from MBA at Cincycon. I also picked out the stacks of tires, knowing how easy they'd be to get ready for the tabletop. My standard method is to run the pieces through the dishwasher on low heat. Next, I spray them with Krylon matte black. I follow that up with a 50/50 mix of acrylic black paint and water to ensure complete coverage. Then I dry brush it a dark gray, light gray, and so on. For the rims of the tires, I painted them with a metallic gray steel-colored paint. Finally, they receive a black wash and flocking and they're done!

I think these Acheson concrete pillars will look good for a bombed out or post-apocalyptic area  
I also liked these lone concrete pillars or pilings that look like they belong on a ruined city or post-apocalyptic tabletop. They received the identical treatment as the tires, above. Now that I see them in a photograph, I may have to create some piles of rubble to mix in amidst them. Or who knows? Maybe I already have something that will work for that -- I will have to check.

   The Bass Reeves, one of my post-apoc gangs, prowl through the rubbish looking for things of value
The final pieces are absolute trash. Well, two piles of garbage and a row of trash bins, that is! The trash piles are NOT Acheson. I'm not sure where I picked them up. My guess is that they were cast for me by my friend Tim Peaslee a couple years ago, and could very well be Hirst Arts or something similar. They took the most time to paint up due to having to put more than just black and gray in them. I could have spent even more time picking out details in the trash with other colors, but decided to keep it simpler. They are designed with a flat back and I believe meant to be shoved up against the wall of a building to show trash piled against it. The row of trash bins ARE Acheson Creations, and was the first time I found this casting in 28mm. I should probably buy more for my modern games, but hey! That gives me something to look for next time I see MBA or RRB Minis and More at a show!

All in all, these pieces should flesh out my tabletop more. I honestly believe it is the random "scatter" pieces that can make a game table seem to come to life. Acheson Creations makes some great pieces for that! If you see someone carrying them at a convention, you should pick some up!


Thursday, March 16, 2023

More Sci-Fi Terrain & Ruined Buildings

    All that remains of this ornate church is its ruined facade -- a 3-D print I purchased at ATC 2022
I'm really enjoying cranking out more ruined buildings for my post-Apocalyptic games, as well as Sci-Fi terrain for Space Station Zero. This update includes the last of the ruined buildings that I bought from Rusty of Jarls Workshop at Advance the Colors 2023. I am really happy with how the two-story facade of a ruined church turned out. I am looking forward to running another post-Apocalyptic game and getting all of these on the table together! Likewise, I'm itching for Jenny and I to get in another game of Space Station Zero soon. This batch of fairly small buildings or scatter terrain should add some variety and color to our exploration of the derelict space station. 

    The rear of the 3-D print -- you can see there is room for 28mm to fire from the 2nd story platform
The two-story ruined church is the eye-catcher of this batch, I think. It comes in two parts, and I used 5-minute epoxy to affix the top half to the bottom part. Rusty's print was exceptionally clean, as always, and required almost no cleanup prior to priming. I followed my usual black spray prime, followed by a 50/50 mix of black paint and water, to get it ready. A dark gray dry brush with light gray highlights was all that was required to paint this model. Next, I did a black wash, which I think "blends" the dry brushing strokes well, giving the model a smoother looking appearance. I added in patches of green grass flocking with white glue to break up the all-gray look. Otherwise, this was an extremely fast model to paint up. I thought about putting more debris like bricks and ballast on there, but as tumbled stones were already sculpted into the model, I didn't think it was necessary. I think a mix of different heights of ruins will add to the look of the table, so I am really glad I picked this one up from Jarls Workshop!

    This Acheson Creations chimney ruin has been sitting unpainted for years
Next up, is an Acheson Creations building that I have had sitting in my unpainted tub for a number of years. It is originally meant for their Frontier America line, but in the end, it is a ruined building and won't look out of place mixed in with the other ruins.  It is a square chimney with some stones tumbled down. I believe it is modeled to represent the rest of the house having burnt down, leaving only the chimney standing forlornly. I really miss Acheson Creations. They were my favorite building and terrain producing manufacturer. Fortunately, some companies like Miniature Building Authority and RRB Minis & More are carrying some of their pieces, and you can still see their stuff at conventions where vendors bought up some of Acheson's products.

    The Green Dragons prowl amidst the ruins of a house where only the stone chimney stands
This was done with the usual method above, except an added preparation step at the beginning. Since Acheson pieces sometimes have a paint-defying mold release agent on them, I run them through the dishwasher at low heat first. I did an extra black wash on the inside of the chimney to represent its smoke-darkened stones on the interior. The wooden beams were done in Howard Hues Camo Brown dry brush and tan highlight. Looking at it now, I should probably added more shrubs or flowers or something growing amidst the ruins for a more 3-D look. Oh, well - I made up for that on the next piece!

    See the lizard outline beneath the flocking going up the column? No? Good - that's how I wanted it!
I almost didn't paint this last piece. I bought it when our former Acheson Creations local rep, Bryan Borgman, was selling off most of his stock. It is a ruined, circular pillar. Sounds great, right? Well, molded into one side of the pillar is a bizarre statue of a lizard with outstretched arms and holding a dragon-headed staff. Obviously, it is meant for fantasy games. However, as I was painting it up, I got the inspiration to simply cover the lizard and staff with flocking and flowering plants. I really liked the way they disguise the outline of the lizard. One more piece for my ruined post-Apocalyptic tabletop!

    This piece is also from Acheson Creations (I believe) that I picked up from RRB Minis & More
Now, on to my smaller terrain pieces for Space Station Zero for part two of this post. These were actually finished several weeks ago, but I simply hadn't had time to take pictures of them and write up a blog post. Speaking of weeks, it has been awhile since Jenny and I played out a mission in this cooperative, solo/multiplayer game. Hopefully, we will get in mission #2 in soon! Anyway, I really like the look of the dark green metallic craft paint that I have used for some previous Sci-Fi terrain. The snaking light green hoses came out really nice, being a three-color base coat, dry brush, and highlight. The dark metallic gray and copper for machinery components looks cool. I went with a slightly darker metallic grayish-silver for the base of the miniature.

    Sci-Fi domed building from RRB Minis & More - will work great as a stand alone small terrain piece
Next up is a piece 3-D printed by RRB Minis & More. I picked it up from them this past December at Shore Wars 2022 in Mentor, OH, I believe. The roof comes off on this one, but I decided that since I am using it for Space Station Zero, I really won't need to remove the roof for games. So, I epoxied it down, and added it a control panel I also bought from them atop the entrance to make it look even more high tech. The color is technically metallic brown, according to the craft paint maker, but I like how it looks for Sci-Fi stuff. I did the accent pieces in Pewter and Metallic Gray. For the glowing control panels, I painted them black first and did tiny dots of red, yellow, and green to look like lights. I like how it looks and am pleased with how it turned out!

    Another Acheson Creations Sci-Fi terrain piece picked up (I believe) from RRB Minis & More
The next piece features a new metallic cover I'd purchased when painting the flying drones for Space Station Zero. Like with the Dark Green, I really like how this Dark Red looks on surfaces that are supposed to be metallic or otherwise shiny material. This one was incredibly easy to paint. I gave it a black base coat and then a couple coats of the metallic red and metallic pink (NOT how it was marketed...it was supposed to be red!). The black base coat would show through, requiring multiple coats to look like this. 

    The final terrain piece is another from Acheson Creations, which I did in a blue metallic
Finally, a smaller version of the Acheson domed structure was done in blue, as well. I probably should have jazzed this one up with one of the control panels I bought from RRB Minis & More. However, things were pretty busy and hectic for me at that point. I just wanted to finish them and feel like I was getting things completed. 

All in all, I am happy with the additions to my Sci-Fi and post-Apocalyptic terrain. Next up, is some even smaller pieces of scatter terrain from Acheson Creations. So, stay tuned!


Tuesday, March 14, 2023

Thracians Facing Down the Greek Phalanx

    Rusty Parker's Athenian hoplites from Victrix Miniatures were my Thracian's first opponent in Saga
Awhile back, Saga released their Age of Alexander book covering armies from that part of the Classical period. Of the six armies covered, the Thracians interested me the most. These semi-barbarian tribes from the northeast of Greece were a thorn in the side of a number of Ancient kingdoms. They were also known for very colorful cloaks, which I thought might be fun to paint in the 28mm scale. However, they had an unusual mechanic attached to their Saga army list called "Pillage." I thought perhaps I should try them out  for a game or two before purchasing any figures.

    Rusty, left, consults his Greek City States battleboard as he analyzes what to do against the Thracians

I know, I know! That goes against the knee-jerk response of most miniature gamers: "Oooh, shiny!" New army? Take my money, please! For a change, I was being deliberative about the process. So, I read through the list the day before our latest Saga Sunday at the Guardtower East. I drew up an army list and then went downstairs to cobble together forces to be my proxy Thracians. I used my Picts, Irish, some medieval peasants, and Roman cavalry to represent three units of Thracian warriors with javelins (two 9-figure and one 10-figure unit), one 6-man foot hearthguard unit with rhomphaia (a Thracian heavy cutting weapon), one 8-man mounted warrior unit with javelins, and a mounted warlord.

    The two armies deployed for battle - Thracians at bottom and Rusty's Greek hoplites at top
Rusty contacted me and said he'd be coming down from northern Ohio for the weekend for family reasons, but would sneak away for a game of Saga on Sunday. He wanted more practice with his Athenian army from the Alexander book, as well. Perfect! Rusty and I had never played each other in Saga, and we'd both get a chance to test out Alexandrian armies against each other. Rusty's Athenians were composed of a foot general (which we both decided would be better to switch to a mounted one in subsequent games), one 8-man foot hearth guard unit of veteran hoplites, three 8-man warrior hoplite units, and a 12-man unit of levy slingers.

    While Rusty and I fought a historical matchup, Mike S and Andy S play Age of Magic fantasy Saga
We decided to try a straight-forward "Clash of Warlords" game, since we were both learning new armies. Since the Athenians had no mounted, I began terrain placement with a large gentle hill in the right center of the board. He placed fields on his right for his slingers to shelter inside. I countered with a ruins opposite it on my side of the table. He then placed a marsh on my base edge, hoping to mess up my deployment. I then eschewed placing a piece, instead scooting the marsh towards the side edge. With the mostly open battlefield set up, we were ready to deploy. 

    The Thracian cavalry at right pull back after a lackluster pair of javelin tosses at the Greek hoplites
My plan was to use my cavalry and javelin-armed warriors to swing around on my right and enfilade and shoot at the left end of his battleline. I deployed my three foot units of warrior javelin men across the center of my line. Backing up the unit on the right was the hearth guard with their big chopping weapons. I placed the cavalry on the far right, where they would attempt to use an ability on the Thracian battleboard that allows units to throw javelins then move away. If I used a "Rare" die, it was a free move. Otherwise, it would cause one fatigue, as per normal. Either way, the dice used to activate "Elusive" not only gave two bonus shooting dice, it also moved them. A nice ability, I thought, and fitting with ancient skirmishers.

    Stung into action, the Greek hoplites dash forward and shatter a unit of Thracian javelin men
Rusty deployed his battle line close together, as the "phalanx" special rules require. From my right, there were two units of hoplite warriors, then the double-strength veteran hearthguards, then another hoplite warrior unit, and finally, the levy slingers in the fields arrayed against my left. I was first player, so moved forward in a staggered line -- pressing forward on my right and hanging back on the left. We also edged the left towards the center to avoid the enemy's sling stones. The warlord trumpeter sent a long, deep-throated blast on his horn, and with a shout, the Thracian cavalry galloped forward. They tossed their javelins, but I held "Elusive" back because I planned a second volley. Rusty saved against all of my hits. I did the second volley with Elusive and this time nicked one figure for a single casualty. Ten dice and one kill was under average...hmm. Was this a sign of things to come? Rusty had a chance to slow the cavalry down as they withdrew, but decided against it. 

    Greek phalanx advances 12" with 3 Saga dice on Turn 1 -- everyone is within spitting distance!
Instead, his eyes were focused on my first unit of warrior javelin men who had advanced forward quickly, the rhomphaia men close behind. We were both about to very shocked at how quickly an Athenian hoplite battle line advanced. The Greek City States battle board has a Basic ability (meaning it can be played as many times as a player likes) called "Form Line of Battle." It allows all phalanx unit in the battle line to move a Short distance (4"). Yes, I know, that sounds slow. Remember, though, it costs only one dice for all those units to move. Rusty played it twice, plus used "Marathon" which changes the following Form Line move to "Short plus Short: (8"). So, for just three dice, all four of his battle line units came screaming across the battlefield 12"! One of the Form Line activations can be a charge, so his leftmost hoplite unit slammed into my right wing unit of warrior javelin men.

    Thracian cavalry men charge into the surviving spearmen of the Greek phalanx unit
With all the defensive abilities the Greek City States battle board allows, and three dice for movement, Rusty didn't have any melee abilities queued up. I felt relatively good having 10 guys vs. his 7, though his armor class was one better. Rusty rolled all seven hits (needed 3+), though, and I piled onto this misfortune by missing all seven saves (5+). Yowsa! The dice were definitely showing bias in favor of the Greeks in the early going! We hit him hard in return, though, causing four kills. It was a bloody start to the hand-to-hand fighting! Thankfully, Form Line of Battle allowed only one charge, otherwise he could have decimated my line on turn one!

    Not to be outdone, the Thracian Rhomphaia men wade into the next phalanx in the Greek battleline

On my second turn, our two battle lines were already close, within spitting distance. I used "Elusive" on my middle warrior unit to toss javelins at one of his hoplite units and then pull back a Medium distance (6"). I debated having my horsemen throw javelins at the depleted unit, but I figured it would be too easy for the hoplites to shrug off the hits. Rusty had played on of the four (!) Activation/Reaction abilities on the Greek board to make all of his units save vs. shooting as if they were in cover. I decided to send the Thracian cavalrymen in for a charge instead. Javelins add +1 to the attack roll in melee, and his unit had a fatigue which means I should rack of plenty of hits to eliminate the unit. The dice did not cooperate, again, and there was one survivor reeling back from my horsemen. Still, I decided to follow up the success and send in the hearth guard Rhomphaia men in with their choppers. I expected another slaughter, as this was my best unit rolling 12 dice at +1 against a fatigued enemy. My dice deserted me once more. I rolled a boatload of 1's, plus Rusty continued to save like a demon! Instead of nearly wiping out the hoplites, we killed only three, while he killed one of mine.

    End of Thracian Turn 2: My plan to envelop his left end of his battle line appears to be working
I knew my Rhomphaia men's charge would leave them dangerously close to his veteran hoplites. So, I played another ability to remove the fatigue from our battle, and had queued up the best defensive ability on the board: Protect the Loot. The Pillage mechanic means that when a unit wins a melee against non-levy, it acquires a Loot marker. So, both my cavalry and hearthguard had loot markers, now. Interestingly, this also means they would be harder to activate to move. Still, I was willing to dig in and let him charge my hearth guard and see how Protect the Loot worked. Unfortunately, Rusty wisely kept track of what I had queued up on my board and did not fall for my trap. Either that, or a Greek version of Admiral Akbar was whispering in his warlord's ear!

    The dice begin to go my way -- my unit of Thracian javelin men shatters and drives off a phalanx
Instead, the wily Greek general consolidated his depleted units away from where I was enveloping him, and towards his right. He then moved to the attack on that wing. His warrior hoplites crashed into my Thracian javelin men opposite them. I decided to save Protect the Loot for this fight and have my 9 warriors try to kill as many of his hoplite as I could. We had also killed some of them with javelins last turn. Once again, the melee was bloody. The Thracians got the better of it, though (were the dice changing in my favor?), as only two hoplites were left standing at the end, while four of my javelin men were alive. Crucially, as it would turn out, they also acquired a Loot marker. 

    Thracian defensive abilities are put to the test & enable 4 warriors to drive off 8 hearthguard!
Now, the question was where would Rusty send his veteran hoplites -- fully 1/3 of his army points? He chose to have them go in mop-up role against the surviving four javelin men. I played Protect the Loot and also another Thracian ability that allows them to count as in heavy cover. Not only would I be saving on a 4+ instead of 5+, Protect the Loot allows me to re-roll 1's and 2's that missed. If I had a Rare (which I didn't) it would allow re-roll of ALL missed saves. On top of all that, the ability also allows the Thracian player to discard their Loot token to cancel the first two casualties suffered after rolling saves. The Athenian veterans rolled their 16 attack dice and I rolled my two. Amazingly, both were hits, and even more astoundingly, he failed both saves. On my end, I saved all but two of his hits. That means we tied. Since I was defender, and in solid cover, my javelin men drove off the Athenian veterans! The worm had truly turned, I felt.

    The battlefield at the end of Athenian turn 2: Thracian speed, javelin fire & defense are proving key
On my turn 3 (wow, was this really only turn 3??), I sent my only remaining full strength javelin men forward, charging one of the heavily depleted hoplite units he had consolidated onto his right. The survivors were wiped out, which sprayed fatigue around to all units within Short distance. Rusty and I surmised that this is a danger players of Greek City States armies need to watch out for and minimize. Over and over in this game, his tightly-packed units suffered fatigues when one of their number was eliminated. Towards the end of the game, this sometimes meant three units were taking additional fatigue. Encouraged by the mayhem my Thracians were creating, I sent the Rhomphaia men into to assault one of his other hoplite units. It was not nearly as devastating, but brought the five-man Greek unit down to two at the cost of one of my Rhomphaia men.

    Rusty consolidated his depleted units into his line, which left them easy targets for my fresh units
Rusty was in a pickle, he knew -- mainly because of the fatigue he had been suffering. Also, as yet, his slingers had not contributed to the battle at all. He surprised me by sending his Greek warlord charging in against my Rhomphaia men. In continuing with a theme, the battle was bloody. All four of my hearth guard were cut down. In return, he took three casualties. Rusty had planned well, though, and his own veteran hoplites were within "Bodyguards" range. He decided to kill two of them, and take one fatigue. He then pulled the general back to a safer distance (giving him a third fatigue, and exhausting him).

Rhomphaia men join in on the mayhem, whittling down more Greek spearmen & bunching them up
I knew if I could kill the remaining veteran hoplites and his general, Rusty would likely concede the game. So, the Thracian horsemen -- who proved to be a key force in this game -- charged in and trampled the remaining fatigued Greek spearmen. The full strength javelin men unit then raced forward and hurled their javelins at the warlord. It came down to Rusty's saving dice, and this time, they deserted him. The Greek Strategos was transfixed, and fell to the ground. 

    When the Athenian strategos is transfixed by javelins and killed, we called a bloody end to the game
With that, we called an end to a very bloody (and fast-moving) game. The Thracians had triumphed with their combination of speed, javelin fire, and a couple stalwart defensive abilities on their battle board. They DO take some management with the Pillage mechanic. The Thracian board gives good multiple move abilities for units without Loot markers, but the tribesmen become less willing to move once they have one. Both hearth guard and warriors activate only on Rares or Uncommons once they have Loot. The warlord's "We Obey" can be used to remove or give a maker to a unit, but that means you lose that ability to activate a unit to do something else. This is not a beginner's board, in my opinion. It has the potential to be a very fun one, though. I really enjoyed playing them, and thanks to Rusty for providing a fun, hard-fought game.

    Joe's Mutatawwi'a camel riders and foot battle against Dave E's Roman legionaries

Otherwise, it was a lighter Sunday for us, with only 8 players total showing up for Saga that day. Here were the scores in the various games:

  • Mike D's Thracians defeated Rusty P's Athenian Greek City State in Clash of Warlords, 28-16
  • Dave E's Romans defeated Joe M's Mutatawwi'a  in Clash of Warlords, 16-10
  • Andy S's Undead defeated Mike S's Native Americans in an Age of Magic Battle of Heroes, 27-17
  • Jenny T's Eastern Princes defeated Mike C's Carolingians in Clash of Warlords, 25-17


    Mike S's Native American army battles hordes of undead in an Age of Magic game

Tuesday, March 7, 2023

Picts Triumph in Cincycon 2023 Saga Tourney

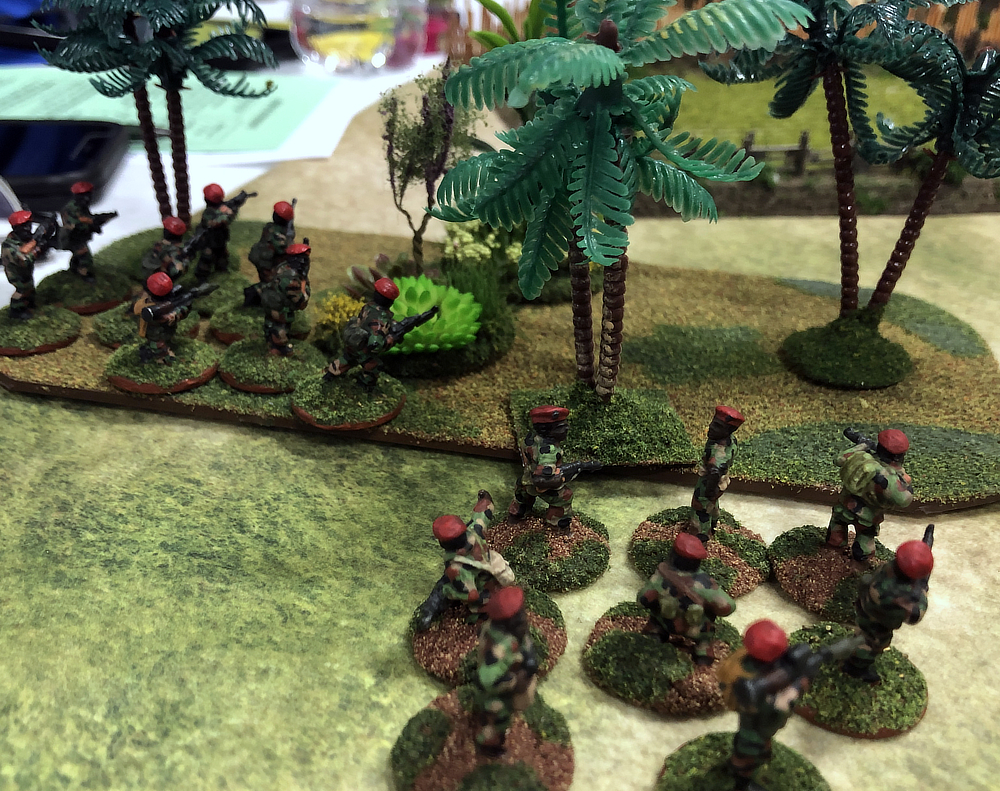
Opening stages of my Picts' Round 1 game against the Normans -- their cavalry attacking my right
After playing last month in the Ft. Wayne Saga tournament, I went back and forth a bit on which army to take to Adrian John and Jim Beegan's Cincycon 2023 tourney. On the drive back from Ft. Wayne, Jenny and I hashed out how her Eastern Princes and my Picts had performed. I floated the idea of taking a unit of mounted hearthguard with javelins to be able to shoot at armies that were keeping their distance from my Pictish levy occupying the terrain. Ostensibly, I could send them a Long distance away (12"), then they would toss their javelins a further Medium (6"). If I make sure they're close enough to terrain, they can get the bonus three dice from the "Stalking" ability on their battle board.

Jenny suggested squeezing a half army point out of my two units of Pictish levy. Instead of making them two full units of 12, instead field them at 9 figures each. Use that half point (and the new FAQ rules) to bump 1 army point of hearthguard up to a 6-man unit. My warband would be composed of those six cavalry, two levy units of 9 figs each -- one crossbow and one bows, three units of warriors, and my warlord. I honestly felt it would be a more flexible army than my previous list. Not only could those Pictish cavalry shoot, they could also charge in a pinch. The idea of using that army list convinced me to settle upon the Picts as my army for Cincycon.

    The Pictish left and center held in force, as the Normans do likewise across the table from us
The first scenario was a popular one for Saga tournaments, it seems: Desecration. Each player places three objective markers on their half of the board and is attempting to destroy the opponent's markers while defending their own. I used to like this one as a tourney scenario, but it is beginning to sour on me. Recently, I have seen very defensive armies place all their markers on one side edge and then draw a line across the table diagonally with their troops to protect them. If the opponent does the same, the game ends up being a tie (or an unexciting one). The scenario victory conditions cap your points at how many enemy markers you've destroyed. So, scores tend to be low in this one.

    One of my objective markers guarded by my center - warriors, archers, cavalry & warlord himself!
Thankfully, my opponent and I did not do that and we had a fun, much more freewheeling game. As the Picts, I placed as much terrain on the board as I could. The scenario has you place the objectives at various distances from your table edge. The furthest forward objective I hid inside an area of rocky ground occupied by my levy crossbowmen. The middle one was next to an area of ruins that my levy bowmen and a unit of warriors were holding down. And the one nearest my baseline had another unit of warriors hanging out nearby, in case my Norman opponents used their mounted troops to make a run for it.

    Dennis L's Norman mostly-mounted army deployed for our Round 1 battle, "Desecration"
 I was matched up against Dennis L from Newark, OH. They have a modest-sized group of Saga players there, although we don't get to see them that often. His army was composed of five units of mounted troops (three 4-man knights and two 8-man warriors with javelins) and one foot unit -- levy bowmen. I have played against a number of Norman armies and they often like to sit back and use their "Volley Fire" ability, which enables archers to fire at double range. They will pelt you with arrows and try to force you to come forward and attack them at a disadvantage. 

    Dennis's Breton cavalry hurl their vollies at my Pictish crossbowmen sheltering in the rocky terrain
Dennis did something a little different, though. He sent both of his mounted warriors, which represented Breton skirmishing cavalry armed with javelins, forward to hurl their spears at my crossbowmen in the rocky ground. This counts as "heavy cover," so I was expecting to be able to survive it with few casualties. My typically poor saving die rolls meant we lost two crossbowmen immediately. This took my already smaller 9-man unit down to 7 figures. I was very surprised to see that he did not pull the warriors back, and they remained in place for my return volley. My Pictish hunters fired back at the Bretons and caused a few casualties. This was only to soften them up, though. I sent a unit of warriors forward with "Scouts," then charged them in with "Swift as the Wind" (which allows a charge move with no fatigue). This is a combo I have used over and over in my games with the Picts, effectively giving infantry as 18" charge range.

The warriors wiped out the Breton skirmishing cavalry, which encouraged him to pull back his other unit of warriors on his half of the turn. Meanwhile, on my left, my two other units of warriors began edging forward across the table, their lines providing a screen for the Pictish cavalry behind them. My plan was to get the cavalry within range of his furthest forward objective marker and charge it. I could probably also get a second marker with my long range movement combos, but it would likely leave the unit on the opponent's side of the table and vulnerable to a counter-strike by his knights, which he was holding in reserve.


Screen by Pictish warriors, the mounted nobles line up for a charge against Dennis's sacred objective   

This was Dennis's first time facing the Picts, so he wasn't as aware of some of their tricks. One that I have finally begun to be able to use more lately is called "Secret Ways." When one of my units is shot at or charged, the unit (after suffering the enemy attack) can be picked up and redeployed near any uneven terrain on the board, as long as they are at least Medium away from enemy figures. Dennis planned to send one of his units of knights against my infantry that had cut down his Bretons. However, he decided to soften them up first with his archer's Volley Fire. I played Secret Ways and redeployed them in the woods on the flank of his levy archers. 

This left my crossbowmen all alone guarding my objective that was placed furthest forward. The remaining unit of Breton cavalry showed up, hurling javelins at my crossbowmen. Dennis decided to charge them into the rocky ground. He debated whether to go after my objective marker or the crossbowmen. He ended up deciding to take on the crossbowmen, who were a much lower armor class than the pagan wooden idol. The crossbowmen, sheltered by the hard cover, drove off the Bretons, and won the melee. On the next turn, the crossbowmen shot down the remaining cavalry men.


    After being shot at by the Norman archers, Pictish infantry reappears near the flank of the bowmen

Meanwhile, it took two Pictish cavalry charges against the Norman's center objective before we were finally able to destroy or "desecrate" it. I immediately pulled the cavalry back, so that they would be safe from his knight's counter-strike. The two units of infantry continued to screen the horse troopers, which was doubtless frustrating Dennis's archers and his knights. Finally, the impetuous Norman knights charged one of the warrior units, loading up the immense number of attack dice that the Normans can dish out. Five of the eight Picts were cut down. Luckily, I had Secret Ways queued up, and pulled the crippled unit back to the ruins in my center, behind the archers.

We had our own revenge on the knights on my half of the turn. The Pictish archers shot volley after volley into their ranks, turning their mounts into pin cushions and eliminating the unit. At this point, I felt my Picts had to the game firmly under control. I could potentially take out another objective, but since he hadn't taken any of mine, the maximum points he could score would be 10. I would be capped at 16, which I had already scored. That would be enough for a victory, so I played it a bit safe and let the Normans lick their wounds. The game ended with a Pictish victory, and I was off to a good start in the tournament!

Round 2: Change of Plans vs. Baltic Crusaders

 I knew I was in for a tough game when I was matched against Dan N. The winner of our Shore Wars tournament this past December, Dan is an avid Saga player who has been getting in a lot of games, lately. He was my co-host on the Saga Ohio podcast analyzing the 2023 FAQ changes, and knows the rules inside and out. In fact, I would probably say he's the top authority in our group on the rules, even though he has been playing the game less time than myself and several other players. Dan is a frequent contributor on not only the Saga Ohio (and other) Facebook groups, but also on the Discord channel. Plus, he was playing his Baltic Crusaders, which he had won with at Shore Wars.

    The Pictish battle line ready to advance and seize the terrain in the center & enemy side of the table
Our scenario was Change of Plans -- one that our tourney host Adrian enjoys. I am less enthusiastic about it in a tournament setting because you have to count victory points three separate times. The players are competing for Massacre Points through the end of turn 3, Survival Points in Round 5, and Conquest Points at the game end. Luckily, both Dan and I were playing relatively quickly and we were just able to get our game in within the allotted two hours of time. In fact, all three of my games ended on time, though none ended early. Dan was first player, which he felt was a disadvantage three times over since we'd be counting victory points at the end of the second player's turn three times. I'm not sure, though I agree that in Saga the "first player" often seems to be at a disadvantage.

    Not wanting to engage the Picts in the terrain, the Baltic Crusaders shift left to more open ground
Dan knew the Picts wanted uneven terrain, so immediately placed a large, gentle hill near the center of the board. I countered with a ruins even more dead center. Surprisingly, he then placed a swamp on his baseline in his left corner. That allowed me to place the other hard cover -- rocky ground -- on my left near the center of the board. He then chose to drag my ruins just across the center closer to HIS side of the table. I was permitted one final piece, so placed a large forest on his baseline in the right corner. I planned to use "Secret Ways" to redeploy units into that woods because the final turn victory conditions are based off of units being on the opponent's half of the table.

The Baltic Crusaders deployed a little back from their permitted 12" from their baseline. Only his crossbowmen, who were just touching the ruins I'd deployed, were the full Long distance forward in the center. The rest of his army hung back a bit. Dan had mirrored what I had done with my two units of levy. He had 9 crossbowmen in the center and 9 bowmen in the woods I'd deployed. The remainder of his army was hearthguard -- elite troops. All but five of the 18 were on foot. That, added with his defensive battle board abilities, meant my missile fire would struggle to cause casualties in his ranks. Still, I deployed forward aggressively. My three warrior units were stretched across the center, flanked on the left by my levy archers in the rocky ground. On the right, they were supported by the crossbowmen and mounted nobles in reserve.

    Baltic foot knights move back towards the ruins, hoping to take out my crossbowmen, but spearmen black their path
My plan was to advance forward and seize all three pieces of uneven terrain (woods, rocky ground ruins). The crossbowmen would follow the warriors into the ruins and begin firing into the enemy from that hardpoint. Surprisingly, his crossbowmen abandoned the ruins and pulled off to their left. In fact, his entire army seemed to be edging in that direction, except for the archers who would remain in the woods throughout the game. After my spearmen and crossbowmen had occupied the ruins, he advanced one of his 4-man foot hearthguard in a beeline towards the crossbowmen. On my half of that turn, I stretched one of the warrior units across the flank of the terrain, blocking their path to my levy. Dan wasn't dissuaded, and after softening them up with a volley from his crossbowmen, charged into the warriors, heavy weapons slashing to the left and right.

    Although the foot knights shattered the spearmen, the Pictish noble cavalry rode them down to a man and then pulled back behind a new line of spearmen
We both made mistakes in that melee. I had my Picts close ranks instead of trying to take out some of his hearthguard with their lower armor class. Dan forgot to play an ability that would remove the fatigue he would get from our combat, enabling him to charge a second time, fresh, into my levy crossbowmen. His foot knights shattered my tartan-clad spearmen, cutting down seven of eight, and sending the survivor fleeing. However, he thought better of pushing his luck, and charging in with a second fatigue against my crossbowmen in the ruins. This gave me a chance to take advantage of the foot knight's fatigued state. I ordered in my mounted nobles, playing "Ambush" to give us 4 bonus attack dice (it would be my 16 dice against his 8), each of us getting +1 to our rolls with my javelins and his heavy weapons. The foot knights were ridden down to a man, while my own troopers rolled my greatest saving roll of the day -- shrugging off ALL of their hits!

    Although used sparingly, the Pictish noble cavalry played key roles in winning my 1st and 2nd games
At that point, I honestly think Dan's morale broke. He felt that placed him on a downward slope. I was losing Warriors and he was losing Hearthguard. The game was still very close (I was up by one point at the end of turn 3). Even though my shooting was not being particularly effective, I kept picking off his own levy and targeting (unsuccessfully, for the most part) his knights. Meanwhile, Dan was rolling a LOT of rare dice, allowing him to use "Activation Pool" and getting to his maximum Saga dice turn after turn. It was an amazing display of rolling. It encouraged him to send his mounted knights on an end run. I knew he was gunning for my fatigued mounted nobles (who I had pulled back after their successful charge). However, I drew another line of infantry in front of them. He pulled out every trick in the Baltic Crusader book to remove fatigue from multiple moves, but in the end, didn't feel strong enough to charge the fresh warrior unit guarding the cavalry. Instead, he picked off the sole survivor of the shattered spear unit, causing a major "fatigue bomb" (as it is called in Saga when a unit within Short (4") of a destroyed unit receives a fatigue).

    Baltic Crusaders begin pulling back, away from the center, and moving to their left
In the meantime, my own Saga dice were failing me and I wasn't rolling Uncommon Dice, which I needed for Secret Ways. So, I began to move my force forward with activations, knowing we would have to get across the center point by our final turn. My archers loosed volleys into Dan's archers in the woods. My crossbowmen continued to shoot at targets of opportunity. I had my own failed charge late in the game when my warrior spearmen charged from the ruins to attack his depleted crossbowmen. Though rolling three times as many attack dice at an easier-to-hit target, we did little damage. I considered charging into his depleted archers in the woods with my other units of spearmen, but felt that I would be better off simply using them to screen his archers from shooting my horsemen. 

The game ended anti-climatically with both of us simply moving in a Yin-Yang towards the opponent's left side of the battlefield. Dan assured me that I was ahead, and when we counted up the points, I did come out victorious. A lot of that was due to edging him out just slightly in all three of the VP counting phases. I killed more points worth of troops, had more alive during Survival Points, and finally scored more Conquest Points with my larger units at the end of the game. It was a close game, but the Picts were now 2-0 and had a chance at another tournament victory!

    A closeup of my foe for Round 3 -- the Goths and their 12-man warrior infantry blocks
 

Round 3: The Crossing vs. the Goths

I had a couple "firsts" on tap in my final game of the tournament. I had never had the pleasure of matching up against Rob S, the son of a veteran Cincinnati area gamer I had known for decades. We had both entered in the same tournament before, but just never played. I had also never fought against my opponent's army, the Goths. Still, I felt I had a lot of advantages going into this game. Number one, our scenario was The Crossing. In this game, you are attempting to reunite your army which is split by deployment in opposite corners separated by a river. People who first play against the Picts are often astonished by the speed of this mostly foot army. I felt I would be able to use Secret Ways to move my units to my chosen side of the battlefield where we would reunite. Also, I would be able to use "Scouts," which allows a unit to move Long Distance (12") and cannot be slowed down by either terrain or an opponent utilizing their fatigue.

    A view of the right half of the board with two Gothic infantry blocks and my "moving force" opposite
Not only did I think the Picts would be able to muster together much more easily than the typical foot army, I found I had another advantage at deployment. Rob deployed his Goths into five units, while my Picts had seven units, counting each of our warlords. Each unit that ends the game within Medium (6") of their general receives 2 bonus victory points. If the unit ends on the opposite side of the river from where it started, that 2 points goes up to six. My goal would be to cross four units to join the three units. If I could do that, and keep the battle relatively even on destroyed enemy, then I should win simply by having more bonus points.

    The other half of the board, with my archers, crossbowmen and warriors. Opposite, Rob's large cataphract horse, archers & warlord.
That being said, I was wary of the reputation of the Goths.  I had heard that they are able to use their own and enemy fatigue to pile up impressive numbers of attack dice. I would have to weather Rob's blows, and dish out damage in somewhat equal numbers. Rob's army featured two large units of 12 warriors, one 8-man mounted hearthguard (cataphracts), one unit of 12 levy archers, and his mounted warlord. His infantry deployed on the bank opposite from my four unit command which would be attempting to move across the river. That wing was composed of my foot warlord (a mistake -- I should have mounted him for this game), two units of warriors, and my mounted nobles. The rest of my army was sheltering in the terrain on the opposite corner of the battlefield.

    One of my warrior units cross the river and move along behind the woods and Gothic infantry
Once we were deployed, we made what to me was the most critical roll of the game -- how difficult would it be to cross the river? If I rolled a "5" for the section next to my warlord, I would be screwed as it would be impassable. Luckily, I rolled "Dangerous," which means a unit ending their turn in its waters takes a fatigue. Rob rolled "Uneven" for the side opposite his warlord, cataphracts, and archers. The movement game was on, and my battle plan SHOULD work...! I was first player for the only time in the tournament, and limited to three Saga dice. I queued up Secret Ways and moved one of my warrior units in a screening line in front of the rest of the force. The other warrior unit moved to the river bank and the mounted nobles did likewise. The warlord moved into the woods towards the edge of the table, wondering why he'd left his horse behind in that battle!

    By the end of my turn 3, five of my seven units were assembled in the target corner of the battlefield
Rob obliged my plan and moved up his archers to shoot at the screening warriors. We used Secret Ways, and after taking two casualties (other than the roll last game with my cavalry, my saves were my usual terrible all tournament). The slightly depleted Pictish spearmen redeployed into the opposite corner, safe and sound in the ruins. They were effectively done for the game. On my next turn, I used a Rare dice on Scouts, which allowed both the cavalry and the other unit of warriors to cross the river. I had a line of activation dice ready to race the nobles all the way into their destination corner. Two of four units in position, two to go!

    The Gothic cataphracts begin to cross the bridge as our archer's arrows bounce off ineffectively
At this point, Rob may have surmised my plan, or simply wanted to do some fighting. Both his warrior units forged their way through the frozen woods towards my warriors who had crossed the river. They couldn't reach them this turn, but would easily next turn. On my half of the turn, I queued up Secret Ways again. When the Gothic foot warriors charged into my spearmen, they closed ranks to minimize casualties and were pushed back to the board edge. They were then picked up and redeployed to the destination corner. Three units in place! The only unit remaining was the most important of all -- the warlord. The way the scoring is set up in this game, if you lose your warlord, you effectively lose this game. You will receive zero bonus points because no one is within Medium of him.
    The first Gothic attempt to batter through to my warlord protected by a line of Pictish spearmen

It then became a cat and mouse game of me trying to move my warlord via Scouts and other moves to the corner where the rest of the army was waiting for him. Rob's cataphract cavalry came thundering across the bridge to try to ride him down. First, a unit of spearmen formed a battle line in front of their warlord. The Gothic heavy cavalry charged in, but I had many of the Picts' defensive abilities ready for the melee, and we lost only one figure. On our turn, we continued to fire at the cataphracts with our archers. At one point, Rob had shrugged off nearly a dozen hits (50% chance of saving a missile hit) in a row! Although his attack rolls were abysmal with the cataphracts, his saving dice were odds-defying. 

    The Pictish army is assembled, but the warlord is still in danger - not all the way inside the fields

Meanwhile, the warlord shunted along the back edge of the battleline towards the corner. Now, it was the turn of the archers to draw a line in front of the warlord. It was Turn 5, and Rob felt this was his last chance to catch my general, who was only partially within the frozen fields. Rob's cataphracts slammed home and drove back my archer unit. Rob then declared a follow up charge on the warlord, whose base edge projected out of the fields. I felt horrible to do it to him, but I used his cataphract's fatigue from the melee to shorten his move. He came up about a half inch short or the warlord's base, so his activation cancelled. He had no further dice to activate them, plus his warlord (being a cataphract) was too far away to dash forward and give them a "We Obey" command.

    Attempt #2, this time the Gothic cavalry thunders down upon my levy archers

On my Turn 6, the crossbowmen eyed the cataphracts, overjoyed to finally have an enemy within range for the first time in the game. The bolts flew, struck home, and broke the veneer of invincibility the cavalrymen had enjoyed all game. Four troopers tumbled from their saddles. Meanwhile, the warlord moved to the back edge of the fields, while the rest of the army collected around him. On Rob's half of the turn, he decided the best course was to start collecting his own army together. All of his units were able to successfully gather round their commander, and it was time to count up victory points. 

    Rob's Gothic cataphracts were near invincible in this battle, shrugging off hit after hit
As I had projected, my higher number of units offset his slight edge in kills. The Picts had emerged triumphant in all three battles. As it turned out, I was the only player in the field of 10 that went 3-0. So, for the second time in a year and a half, the Picts won a tournament for me. I really like the flexibility and speed of this Saga army. Their battle board gives them the ability to compete in many different kinds of scenarios. I think they are indeed more potent with the addition of a 6-man mounted hearthguard unit. Although they did nothing in game three except run for the opposite edge, they were a big part of my victories in round one and two. Thanks to Adrian and Jim for running the tournament, and to all of the players who came to Cincycon to play. My opponents were all gracious and tough adversaries, which makes the victory that much more satisfying.