 |
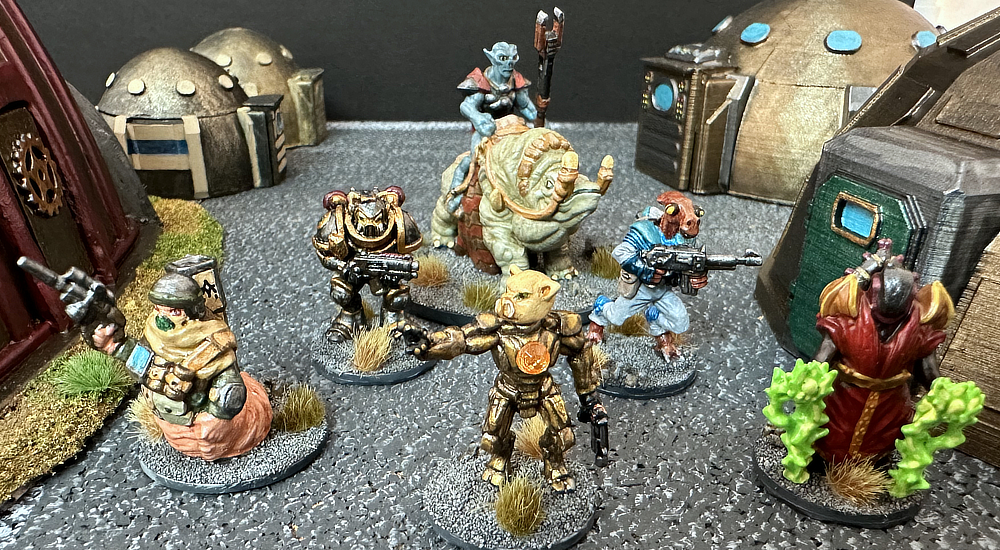
| 4 of the Warlord Games 'ABC Robot Warriors' that I painted up as alien monsters for Majestic 13 |
Earlier this year, I made a list of things in my unpainted lead pile that I'd like to get finished. One of those was a collection of three boxes I won at the
Advance the Colors raffle (I believe) back in 2024. They're called ABC Robot Warriors and made by Warlord Games, and I thought perhaps some of them might make good alien enemies for Critter Control in my
Majestic 13 games. When I opened the box, I was immediately disappointed. They are made of soft plastic and some come in a number of parts that need to be assembled. As I mentioned on an previous post, their soft plastic bodies, arms, etc., was difficult to glue together. Neither superglue nor modeling glue nor epoxy really held the pieces together well.
I persevered, though, and eventually got them assembled. My favorite was the one that was hardest to put together, a bizarre robotic creature with a metallic sphere for a lower body and four sets of limbs or arms protruding from his shoulder area. He wears a long, flowing cloak which is actually the base. On the box, he was named "Raz-Putin." How they ever expected the bottom of the cloak to stand up on its own, I don't know. Still, I eventually epoxied all of them onto their bases. A different one that I liked had a weird lean to it which was most likely from either poor design or production. Like Mr. Four-armed Globe-body (Raz-Putin), he was armed with two swords. These swords were obviously designed to look like they were on fire. He was called Genghiz on his box. The remaining two were flying robot alien thingies each holding a Sci-Fi-looking gun. They were named Volgan Yaks. The last one, well, we won't talk about him. I eventually decided not to paint him because it was one of the most stupid designs I'd ever seen (even though he was the sole one that I didn't have to glue together). The best I can describe him is as a tall, humanoid robot wearing a Fascist-style military dress uniform with huge epaulettes and a peaked dress uniform cap. Hunh? What's the point of THAT?? If you're intrigued, Warlord Games called him General Blackblood.
 |
| For being a pain to assemble and paint, some of these were actually very cool looking miniatures! |
I decided to start working on those remaining four ABC Robot Warriors while finishing up my
first batch of Elven spear (actually, there are two more robot warriors that I didn't take out of the pack because they looked too like Battletech Mechs -- which I have no interest in). Because they were very complicated figures, I further chose to do them one by one, rather than all together. I base coated all four in Iron Win Metals Steel -- a very dark metallic that I like to use (which I restocked up on at
Cincycon 2026). First to be painted was Mr. Four-armed Globe-body. I decided the metallic sphere that was his lower body would be done in a green metallic paint I think looks particularly "Sci-Fi-y." I picked out various plates in that color, leaving recesses in Steel. I then did some accents in one of my bright bronze metallic craft paints. I then extended this scheme to his four arms, his torso, and head. I had to admit that it really is a cool looking figure. His giant cloak thingy I painted in a newly-purchased dark bluish green (because I needed more varieties of dark green for my elves!). I dry brushed the cloak, painted up the two swords, did his eyes in metallic red, and was very happy with my first completed ABC Robot Warrior!
 |
| I thought the yellowish armor & flaming sword effect came out fairly well on Mr. Leaning Robot |
Next up, was the good old Leaning Robot with the flaming swords. Hmm...what metallic color to do HIS robotic body in? I hadn't used my color shift paints in awhile, so grabbed the one that is called Black Flash or something like that. It is a very dark yellowish metallic that doesn't shift color noticeably. Once again, I left some portions in the dark Steel color -- mainly the recesses. The plates you could see more clearly (and paint more easily) were done in the Black Flash. I liked how he was was looking, so far. He also had a number of horns projecting from his robot helmet head, because, you know, all designers of mechanical soldiers know the value of horns, right? I did these in a bright gold and bronze metallic combo. His eyes were small and round and reminded me of C3PO from Star Wars. So...why not? I gave him C3PO eyes. I felt a dark red cloak (because robots always wear cloaks!) would set off the yellowish metallic even more. I did it in Blood Red as a base, highlighted with a craft paint red. I went back and forth about how to do the two flaming swords (because he has two arms, why not two swords? All robots...uhm, never mind -- you get the drift!). I ended choosing a copper/bronze color for the blade and for the flames, I chose a fluorescent orange accented with yellow on the uppermost portion of the flames. I was surprised how nice the flame effect looked. Wow, after all my complaining, I was really very happy with my second ABC Robot Warrior!
 |
| I probably should have chosen a less busy background for these smaller flying robots |
I did a "redo" on the final two -- the smallest flying robots, or Volgan Yaks. I began painting one of them with my Violet-Blue-Red color shift craft paint. It was looking okay, but as I kept zooming in on it under my lighted magnifying glass, I kept thinking how it looked like a flying version of a xenomorph from the Alien movies. Then I remembered how easily I painted up my
3-D printed Alien xenomorphs. To this day, they are still the easiest models I've painted up. The color shift paint was going on okay, but it was
very fiddly work. In the end, I wanted easy. So, I set the half-completed color shift alien aside and picked up the second one. I dry brushed him in silver, like I had done with the Aliens, then began picking out wires, knobs, panels, and bits of his body in Copper metallic. I gave him red eyes and a metallic dark red trim on his weird Victorian Sci-Fi looking jet pack wings. Heyy, he actually turned out pretty good, too!
 |
| Another look at the 4 minis that I probably complained more about than I should have in this post! |
Once finished, I picked up the half-painted, color shift alien. Sorry, buddy! Your sparkles have to go!! I re-base coated him with Iron Wind Steel again. The next day, after it had dried, I essentially copied what I did with his flying companion, using a different metallic and a different trim color. I had been complaining to Jenny about how much I hated painting this batch of figures, but when I was mostly done with them I actually took them upstairs to show her that they didn't turn out half bad. So, after multiple struggles early on, I actually feel fairly successful with this group of Sci-Fi monsters. To be sure, they were NOT as simple as A-B-C! They were more of a P.I.T.A., if you know what I mean!
 |
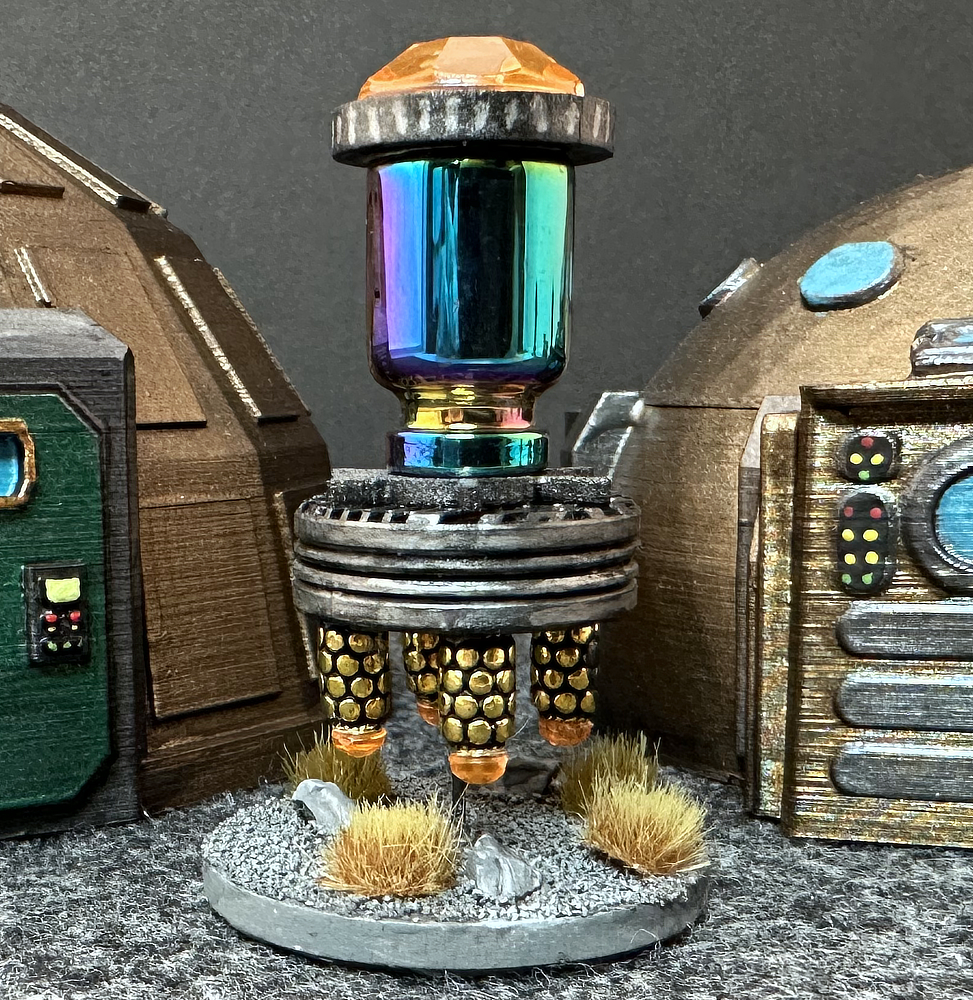
| A Crystal Spider that is 3-D printed with colored filament from A Critical Hit - no work required! |
I based them up as I did with many of my Sci-Fi models, with a dark, rocky look. I honestly don't know when -- or even if -- I will use them in a game. The most likely time would be if an alien's description in
Majestic 13 evokes "Mr. Four-armed Globe Body" or "Leaning Flaming Sword Guy." The two little flyers could be a Sci-Fi aerial drone in any game, possibly. But hey! These four completed figures will be sitting there waiting in the box for that moment. Unlike "Mr. Fascist Robot Jack Boots," who will be permanently ensconced in my unpainted drawer...haha! Speaking of the drawer, I rescued one of my purchases from A Critical Hit from there because it required no painting, as far as I could tell. It is printed in several colors of 3-D printer filament and looks fine all on its own, I think. I'm calling it a Crystal Spider and may also make a good monster for Majestic 13.
 |
| Another look at the spider -- the attachment of his legs to his body is flexible, so they actually move |
What else is on my painting desk? I have begun work on the next batch of elves, of course. More archers this time. For terrain, I've started working on one of the medieval buildings I got from
RRB Minis & More at Cincycon -- the Catrine House. So, stay tuned for that. I promise no robotic rants about them...
MINIATURES Acquired vs. Painted Tally for 2026
- Miniatures acquired in 2026: 159
- Miniatures painted in 2026: 65
TERRAIN Acquired vs. Painted Tally for 2026
- Terrain acquired in 2026: 3
- Terrain painted in 2026: 21
SCATTER Acquired vs. Painted Tally for 2026
- Scatter acquired in 2026: 16
- Scatter painted in 2026: 48


:strip_icc()/pic4307898.jpg)


