Monday, September 5, 2022

Mongol Horde's Victory Appeases the Gods

Mongol warlord Budokhan surveys the battle as his men compete to bring him the skulls of his enemies
The Mongol khan stroked his mustache as he watched the Polish raiding force hurriedly organize themselves into a battle line. His Ordu had caught them by surprise as they were attempting to desecrate his Jurkin tribe's holy site. Doubtless, this was in response to the Mongol's own raid last month. He barked out deployment orders for his Mongols and immediately the air began to reverberate with the sound of kettle drums. His standard bearer lifted the great horse tail banner and swung it back and forth to indicate which formation Budokan's Ordu should take. Rapidly, the well-drilled Mongol warriors formed into a great line, overlapping the Polish raider's compact mass.

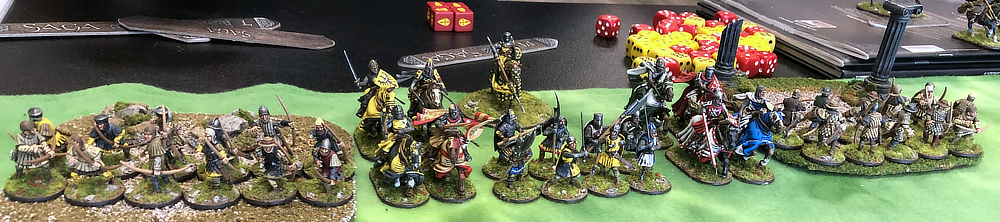
    My Mongol army's first game would be against Dan N's Polish army, also from the Age of Crusades
So, here it was. My Mongol warband's first game of Saga. I had spent many months painting them, detailing their pastel robes with various patterns. I had individualized the horses, switched out weapons, and mixed the different poses of 28mm Curteys Miniatures. I had been very happy with how the army had turned out. How would they perform on the battlefield, though? I had chosen the Mongols because I thought it would be a challenge to play a horse archer army on a usually terrain-cramped 3'x4' Saga battlefield. Would this be the start of a long, learning curve? Or would my previous game commanding the Mongols in a remote, game played via Skype (which had ended in a win) be a harbinger of victories to come?

    Dan's Poles deploy in a compact mass, ready for the trickery of the wily Mongol horse archers
My Mongols' opponent was a historical one, Dan N's Polish army. Dan had played them several times at our monthly Saga game days at the Guardtower East. He is a gracious opponent, enjoyable to play against, and accepts the vagaries of a game often decided by dice with equanimity. I was looking forward to getting in a game against his Poles because they are one of the more rare armies that are fielded from Age of Crusades. I believe Andy S has used his medieval figures to field Poles once or twice, but otherwise, Dan is the only Saga Ohio member to field an army of them. He's painted them historically, researching the heraldry of Eastern European nobility and they look resplendent on the tabletop.

    'Wrath of the Gods' features three objective markers representing pagan idols
Dan wanted a chance to practice the Wrath of the Gods scenario which we will be using in the upcoming Advance the Colors Saga Tournament, Oct. 8, at the Clark County Fairgrounds, Springfield, OH. I am very excited about what appears will be an incredible turnout. Nearly 30 players have committed to play, with several "maybes," as well. Dan will be one of the participants, and he was eager to practice this scenario, which was developed by Joe M from the Northern Tempest Saga Podcast. Opponents seek to control three objective markers roughly in the center of the table. For each pagan idol a player controls at the start of their turn, they can force their opponent to remove one of their figures. Scoring is done with standard Massacre Points, so the goal is still to defeat the enemy army. No points are awarded for controlling the idols (other than what you receive from the figures you've forced your enemy to remove).

    Action opens on the Polish left - Mongol horse archers fire volleys of arrows, slaying many sergeants
Dan was first player, so chose a Ruins to deploy in his left center, while I responded with a large, gentle hill in the center of the board. He then selected rocky ground for his right center. I chose to "pass" on a third piece of terrain, and instead pushed his ruins back against the base line. Dan placed the final fourth piece as a marsh on my half of the table, near my center. Predictably, the Polish army deployed both of their units of levy archers in the solid cover, one unit in the ruins and the other in the rocky ground. Surprisingly, he had a unit of mounted sergeants (warriors) far to the left, poised to take control of the leftmost pagan idol. His two small units of mounted knights sheltered between the terrain behind the line of warriors armed with heavy weapons.

    End of my turn 1, with most of my horse archers withdrawing to about the middle of the battlefield
I deployed my entire army along the back edge of the battlefield, knowing we had the mobility to gallop forward and skirmish with the enemy from great distances. Dan's Saga dice were not kind to him, and he did not receive either enough Rare or Uncommon dice to set up his most dangerous counter-strike, "Terror of the East" (which requires two Uncommon dice). This allows him to interrupt one of my moves with a mounted charge. Still, his mounted sergeants trotted far enough forward to take control of the pagan idol on his left. Those brave riders would be my Ordu's first target. With a pounding of kettle drums, the Mongol army galloped forward. One unit of horse archers seized the pagan idol on my left. Another moved towards the central one, and finally, two converged on the Polish mounted sergeants. We fired several volleys with our composite bows. I was rolling very good with my hits, but Dan was rolling well with his saving rolls, too. Finally, once the sergeants had been whittled down from 8 to 3 figures left, the two units Mongol horse archers withdrew and raced back to our lines.

    Polish bravery is legendary, and his mounted sergeants charge into my battlelines to prove it
I did screw up on my first turn, though. I was supposed to move forward my heavy cavalry hearthguard far enough so that my unit using the "Bow and the Lance" ability would end up next to them. I hadn't, so instead of just two fatigue markers, they came back Exhausted. Dan immediately took advantage of that and charged his depleted unit of sergeants forward to take out that unit. He caused 6 of 7 casualties, while my Mongols killed one of his remaining three. On our next turn, we would shoot the remaining two sergeants from their saddles, but Dan's counter-strike had caused me to also lose one of my Saga dice. As proof that my die rolling was exceptional today, Dan's foot archers launched a potentially devastating volley of 10 attack dice, causing 9 hits. I had played "Evasive Maneuvers," which allows me to re-roll any missed saves. I didn't have to re-roll any dice. All nine dice rolled 4+, saving against what should have been a withering volley.

    Horse archers fire volleys at the Polish levy archers, hoping to provoke the Polish knights to charge
My next target was his archers that had rolled so well. Our fire was not nearly as effective, but we began a steady process of whittling them down. I left one unit of horse archers out near the central objective marker, hoping to lure his knights out to charge them. His army doesn't have a lot of movement ability that would allow them to retire back to their lines after a charge. On turn 3, Dan finally rolled enough Uncommon dice to leave his "Terror of the East" ability queued up. This meant I had to be very careful. I brought my large, 11-man unit of horse archers up to fire at his levy again, hoping that would do it. He didn't take the bait. It was only when I declared a charge with my heavy cavalry that he launched his own countercharge against my smaller, "bait unit" of horse archers.

   The Polish foot sergeants advance, while the knights ensure they can counter-charge through the gap
Dan admitted he made a mistake when he placed the figures into contact with the doomed horse archers. The Polish army has the ability to launch deadly mounted charges, and he slaughtered the remaining figures easily. However, the slain horse archers were not close enough to my heavy cavalry to inflict a fatigue on them. This meant my charge against his foot sergeants could hit home. The Mongol mounted hearth guard have the ability to charge into melee with deadly effect. So, I figured it was time to use that weapon in my arsenal. 

Mongol heavy cavalry rest after their charge, slaughtering 6 foot sergeants at the cost of one horseman
We rode down all but two of the eight figures, and then, of course, withdrew backwards using "Hell for Leather." The big 11-man unit of horse archers then stretched itself between the knights and the rest of the army, and poured shots into the Polish nobility. As usual for this game, we rolled an above average number of hits. This time, though, Dan failed miserably on the saving rolls and all but one of the knights toppled from their saddles with a crash. To me, this was the moment when the Mongols won the game. He had simply lost too many figures, at this point.

Polish knights thunder forward, slaughtering horse archers, but not stopping my heavy cavalry charge

I think the part of commanding a Mongol army that requires the most skill is how to manage the movement of your forces so that the bulk of them are able to withdraw out of range of enemy counter-strikes. As I began to lose my smaller 7-man units of horse archers, the big "hammer" unit of 11 had to take over the role of screen. The good thing is it is large enough to stretch across my front and cover the heavy cavalry and both the warlord and kettle drummer. Plus, charging an 11-man warrior unit can be daunting for enemies -- especially if I leave "Master of Men" queued up on my board. This ability gives 4 bonus dice (either attack, defense, or a mix) if the unit is within Medium of the warlord or kettle drummer. The one remaining knight simply didn't have the gumption to do it. Dan pulled him back and then brought out the other levy unit to help screen his dwindling forces.

    My large horse archer unit screens the rest of the army, while pouring withering fire into the knights
By this point, I think Dan was feeling a little of the frustration of facing such an elusive foe. Doubtless, he was probably also frustrated by my consistently above average dice rolling. I was rolling well not only on shooting, but also in melee and on saving rolls! To add insult to injury, on the turn after he removed my third Saga dice due to losses of horse archers, I managed to go on a ridiculous run of Rare rolls which allowed me to use Activation Pool to stack my board with all 8 of my Saga command and control dice! Dan accepted it all with grace and shrugged off my apologies as unnecessary -- saying he was making good rolls, too.

    The Polish warlord rides to his doom, hurling himself upon the swarming Mongol horse archers

I think this was what lead him to strike his final blow of the game, though. He brought out his warlord and queued up his board with all of his deadly melee abilities. The warlord charged gloriously into the horse archer screen. Proving that he was having good rolls, too, the warlord cut down 9 of the remaining 10 Mongol horse archer! However, he ended up Exhausted, and stuck within range of my own warlord and heavy cavalry unit. It was only a decision in how to eliminate him. Loss of his warlord would seal the game, but if he took down an equal number of points, the score would still be fairly close. So, I used "Predators," which gives composite bow to my heavy cavalry. They galloped up, fired a volley, and the heroic Polish general fell to the ground. Meanwhile, another unit galloped over to his remaining two foot sergeants and slew them with archery, as well.

    The battlefield at game's end - the Poles with 2 units left, while the Mongols are also depleted

It was a good, hard-fought game. I felt like I was in control for most of it. I felt fortunate that I had to worry about his "Terror of the East" Activation/Reaction ability only once. If he'd rolled his Saga dice well enough all game long to have it queued up nearly every turn, I think the game might have turned out differently. Still, a charge during my turn by his mounted troops would likely end up with that unit also being either destroyed or badly damaged by my other units pouncing on the charger. 

    At left, Mike C maneuvers troops against Jim B in a Jomsviking civil war, while Dan N deploys
I felt that I did an okay job managing my moving forward and back with the Mongols. I took the suggestion of veteran Chicago Saga player Terry D how to organize my 4 points of mounted warriors. I used three units of 7 figures and one of 11. Typically, I would send forward two units against my selected enemy target. One of the smaller units would go up first and fire at the enemy. Then, the larger unit would go up and shoot, as well. That was typically when I would play "Short Range Volley," which forces the target to re-roll all successful saving throws against that shot. As amazing as it may seem, it is the ONLY shooting ability on the horse-archer heavy Mongol battle board.

   Jenny coaches two tables of relatively new players, from left Todd S, John B, and Randy W

We had a great turnout for the first week of September, too. Our game was only one of six. We had a dozen players show up, three of them relatively new. Thanks to Jenny T for shouldering the teaching duties this week. My Mongol army would NOT have been a good army to learn Saga playing against! Here are the results for the six games played:

  • Jim B's Jomsvikings tied Mike C's Jomsvikings, 29-28, in Wrath of the Gods
  • Mike D's Mongols defeated Dan N's Poles, 26-15, in Wrath of the Gods
  • Joe M's Gauls defeated Dave E's Romans, 22-16, in Wrath of the Gods
  • Adrian J's Anglo-Saxons defeated Karen C's Vikings, 24-25, in Wrath of the Gods
  • Randy W's Vikings defeated Jenny T's Eastern Princes, 25-14, in Clash of Warlords
  • Todd S's Anglo-Danes tied John B's Vikings in Clash of Warlords

    At left, Joe M and Dave E square off, while Adrian J prepares his assault against Karen C's Vikings
I highly encourage interested Saga players to show up for our tournament at Advance the Colors. A number of sponsors have promised prize support, including Gripping Beast, Badger Games, Game Table Adventures, and Jarl's Workshop. Saga Ohio will also be providing SIX painted warlord stands as prizes, too, with warlord, standard bearer, and musician or pet dog. If you are interested in attending, please contact me ahead of time so that I can have the appropriate number of tables set up. Hope to see you there...!

Monday, August 29, 2022

Road trip and gaming weekend in Michigan

Saturday afternoon at Jim's Clubhouse - hypothetical defense of a station in the Anglo-Zulu War
If you had the budget, what's your dream for the ultimate gaming clubhouse? How about your own building for you to keep all of your miniatures, terrain, unpainted stuff, rule books, etc.? Make it within walking distance of a pub, couple restaurants, and in a quaint, downtown area. Sound perfect? Well, that's what my friend Jim W has done!

    Jim's painting desk with his comfy, leather lawyer's chair and rack of paints at his fingertips
Jim's gaming clubhouse came about when the local law firm in the village (population approximately 3,000) had its last attorney retire. They were looking to sell their one-story law offices downtown and gave Jim (an old acquaintance) a sweetheart deal. Jim even got to keep all the furniture! So, Jim moved in and kept as much of cabinets, shelves, tables, and of course padded leather chairs as he could. He uses the attorney's comfy office chair for painting. The filing system for blueprints, large deeds, etc., now houses miniatures. The taller shelves hold 28mm figures, medium height ones 20mm, and shortest ones 15mm scale miniatures. Of course, Jim -- who admits to being a bit OCD -- labels each shelf with the appropriate label. Terrain and buildings line the shelves on the walls, with everything close at hand and not packed away in some crate or box.

    The Game Room - note the shelves all around with terrain, buildings, and necessities close at hand
Jim described the clubhouse to us at Drums at the Rapids and we all agreed that we should pick a summer weekend and have a bunch of us drive up north to visit. We agreed to stay for the weekend and game Friday night and Saturday afternoon. Life got in the way for just about everyone else, though, and I ended up being the only out-of-towner joining Jim and his regular gaming partners Ted and Gene for the games. I'd rented a room at the local B&B, and in a great case of serendipity, the weekend we chose also ended up being the village's Beerfest! So, after the Saturday game, Jim and I met his wife and her friends at the beerfest for brews, food, and I am not kidding -- a Kiss cover band!

    The law office left Jim these various-sized drawers pull out and hold Jim's miniatures collection
Most of my friends know that I have a plug-in Electric Vehicle, so this ended up being my longest road trip with it. I searched on the Plugshare app and found a high-speed charger at a dealership in Sylvania, OH -- 20 minutes from Jim's village. I drove north, found the high speed charger and plugged in, and then retired for a leisurely lunch. My 2017 Chevy Bolt's range got a boost last year when the manufacturer rolled out a recall and installed a brand new battery. My range went from 250 miles to close to 300. Of the 20 "battery bars" which designate remaining charge, I had used 12 of them on the drive up. I charged it back up to just over 90% to be on the safe side, and continued on to the B&B.

    Jim is VERY organized...so all the drawers are labeled with period and scale!
I met Jim and Ted at the clubhouse and he gave me the grand tour. Honestly, I don't think any miniature gamer would be disappointed with Jim's setup. I know I'd be more than happy with something like that. After the tour, we sat down and Jim ran the three of us through his "Prisoner Exchange Gone Wrong" scenario. I controlled the gang from out of town, appropriately enough. Jim played the locals, while Ted (ex-Corrections Officer) was the cops. We were using Fistful of Lead Core Rules, which is the same set I am using for my Post-Apocalyptic games. One innovation Jim had done with the rules was to take his deck of cards he was using for it and write on the "special" cards what they do. For example, 2's allow a player to roll two dice and take the higher roll for any rolls they are called upon to do that turn. He wrote it in ink and this proved to be a good reminder and one less thing you need to check the Quick Reference Sheet for!

    Jim has plenty of shelf space for all the miniatures rules he likes to buy
The game was a blast, as I imagined it might be. Jim sprang an ambush on my out-of-towners, but we quickly shot back. In a space of one turn, my group gunned down three of his characters and wounded another. After that, Ted, who had been trying to treat both gangs equally, decided his local cops would favor the local bad guys in their shootout with the strangers. Things started to go bad for my guys after that, and my rolls cooled off a bit, too. We did free our prisoner and he, my leader, and another gang member ran back to the car, jumped in, and drove off. This was about the same time as Ted's "back up" was arriving. He rolled randomly for the two police cars and BOTH came in on the road my guys were trying to escape on. One in four chance...really??


    The room for storing unpainted lead, terrain, and buildings is slightly less neat...!
Still, he had to make a roll to put two and two together and realize the car driving off was involved in the shootout and not locals fleeing for safety. He failed both those and my gang was able to rescue its prisoner, thus "winning." As it turned out, all three of us completed the victory conditions Jim had set. So, we all won...ha, ha! We didn't all get a trophy, though. I lost one more gang member than Jim. Considering he was set up in ambush position, and Ted concentrated at least 2/3's of his attacks on me, I considered it a victory!

    Jim shuffles the deck in preparation for another turn in his "Prisoner Swap Gone Bad" game
We sat around and shot the breeze for awhile, before I retired for the night to my B&B. Breakfast there the next morning was fantastic, and the owner of H.D. Ellis Inn entertained the guests with stories from the past of not only the house, but the village's founding, too. It was very interesting to learn about Blisffield's history and anecdotes about the early residents. At the agreed upon time, I headed back to Jim's clubhouse. Though it was within walking distance, I drove since Jim had parking right out front of his clubhouse. Plus, it was supposed to rain today, and I didn't fancy getting soaked walking back.

    Jim's thugs and my out-of-town gangsters meet at the fountain to swap some prisoners
We chatted for awhile while Ted was setting up Saturday's game - a hypothetical clash between Colonial British and Zulus using Fistful of Lead: Bigger Battles. I had downloaded the rules earlier, but had yet to play them (or even read them, I confess). I was really curious how a skirmish set scaled up to bigger battles since that is something First Command Wargames is working on doing with our French & Indian War rules, Song of Drums and Tomahawks. In the end, I really liked the way the same basic mechanics translated to a game which saw us controlling almost 10 times the number of troops. In particular, I liked how the "Shock" mechanic functioned as a morale effect. Units need to rally when under the stress of combat or they become ineffective. 

    Ted's police cars drove right by my escaping out of towners in the yellow sedan

Ted's scenario was very much in the vein of Rorke's Drift. Jim and I were defending a station against overwhelming numbers of Zulus. Ted had set the game up with essentially two phases - an initial attack and a follow up. For awhile, I didn't think we were going to repulse the initial attack. However, we did. Ted also let our Surgeon make rolls to bring some walking wounded back into the fight. The Zulus then received all of their reinforcements that had not shown up and rolled for their initial entry points. The results looked grim, with a massive force coming at us from one direction. This meant, they would be able to screen each other. By the time we had caused enough casualties on the front unit, the ones in back would be essentially able to charge us. 

    British force prepares to defend the station against the oncoming Zulu first wave
I honestly thought there was no way we would survive the onslaught. We even received two small troops of cavalry as reinforcements, but there was little they could do with only melee weapons vs. massive impis of Zulus. Somehow, we ended still being alive when the final turn was reached. Ted ruled that was when the relief column trundled onto the table and the remaining Zulus scattered. Our surviving Brits were less than a skeleton of the our initial ranks. Still, we somehow "won" the game. That meant two hard-fought battles where I lost more than half of my troops. 

    Supporting fire from the Gatling gun and rooftop riflemen were crucial to turning back the first wave
I had a fun time in both games, though. It was fun to get a chance to game with Jim, Ted, and Gene in a friendly "gaming night" setting instead of at a convention. We took a break for lunch, talked politics, the war in Ukraine, future painting projects, and more. Ted and Gene took off not too long after we'd finished. Jim and I closed up his place and headed out into the first sprinkles of rain to check out the brewfest. Unfortunately, the rain kept up all night long, which somewhat detracted from the experiences. However, we had a good time enjoying some beers, talking with his wife and her friend, and even watching the Kiss cover band for awhile.

    After lunch, the 2nd Zulu wave arrived and things began to look grim for the defenders
It was a great, relaxed gaming road trip, and I had a blast. I ducked out early the next morning from the B&B so I could get home before noon. I had a lot to do as school was starting that very next day. So, I guess that meant I was productive with my summer, squeezing out one last trip on the very weekend before school restarted! It was great to see Jim's clubhouse, and I definitely envy him his setup. I think every gamer upon seeing it would be equally jealous!

    This was all Jim and I had left of our original force at the bitter end of the game!

Saturday, August 13, 2022

More Altars for Saga Objectives

    More altars and idols for Saga objective markers (and maybe also Pulp temple scenery?)
This last week before school starts up has seen a flurry of projects finish on my painting desk. Here is a second batch of altars and idols for objective markers for Saga. I think I needed only 10 more, but once I got started creating them, I kept finding more things in my unpainted boxes and drawers that would work. Some of these items have probably been in a box for more than a decade, just waiting for that right project to be used with. And once again, the plaster bricks that Tim and Zeke had given me years ago were crucial to being able to create these.

For example, in the first photo, that bull's head was lead and I don't even remember where it came from. I would not be surprised if it has been lurking in my unpainted lead drawer for 20 years! However, it makes a perfect pagan idol when set atop some Hirst Arts fieldstone "bricks." The two matching temple dogs are brass pieces that I picked up in one of my trips to Southeast Asia. They're very detailed - note the Buddha on the back of the dogs - look like statues you might see in a medieval Hindu temple. The stone column base is Hirst Arts fieldstone again, along with two plaster bricks picked up from a bag of scenery items at a gaming store.

    More brass pieces that I picked up in my travels plopped atop stone altars

And as long as I am showing off what I'd picked up in Southeast Asia, I may as well talk about these three next. Once again, they were bought while visiting a temple somewhere in my travels - Myanmar? Thailand? Vietnam? Not sure. The middle one is the monkey god Hanuman. You see statues and paintings of him in many temples. On the right is a brass figurine of Ganesh, the elepant-headed god beloved by Hindus. Both he and Hanuman sit atop Hirst Arts brick columns like the temple dogs. The other Ganesh to the left sits atop a plastic piece from the Pegasus Hobbies Gothic Cathedral box. I did not use any of the interior pieces when I built St. Jennifer's with the kit. I saved the pieces, knowing they'd come in handy one day. I believe it is a baptismal font, but the circular base of the Ganesh fit so perfectly into the font basin that I made it into a pedestal for the statue.

    Two altars from the Pegasus Hobbies Gothic Cathedral & Reaper Bones Cthulhu column

The two altars on either side of the column also were interior pieces intended for the cathedral. I added a Hirst Arts stone pedestal and a fancy bead to the back so it wasn't so plain. Since I was basing them up on 1.5" wooden circles, I didn't want a large blank area on the back. The pieces will be towards the center of the table in the Wrath of the gods scenario, so will be seen all around. The column is a Reaper Bones Cthulhu eldritch, carved column. The base it came with was the perfect size, too. So, the only thing I had to do with it was the same thing I did with all of them. Spray paint with acrylic black paint. Seal it with a 50/50 mix of black paint and water. Then dry brush it to shades of gray.

    The final three altars or idols were Reaper Bones models and an unused 28mm Greek hoplite

The two end altars or idols here are also straight out of the box. They are from the Reaper Bones "Harrowgate" pack, and are actually the second pack of these that I painted up. The one in the center is a 28mm Greek Hoplite as a statue, placed atop more Hirst Arts stones. I realized after I had taken the picture that I had made him into a "lefty." I put the shield on the wrong arm! Not sure why, but it looks fine as a Greek statue, I think.

So, with this batch, I am done with the objective markers. Time to move on to the next project! Stay tuned for what that will be...!

Thursday, August 11, 2022

Mongol Horde Ready to Ravage the Saga Scene!

    More than 40 horsemen comprise my Saga army from 28mm Curteys Miniatures
My Mongol horde for Saga is done! I say "horde" because it felt like I was painting up a horde of figures. Lots of people joke about hating to paint cavalry, but there is no denying it takes longer to paint up a mounted 28mm miniature than it does for most foot figures. Looking back at my blog posts on this army, it not only felt like it was taking a long time, it DID! I began painting this army more than a year ago. The first blog entry for the Mongols I found was dated July 28, 2021. Wow!

    My Mongol warlord, Kettle Drummer, and half of the light cavalry horse archers
Now, I admit I worked on other things in the meantime, from terrain for the Advance the Colors Saga tournament (last year and this year's), to post-Apocalyptic figures, to demons for Reign in Hell rules. So, it was not literally 13 months of uninterrupted painting of this army. In fact, with my busy teaching schedule, there were long stretches of time when I did no painting whatsoever. On the other hand, I am not really done painting all the figures I want for this army. I plan to paint up one more batch of mounted, armored cavalry to give me some choice and variety in army composition. So, technically, I'm not really done...

Six armored cavalry and the rest of the light cavalry of my Mongol Ordu (where we get 'horde' from)
Nevertheless, I have 6 points worth of Mongols that I can begin playing with. The last two things I painted were the warlord's stand and the Kettle Drummer's stand. The Kettle Drummer is a 1/2-point "hero" stand that gives a free activation to all units within one Long distance of him and is indispensable to a Mongol general. As I plan on fielding my army, I am also taking 1.5 points of mounted hearthguard (armored cavalry) and 4 points of mounted warriors (horse archers). So, that's a total of more than 40 horsemen that I painted up for this army.

    Three different angles of the warlord's stand (with small pile of severed heads)
I like to paint up the warlord stand last when I do a new army. I think I will be more skilled at color combinations and looks for the army by that point, so I want to maximize on what I learned painting the rest of the army. I decided to mix things up from what my 28mm Curteys Miniatures cast for the army general. I mounted him on one of the armored horses rather than the unarmored one that came in his pack. I gave what was supposed to be his horse to the standard bearer. This included a very cool add-on - a pet leopard perched on the rump of the horse. This isn't fantasy, it is from an account written by Marco Polo from his visit to the emperor's court!

In addition to the spotted leopard riding shotgun with the standard bearer, I added in a stack of four severed heads to the base. I went through my unpainted (and unlikely to use) 28mm figures and found figures that would be easy to sever, and leave a nice, flat bottom to be glued in place. With the horse tail banner, leopard, and heads, I think the warlord stand turned out very nice. Especially considering the time I took painting the individual scales on the horse armor!

    My Mongol Kettle Drummer mounted on a camel and accompanied by a Shaman on foot
When I ordered my 28mm Curteys Miniatures from 1st Corps in the UK, I ordered quite a few extra packs. The main reason I chose Curteys was the huge variety of poses that they had in their Mongol line. One of those was a Mongol Shaman banging a large drum that I added onto the Mongol Kettle drummer's base. Perhaps the coolest part is that the towering kettle drummer figure is mounted on a camel. It's the only camel mount in the army - the rest are all on horses. The camel and the rider are also cast as a single piece. With all the other packs, the riders are separate from the horses. The kettle drummer actually painted up fairly quickly, at least compared to the horse archers, who are festooned with all kinds of equipment, bottles, bow cases, quivers, etc. With him wearing mail, there wasn't a lot to decorate on him - just his sleeves. So, I made up for it with the foot shaman, and gave him a patterned robe and decorated border and headband.

I really enjoyed painting up this army. The figures are a bit smaller in size than other 28mm mounted, but I am okay with that. Not only are all the figures in my army from the same manufacturer, cutting down on odd-looking size differences, I mounted them on taller bases so that they don't look too much smaller than opponents on the battlefield. I also used oval bases that were probably a bit narrower than most probably would have. This was purely for game purposes. I wanted the bases of the back rank figures to be able to project up in between the front rank for measuring range in Saga. The composite bow in the game shoots only 6", so the more I could scrunch them up, the easier it will be to move and fire my horse archers on the tabletop. I put lead sinkers as weights on the base to keep them from being top-heavy or (hopefully) from toppling over.

    Eight 28mm ravens as fatigue markers for my Mongol army - I like scenic markers on the tabletop!
The final touch was an addition at Historicon last month. I found a pack of 8 ravens from Bad Squiddo Games. I figured these would be perfect fatigue markers for Saga! I can use them for other armies, of course, but these will be the ones I put in the Mongol figure box. They were quick and simple to paint up, as nearly all of a raven except the legs are black. I based them on squares of magnetic material, flocked them, and now my horde is complete. It took my way longer than I would have guessed last summer when I started painting my Mongols, but I am very happy with how they turned out. Whew - finally done!

Tuesday, August 9, 2022

Romans Defend Idols Against Crusade

    My Roman legionaries moment of glory - 5 Warrior infantry repel the charge of 8 mounted knights
We had 9 players at our August monthly Saga game day at Guardtower East. Jenny graciously bowed out as the extra person, which allowed my Republican Romans to take the field at second time. This time, we were matched against the black-robed crusaders of Lee P's Milites Christi. I encouraged players to try out one of the scenarios we will be using in the upcoming Advance the Colors Saga Tournament (Oct. 8). Two groups of players chose Wrath of the Gods, a scenario designed by Joe M of the Northern Tempest Saga Podcast. I apologize if this is a nuts and bolts analysis of Saga game mechanics - so, if you're not interested in Saga, you may want to skim this report!

    'Wrath of the Gods' scenario involves players trying to seize control of 3 pagan idols on the board
In this scenario, players are attempting to control one of three objective markers in the center third of the board. If they have a unit within Very Short (2") distance and there are no enemy within Short (4") of them, they may force the opponent to remove 1 figure per objective marker controlled. These count as losses and the game is scored with Massacre Points. I had recently created a bunch of appropriate objective markers for the pagan idols that the scenario encourages you to use. My favorite were the tree idols made using the Enchanted Tree Stumps from Bad Squiddo Games.

    Two tables played 'Wrath of the Gods' - Lee and I in front and Bob B and Mike S in the back
The first marker goes dead center of the board, and each player places another. Both Lee and I placed our markers as close to our side (just past 12" Long distance) of our board edge, and moved up to the markers with our first turn movement. I had a quandary on how to take the battle to Lee, though. I knew he had one unit of Warrior crossbowmen and a mercenary unit of Turcopoles. So, once again, my Republican Romans were up against a warband with significant shooting capability. I view that as the chief weakness of the battle board, though after Game 2 with them, I think there are some other vulnerabilities. I decided to make a strong push in the center with 3-4 infantry units. My Velites were my only shooting unit, and I was worried about a long range charge against them by Lee's 8-man, Hospitaller knights. So, I moved them forward then into the heavy cover of the ruins in my center half of the board.

    View from the Roman side at the end of our Turn 1, making a general advance towards the objectives
I deployed my big 8-man unit of Roman legionaries on the far right to contest Lee's control of the objective marker closest to him. It was a waste of time and resources, though. After moving them up on the first turn, I never moved them the rest of the way to get within Short of his Hospitaller foot sergeants that had seized the objective. Otherwise, it was a steady advance by my Roman legion. Lee responded with a similar advance, but also proved that his shooting was going to be something I would have to worry about. In one shot with his crossbowmen, he killed three figures of a six-man unit (one Saga dice down already!). His Turcopoles also shot down another legionary from the unit which had moved up to contest the center objective. In my five, supposedly 50% chance saving rolls, l had made only one roll. Sigh. I sometimes wonder why my Romans even wear armor??

    Each of us seized our closest objective on Turn 1 - here my legionaries defend one pagan idol
I did have a slight edge in this scenario as the Milites Christi are not allowed to take any Levy troops in their list. So, when I forced him to lose figures with the Wrath of the Gods, he was losing Warriors while I would be losing Levy (until he eliminated that unit on turn 3!). On my Turn 2, I brought my Levy out of the rocky area, tempting his knights to charge. Meanwhile, I advanced to control the center pagan idol, and would hold it for a couple turns. I left my board loaded up with defensive abilities for his counter-thrust, which I had a good feeling was coming on his half of the turn.

    I kept pushing forward with my legionaries, reaching the center page tree idol and controlling it, too
Luckily for me, this time his shooting did little damage. He planned to make up for that, though, with the charge of his knights -- two full points of mounted hearthguard against one unit of 5 Warriors. Slam dunk, right? However, this was the strength of the Romans (supposedly). I had played Exhortation at the start of his half of the turn, giving all my units within Long distance of my Roman Consul warlord two bonus dice (either attack or defense) in melee. I also had queued up three melee abilities on my board. I closed ranks, but still would roll 9 attack dice and receive 6 bonus dice. This combat would prove to be my high water mark for die rolling for the whole game, though! The five Roman legionaries shrugged off more than a dozen hits from his knights. Lee had played a number of dice on his Orison battle board ability, too, allowing him to shrug off our hits, as well. Neither side suffered casualties, so his knight recoiled.

    The 'one that got away'...15 shots against Armor 4 mounted knights result in only 2 casualties!
On my next turn, I decided to go after those knights with shooting. Mounted hearthguard are 4 vs. shooting, but armor 5 in melee.  So, I moved up my Levy and took two javelin throws with them. In addition, another 6-man unit of legionaries tossed their pila (3 more shots) and charged in. I rolled 15 shots at a 50% chance to hit (7.5 hits, right?). We killed just two knights with the shooting instead of the four we should have, and two more in melee. His unit of 8 was down to 4, but my 6-man unit failed every single save and was eliminated. My streaky/bad die rolling with the Romans was continuing and would keep it up all game.

    Lee's one that didn't 'get away' - his Hospitaller knights prepare to charge and wipe out my Velites
With the eliminated legionary unit, the Velites received a second fatigue. Of course, on his next turn, his knights charged and totally destroyed that Levy unit. Despite inflicting 1-2 casualties on Lee through Wrath of the Gods every turn, I began to feel that my army was  coming out on the wrong end of the casualty exchange. His shooting was wearing my legionary units down, and more importantly, I was not capitalizing on my attacks where I had the advantage. With the missed flubbed shooting turn and my charge that killed only two figures, I felt I was losing. However, during his half of the turn, I counted up the casualties. To my surprise, we stayed surprisingly close all game. 

    Romans are stubborn, and keep up the pressure. My Triarii (right) cutting down his crossbowmen
I sent my legionaries in against his knight unit, which had been whittled down to 2 figures. I played "Pilum," and an extra dice in combat bonus. This time, our javelins finally struck home and both knights fell! On the next turn, I brought my Triarii hearth guard forward and charged into his crossbow unit. We ended up killing all but two. Things were finally getting better, it seemed. At this stage, I might even be ahead, I felt. 

    Hospitallers don't give up either - his Turcopoles mercenaries ride down a battered legionary unit
Lee still had his warlord and mercenary Turcopoles, and they both charged home next turn to redress the odds. My dice deserted me again and his warlord not only completely destroyed the Triarii, the Turcopoles also wiped out the remnants of the legionary unit next to the center objective. This set up my turn 6, though, and I felt I knew a way to seal the win. His warlord was Exhausted, meaning one more casualty would eliminate him. I set up my remaining Saga dice and prepared to see my legions through to victory.

    Another vicious, hard-fought battle was Mike's Jomsvikings clash with Dan N's Poles
However, it was not to be. Lee received an urgent text from his wife and had to pack up and leave right away to take care of a family matter. We didn't have time to count up points. So, sadly, this hard-fought game had to be called with no winner and no loser. I think I could have pulled out a victory by eliminating both his warlord and the remaining two crossbowmen. However, the dice had not been kind to my Romans this game, except for a couple of instances where our saves were good. So, my final strike could have fallen flat. Equally, Lee could have turned the tables in his half of the 6th turn. We'll never know, though. 

    Poles and Jomsvikings batter each other in this brutal, 23-23 tie in Clash of Warlords
After the game, I reflected again on the Republican Roman battle board and warband. We covered this faction in depth on the most recent Saga Ohio podcast. Three other Republican Roman players and myself analyzed the board in a great conversation. As I expressed in that podcast, I don't know if the Romans have a "Plan B" if getting to grips in melee is not successful. In the beginning, I thought loading up on defense dice and letting the enemy wear itself out in fruitless attacks would be a winning strategy. After two games, I'm not so sure. 

    Earlier in their match, the Jomsvikings on left close with the Polish battleline
Perhaps another big vulnerability is whether an army that relying on mostly Warrior infantry can roll enough "Common" Saga dice to be able to move and maneuver its army? Some of the better abilities on the board also require Rare dice. In both my games, I have failed to roll Rare dice on most of my turns. In fact, I think I rolled a Rare on only two of six turns against Bob's Age of Invasions Romans. I know I rolled them on only one of my five turns against Lee. So, that's three of eleven rolls with no equivalent "6" on a Saga dice for an army that generates seven dice when fresh. Crucially, if the Republican Roman player rolls no Rares and instead mostly Uncommons instead of Commons (as I did at least a couple of turns in each game), they are severely handicapped. So, at this stage, I think the jury is out on the effectiveness of this army. 

    Joe D (L) teaches his friend Bob how to play Saga in a Viking vs. Viking battle
Perhaps even more key, I am simply not having a lot of fun with this army. Loading up defensive abilities to blunt an enemy's attacks is not the most exciting part of a game of Saga. Their ability to launch offensive melees is also not overwhelming. Since most of their battle board abilities are Melee oriented, and if they really aren't that great in melee, uhmmm...what can they do?? I think I will give the army one more try, though. If third time is not a charm and I am not having a lot of fun with these guys, it is likely they will go on the shelf except for Age of Hannibal type events.

    Bob B's Byzantine army takes control of the center objective in his 'Wrath of the Gods' match
Elsewhere, my game with Lee was definitely NOT the only close game. In our four games that day, three games were ties (counting mine as a tie). Here are the results from our game day:

  • Dan N's Poles tied against Mike H's Jomsvikings in Clash of Warlords, 23-23.
  • Lee P's Milites Christi tied against Mike D's Republican Romans in Wrath of the Gods (unknown score).
  • Bob B's Byzantines defeated Mike S's Milites Christi in Wrath of the Gods, 56-8.
  • Joe D's Vikings tied Bob's Vikings in Clash of Warlords, 29-30.

    Byzantine and Knightly cavalry struggle for control of one of the objectives on the flanks
Both boards that played Wrath of the Gods said they enjoyed it, so looks like we have a fun scenario lined up in October for the Advance the Colors tournament. I hope folks can make it out for this event! 

    Vikings vs. Vikings in a Clash of Warlords, somewhere in Scandinavia