Monday, October 13, 2025

Advance the Colors 2025 Purchases


    This was a landmark year for our chapter's flagship con -- the 30th year of Advance the Colors!

I went into Advance the Colors expecting to spend some money with the vendors we had coming. The fact that I am also the Vendor Coordinator at the convention meant I would also be purchasing items as a "thank you!" to them for attending and supporting our convention. Some of my favorites had booked their dealer tables, too -- at least when it comes to buildings and terrain. And when I received my quarterly profits from sales of our First Command Wargames sales the night before the convention (as well as being paid back by some of the Board members for their polo shirts), it was just like making money in a flea market. I would turn around and spend it in the dealer area...ha, ha!

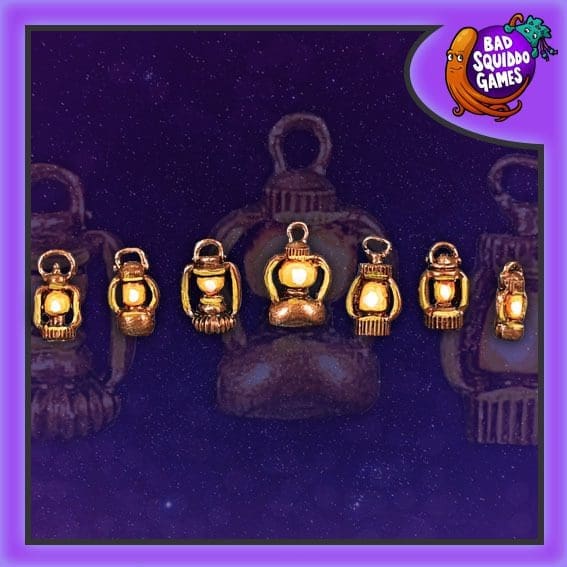
    A gift from Graham of Graham's Wargame Vault who was visiting from England to attend ATC
My first stop was with one of my favorites, Miniature Building Authority. This was actually my fourth time seeing him at a convention this year. Kirk is such a nice guy and is always so positive about attending conventions that you can't help but want to spend money on his excellent products. I had noticed that his stock of MBA's trademark resin buildings had been going down, and the proportion of 3-D printed ones was going up. I asked him about it and he admitted that it is difficult nowadays to keep the resin ones in stock from his manufacturers overseas and domestic. Since I like both 3-D printed and resin terrain, that is not a problem for me. I would happily buy either!

    One of Miniature Building Authority's newer, 3-D printed buildings that I bought at ATC 2025 
In fact, I picked up three of his newer, 3-D printed buildings at the show. They are modern-style buildings that look like they could be used for just about any place in the world and at anytime in the last century or so. The first one I picked up is called Large Concrete Building. It comes in three pieces -- the ground level with its walls & floors. The second piece includes the ceiling or roof of the first level. It also has one much smaller room, along with the a large floor/balcony. You could put all kinds of things on this balcony from a rooftop garden to clothes lines for laundry, to a little cafe.The third piece is the roof of the 2nd story room. 

    These buildings are modern ones that can be used in a wide variety of locations and settings
The next building I picked up from MBA is called Long Metal Building. This is divided into three rooms, each of which has windows to the outside. There is one door and the building has a detachable roof. Although the vertical panels on the outside face of the building are probably meant to be painted as metal (considering the name), I don't see anything that would keep you from painting them as wood or some other material. It has a flat roof that would be ideal for various scatter, such as air conditioners, vent fans, billboards -- whatever. 

    This Small Metal Garage will be a great addition to my modern or post-apocalyptic games
The last building is the smallest and is called Small Metal Garage Building. It has the same vertical panels that the Long building has, and of course, a wide garage door in addition to a standard door entrance. The garage door is a removable flat piece, as is the roof of the building. Once again, this is a flat topped roof, so there are possibilities of putting scatter on it that will personalize and bring it to life. I really look forward to getting these painted up. I could see them being used in both "first world" and "third world" locations. There are lots of opportunities to modify or jazz up these buildings with paint, scatter, or other items.

    The four Pacific Huts on stilts that were a perfect find at ATC 2025 for my 28mm Vietnam project 
My next stop was at Diabolical Terrain. I am a regular customer of Ron Weaver's, having bought quite a few of his 3-D printed products over the years. So, his stuff is definitely another of my favorites. I had picked up the rest of his Tatooine buildings for my Star Wars games at Historicon, so I was kind of curious what he would bring to Advance the Colors to tempt me. One quick walk through his space and I knew what I was going to buy! Something I had never seen before at his stand at previous shows, were his Pacific Huts on stilts. These look a LOT like my own scratch-built Jungle Huts, though a bit smaller. I virtually let out a whoop when I saw them -- they would be perfect for my Vietnam games! They come disassembled with the stilts needing to be attached to the underside of the buildings. I guess that means you could make a base with the stilts on it, but not attach the building itself to it for flexibility of use. Then you could set the building down onto the stilts or onto your gaming mat for without stilts. I'll glue mine all together, though (except for the detachable roof). The sides of the building are modeled to look like they are woven from cloth or vegetation. All have airy windows and porches, so look perfect for a hot climate. The roof is designed to look like thatch. I picked up W2-PT Pacific Hut #3, W2-PT Pacifi Hut #4, W2-PT Pacific Hut #5, and W2-PT Pacific Hut #6. Essentially, I grabbed all the ones without the railings or screens on the porch. Being for my Vietnam project, these will probably be the first of my purchases that I paint up.

    Huge time-saver over my laborious dowel post and wire weaving method of making a wattle fence!
My final purchase from Diabolical Terrain were some wattle fence sections. Although labeled as Wooden Fence and Wooden Fence (Gate) on the website, these are proper woven wattle fences common in Dark Ages and Medieval Europe. In fact, I scratch built one of these for a small field awhile back. Once I saw these fence sections, I picked one up and walked it over to Ron. I asked him if he knew how much time he saved me by selling these. He chuckled. I plan to paint these up soon, too, as there's nothing keeping me from using these in my Vietnam (or Dark Age, Medieval, or Fantasy) games. Each section is about six inches long and you can use them in a number of configurations -- small pens, large ones, fences abutting a home, etc. 

    I really like the dilapidated and tumbled-down look of this ruined corner of a fortress or walls
Keeping things on the building theme, another of my up and coming favorites to buy 3-D printed buildings or terrain from is Scott Gray of Sword & Scabbard Games. This is the fourth time I have seen his booth at a convention this year. Hailing from nearby Indiana, Scott stocks various 3-D printed items and can always be depended upon to be selling painted armies, as well. I bought a number of things at his booth at ATC because I don't think I did at Historicon. He always carries interesting looking ruins, and I made it a point to get two that caught my eye. The first appears to be the corner of a ruined fortress made of stone or brick. I really like how the pile looks like it is in the process of tumbling down. This will likely see use in my 28mm Fantasy or Dark Age/Medieval battles or skirmishes. 

    The arches give this corner ruin from Sword & Scabbard Games the look of a religious building look
The other ruin looks a little more pristine, as if it has been weathered or possibly even pilfered for stones by residents. The arches give it either a classical era look, or perhaps from a religious building in the Middle Ages. Either way, it is generic enough that it can be used in a variety of settings. Hmm...seems to be a theme of my purchases this year! I like how it is a multi-level piece that figures can climb and use in a skirmish. I realized awhile back that I have a definite lack of these type of pieces, so have been trying to pick up more that have multiple levels that can be climbed by figures in a game.

    2 Medieval looking town buildings that could be used in either fantasy or historical skirmishes
I was intrigued by these next two buildings I picked up from Sword & Scabbard. They look to be a great fit for either a Fantasy, Medieval or Renaissance era town. They have that slightly ramshackle fantasy look, but also the stone and timber of the Middle Ages. Their tiled roofs and steep gables have the proper Middle Ages vibe, and I love the screened windows! I especially like how the one on the left has part of the building set up on pillars overhanging the entrance way. These can join the Duncan House I got from RRB Minis & More for a great start to a medieval or fantasy town setting for skirmishes. The roofs all come off, which is something I insist upon in my purchases anymore. I don't really see the need to buy solid buildings, considering how much of my miniature gaming nowadays is skirmish.  

Dry stone wall sections (& animal pen?) that I couldn't resist picking up from Sword & Scabbard
The final things I got from Sword & Scabbard were some dry stone wall sections that Scott says were meant for Dark Ages or Medieval Scotland. They do have that Celtic look about them, but I think they could be used for 28mm Fantasy, as well. I bought one angled section, as well as one that includes a rounded pen (for sheep?). If I use it as ruins, I don't need to find a gate for the pen. Otherwise, I'll need to find or build something to keep all the sheep from getting out! These will paint up ridiculously quickly, I think, and are generic enough they will doubtless find their way onto many an upcoming battlefield.

    Griffon's Lair carries 6' long 'Scenery Stripes' in a variety of patterns, including these cobblestones
Speaking of stone and towns, I had been eye-balling this purchase the last two conventions! It is a roll of neoprene material printed with a cobblestone street pattern, which I picked up from Griffon's Lair. I finally pulled the trigger at ATC and bought it from them. It is from Deep Cut Studios and includes six feet of cobblestone street pattern, 3.5" wide (9cm) and 2mm thick. It also includes two rounded, half circle sections. Griffon's Lair carries a variety of these "Scenery Stripes," including dirt or tarmac roads, and rivers. The only thing that worries me about them is cutting them to size to use in a game will be permanent. Sure, I can shove the cut sections back together again, but I want to be careful about how I chop up this six foot roll of material!

    After liking how the Dirty Down Rust worked, I look forward to trying out this Moss effect
I was so excited to see Griffon's Lair still had one of their cobblestone rolls left that I forgot to look around at the rest of their booth. While owner Steven Holowienko was ringing me up, I noticed that he also carries the "Dirty Down" line of specialty paint effects. I have a bottle of the rust effect and like it. I noticed that he carried the Moss effect, and since that is something I really don't have a handle on how to paint on my buildings or scenery, I thought I'd pick it up. Maybe I will try it out on some of those dry stone walls that I picked up from Sword & Scabbard? I am sure there are many YouTube videos out about it that give suggestions on how to use it, so I'll likely watch some of them for ideas first. 

    Various metal scatter I picked up from RRB Minis & More (and ONE miniature...)
Last but not least was my visit to my friend Rich Brown and his RRB Minis & More booth. Unfortunately, Rich had been unable to 3-D print the main item I was going to buy from him at ATC. It is another medieval building in the "Duncan House" line that he gave me at Battles at the Brewery. I liked how his photos of it looked and asked him to print it up for me. However, problems with his 3-D printer kep him from getting it done in time. Hopefully, he will have it fixed and readied for me before I see him at Hold the Line convention at Camp Perry, OH, Nov. 14-15. In the meantime, though, I sorted through his scatter metal pieces from the venerable Reviresco line. I have picked up numerous computer monitors and other things for Sci-Fi buildings from him before. This time, I grabbed some things to glue onto various buildings, including vent vans, metal doors, and tube ventilators (pictured above). I did break my vow to buy no more miniatures until after the end of the year when I saw the HWV-24 Power Loader, aka Walking Forklift. This would be perfect for an Aliens scenario, right? Hopefully, the miniature inside looks sufficiently like Sigourney Weaver...ha, ha!

    2 crag pieces that I picked up from RRB Minis & More at the last minute as Rich was ringing me up
As Rich was beginning to ring me up, I looked over and saw some 3-D printed crags on his shelves. I snagged a couple of them to add to my Canyon Rocks and Stacks that I painted earlier this year. Rich hadn't brought most of his 3-D printed stuff because he rented only two tables. He admitted to me later in the show he should have gotten a third table! 

    Tufts I use on my bases -- Dad's Armies carried my favorites, so ATC was a perfect place to restock!
Okay, so I lied. My purchases at RRB Minis & More were not the last! One of the things I did this year as Vendor Coordinator for ATC 2025 was wheel around a rolling cart filled with cold water and snacks every 2-3 hours to the dealers. All of the vendors said they really appreciated the service. It also let me check in with them regularly throughout the weekend. Even if I did not buy something from one of the vendors (we had 12), they knew I appreciated them by my regular visits to their booth. While stopping by Dad's Armies booth, though, I noticed that John carried my favorite type of tufts for miniature bases. I picked up one each of the ones I use the most. 

I'm sure that preparing for Advance the Colors put my painting and terrain making schedule behind. Hopefully, now that it is past, I will get back into the swing of things quickly. I'll do another post with photos from the various games at ATC, but after that, expect to see some more Devilry Afoot figures! Oh, and I have updated my Acquired vs. Painted lists below. I'm sure that the fact that I was significantly ahead in Terrain and Scatter had nothing to do with the fact that most of my purchases at ATC were in those categories! Nothing at all...move along, nothing to see here...!

MINIATURES Acquired vs. Painted Tally for 2025

  • Miniatures acquired in 2025: 289
  • Miniatures painted in 2025: 231

TERRAIN Acquired vs. Painted Tally for 2025

  • Terrain acquired in 2025: 53
  • Terrain painted in 2025: 61

SCATTER Acquired vs. Painted Tally for 2025

  • Scatter acquired in 2025: 136
  • Scatter painted in 2025: 201

Monday, October 6, 2025

'I Don't Take Orders from Stinking Morgul Rats' - Gripping Beast Armored Goblins

    First batch of 28mm Gripping Beast armored goblins for my Dragon Rampant army
The 2026 project -- an orc and goblin army for Dragon Rampant, 2nd Edition -- continues to move along. I chose seven figures from the horde of unpainted 28mm Gripping Beast lead I picked up from my friend Jeff, and got them ready for painting. I believe all the poses are from the Armored Goblins pack. I had to glue on their shields and put weapons into their hands, which at times is a blessing and a curse. It is nice to be able to create a little more variety with the weapons, but equally it can be a pain in the butt to attach the darned things sometimes! I used Gorilla Glue superglue for the initial attachment, then reinforced it after it had hardened with two-part, 5-minute epoxy. Sometimes, I have to use soft gray tack to hold the figure in an odd position while the glue dries, but it all worked out fairly painlessly this time.

Poses are fairly similar as I sorted through the unpainted horde looking for ones that looked alike
When attaching the weapons, I immediately forgot about the advantage mentioned above and gave spears to all three of the under armed poses and short swords to the three with their arms held back. D'oh!! The one with his arm over his head was given an ax. Thanks to my brain lapse, there isn't as much variety in pose and weapons as I'd like with this batch of seven figures. And why seven? Well, I was looking for a group that had similar equipment and dress, and these seven fit the bill. I guess that I was thinking that it would make it quicker to assembly-line paint them if they were dressed and equipped similarly? Of course, seven figures is a pretty small assembly line, by most people's standards. However, it is right in the six to eight figure batch "sweet spot" I prefer for my 28mm figures, though!

    I really like the expressions & animation on these goblins -- they look to be snarling or semi-scared!
After the epoxy had dried thoroughly, I primed them with Liquitex White Gesso and let them dry overnight. I gave them my standard recipe for orc and goblin flesh that I have used so far on my other three batches. I begin with a Walnut Brown base coat, dry brush them Raw Sienna, and then highlight them Khaki. Next, I used one of my all-time favorite colors for the base coat on their chainmail -- Iron Wind Metals Steel. This is a very dark metallic, which I then dry brush a silver over once it has dried and "shrink wrapped" to the miniatures. I had recently purchased a new Brushed Silver craft paint and decided to try it out on these. I liked the effect. However, I admit I would be hard pressed to pick out the difference between mail highlighted with the Brushed Silver as opposed to my normal silver!

    I used the same basic dark or pale clothes colors I've been using for this army, so far
At this point, they were ready for their clothes to be painted, which in this case was a tunic. Some of them also had trousers underneath the tunic, but some did not. I referred to my list of acceptably ugly colors to paint orcs and goblin clothes and picked one out for each figure and set those bottles behind it. While painting this project, I will stay on the lookout for more colors in a grayish, pale, or dark versions of colors so that my entire army isn't painted just the same 8-10 colors...haha! From that point on, it was my usual routine of base coat one day and dry brush the next. Tunics, then trousers, then footwear, and so on.

    All of the shields lined up so you can see the designs I chose -- I'd love to hear feedback on these!
However, for the first time in four batches of orcs or goblins, though, I had to paint shields! I didn't want to limit myself to Mordor orcs with their red eye, or Isengard with their white hand. I wanted them to be more generic. I didn't want them all be blank, either. So, I sat down and brainstormed what types of things orcs or goblins would put on their shields: skulls, moons, mountains, spiders, wolves, flames, fangs, etc. Then, I did Google Image searches (with the key word "clipart") and copied and pasted images of these things that I liked into a Word document. I even did Google searches to see what the internet said about what designs orcs or goblins would have on their shields. One page mentioned "tribal symbols," so I did a search for that and found several really cool pages of crude, tribal-like images that I thought would work perfect for my army's shields. 

For most of the shields, I painted it a base color, dry brushed it, and then used my black or dark brown micron pen to draw the design image on the face. I filled inside the pen outline in with paint most of the time, or if I wanted the design to remain dark dark, sometimes just colored in the whole image with the pens. I felt that the designs stood out too much, though, and looked a little too bright. However, when I did my last step of painting, the black wash, it seemed to fix that. I felt that the black wash did an amazing job of muting the shield. Will I continue to give every orc or goblin their own unique shield design? I'm not sure, at this stage. I am happy with how these looked, though!

Final look at my first armored goblins -- many more needed to fill the ranks of my orc & goblin horde!
I know seven figures doesn't go a long way towards finishing a Dragon Rampant army, but these are the size batches I like to work with. I just don't see myself ever priming and painting 50 miniatures at a time, nowadays. That's. Too. Much. Like. Work! So, this will have to be incremental progress for the rest of the year and possibly well into next year. Since I've decided to also work on my Devilry Afoot project simultaneously, that will likely slow it down even more. Oh well...that's the way it goes! I will get the figures I bought all painted someday, though I'm not sure my 2025 totals for Acquired Miniatures vs. Painted will ever make it into the green and "positive" range. To get there, I need to paint 57 more miniatures AND not buy anymore by the end of the year. Will I make it? My pessimistic guess is no, but we shall see!!

MINIATURES Acquired vs. Painted Tally for 2025

  • Miniatures acquired in 2025: 288
  • Miniatures painted in 2025: 231

TERRAIN Acquired vs. Painted Tally for 2025

  • Terrain acquired in 2025: 40
  • Terrain painted in 2025: 61

SCATTER Acquired vs. Painted Tally for 2025

  • Scatter acquired in 2025: 115
  • Scatter painted in 2025: 200

Wednesday, October 1, 2025

Devilry Afoot: First Figures for a New Project


    My first group of six 'Hunters' for Devilry Afoot -- a cooperative supernatural monster hunting game
There's an outside chance I may squeeze in my first game of Devilry Afoot in honor of Halloween this month. Just in case that happens, I wanted to get a batch or two of miniatures done for the main characters and their followers. I've decided that each of my players will control one Hunter and one Follower. In these rules, Hunters are divided into five different Archetypes:

  • Gentleman
  • Goodman or Goodwife
  • Religious
  • Scholar
  • Soldier

    I went back and forth between several rules & eventually decided on trying these cooperative ones
I am setting my games in the tiny, new settlement of Franklinton in the Ohio territory of frontier America. The games will take place in the late 1700s and early 1800s, prior to the War of 1812. As such, I have plenty of appropriate figures for the "Soldier" archetype (and probably followers, too). I think my French & Indian War armed civilians will also work for a "Goodman" (or Goodwife), as well. The nicer dressed leader types could be Gentlemen, too, I guess. However, when it comes to Religious or Scholarly types, I had very few figures. Thus, my purchase at Historicon this summer to enable me to field those archetypes.

    I'm calling him the 'Monsignor' - on the Brigade Games site he is in the 'Cardinal & M'Lady' pack
As such, this first batch is fairly heavy in Religious and Scholarly types. I have another batch of six primed and with the flesh done waiting in the wings, too. Those come later, though. Let's talk about these first six miniatures I just finished! They are all 28mm metal and from a variety of sources. My favorite miniature of this crew, so far, is one that I am calling the "Monsignor." He is from a Brigade Games two-figure pack called, "Cardinal and Milady." The lady I will discuss in a moment. She is also part of the first batch of six. Anyway, the Monsignor (or Cardinal) is wearing a cool robe, sash, and mantle, along with a "beanie" type cloth cap. Very appropriately for the game, he holds a nasty looking spike dagger behind his back in one hand while raising the other in a benediction or blessing. I love the folds and drape of his clothing, and I think the blood red and black color scheme works really well for this figure. You may ask what is a cardinal doing on the rough frontier of America? In my story, he is a visiting Catholic priest ministering to the needs of some converted native Americans who live near Franklinton (which is early Columbus, Ohio, where I live). More on the story below of the how Hunters came to be in this small, frontier village!

    One of my favorites from this batch, he is a Crucible Crush Puritan who I added a lantern to
The other religious type is from Crucible Crush. His outfit is a century or so out of date, but I think he still has that frontier preacher look about him. Yes, he is from the English Puritans pack, but just look at him! He is clutching his holy book to his chest, his arm is raised in calling down God's fury on the heathen demons of the frontier. Can he be more perfect for a game of Devilry Afoot? I painted him pretty much identically to the picture on the Crucible Crush website. The severe black and white color scheme just screams frontier preacher to me. I am envisioning him representing the Franklinton's local Protestant deacon or preacher. He is obviously filled with God's righteous anger and bravely steps forward to hunt down the servants of the Devil prowling around the village!

    Sarah Starling, wife of Franklinton founder Lucas Sullivant, was a skilled nurse - a perfect Scholar!
A female scholar is probably a rarity in frontier America, but I figured it would make for an interesting character. I may make her a healer or herbalist, or some sort of doctor. I figure that the chauvinism of frontier America might be overcome if the woman has badly needed medical skills. Those in need might just look the other way at the impropriety of a woman openly practicing her craft! You know - necessity and all that!! This would be even more likely if said female doctor is relatively high up in the social standing of the town. In my research, I discovered that the wife of the village founder, Lucas Sullivant, was devoted to nursing the needs of the sick in the village. She even lost her life during the War of 1812 taking care of the sick soldiers stationed in Franklinton during a Typhus epidemic. So, perhaps she is Sarah Anne Sullivant, wife of the village mayor? The figure is from the Bad Squiddo Games pack, Beer Maiden and Scholar (she's the scholar, of course!).

    One of the founders of the Franklinton society of supernatural hunters - young lady Marib Domigan
The other female character is the aforementioned Milady. Wearing a voluminous hoop dress, bewigged, and carrying a Carnival mask on a stick, you may wonder how she could ever belong with a group of hunters of supernatural monsters! Right?? Well, if you look at the way she is holding that rapier, you would realize this is no idle patroness of dance balls. She is nobility, for sure! How else would she have had the leisure time to be trained in the art of the sword? In fact, she is actually one of the founders of the club of Franklinton men and women who hunt the horrors of the frontier. To them, it began as a game. She and her male cousin (next batch of figures) read about supernatural hunters in Europe. They decided to mimic the fun by collecting stories of supernatural occurrences here in the Ohio Territory. They were delighted when they discovered the first account of a mangled farm animal on the night of a full moon. And they giggled as neighbors reported drumming and strange animal cries on dark nights. And then suddenly...it wasn't a game, anymore. They were on to something!! I painted her in a dark green outer dress with pale yellow inner skirts. The white wig and mask is concealment, keeping her identity safe from those outside of their secret society. I like how she came out, and even if none of my players choose her as their Hunter, she will be an important part behind the scenes!

    Lawyer and hobby naturalist, Orris Parish, is skeptical of the whole supernatural angle
The two male scholars are both from the same pack from Brigade Games. Owner Lon Weiss very helpfully found this pack for me in the Napoleonics section when I described what I was looking for. It is the French Scientists/Savants pack of four miniatures. I picked out my two favorites from among them and included them in this first batch of six. If you click on any my above links for the half dozen figs in this batch, you'll notice something different. Lanterns! At Historicon, I also picked up a pack of 28mm lanterns made by Bad Squiddo Games when I was shopping at the Badger Games booth. They appear to be made from 3-D printed material, as the thinner parts are fairly brittle. Otherwise, they're perfect for Hunters or Followers to be holding aloft. Whether a character (or monster) is in the dark or light is important for Devilry Afoot. As you can see, three of these figures have a lantern added to their raised hand. I used superglue to attach it, and then added a thin streak of epoxy to it once the glue dried. The bond between the lanterns and their hands seem to be fairly sturdy (with the primer and paint on top of it), so hopefully none will pop off when playing!

    An occultist is key to a group of supernatural hunters, and Scholar Jacob Shade fulfills that role
These scholar figures are obviously at the later end, time-wise, of the figures I'm painting up for this project. The Protestant preacher above is at the early end. I tried to mix up the colors of the Hunters, but keep them in a darker tone. I also tried to mix in something on each that has the Iron Wind Metals Blood Red color that you see on the Monsignor's robe. It's not exactly a sinister color, but suggests something darker and more secret. For some, their sash is in blood red. For others, it might be a simple accent on an article of clothing (the band in the preacher's hat). I like how all of these came out, though, and am very happy with this batch of six. I kept going back and forth on which figure was my favorite. The Monsignor was my early favorite, and may still be the one I like best. However, I also really like the female scholar. And what's not to like about the fire and brimstone Protestant preacher? I'd be curious to hear from my readers which ones they like best...

    A final look at the first group of six Hunters (from a variety of sources) that I painted up
The lanterns were painted bronze and then highlighted with gold. After that was done, a dark black vehicle wash was added to give the lanterns an old and well-used look. Finally, I did the glass. I used a dull yellow on most of the glass, with a watered down pale yellow in the center. Once spray coated, I added in a clear gloss over the glass. Hopefully, this makes it look like it is shining more than if it were matte. I have the next batch of six figures waiting in the wings, too. One of them is a young nobleman, but most of the others are meant to be armed Followers. I chose rather rustic looking ones for them, except for one servant in fancy livery. More about those in a future post, though, as I have a batch of Gripping Beast goblins in front of them.

    I love the look of these 3-D printed lanterns from Bad Squiddo Games
Also, I decided to use my "standard" flocking system for the Devilry Afoot figures. I am trying to limit any unique period or location-specific flocking, nowadays. I want to be able to use figures together that were ostensibly painted for different projects as much as possible. So, stay tuned to see if I actually do run that first game of Devilry Afoot around Halloween or not. Sorry for this past week's break in posts -- Jenny and I went to visit friends on Long Beach Island in New Jersey for a few days. Now that I am back, hopefully the pace of production will resume!

MINIATURES Acquired vs. Painted Tally for 2025

  • Miniatures acquired in 2025: 288
  • Miniatures painted in 2025: 214

TERRAIN Acquired vs. Painted Tally for 2025

  • Terrain acquired in 2025: 40
  • Terrain painted in 2025: 61

SCATTER Acquired vs. Painted Tally for 2025

  • Scatter acquired in 2025: 115
  • Scatter painted in 2025: 200

Tuesday, September 30, 2025

World War II City Fight with Xenos Rampant!

    Keith wanted to get all of his craft store wood buildings and MDF structures on the tabletop!
My friend Keith decided he wanted to get all of his craft store wooden buildings and MDF stuff onto the table for one of our Sunday evening games. He apologized that circumstances kept him from getting all of the buildings completely finished in time, but they all had paint on them. And there were LOTS of them! Keith had his setting in mind, but wasn't 100% sure about the game itself. In the end, he decided to go with a World War II city fight using Xenos Rampant! rules. 
    After 3+ turns, my U.S. paratroopers are finally all on the board -- in a much safer landing zone!
It had been too long since we played XR!, so I was glad he chose them. He was intrigued by our mutual friend Jim W (of Jim's Toy Box fame) using the rules for modern or WW II games. In our latest visit to Jim in Michigan this past August, he had run a modern game using small, 5-figure squads and XR! rules. I told Keith that I was surprised by how survivable these small squads were, when given terrain to hide in. In XR!, units typically roll 10 attack dice until they fall to half strength. Units takes casualties in increments of their armor, so if they have armor 2 (like most in this game) and take four hits, that's two of their five men gone. Very deadly. However, soft cover increases a unit's armor by one, and hard cover by two, meaning the same number of hits would be only a single casualty if you're ensconced in a building. And there were lots of them on Keith's city tabletop! In addition, you don't round up. It would take 8 hits on 10 dice to cause two casualties to a unit in a building -- 7 would round down to one. 

U.S. paratroopers are sitting ducks for the German machine gun guarding the street they're strolling
 Keith said the scenario was inspired by an incident during the WW II Arnhem campaign. The German side (Joel, Tom, Mike S, and Mike W) controlled rear echelon type units. Their ostensible goal was to defend German high command staff in a four story office building in the center of town. The snooty commanders didn't want the rear area riff-raff in their building, though, and had only their guards protecting them in the actual building. The bulk of the German forces were supposed to be an outer arc of defense that the allied paratroopers and Dutch resistance would have to fight their way through.

    One of my U.S. machine gun jeeps moves into position to support the British assault
Jenny controlled the British paratroopers on our left, Allen the Dutch Resistance in the center, and I controlled a huge force of American paratroopers. My force outnumbered my allies, so I handed off a squad of paratroopers (Light Infantry in XR!) to Allen to bulk up his smaller force. Of course, Allen being Allen, promptly marched them up a wide open street towards a German heavy machine gun emplacement. Needless to say, Mike S rolled very well and slaughtered them on his half of Turn 1! One turn, one attacking unit gone! So much for the terrain making the units survivable! Of course, for it to do that, I pointed out to my impetuous Dutch ally, you have to USE the terrain! 

    U.S. paratrooper force is hunkered down in terrain and ready to hammer the Germans opposite them
Meanwhile, I was making horrible "Special Insertion" (yes, cue several rounds of off-color jokes) rolls for my paratroopers to come onto the board. Keith allowed us to land anywhere on the board -- including rooftops -- as long as it wasn't within 6" of a building occupied by German defenders. Jenny kept getting proximity warnings for her Brits trying to parachute in as she tried to deploy forward. Joel and Tom had saturated the area in front of her with defenders, and she ended up having to land in relatively open area. Guess what happened to some of her paratroopers when the defenders took their first turn? Yep, many were cut down in the open, too.

    My U.S. paratroopers fire down upon the German machine gun emplacement at the intersection
Seeing how things were going, I made it a point of landing behind the buildings on my table edge -- except for one unit which landed on the rooftop of a tall building overlooking Mike S's deadly machine gun emplacement. Sure enough, Mike S opened up on my guys immediately after I landed, but my armor being bumped up to four meant they took only a single casualty. We passed our Courage check and sprayed them from above next turn. Mike got his revenge and shot again on his turn, but even though I took no casualties, I failed my check that time. The following turn, he unlimbered on me again, and I roll ridiculously bad on Courage and my guys routed (which I assume means we cowered there or on the floor below the rest of the battle). 

    Safest place for infantry in this game is inside a building or on the roof -- heavy cover is essential!
I had a weird rhythm going on with my dice rolls. I was rolling awful for unit activations, but pretty good on shooting. My two machine gun mounted jeeps activated on a 6+ on 2d6. That's a 72% chance of success, and I estimate I failed on 2/3's of my rolls with them! Eventually, they did get up to where they could fire at Mike's machine gun emplacement and finally took it out. I brought my other jeep over to belatedly help on the assault on the German HQ. In hindsight, as the most powerful force, I messed up pretty bad by focusing on fighting Mike S and Mike W's forces deployed across from me. I was winning the fight against them -- I lost only the rooftop unit and my forces shattered both of their commands. However, I forgot the objective. Eventually, I started moving my squads laterally to help, but looking at the clock, I knew they'd never get there before the game finished.

    Mike W's German (actually Polish) armored car gets a nasty surprise when U.S. bazookas open up
During my firefight with Mike W's forces, I was able to sneak my bazooka-armed Support Infantry up to where they were in heavy cover, but could fire on his armored car. My infantry guys had no hope of rolling five 6's on 10 dice to inflict a hit against his armor 5. It was kind of cheesy, but I moved them up while he was absorbed looking at his phone and not paying attention. Over a couple of turns of firing, the bazookas were able to get a few hits on his armored vehicle, forcing it to back off and essentially handicapping it for the rest of the game. Once a unit falls to half strength, it rolls only 5 attack dice. In addition, damaged vehicles move at half rate. Otherwise, there was a lot of our squads firing at each other in heavy cover and doing nothing other than forcing a Courage check. 

    My two (overpowered) machine gun jeeps hammer away at German squads in the buildings
The Support Infantry and Vehicles were the real killers in this game, unless somebody (I wonder who?) was in the open. They hit on 4+ on each of their 10d6 attacks, while infantry hit on only 6's. Keith and I discussed it online after the game, and we feel that squads need to hit on a 5+ to really be effective. So, Keith may give the infantry units in the game the "Increased Squad Size" ability, which allows them to do that. I also think my jeeps were WAY too effective, counting as a Fighting Vehicle in this game. Also, bazookas in a squad also should not be Support Infantry, we agreed. Just giving an infantry squad the "Armor Piercing" ability does a better job of reflecting their presence, we feel.

    Not learning the 1st time, Allen marches Brit commandos down the street to attack the intersection
After I damaged Mike W's armored vehicle, Mike W pulled his infantry squads out of their buildings and into the street behind them. They weren't really causing any casualties, while my jeeps were putting hits on both him and Stelzer. This gave Mike a good shot at Allen's commandos, who were foolishly out in the open (again!), assaulting the intersection held by the last remnants of Mike S's machine gun emplacement and another infantry squad. Once again, Allen's boys took it on the chin. However, the allies got their payback. I sneaked a unit into the building overlooking the intersection. I also raced my jeep around the side of the building, and together they decimated Mike and Mike's infantry in the open. 

    Dutch Resistance and their British support form to assault through the alleys to the German HQ
Meanwhile, Allen's lone Dutch squad that made it into the office building were driven out by Tom's determined counter-attack by the SMG-armed guards. I blamed myself for not getting over there with my jeeps soon enough to soften them up prior to his assault. As it was, though the German rear echelon troops had taken grievous casualties, at least on my flank. However, I was too busy to see how Jenny and Allen were faring against Joel and Tom. Either way, we made no real inroads to capturing the German high command. Keith didn't declare it as such, but I would give the victory to the defenders. 

    Pulling back from a firefight with paratroopers, the armored car & a squad look for easier targets
In hindsight, I think having our paratroopers "Special Insertion" or drop into the city didn't really work. We should have simply just moved in from the board edge. In all three attacking players' cases, we would have been way more successful. There was some confusion about what the capabilities of the various squads were, and some players were definitely rusty on the rules. Tom and Joel joked that they probably made rules mistakes every turn. We probably should have had a more thorough rules refresher at the start. Fewer troop types with fewer special abilities might have made it easier for everyone to pick up, too. The way it ended up, the most experienced players with the rules (myself, Keith, and Mike S) were all on one end of the table. Those who had played it less were on the opposite end. Likely, that didn't help either. 

    A machine gun-armed jeep & infantry in the adjacent building catch the Germans out in the open
Still, I think that with a few tweaks, XR! can be used for more WW II battles in the future. Of course, Tom is still planning on running O Group for us. So, who knows? Maybe WW II may go from one of our more infrequently played periods to more often in the future! As always, stay tuned to see.

MINIATURES Acquired vs. Painted Tally for 2025

  • Miniatures acquired in 2025: 288
  • Miniatures painted in 2025: 208

TERRAIN Acquired vs. Painted Tally for 2025

  • Terrain acquired in 2025: 40
  • Terrain painted in 2025: 61

SCATTER Acquired vs. Painted Tally for 2025

  • Scatter acquired in 2025: 115
  • Scatter painted in 2025: 200

Sunday, September 21, 2025

First Batch of 28mm Gripping Beast Goblins


    My first batch of Gripping Beast 28mm metal goblin archers from their Ragnarok line
Having "warmed up" painting two batches of Warhost Orcs from Hobday & Hicks, it was time to begin work on the main purchase of my 28mm Orc army for Dragon Rampant. Awhile back, my friend Rusty and I split a large batch of 28mm Gripping Beast metal orcs & goblins that a friend was selling. Many were still in the packs, but others had been based up on 1" MDF circles in preparation for painting. However, when he pulled the plug on his project, he offered it up to me. Not needing as many as he had, I offered to Rusty to split it with him, and we agreed.

    I love the faces on these "nasty goblinses" as Gollum, would say -- great poses and personality!
Most of the figures are from the Gripping Beast Ragnarok Miniatures fantasy line. All are metal figures, which as my readers likely know by now, I prefer. When I split the purchase with Rusty, I tried to do it as evenly as possible. These eight goblins are a good example of that. In the batch, there was a pack of 8 Hill Goblins and a pack of 8 Night Goblins. I made sure we each received four poses from the packs. I chose goblins as my initial batch in case I decide I want to do a game of Sellswords & Spellslingers sometime. Once I finished these, I would have both orcs and goblins, hand weapons and bows -- a bigger variety of foes.

    The Hill Goblins are on left, bare headed, while the Night Goblins were a hood or cowl
The poses were very cleanly cast and had almost no flash. The Hill Goblins wear a long-sleeved robe of some sort, but have no armor or headgear. The Night Goblins are hooded and have a two-part robe. The looks are both very similar, so I figured they'd be a great batch to pair up. I don't intend to do anything to make my goblins look different from orcs. I'll use the same skin tone, the same basic look for their clothing, and similar equipment. My reasoning is that splitting them into two different "breeds" is more of a gaming innovation. In The Hobbit, they are called goblins. In the Lord of the Rings, they are called orcs. Although they're split into different bands and locations, to Tolkien they were the same breed. So, mine will look similar, with the only difference being the size of the castings.

    I used either dark or pale colors for heir clothes and tried to make them look dirty
After priming them with Liquitex White Gesso, I did the flesh first. Same recipe as with the Warhost Orcs -- Walnut base coat, Leather dry brush, and Khaki highlight. Once again, I'm very happy with how the goblin/orc flesh tone came out. I pulled out my list of color suggestions for orc clothes that I'd made prior to painting the Warhost orcs, and selected eight colors. It wasn't until after I had painted the base coat that I noticed the Night Goblins are wearing two different garments. Really, it could be three if you count the hood as a cowl and not part of the loose tunic. Underneath the tunic is a long skirt that comes to the ground. Don't make fun of them for wearing skirts, or they'll "...gut you like a bonefish!" Ha, ha! So, I had to pick colors for the skirts, too.

    For the quivers, I decorated them with "Orc writing" -- from a crude, slashy font I found on Google
Next, I dry brushed the base coat and did the skirts, highlighting them the next day. I actually made a trip to the local craft store to pick up more "orc clothing colors," as I called it. I found only two I really liked enough to buy -- a dark navy blue that had a dull, grayish cast to it and a dark burnt orange. You can see I used two of those colors right away on the Night Goblins' skirts. I'd be interested to see how my clothing color choices sit with my readers. Do they look orc-like enough? I could easily paint them all blacks and grays, but I felt the army would look more visually appealing if they're painted in a variety of dingy pale or dark colors.

    The goblin archers creep out of the ruins and stalk towards their prey
I was curious how quickly the Ragnarok figures would paint up, mainly because I bought so many of them! I do have to qualify that, though. For some, who are used to armies of 200 figures or so, my force is pretty small. However, I have been painting for skirmish games mostly the last several years. So, a batch of around 100 of anything in 28mm is a lot for me! I was pleased that these goblins went very quickly. They don't have a lot of equipment -- just their bow, quiver, sword strapped to their waist, belt, pouch, and then their clothes, which I talked about above. I'm hoping that is a good sign and means this project should paint up quickly.

I pre-ordered Dragon Rampant's 2nd Edition rules, which are due out next month, from Fireland Games. I don't think they'll have them in time for when I see them at Advance the Colors, Oct. 10-11. I'm pretty sure they'll have them in hand when I see them at Fireland Games' own Hold the Line convention, Nov. 14-15 at Camp Perry in Port Clinton, OH. Rampant armies are not huge, maybe just a bit bigger than a Saga army (in some cases). I plan on making 2-3 Orc armies out of the figures I'd purchased, though. I suspect I'll want an entire side of a 6-player game to use my orcs and goblins.

    A final look at all of them lined up, ready to commit murder and mayhem in Dragon Rampant!
After I finished up all of the equipment, I looked over the figures. I liked them, but they looked a little....plain? I briefly thought about giving them bloodstains on their clothes, but felt that could get out of hand! So, I decorated their sword sheaths and quivers. I did a Google Image search for Orc writing and found one that looked all slashy and vulgar, like Tolkien describes it. I adapted the orc runes to the quivers and was pretty happy with how they looked. 

After brown and black vehicle washes, flocking, and spraying with matte clear, they were done! One batch down, SO MANY more to go...! I'm actually taking a break from painting orcs and goblins for a batch or two, though. I've got something else I decided to work in. Stay tuned for what that is soon! 

MINIATURES Acquired vs. Painted Tally for 2025

  • Miniatures acquired in 2025: 288
  • Miniatures painted in 2025: 208

TERRAIN Acquired vs. Painted Tally for 2025

  • Terrain acquired in 2025: 40
  • Terrain painted in 2025: 61

SCATTER Acquired vs. Painted Tally for 2025

  • Scatter acquired in 2025: 115
  • Scatter painted in 2025: 200