 |
Our second game of Rebels and Patriots was considerably bigger with 3-4 units each instead of 1-2
|
The last couple weekends of Sunday night gaming have been trying out
Rebels and Patriots: Wargaming Rules for North America - Colonies to Civil War. These are written by Michael Leck and Daniel Mersey and are from the "Rampant" series of rules. So, the concepts would be familiar to us who had played
Xenos Rampant not too long ago. As each iteration of the Rampant engine is slightly different, a key part is learning those changes. Since Keith was the one hosting (and owning) the rules, it was up to him to explain the differences.
 |
The British are marching from the top of the photo and attempting to exit off the opposite edge
|
Our first game was a very simple affair -- refighting the British attempt to make it from Lexington to Concord on the day of the "shot heard round the world." The British players (Jenny and Joel) had two higher quality units each, while the Rebels (Mike S, Allen, Mike W, and myself) had six lower quality units. All of our units were Skirmishers and we would not stand up to any British charges, hoping instead to pass our discipline check and shoot and scoot away. Sometimes it worked as planned, other times not as much.
 |
Allen's unit of militia is the first to take a stand against the advancing British regulars
|
A key feature of Rampant rules is you need to roll to activate a unit on 2d6 vs. a certain number. In Rebels and Patriots, this activation roll (Move, Fire, Skimish, etc.) is modified by your unit's discipline level. Most of the British force were +1, while much of the Rebel force was -1. The target number is "6". Doing the math, you will see most rebel units would actually need to roll a "7"to succeed. This is modified by +1 if the army commander is within 12". Allen did a great job moving his commander to where he would be able to give his bonus often to as many units as possible.
 |
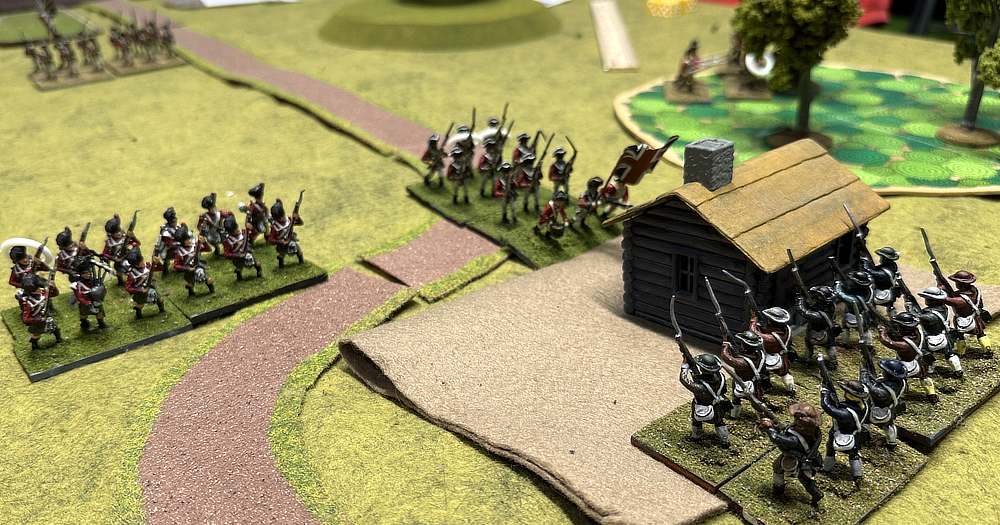
A key point of the battle as when the British attempted to push the Americans from a small village
|
My rolling to activate was awful, nonetheless. Most of the game, my single unit I commanded was within 12" of General Allen. However, I failed more than 2/3's of my activation rolls. So, that means on 2d6 I rolled 5 or less two thirds of the time! Waaaay under average!! Still, other Rebel players (particularly Mike S) were doing much better. They were wearing the British down with their fire. Our goal was to knock the British under half strength. Once we did that, we would have achieved our victory condition. Thanks to my teammates, we did so. I think I actually shot and killed enemy figures only once during the game. Thank goodness for the others, though!
 |
Keith was excited to get his "true 25mm" troops out on the table after years of languishing in boxes
|
We decided that we liked the rules well enough to give them a try again the following week. I recommended Keith do more of a straight up battle, this time. He'd found the Lexington & Concord scenario online, and wanted to follow it. I said commanding one lone Rebel unit with a -1 discipline (like both Mike W and myself did) doesn't make for a really tactically interesting evening. I said give us "X number" of points of troops and let us line up against each other and test out the rules. Keith listened to my suggestion, and we each were given about 18 points of troops. For the British (which was me this time), that meant three units. For the Americans, that usually meant four. However, I was to find out that not all of the Americans were as bad as my poor militia last week.
 |
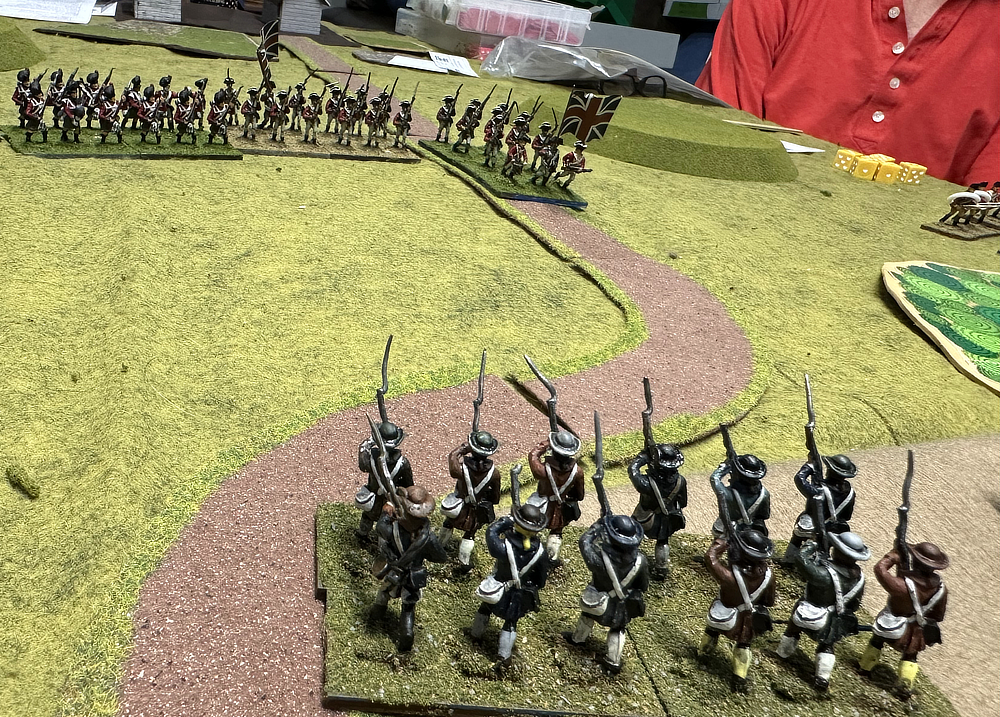
Here's what my three units of British troops were facing in the second game -- outnumbered 7-3!
|
In fact, I found myself matched against the cream of the Continental army. Mike W controlled four units -- the Continental artillery, two Continental Light Infantry units, and one Militia unit. He rolled "box cars" (12) to activate once and was given yet another unit. Three of his units had a Fire Factor (score needed on 1d6 to cause a hit) of 4+. None of my outnumbered troops did (we were 5+). He had two units with Discipline +1, while I had one. I was definitely facing a superior force -- more so because I was also facing two units of Joel's command when we lined up. At one point it was my 3 units vs. 7 American units!
 |
I sent my unit of Lights in skirmish to keep the Brit left at bay, and advanced my others on the center
|
I decided the smartest thing to do would be to delay and distract the enemy, allowing my compatriots to beat the rest of the enemy army. I sent my British Light Infantry in skirmish formation to catch the attention of the artillery and left wing of the enemy. My other two units obliqued towards the center to help Mike S break through with his Hessians. My Lights were in the most danger, so I moved them forward and backwards, trying to keep the hilltops or woods between us and the enemy cannon. They were getting worn down, though. I had occupied Mike's superior forces for 4-5 turns, so I moved them back once they fell to 7 figures left out of 12. In Rebels and Patriots, once you fall down to half strength, bad things tend to happen. Your attack dice are halved and you receive a permanent disorder marker (which gives a -1 to morale checks and activation checks).
 |
Our goal was to break through the patriot lines, so all three of us marched forward to give it our best
|
Speaking of morale checks, the Rampant games usually require units that take casualties from fire to roll a 2d6 roll vs. a target number (6 in this game) to pass. You subtract the number of casualties you took from that roll. This is the key mechanic of the game, in my opinion. You want your opponents to fail that morale check and get a disorder marker. Then, if they try to rally it off, each marker is a -1. Roll low enough and you retreat or even flee the table. You don't usually eliminate an entire unit from musketry in this games, it seems (which make sense). You instead try to give them so many negative modifiers that sooner or later they will have a big failure and run away.
 |
Our best chance at smashing through was with Mike S's center command of Hessians
|
The other key mechanic in the rules is units roll 12 dice when shooting or attacking in melee as long as they are above half strength. Success is rolling your Fire Factor (remember my 5+ and Mike W's 4+). Each success is a "hit," and hits are grouped together to create casualties. The base number is two hits = 1 casualty (figure removed). However, long range, terrain, target in skirmish, etc., all up that number by one. So, I had my Lights in skirmish formation and kept them at long range meaning Mike caused one casualty for every four hits. Unfortunately, Mike W was rolling hot that night and wearing my units down. He wasn't rolling as well to activate, though. So, that enabled me to keep tying down a superior part of their force with my inferior one. Success, right?
 |
Although they got slapped around by cannon fire and musketry, the Brit Lights did a great job occupying a much superior force
|
Well, that all depended on Mike S and Allen's attacks being successful! Allen started out well against Keith, but was battered in the end and had half of his troops destroyed or flee off-table. All our money rode on aggressive-playing Mike S coming through with his attack in the center. I had pulled away some of Joel's center to face off against my other two units who were attacking in echelon in support of the Hessians. Mike S had been the hero of the American victory last week. Could he be the hero again tonight as a Brit?
 |
Hessian command slams into the patriot center, and one by one, the American units begin to break
|
It looked like Mike was going to pull it off. He pierced Joel's line. On Joel's resulting morale checks, he suffered a disastrous series of failures. A number of his units fled the field. Soon, there was no British center. Unfortunately, Keith and Mike W had wheeled forces to fire upon the exploiting Hessians. Ranges in Rebels and Patriots are long (18"), and on what we said would be the final turn of the game, they blasted away at the Hessians, disordering all three units. Ugh! There went the clear victory!
 |
The Brit (Hessian?) high water mark -- table edge in sight with no enemy in between!
|
Based on troops remaining and losses, we decided to call it a bloody draw. We had been very close to securing our breakthrough that was our victory condition, but a last effective turn of American fire and poor morale rolls on Mike's and my part blunted that. Still, it was a fun game. Doubtless, we will be playing more Rebels and Patriots on future Sunday evenings. We have to because Keith went out and bought more figures, right?
 |
The American counter-attack on their last turn took some wind out of our sails, forcing us to stand around and debate who really won...
|


It was a really tense game. And I am liking the way this does Musket & Bayonet AWI.
ReplyDeleteI like how it is easy to learn the mechanics and eventually comes down to morale. Now, if we can do something about those blunders and ubers (whatever you call the box cars!)!!
DeleteGreat looking game and a good read, hard fought battle that's for sure.
ReplyDeleteThanks, Donnie! Two games, two fun ones...!
DeleteGreat game, like seeing these miniatures on the table. I may have to check these rules out.
ReplyDeleteI may buy them too...just so I can see if Keith is doing them right...ha, ha!
ReplyDelete